How to create a docker container
Docker is in high demand these days and you should understand the container as the basic concept of it and how to create it. A container is just an instance of the image (such as nginx, mysql, ubuntu, centos, etc.). A container can be created within a minute by running a single docker command.
In this short article, I’ll show how to create and start a container using multiple options.
To complete this article, you must have the docker installed on your machine. I’m using Linux OS on which I have installed the docker. You can install docker using the simple yum command as following:
[root@instance-20191018-2102 ~]# yum install dockerTo run this command you must have the sudo privileges.
Considering you have the docker installed on your machine, so let’s start with how to create containers.
Note: Please use sudo privileges to run the commands as described in the following sections.
Following is the command to create a ubuntu container:
[root@instance-20191018-2102 ~]# docker container create --name ubuntu01 ubuntu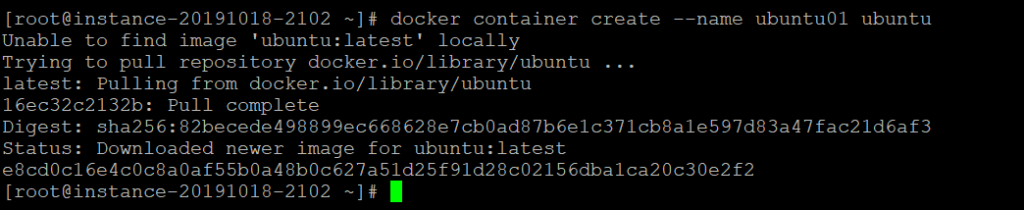
Once a container is created it will give the result as per the above image and a unique id will be assigned to the container.
Let’s understand the options we have used to create a container:
create: This is the command to create the container.
–name: This is the option to provide the name to the container, in this case, ubuntu01 is the name we have provided to our container. If you don’t use this option, the docker will assign the random alphanumeric string to the container.
ubuntu: This is the image name that we have used to create an ubuntu container.
When you create the container, it will try to search the image from the local docker host machine first and if not found then it pulls the image from the docker hub and creates the container.
Now the container has been created and it’s time to start the container. The following is the command to start the container:
[root@instance-20191018-2102 ~]# docker container start ubuntu01Upon successfully, the start command will provide the name of the container as shown in the following image:

Let’s understand the command we have used to start the container:
start: This is the command to start the container.
ubuntu01: This is the name of the container that we want to start. You can also use the container id instead of the name of the container.
If you don’t know the name or container id which you want to start, you can hit the following command to get the list of all containers:
[root@instance-20191018-2102 ~]# docker container ls -aThe ls command gives you the list of all containers as per the following image:

As per the above image, the status of the container is exited, it is because to run the container at least one process should be running.
So, let’s create another ubuntu container with different command (run) and will show you the container should be up and running.
[root@instance-20191018-2102 ~]# docker container run --name ubuntu02 -dit ubuntuThe output of the above command will be as per the following screenshot:

This time docker has re-used the ubuntu image from the local docker host machine and created another ubuntu container within milliseconds.
Let’s understand the commands we have used to create another container.
run: This is the command to create and start the container using a single command.
–dit: d stands for detach, i stands for interactive and t stands for the terminal. We have used the -dit option to run the container in detached mode and associated a terminal with it in interactive mode.
Again, list the container and you will see the container ubuntu02 is running as per the following image:

This is how you can create other containers with different images.
You can look out the complete video on how to create a docker Container:
Further reading
[…] to the blog to know how to create […]