Create a new image using the commit command docker
On a running container, a developer can do various modifications as per the requirement and create another image from the container which will have all the modifications. The benefits of the image would be, another developer can use the same image to spawn multiple containers with all the modifications which are done by the previous developer.
This can be achieved using the container’s commit command. The commit command adds another layer to the base image.
In this article, I’ll show how to use the commit command to create a new image. The following image depicts the pictorial representation of how the commit command works:
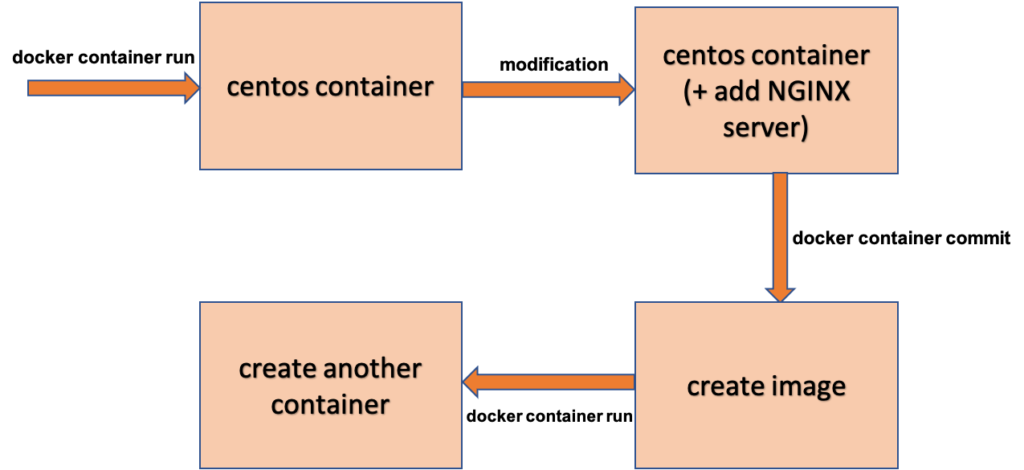
Step:1 Create a centos container
First, we’ll create a container using the centos image. Run the following command from the docker host machine to create a container:
[root@instance-20191018-2102 ~]# docker container run -dit --name centos01 centosThe above command will produce the result as per the following image:

Run the following command to list the container and a container should be up and running:
[root@instance-20191018-2102 ~]# docker container ls -a
Now, the container with the base image (centos) has been created successfully.
Step-2: Modification on the container
The next step is to do the modification on the running container. Let’s first attach to the container using the following attach command:
[root@instance-20191018-2102 ~]# docker container attach centos01Upon successful execution of the above command, you will be inside the container’s host.
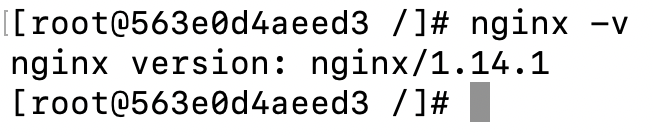
Now, install the NGINX server on the centos container. Run the following command to install the NGINX server:
[root@d3f6f04a143b /]# yum install nginxOnce the NGINX server is installed successfully, run the version command to see the version of the NGINX server:
[root@d3f6f04a143b /]# nginx -vThe above command will give you the NGINX version if installed successfully as per the following screenshot:

Now, we have done the modification on the running container. Let’s commit the changes to a new image.
Step-3: Commit the changes
The commit command will create a new image will all the modification which we have done on the container. Run the following commit command to commit the changes that will create a new image:
[root@instance-20191018-2102 ~]# docker container commit centos01 centos-custom:nginx
A new image must be created with the name centos-custom and the tag will be nginx. Run the following list command to list the images:
[root@instance-20191018-2102 ~]# docker image ls
As per the above screenshot, a custom image (centos-custom) has been created successfully that will have all the modifications done in Step-2.
Step-4: Spawn another container
Now, let’s spawn a new container using the custom image that must have the NGNIX server also. Run the following command to create a new container:
[root@instance-20191018-2102 ~]# docker container run -dit --name centos02 centos-custom:nginx
List the container and see a new container with the name centos02 must be up and running.

Now, let’s verify the container centos02 has the NGINX server or not. So, let’s attach to the container first using the following attach command:
[root@instance-20191018-2102 ~]# docker container attach centos02Once you are inside the container, hit the NGINX version command and see the NGINX must be installed.
This is how you can spawn more containers using the same image we created using the commit command.
Further readings
How to create a docker container
Architecture and basic terminologies of Docker
How to create an NGINX docker container
Know about all commands of the Docker container
You can subscribe to my YouTube channel for further reading.