Dynamic filter on table in Oracle Visual Builder
In this article, we demonstrate working with dynamic filter attributes on the table in Oracle Visual Builder.
Consider a scenario where there is a table that has many columns and we need to filter the data based on each column but we don’t want to create as many as filters. So in this case, we can allow the user to choose the attribute of the table in which the table data should be filtered, and enter a value for that attribute.
Read this complete article to know how to achieve this.
As an example, we are using the details of a student to explain the above scenario.
- First, create a Students Business Object with the following three fields:
- Name
- Class
- Grade
- Go to the Data tab and click on + Row to add some rows to the Business Object.
For more detail on the creation of Business Objects please refer to our antecedent blog which includes the steps to create Business Objects.
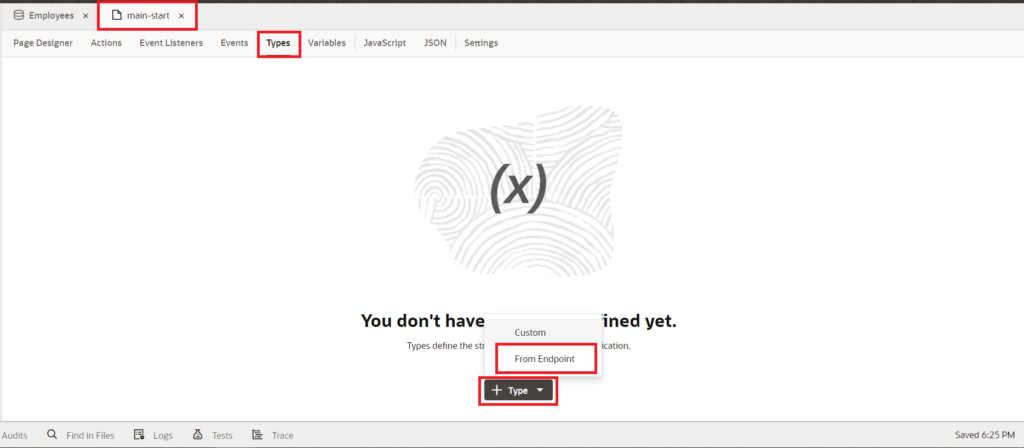
3. Before we create a table, navigate to Types in the navigation tab of the main-start page, click on + Types, and select From Endpoint.
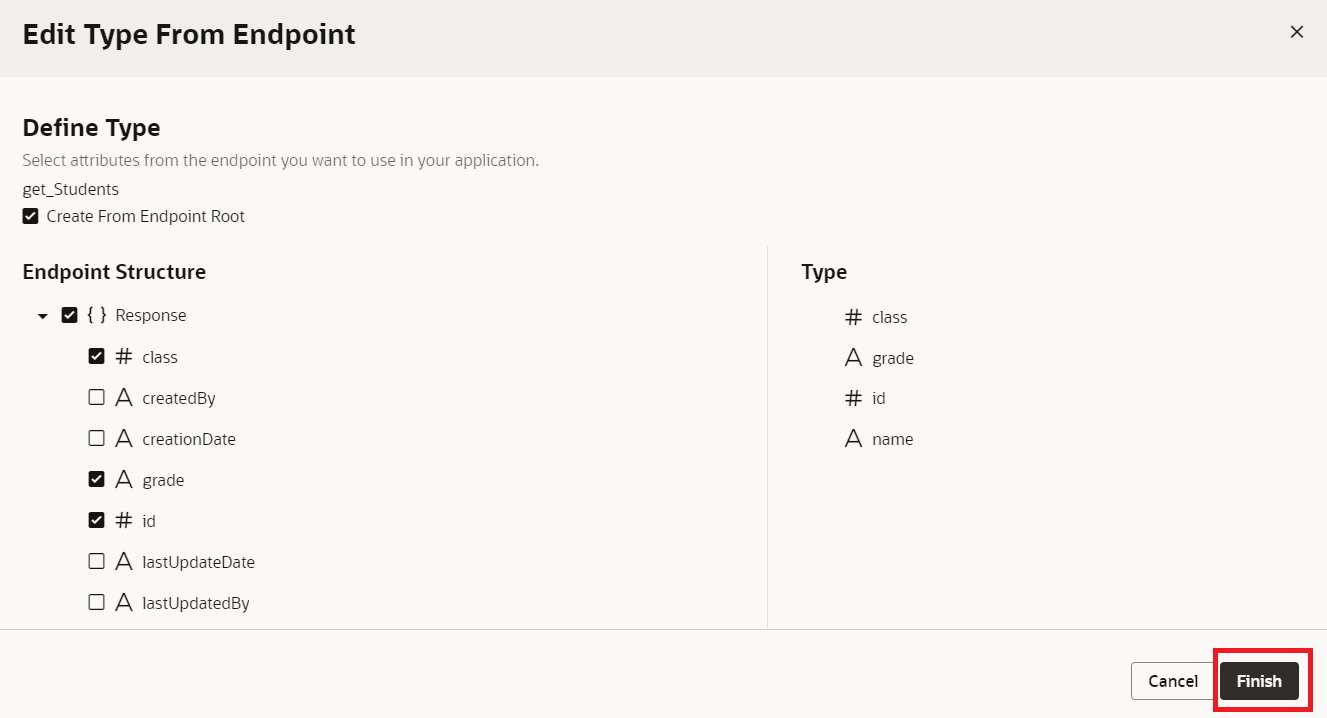
This will open a popup with all the available BOs, service connections, and Process Objects. As we are using BO, expand Business Objects, click on Students BO select GET Students/Students_Id endpoint, and click on the Next button as shown in the following screenshot: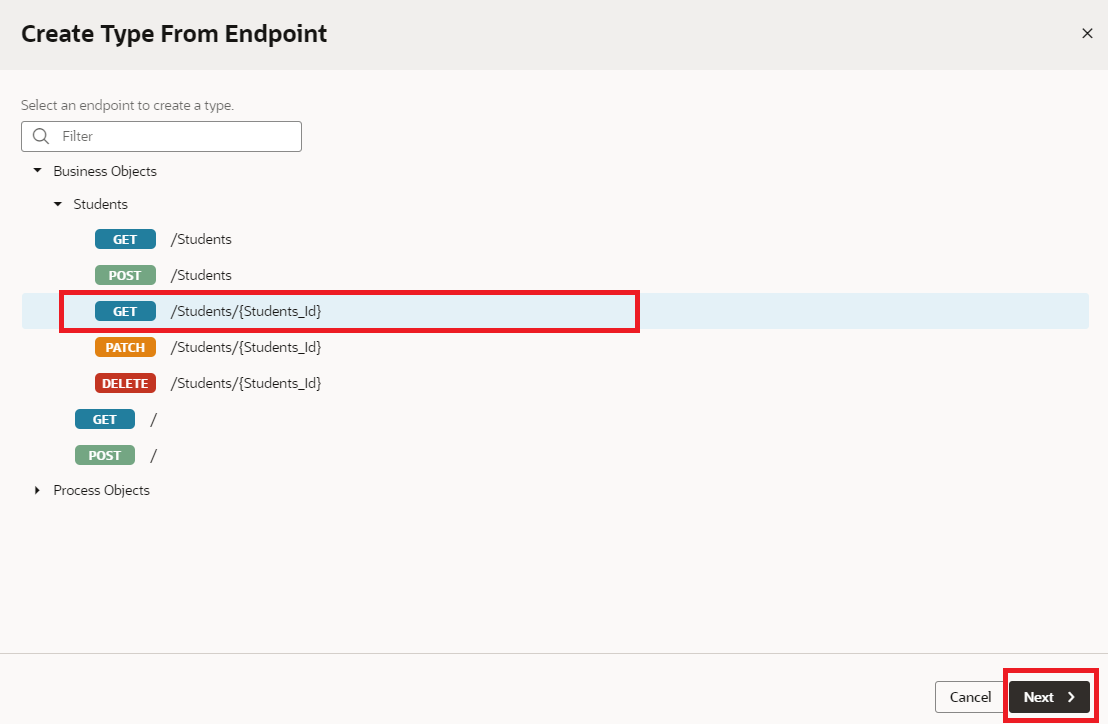 4. Select the fields from the response that we wish to show in the table and click on the Finish button.
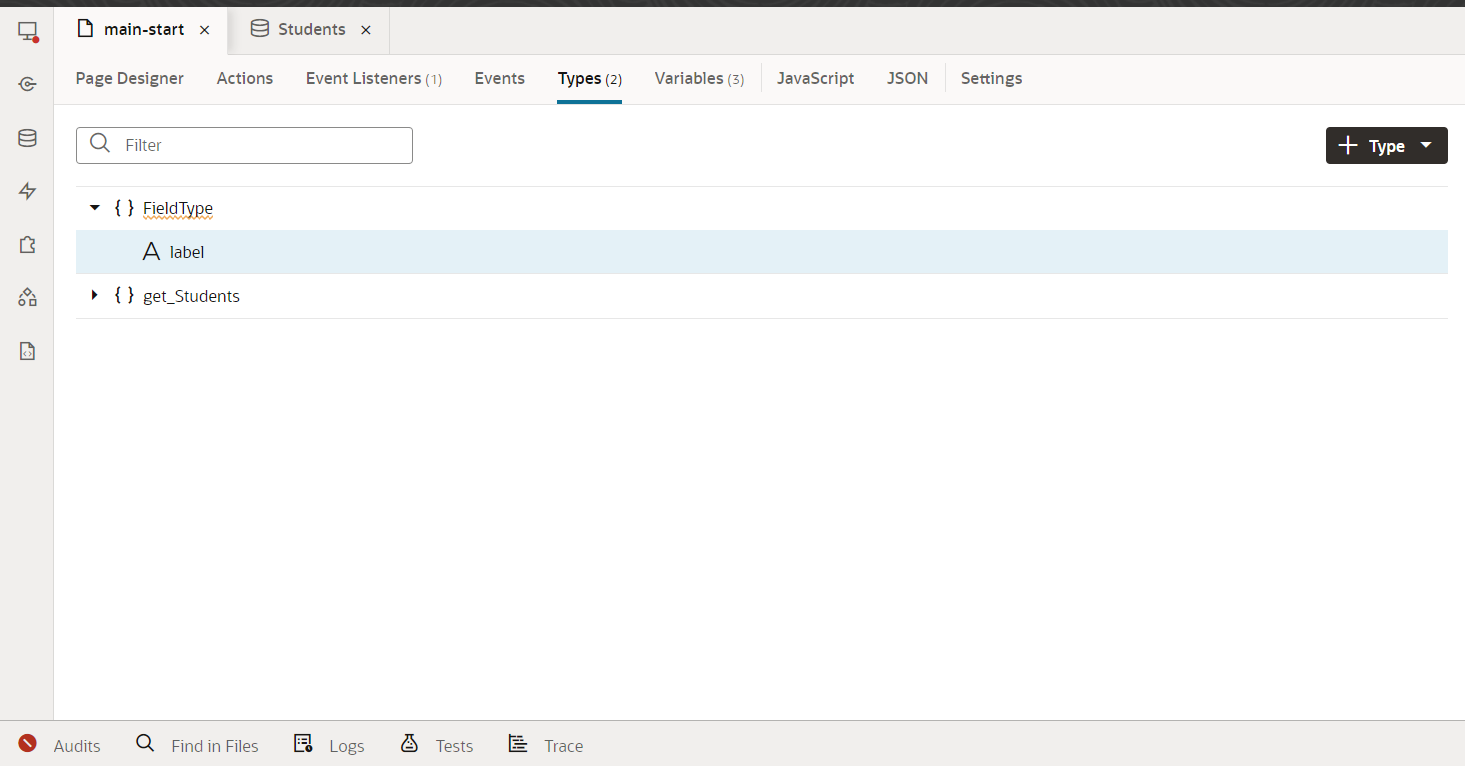
5. Along with this create a custom type, name it FieldType of Object Type, and add a label as one of the fields for that as shown in the following screenshot:
 6. Go to the Variables Tab in the navigation tab, click on the + Variable button, Enter the ID select the Type as Array Data Provider, and click on the Create button.
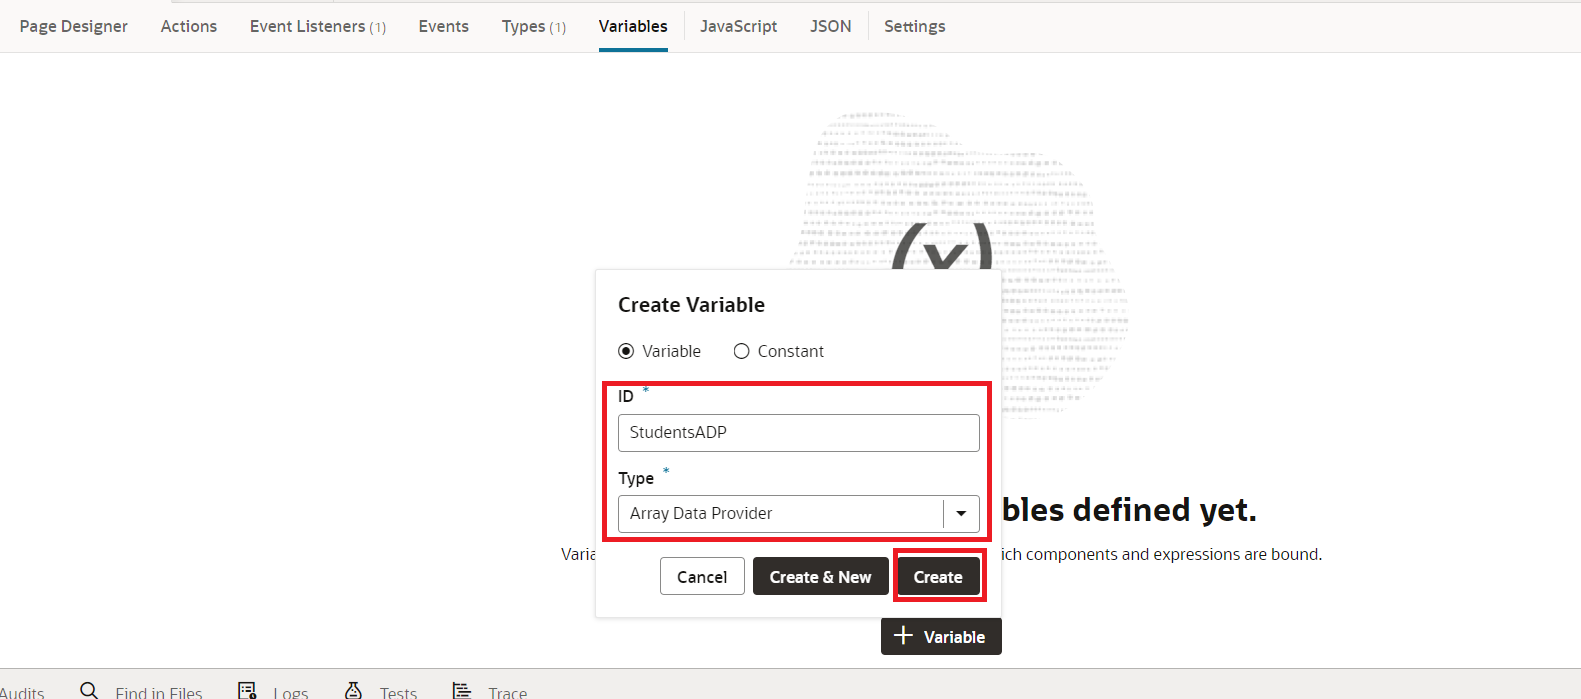
After creating ADP select get_students in Item Type and make Id as key attribute.
7. click on the + Variable button, select the type as Array Data Provider, and click on the Create button.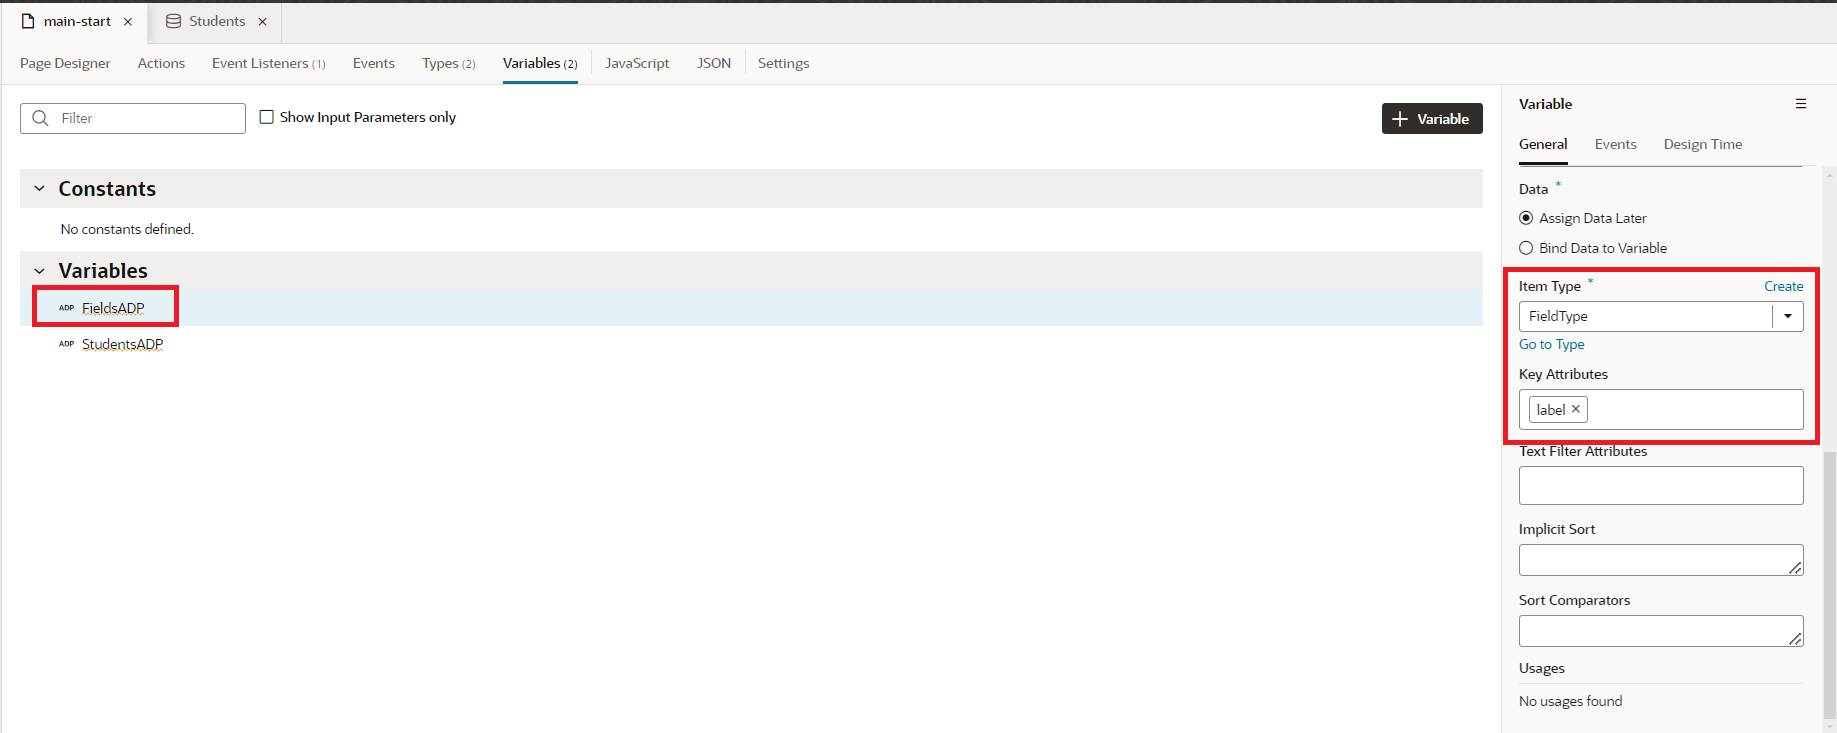
After creating ADP select FieldType in Item Type and make label as key attribute.
8. Create two more variables namely SelectedField and providedValue of String type as shown in the following screenshot: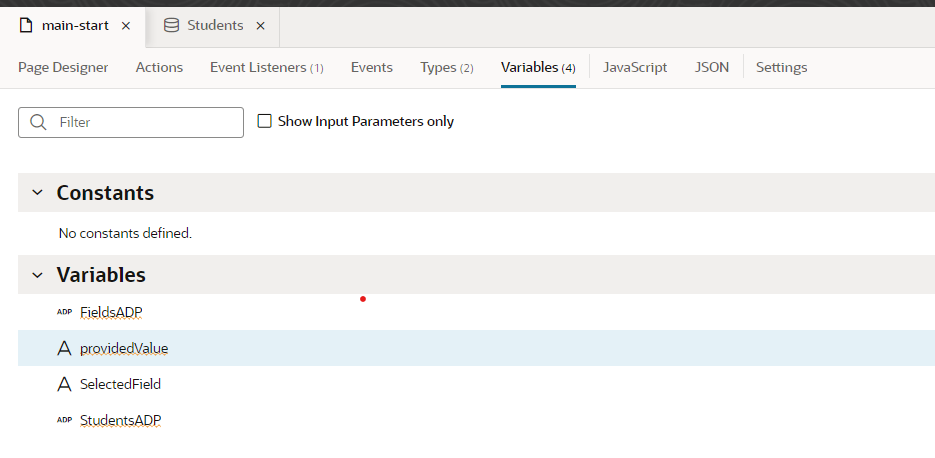
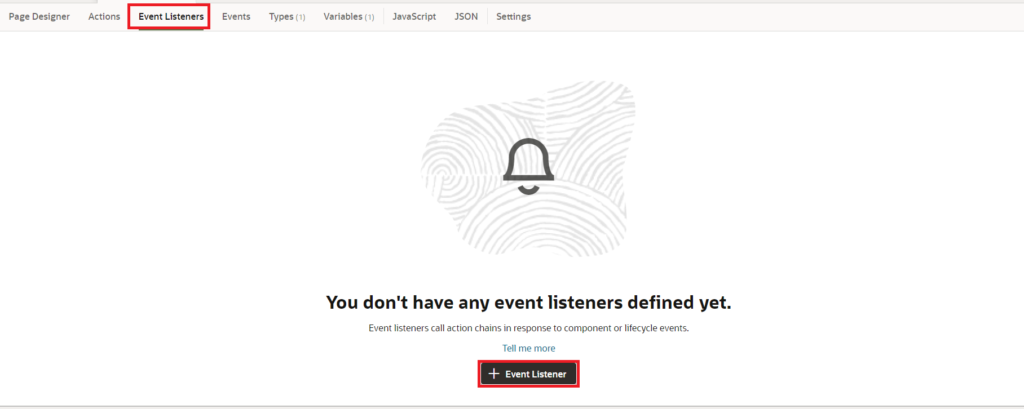
9. We need to create an action to fetch the data from the rest service. Hence, go to the Event Listeners tab, and click on the + Event Listener button as shown in the following screenshot:
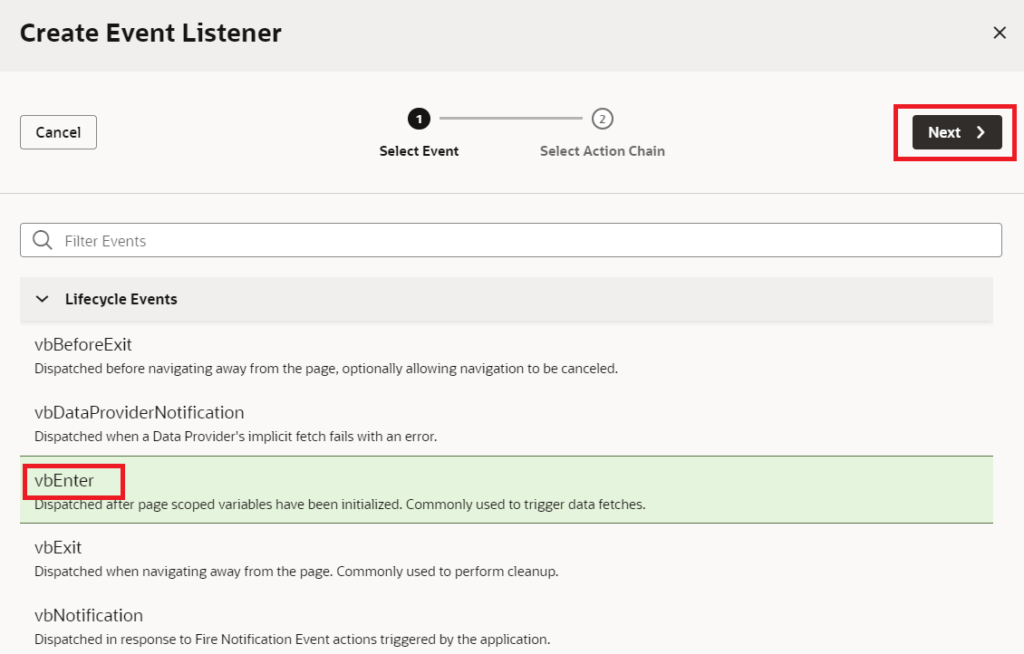
10. select the vbEnter event and click on the Next button:
11. Click on Page Action Chains + enter the ID for the Action chain and click on the Finish button.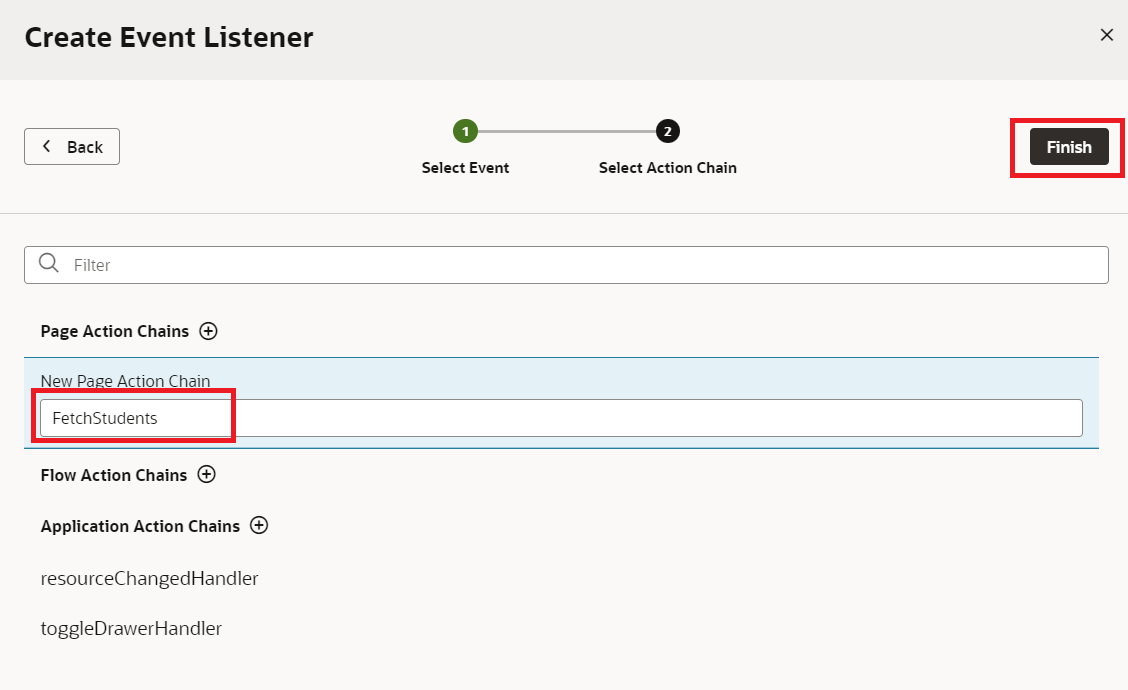
12. Go to the FetchStudents action chain, and add call Rest action to the start node.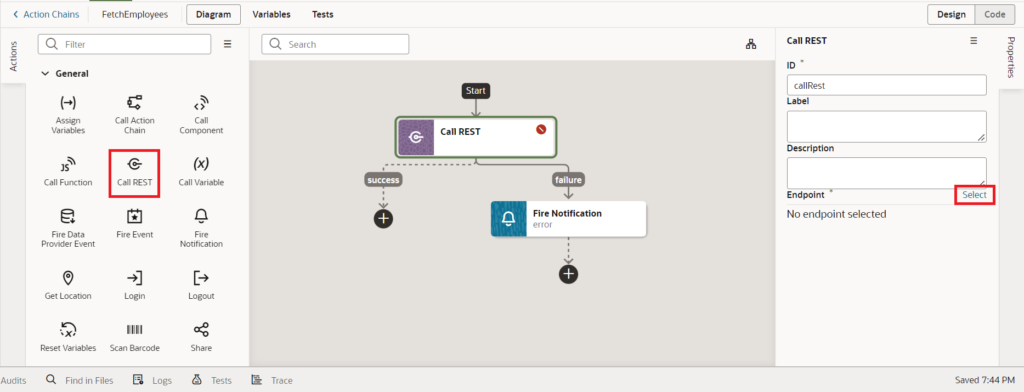
Select the GET /Students BO endpoint from the Students BO and click on the Select button.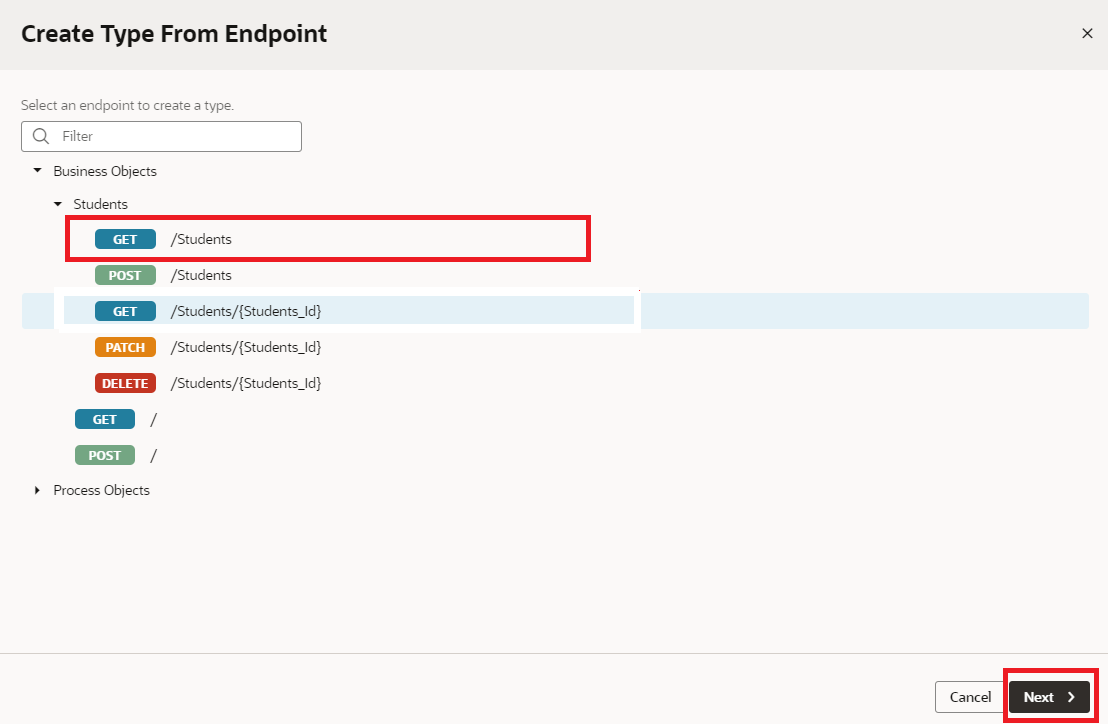
In the q param of the rest call, we need to add the following piece of code which will form a querystring to the request as shown in the following screenshot: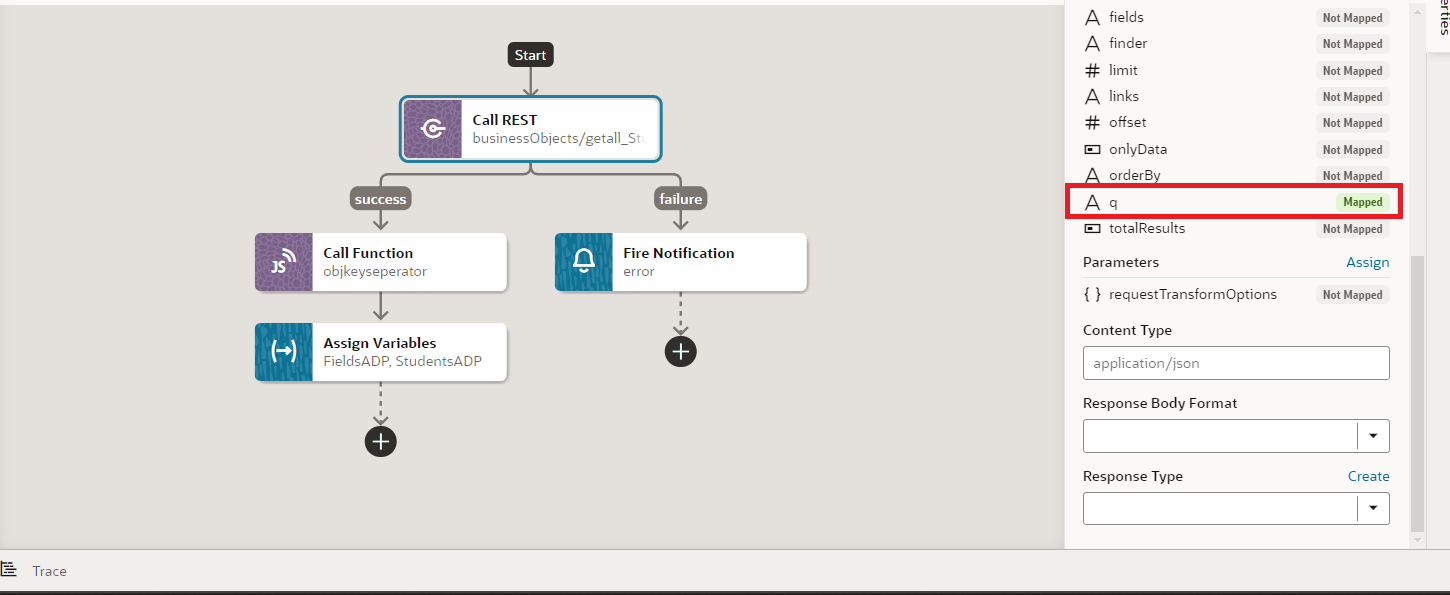
13. To Prepare data for the dropdown, the following JavaScript function is written on the page:
    objkeyseperator(json) {

      const keys = Object.keys(json);

      let arr = keys;

      let result = arr.map(item => ({ label: item }));

      return result;

    }
14. In the action chain, drag and drop the Call Function action, and call the objkeyseperator function.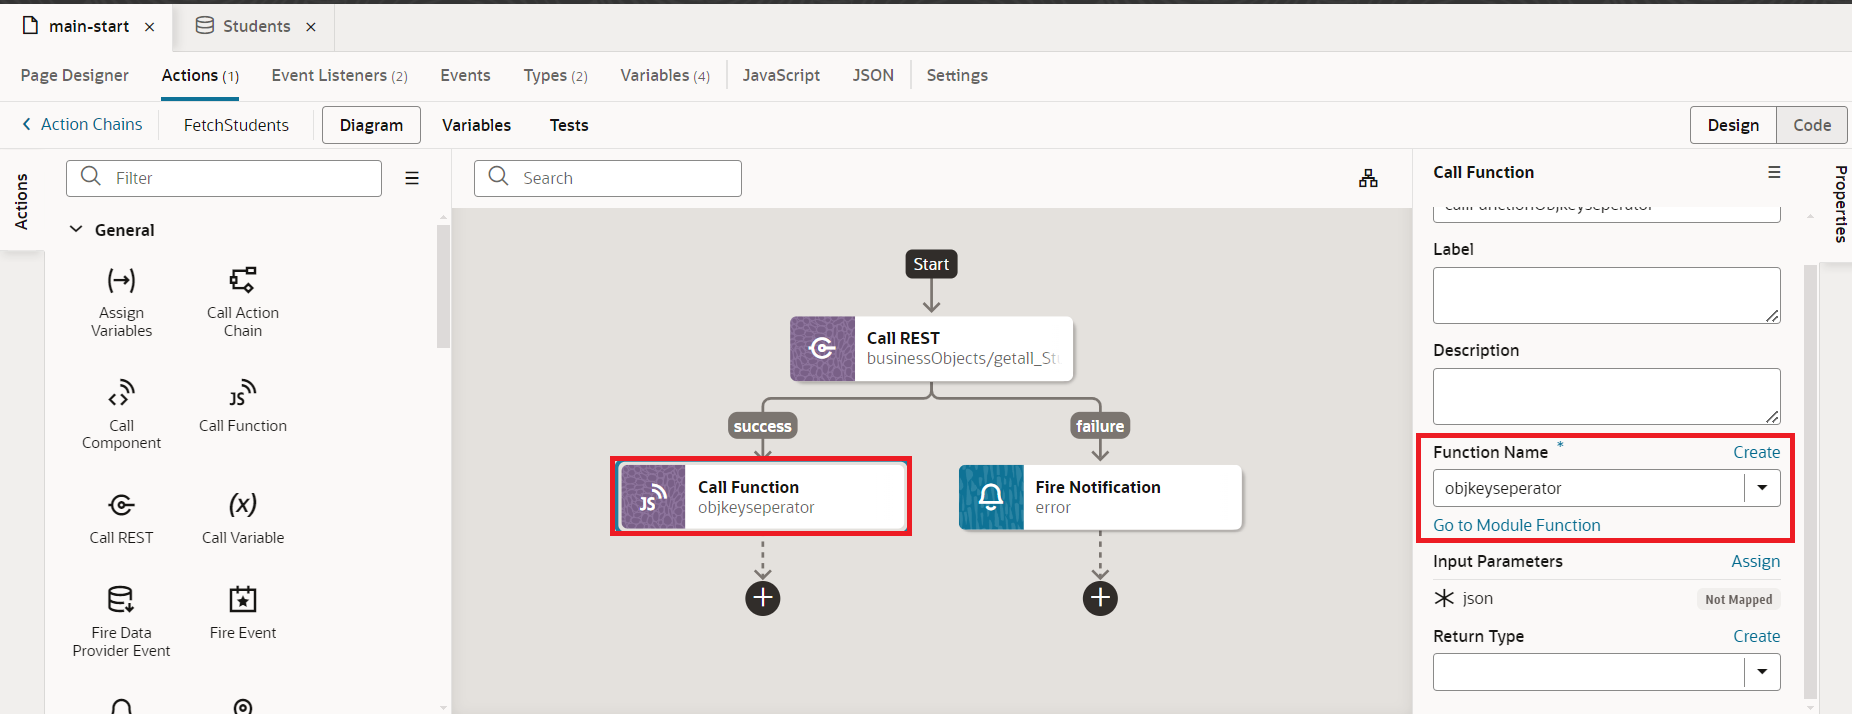
Map the items from the callRestGetallStudents to the json and click on save as shown in the following screenshot: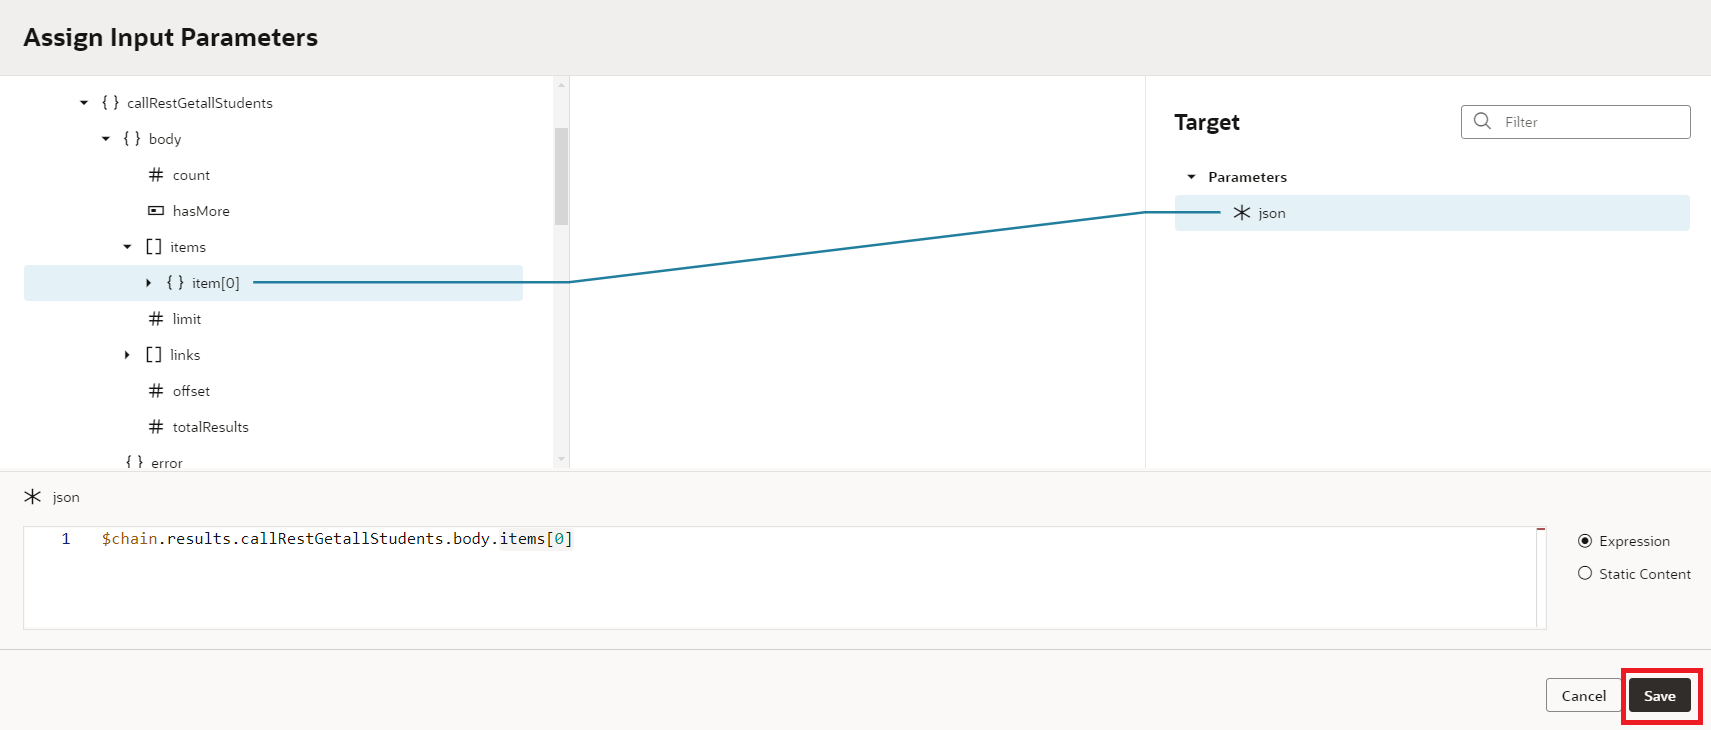
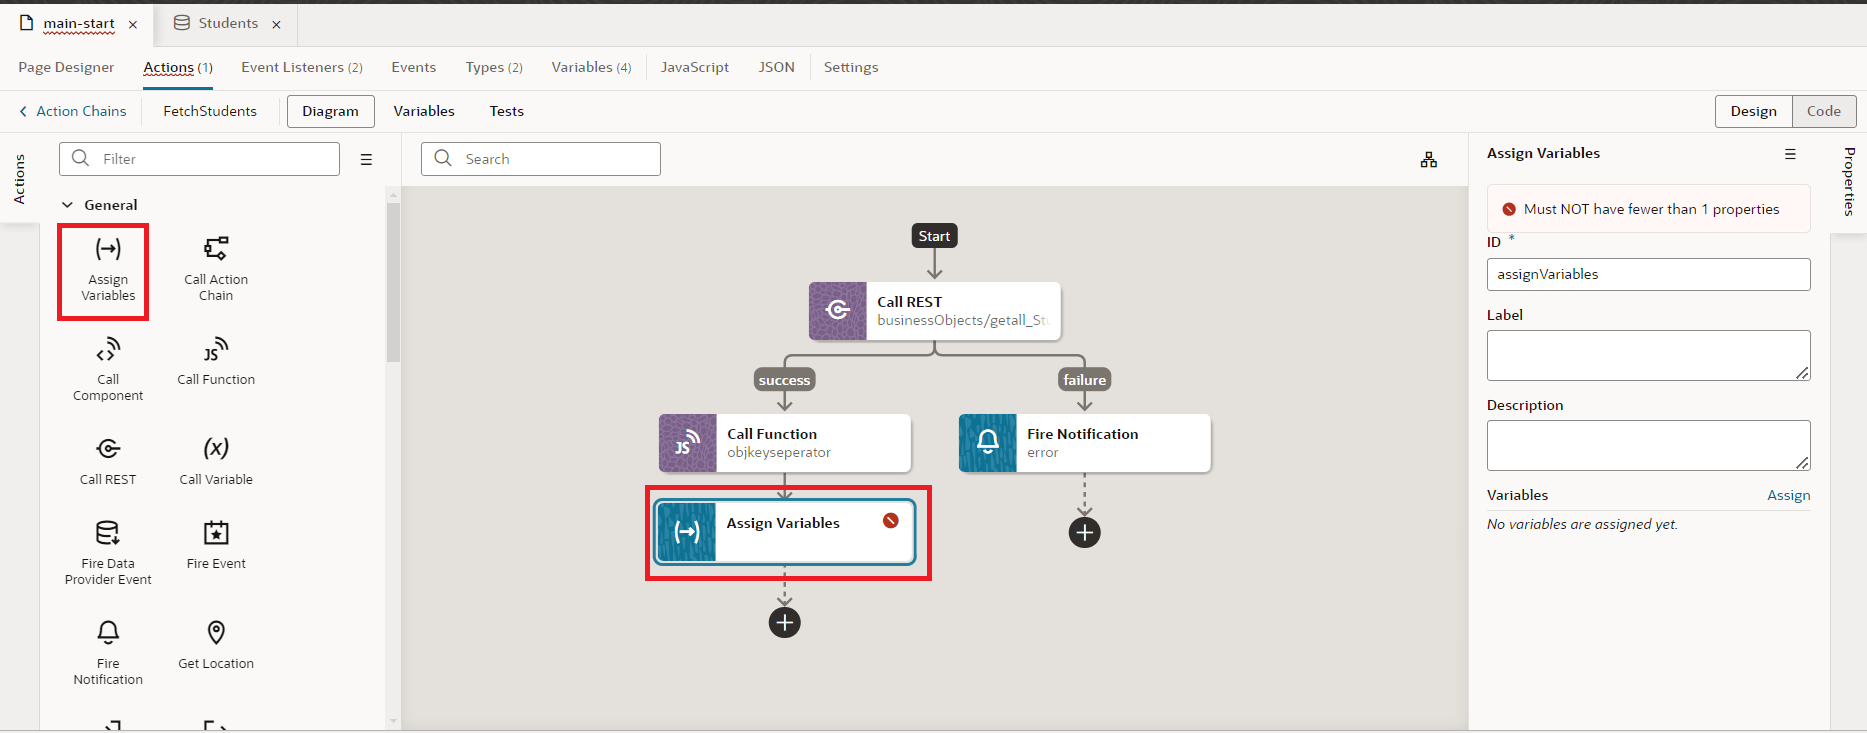
15. Drag and drop the Assign Variables action after the Call Function action
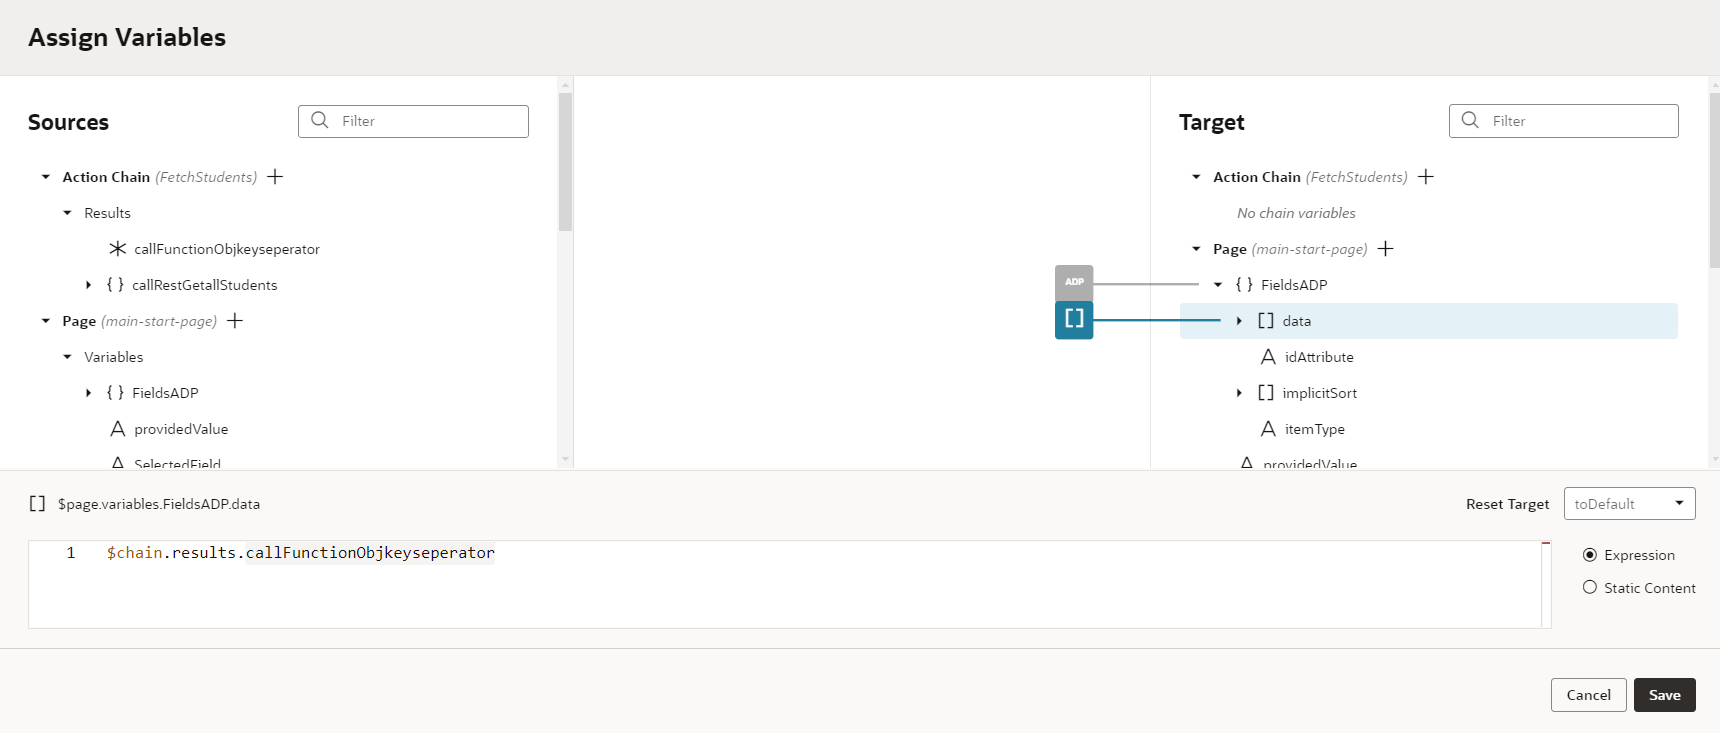
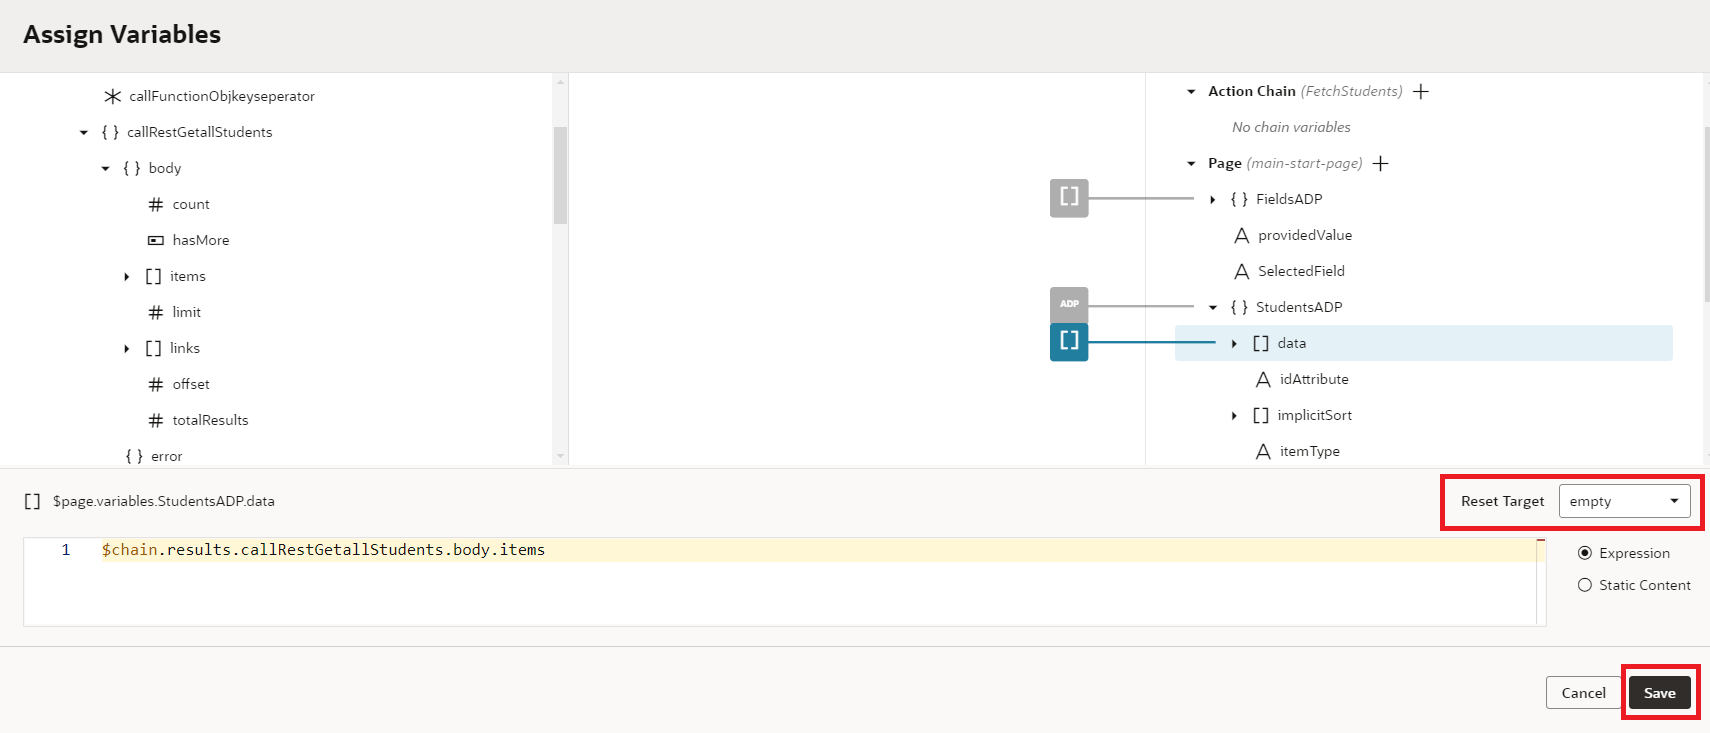
 Map the response from the callFunctionObjkeyseperator to [] data of the FieldsADP. Likewise, Map the items from the callRestGetallStudents to the [] data of the StudentsADP set the Reset target to empty, and click on the Save button as shown in the following screenshot:
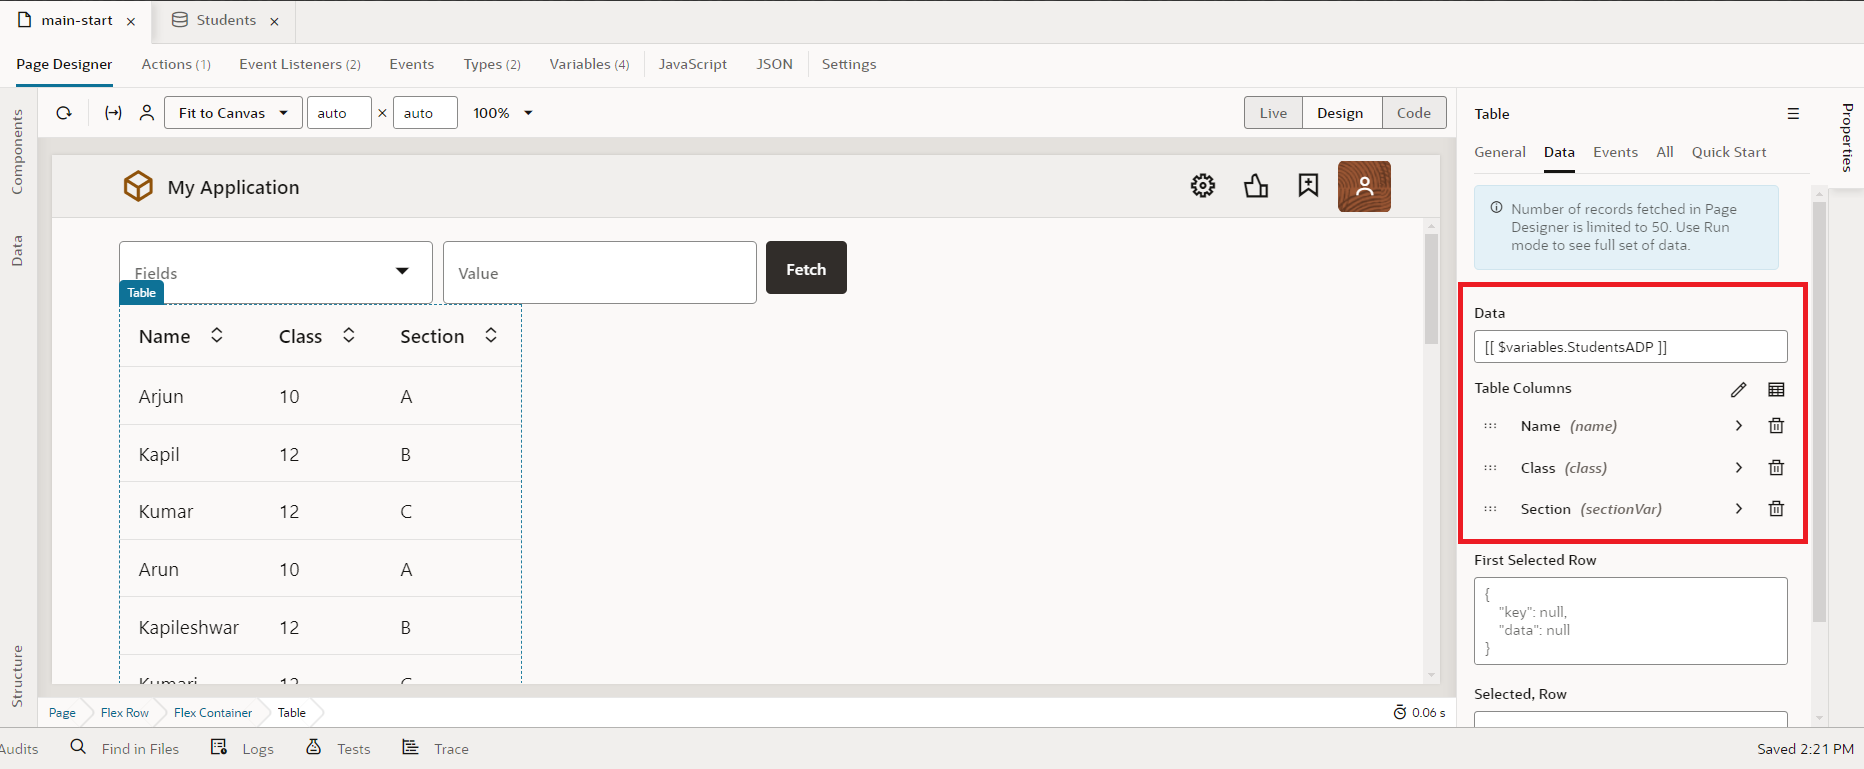
16. Navigate to the Page Designer, drag and drop Table, Select single, input text and a Button from the component pallet to the design area of the main-start page, change the label-hints, and align them as shown in the following screenshot: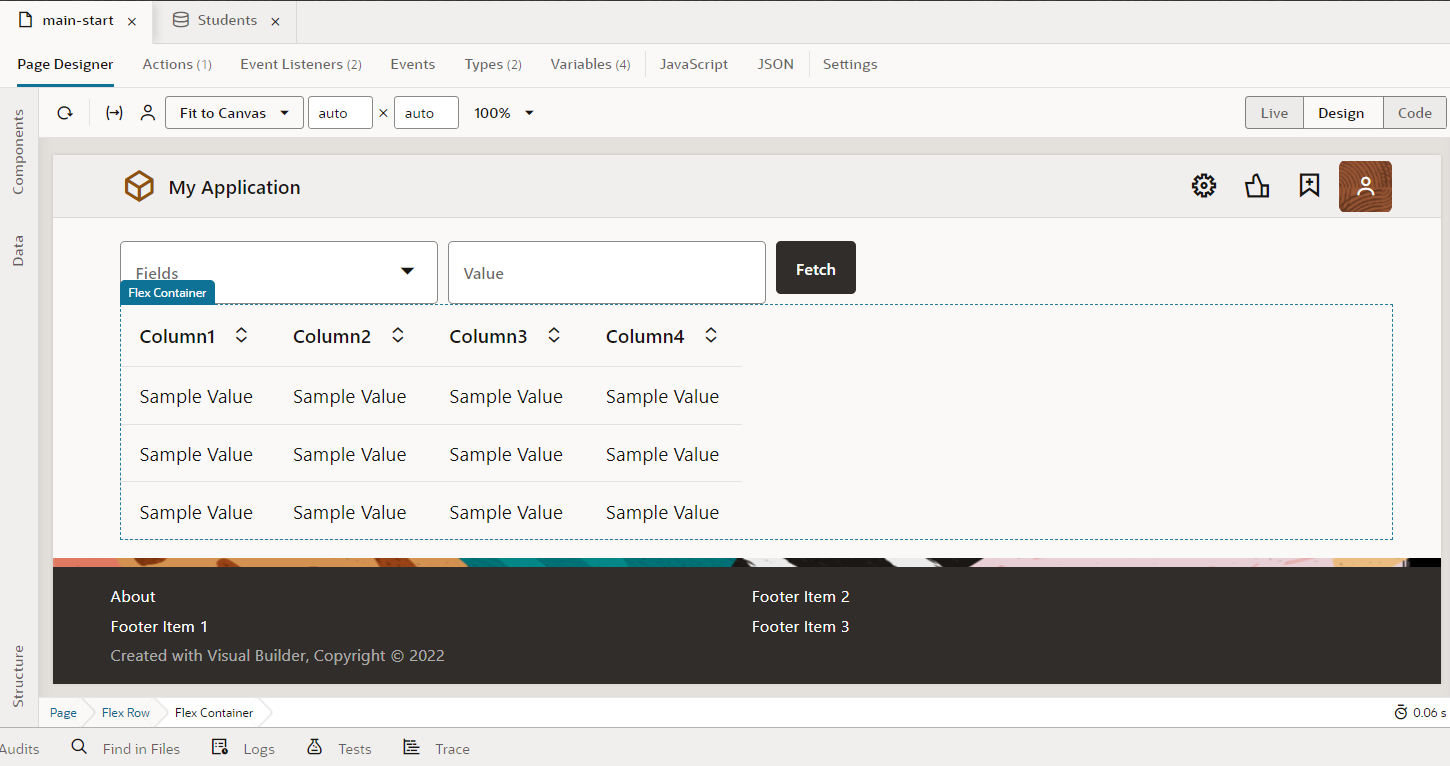 17. Go to the Properties pane switch to the Data tab and select StudentsADP from the variables as Data and select the columns as shown in the following screenshot.
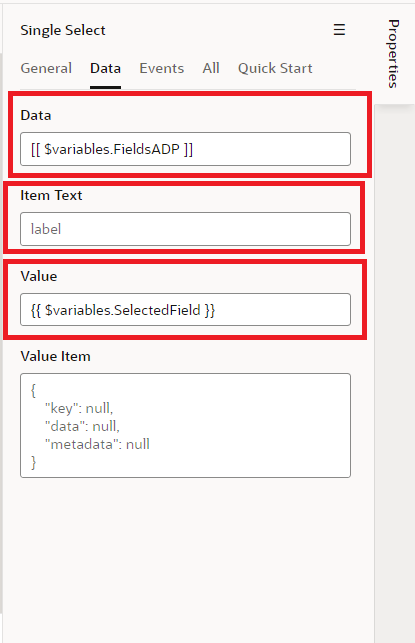
18. Now let’s go to the select single component, go to the Properties pane switch to the Data tab, select FieldsADP as Data, enter label for Item Text, and select selectedfield as a value from the variables.
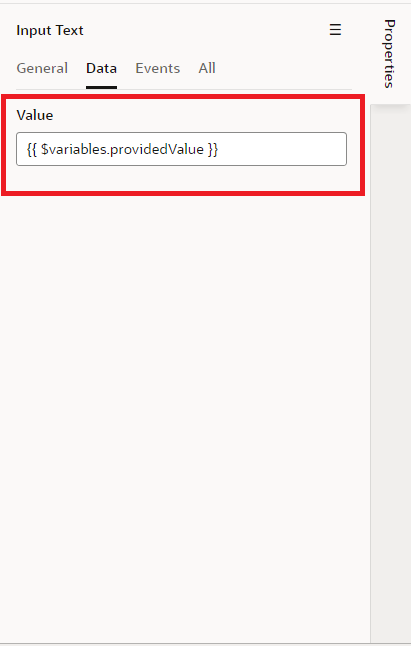
For the input text select selectedfield as a value from the variables as shown in the following screenshot:
For the fetch button attach the fetchStudents Action.
As soon as we preview the application, we should be able to see all the columns of the table in the drop-down, and when we select a field, enter the value to filter, and hit the fetch button, we should see the filtered data as shown in the following screenshot.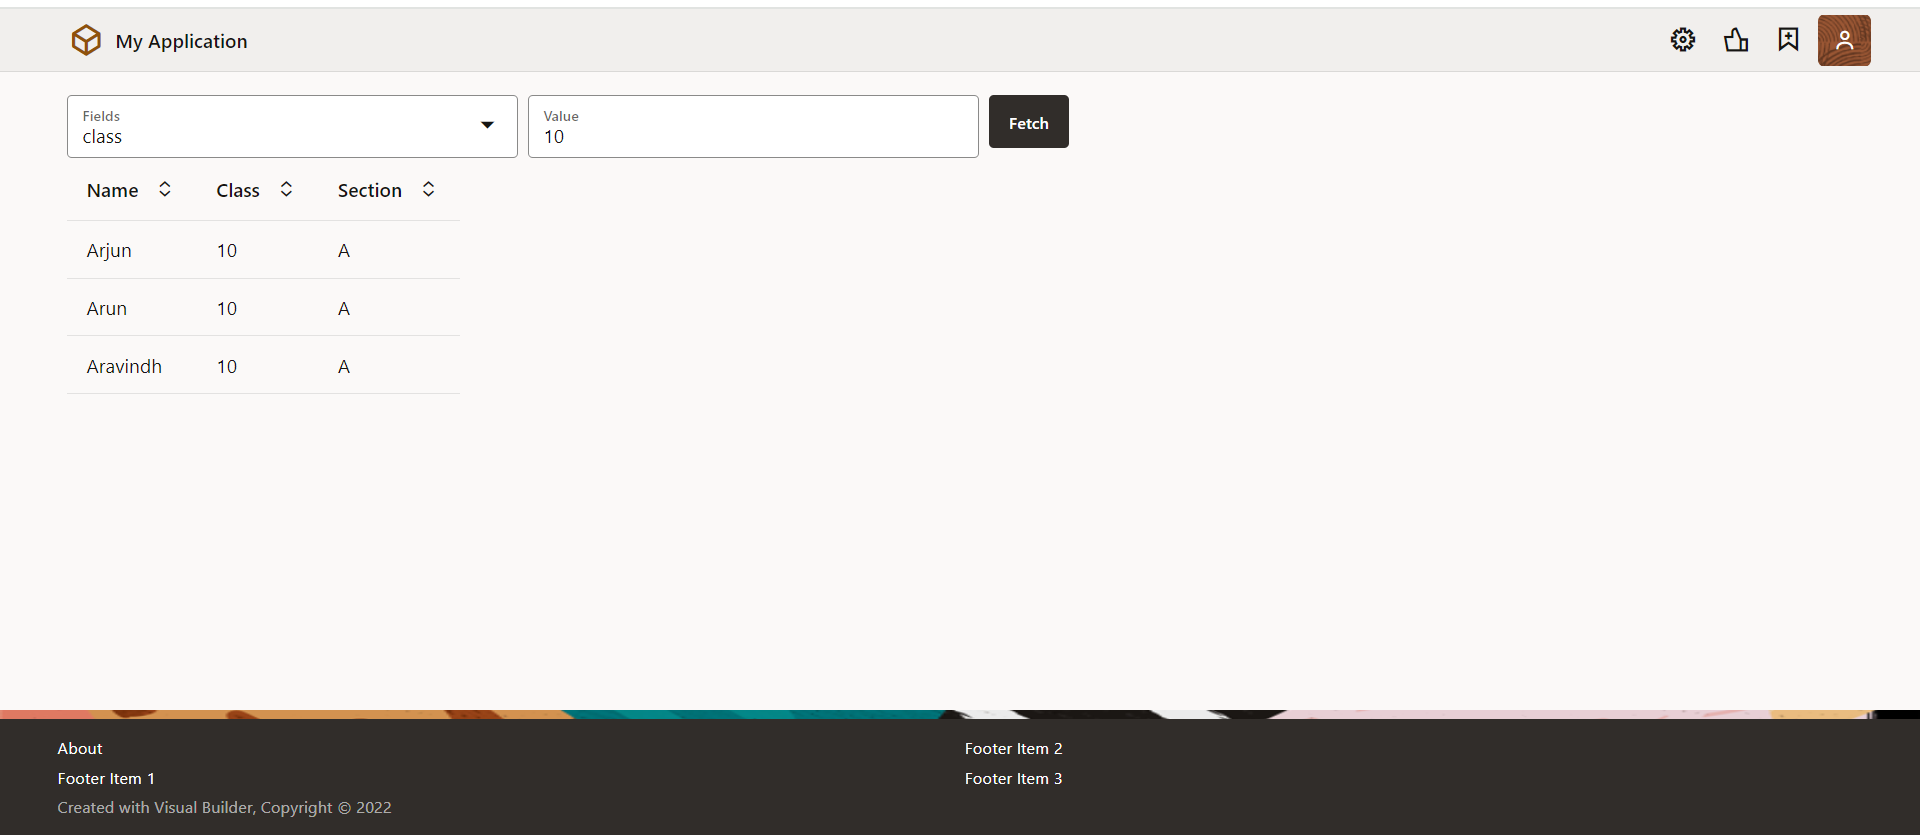
This is how we work with dynamic filter attributes on the table in Oracle Visual Builder.
If you liked the article, please like, comment, and share.
Please look at my YouTube channel for Oracle Integration-related videos and don’t forget to subscribe to our channel to get regular updates.
Further Readings
Scheduled parameters to maintain Last Run Date Time in Oracle Integration
How to Customize the Lock Screen in Oracle Visual Builder
Merging two CSV files into a single file in Oracle Integration
ERP Integration using File Based Data Import: Oracle Integration


