Setting Up Outbound Message & Workflow Rules in Salesforce
This article is written to showcase how to create workflow rules and outbound message in Salesforce.


Outbound messaging is part of the workflow rule functionality in Salesforce. Workflow rules watch for specific kinds of field changes and trigger automatic Salesforce actions, such as sending email alerts, creating task records, or sending an outbound message.
For this article, we’ll create a workflow rule which will trigger an outbound message.
Let’s have a look how to create workflow rule and call outbound message when a specific condition meets.
- Login into the Salesforce account, if don’t have account Please signup for the free trial
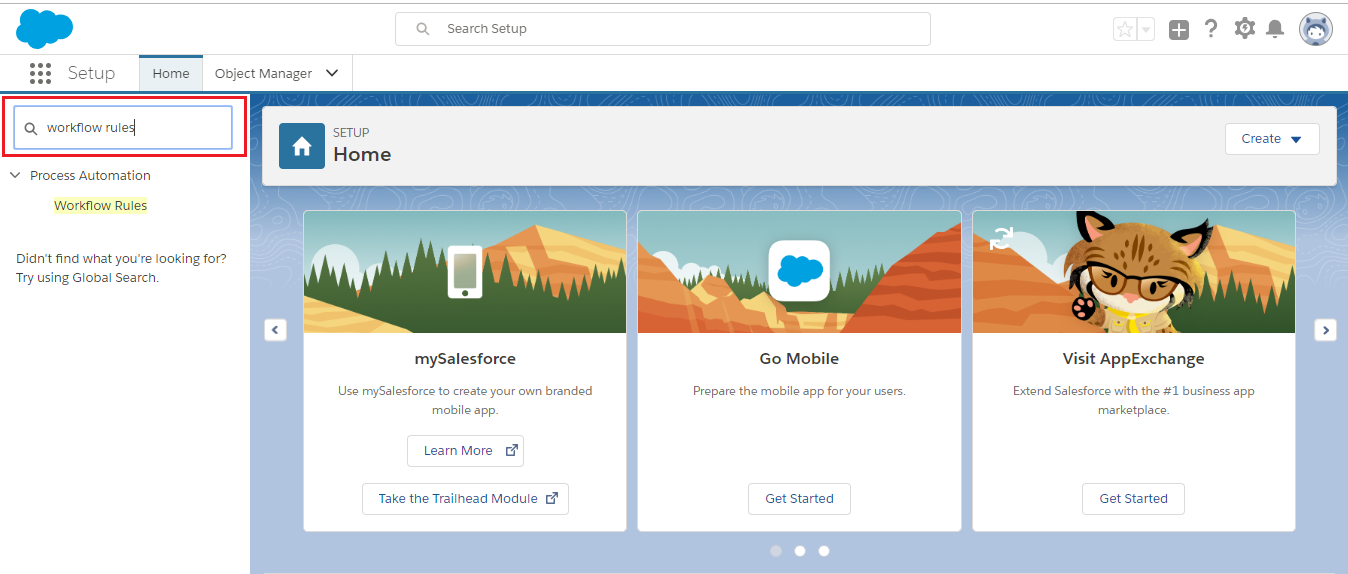
- Click on the Setup icon from the upper right and click Setup

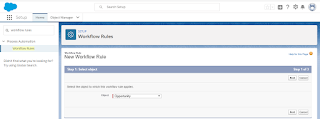
- Search Workflow rules from Quick Find text box
- Click on New Rule

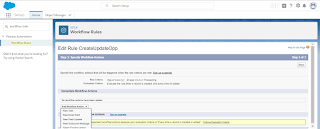
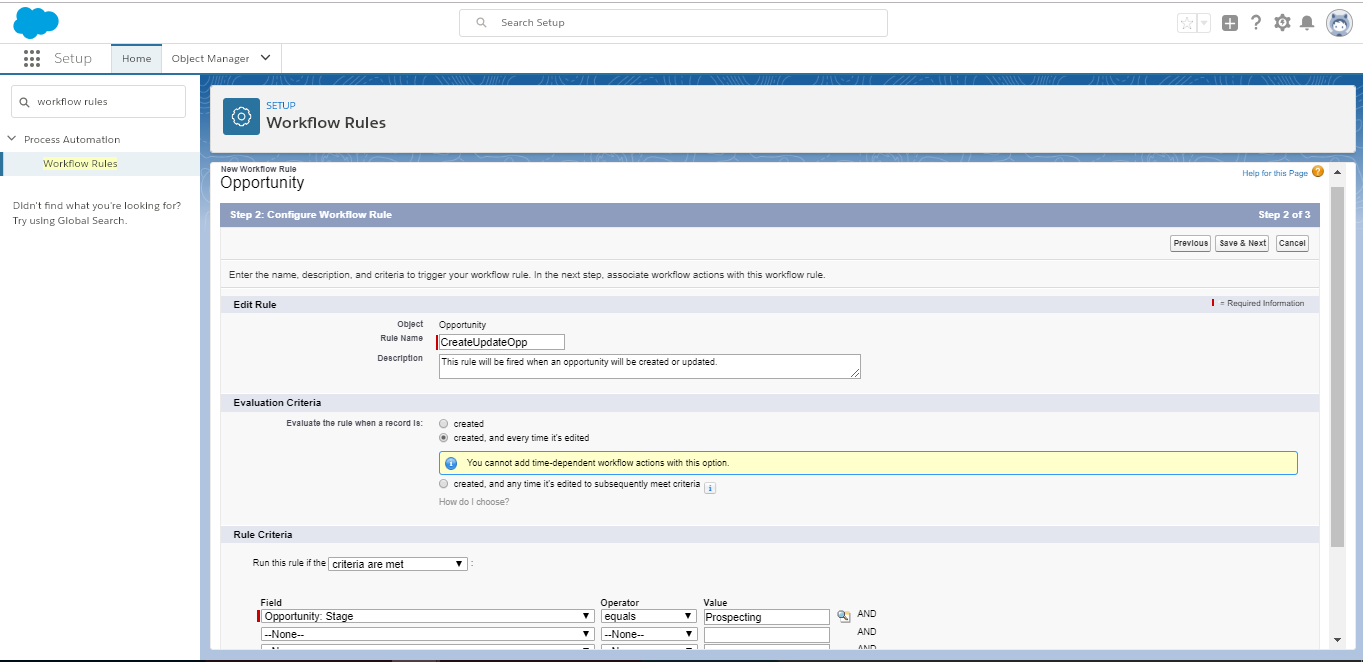
- Select the Object for which you want to create the rule. In our case, select Opportunity Object and click the Next button

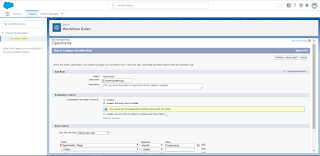
- Enter below information and click Save & Next button
- Rule Name: This is a mandatory field. Enter the rule name of your choice. In our case, we have taken “CreateUpdateOpp“
- Description: Enter the short description optionally
- Select the Evaluation Criteria: Select the evaluation criteria of our choice. In our case, we have selected “Created, and every time it’s edited“. Which means this rule will be fired on every opportunity creation / updation
- Rule Criteria
- Run this rule if the: Select “criteria are met“
- Field: Select the field on which you want the criteria to be met. In this case, we have selected Stage field with value “Prospecting“
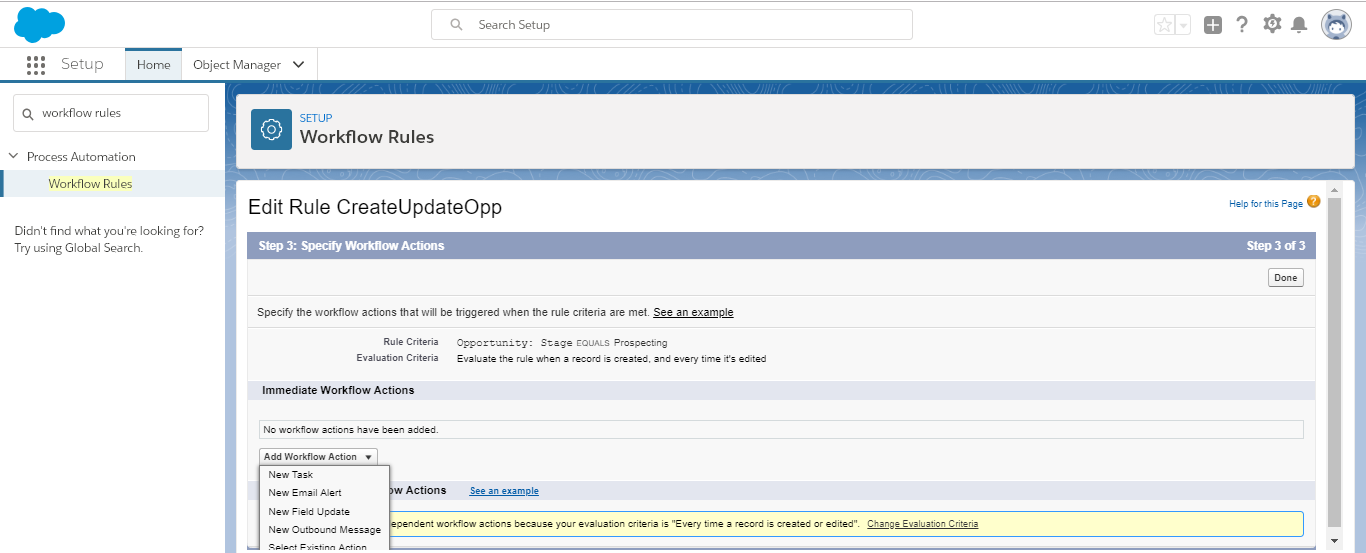
Now the workflow rule has been created. This time is to set the workflow action which will trigger when the Workflow rule will be fired. So in this case, we’ll create Outbound Message which will be triggered once the Workflow rule is met. To do so, follow the below steps:
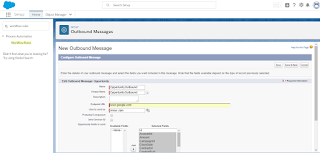
- There is drop down “Add Workflow Action“, click on this and select “New Outbound Message“
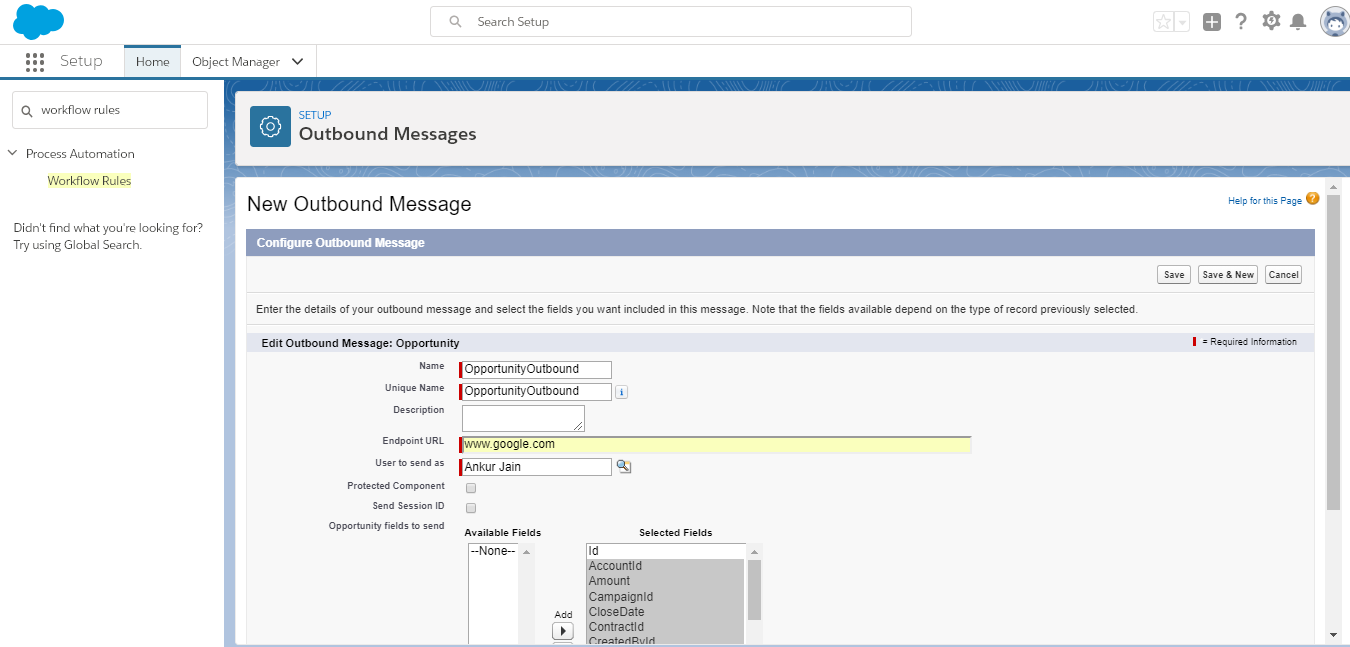
- Enter below details and click Save & New button
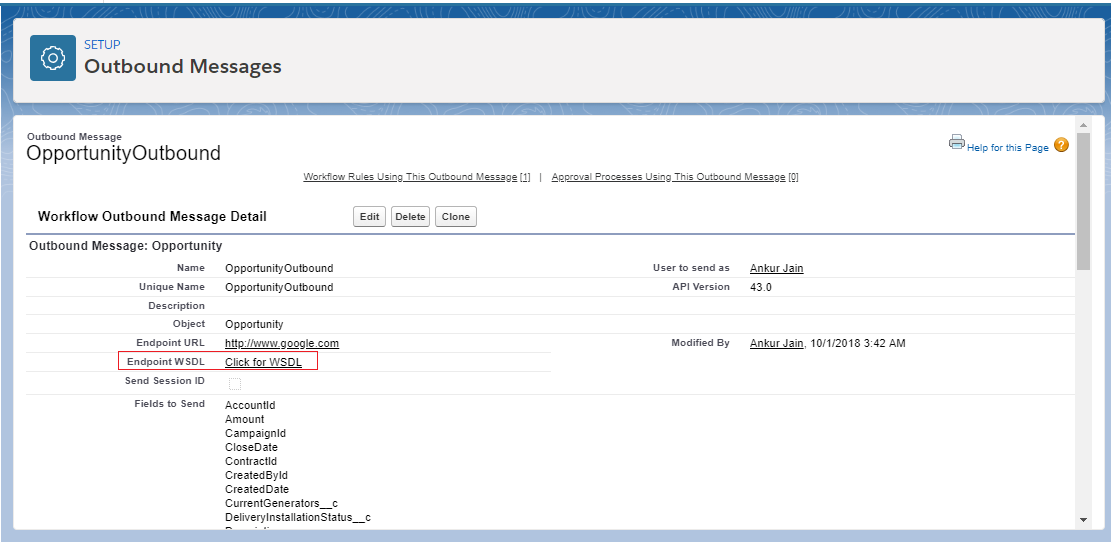
- Name: Enter the name of the outbound message. In our case, we have entered “OpportunityOutbound“
- Unique Name: Enter unique name of the outbound message
- Endpoint URL: Enter the SOAP endpoint URL where the outbound message will be triggered. For the time being enter any dummy URL for ex. www.google.com
- User to send as: Enter the user name
- Opportunity fields to send: Select the fields which you want to send as part of the outbound message. In our case, we have selected all fields for now
The outbound message has been created now.
Just enable the Workflow rule now by clicking the Activate button
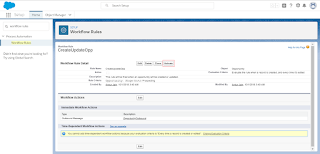

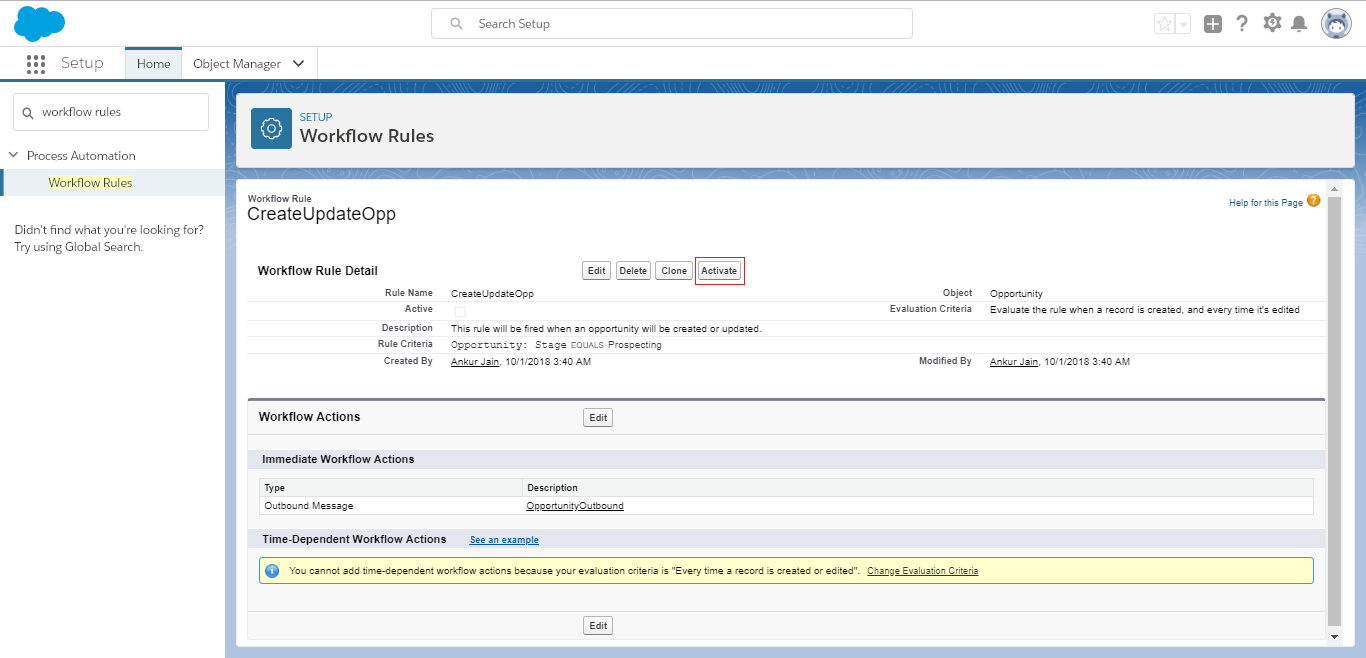
Once it is activated, the Active checkbox will be checked automatically which depicts the workflow is in activation mode

We are ready with One workflow rule and outbound message.

Let’s see how to download, outbound WSDL
- Click on the Setup icon from the upper right and click Setup.
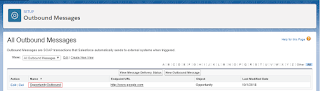
- Search Outbound Messages from Quick Find text box

- Click on the Workflow Actions -> Outbound Messages
- Click on the OpportunityOutbound message which is created in previous steps
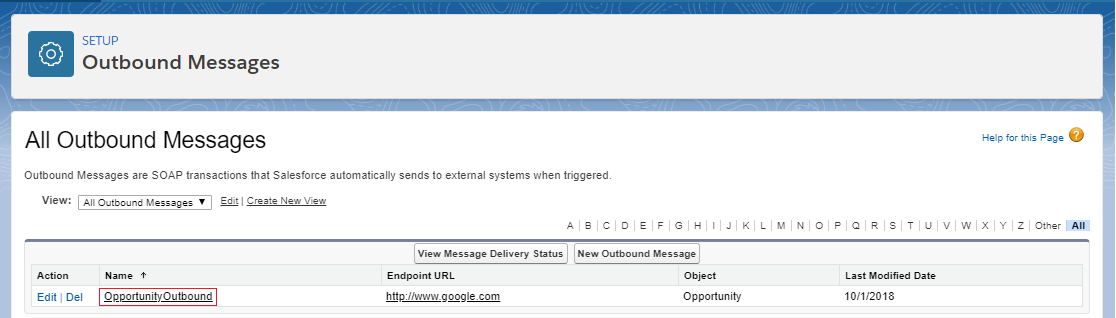
- Click on Click for WSDL to download the outbound WSDL
- Clicking on the link will show the outbound WSDL in a new tab. Just save the file with .wsdl extension
Hi
Really you have given a good information about how to create workflow rules and outbound message in Salesforce. I enjoyed by reading this.
Thanks&Regards
Katherine