Oracle Integration Cloud: CRUD Operation (Create) using Salesforce Adapter (Part-1)
We are writing a series of five blogs which will help to perform Create, Read, Update, Delete (CRUD) operation in SFDC using Oracle Integration Cloud Salesforce Adapter.
In the first part of the series, a Create Operation will be executed which will show how to insert data into Salesforce with few steps.
To complete this series, below are the pre-requisite that needs to be completed
- Oracle Integration Cloud Subscription
- Salesforce cloud Subscription
- An SFDC custom object with name Employee__c with below elements
- Employee_Age__c
- Employee_Email_id__c
- Employee_Name__c
- Employee_Qualification__c
Other parts of the series
Use Case: Expose an Integration Cloud REST service which will insert the employee details into Salesforce
Let’s get started and achieve the use case
The overall integration will look like as shown in the below screenshot
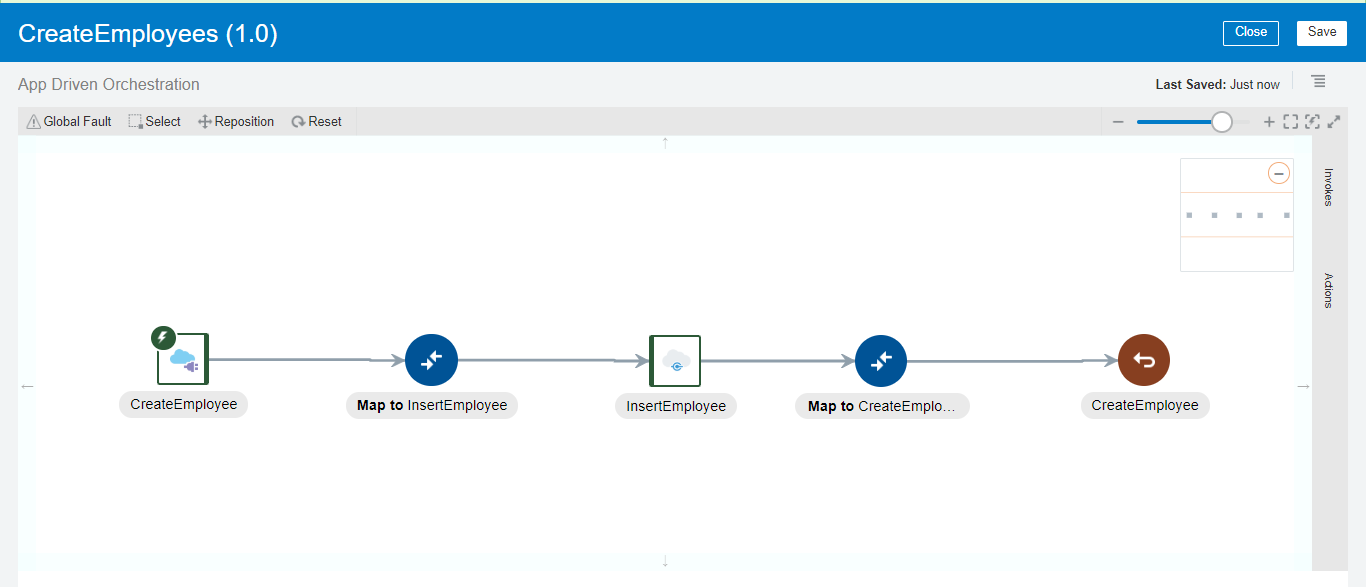
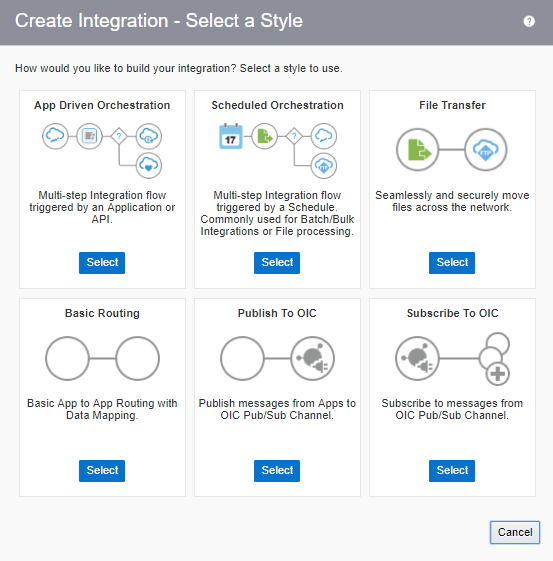
- Create an Integration and select App Driven Orchestration pattern
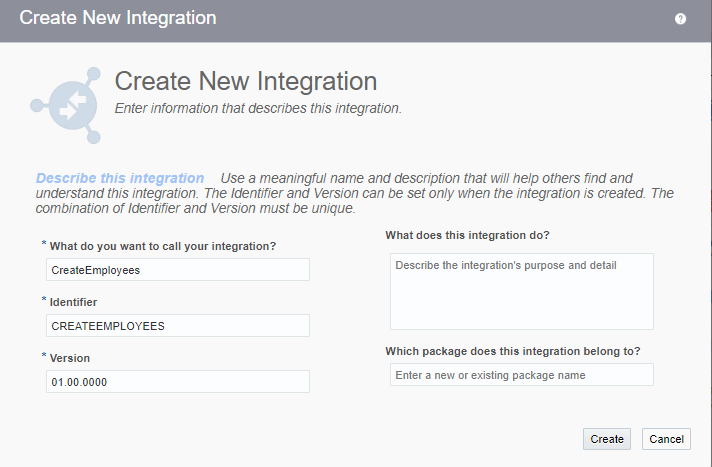
- Enter Integration name as CreateEmployees
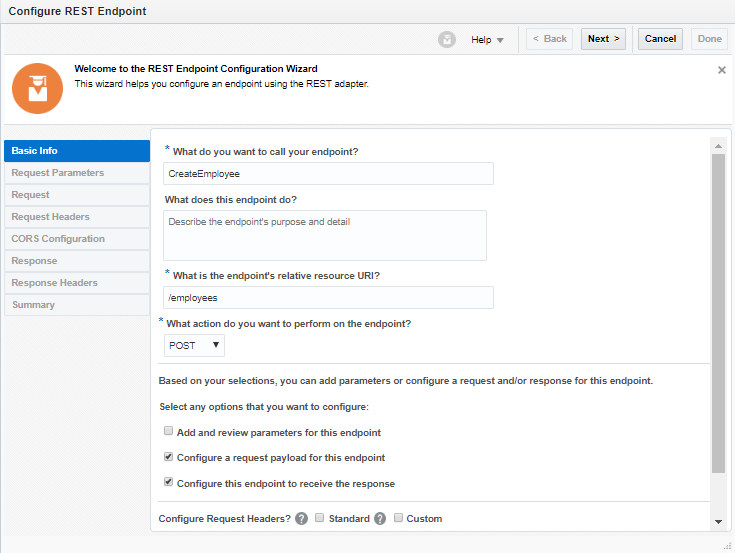
- Select or Drag the REST adapter on the integration canvas as a Trigger

- Enter information as below and click the Next button
- What do you want to call your endpoint: CreateEmployee
- What is the endpoint’s relative resource URI?: /employees
- What action do you want to perform on the endpoint: POST
- Check the checkbox: Configure a request payload to this endpoint
- Check the checkbox: Configure this endpoint to receive the response
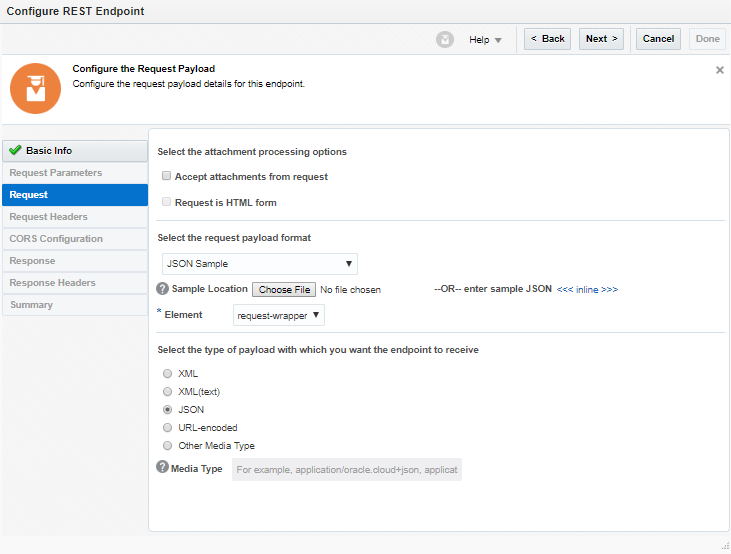
- On the Request page, enter below information and click the Next button
- Select JSON Sample from the request payload format drop-down, click << inline >> link and enter below sample JSON payload
{
“Employees”: [
{
“EmployeeName”: “”,
“EmployeeEmailId”: “”,
“EmployeeAge”: 11,
“EmployeeQualification”: “”
},
{
“EmployeeName”: “”,
“EmployeeEmailId”: “”,
“EmployeeAge”: 11,
“EmployeeQualification”: “”
}
]
}
- On the Response page, enter below information and click the Next button
- Select JSON Sample from the request payload format drop-down, click <<inline>> link and enter below sample JSON payload
{ "status": "success" }

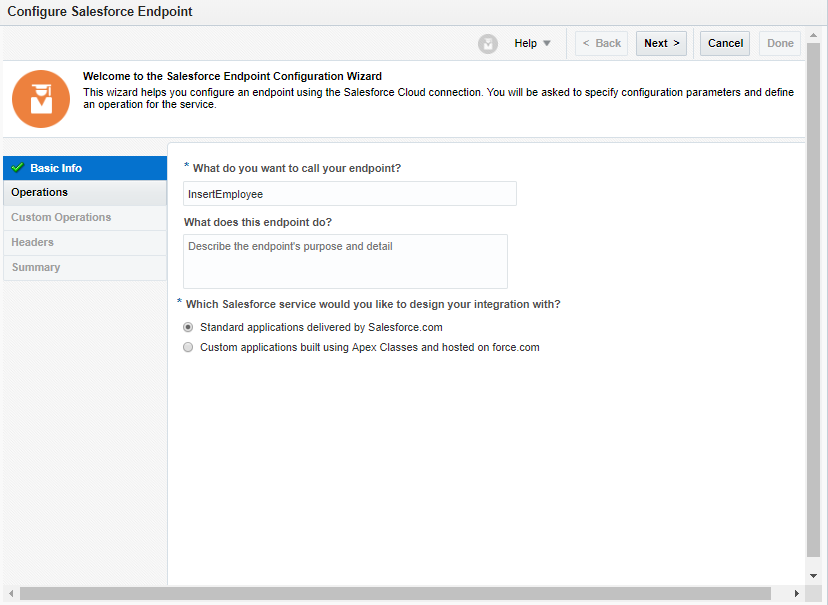
- Drop an SFDC adapter just below the REST adapter

- Enter below information and click the Next button
- What do you want to call your endpoint?: InsertEmployee
- Check the Standard applications delivered by Salesforce.com checkbox
- Enter below information and click the Next button
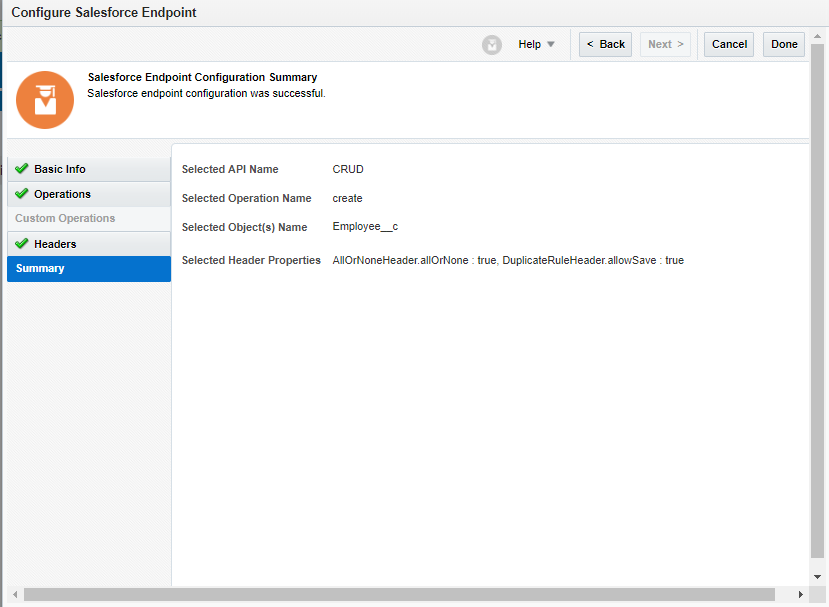
- Select CRUD, create operation from the Operation Type drop down
- Search the SFDC object(employee) and move the Employee__c object to the selected pane
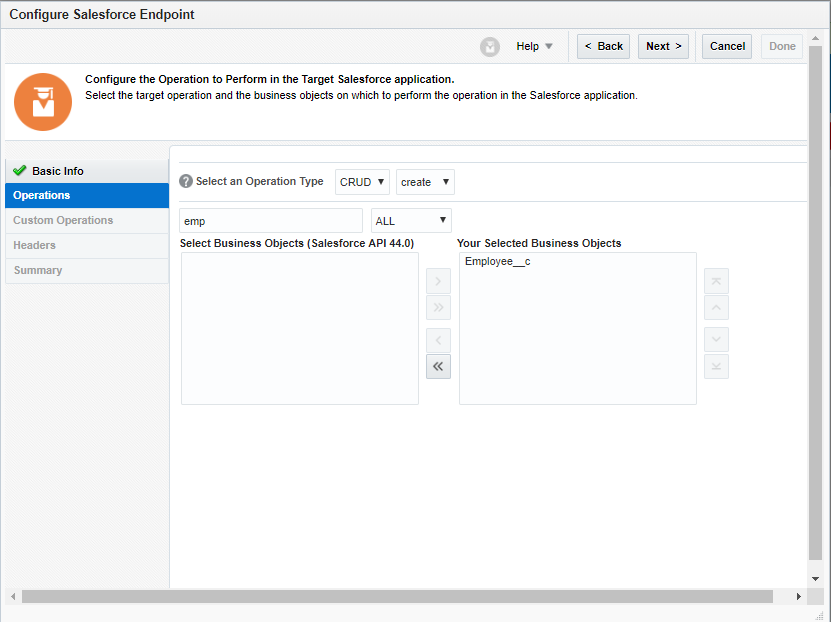
- Simply click the Next button
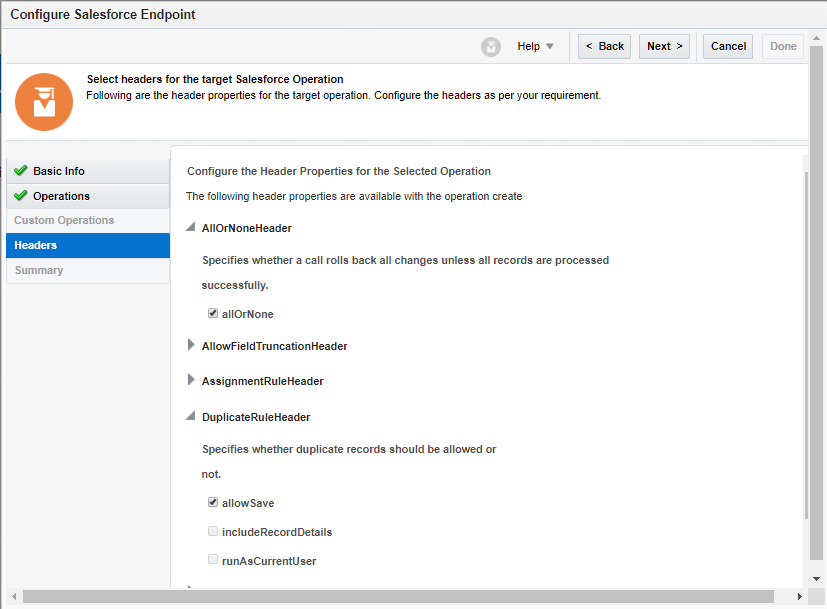
- Click the Done button
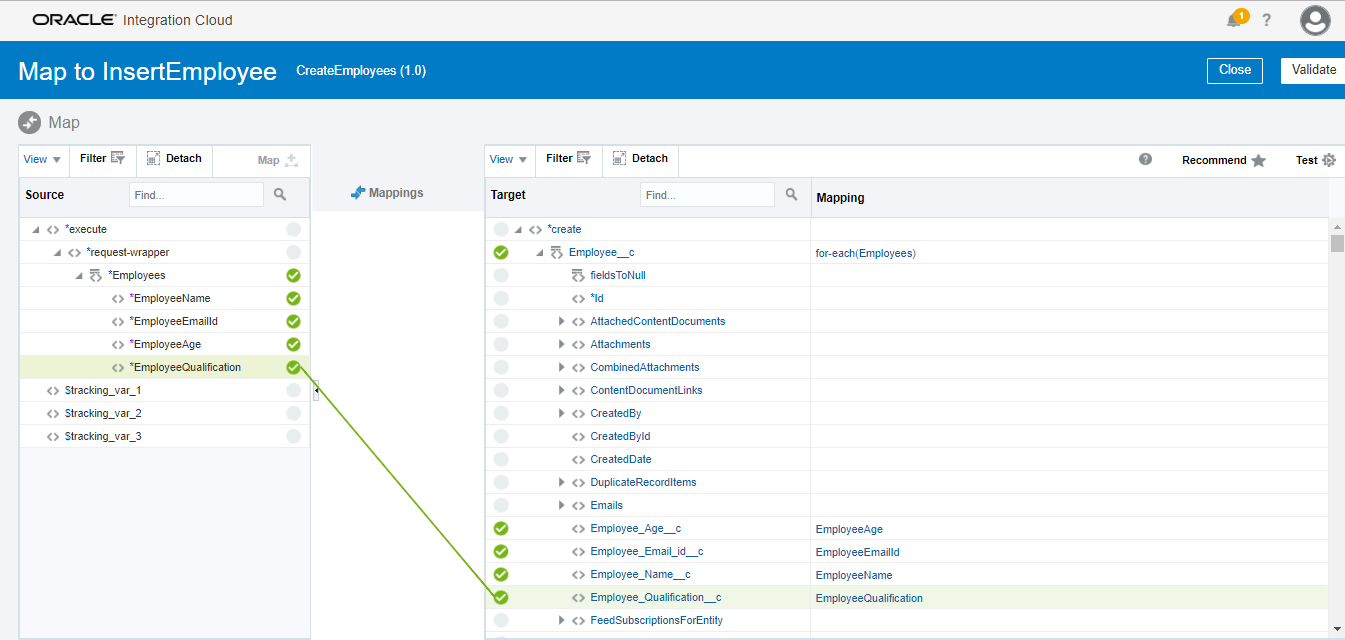
- Edit the InsertEmployee mapper and map the required field from source (REST) to Target (SFDC)
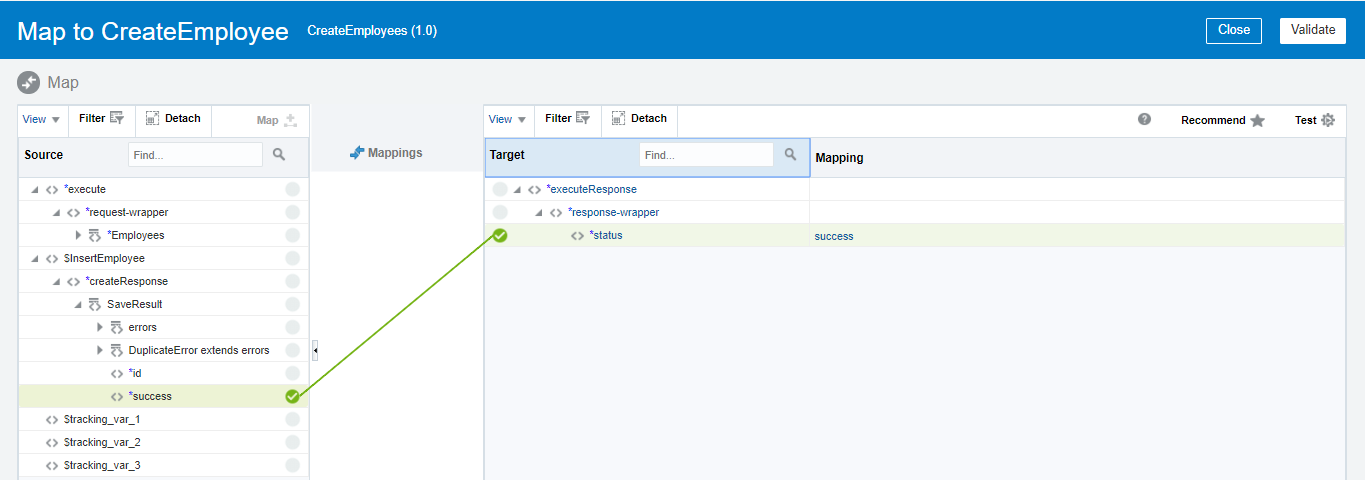
- Edit the CreateEmloyee mapper and map the SFDC response status element with the REST service response status element
- Integration is completed now. Save and Activate the integration
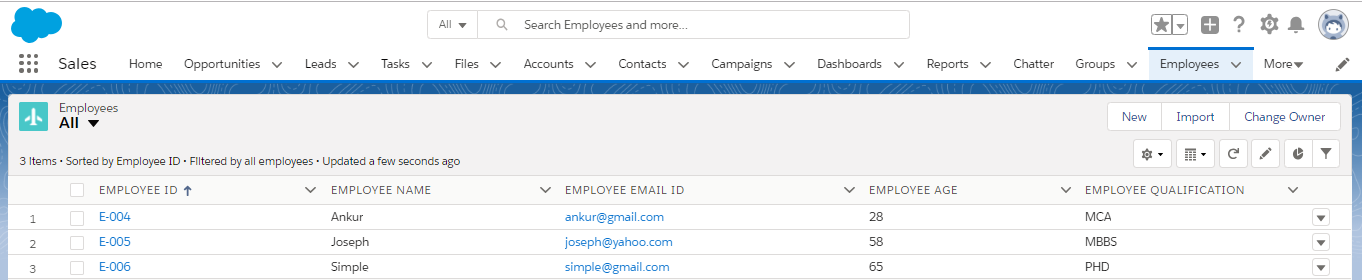
- Let’s test the integration via the POSTMAN tool. Enter the REST endpoint URL and enter below request payload
{
“Employees”: [
{
“EmployeeName”: “Ankur”,
“EmployeeEmailId”: “ankur@gmail.com”,
“EmployeeAge”: 28,
“EmployeeQualification”: “MCA”
},
{
“EmployeeName”: “Joseph”,
“EmployeeEmailId”: “Joseph@yahoo.com”,
“EmployeeAge”: 58,
“EmployeeQualification”: “MBBS”
},
{
“EmployeeName”: “Simple”,
“EmployeeEmailId”: “simple@gmail.com”,
“EmployeeAge”: 65,
“EmployeeQualification”: “PHD”
}
]
}

- Open the SFDC custom Object Employee__c and see the requested data should be inserted into the Object
This blog is full of innovative ideas and i really like your informations.please add more details in future.
Python Training in Chennai
Python Training in Anna Nagar
JAVA Training in Chennai
Hadoop Training in Chennai
Selenium Training in Chennai
Python Training in Chennai
Python Training in Velachery