Know about all commands of the Docker images
Docker provides various commands to manage the images and as a developer, administrator, etc, you must know all the commands that Docker offers to manage images.
In this short article, I’ll explain all the commands of the Docker images with examples:
The easy way to know all the commands of the Docker image is to run the help command on the host machine where Docker is installed as follows:
[opc@instance-20191018-2102 ~]$ docker image --help
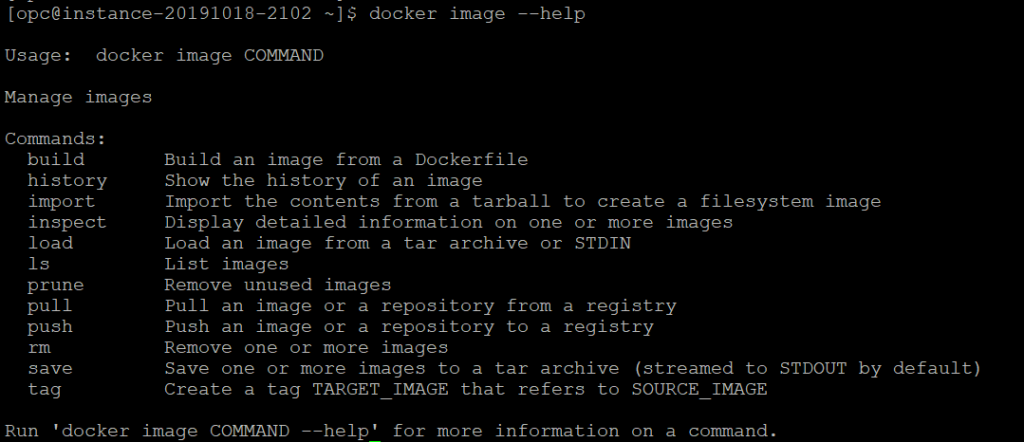
Let’s see all the available commands with examples:
build
The build command is used to create the images using the Dockerfile. Following is the command to create a new image:
[root@instance-20191018-2102 ~]# docker image build .
The build command uses the Dockerfile to build the new image from the context path. The context path in the above command is period (.). The build commands look for the file named Dockerfile in the context path.
The build command given above will create an image without a tag. If you want to provide the tag to an image then use the following command:
[root@instance-20191018-2102 docker]# docker image build . -t custom:image
Once an image is created, you can use the image to create the container.
history
The history command is used to view the history of an image. Following is the command to view the history of an image:
[root@instance-20191018-2102 docker]# docker image history <image_id_or_name>

Example:

[root@instance-20191018-2102 docker]# docker image history centos
centos is the image name in the above command. The following screenshot shows the result of the history command:

inspect
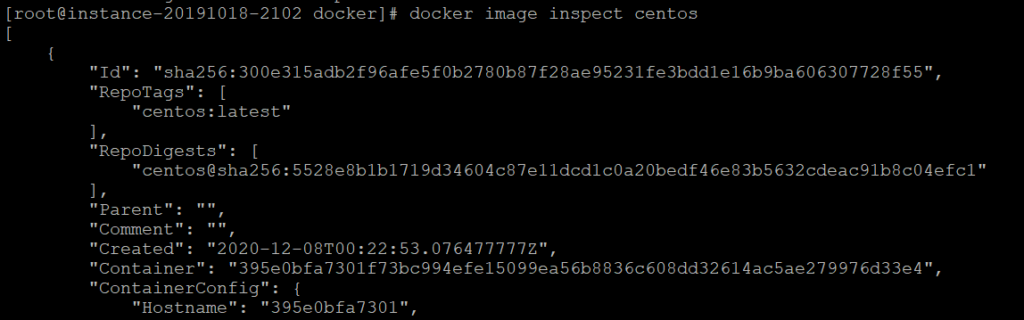
The inspect command is used to get the detailed information of an image in JSON format. Following is the command to inspect an image:
[root@instance-20191018-2102 docker]# docker image inspect <image_id_or_name>

[root@instance-20191018-2102 docker]# docker image inspect centos
centos is the image name in the above command. The following short screenshot shows the result of the inspect command:
ls
The ls command is used to list all the images on the Docker host machine. Following is the command to list the images:
[root@instance-20191018-2102 docker]# docker image ls
The following screenshot shows the result of the ls command:

Each image has digest value also which is always unique to an image. The following is the command to view the digests of all images:
[root@instance-20191018-2102 docker]# docker image list --digests
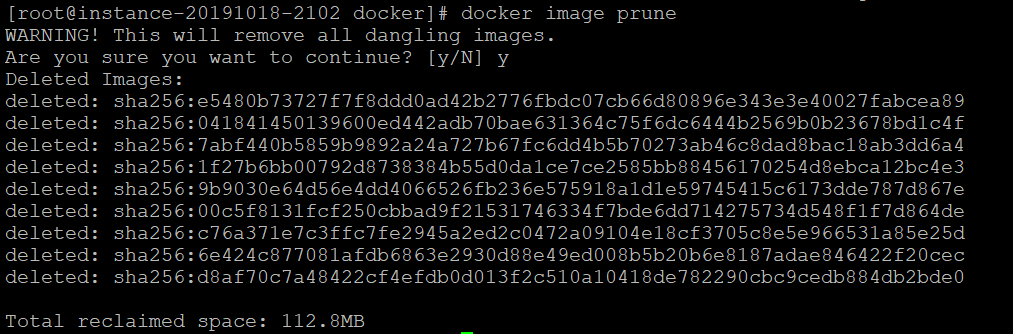
prune
The prune command is used to delete all the unused images meaning all the images which are not referenced by the container. The following is the command to prune all the unused images:
[root@instance-20191018-2102 docker]# docker image prune
The following screenshot shows the result of the prune command:
pull
The pull command is used to pull the images from the registry. By default, the pull command pulls the images from the Docker hub. The following is the command to pull the images:
[root@instance-20191018-2102 docker]# docker image pull <image_name>

Example:

[root@instance-20191018-2102 docker]# docker image pull mysql
mysql is the image name in the above command. The following screenshot shows the result of the pull command:
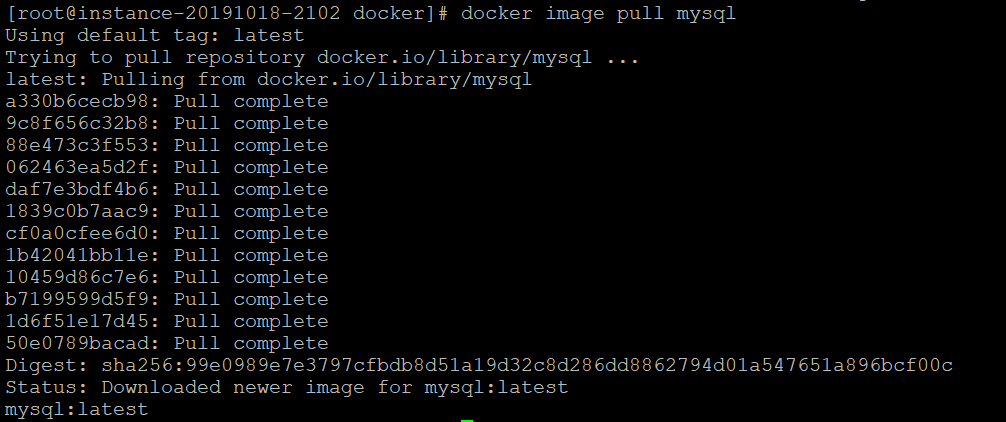
By default, the pull command pulls the image whose tag is marked with the latest (as shown in the above screenshot). In case, you want to pull the image of the specific tag, specify the tag using :<tagname> as below:
[root@instance-20191018-2102 docker]# docker image pull mysql:8.0
You can also pull the image based on the digest value of the image as digest values are always unique to a particular image:
[root@instance-20191018-2102 docker]# docker image pull centos@sha256:5528e8b1b1719d34604c87e11dcd1c0a20bedf46e83b5632cdeac91b8c04efc1In case you want to pull an image from the different registries such as Google Container Registry (GCR), Amazon Elastic Container Registry (ECR), etc, then you have to specify the name of the registry in the pull command as following:
[root@instance-20191018-2102 docker]# docker image pull gcr.io/google-samples/hello-app:2.0
In the above command, we have used GCR (gcr.io) registry. The following screenshot shows the result of the above command:

tag
The very useful command is used to create a tag to the target image that refers to the source image. The following is the command used to tag the image:
[root@instance-20191018-2102 docker]# docker image tag <source_image>:<tag> <target_image>:<tag>

Example:

[root@instance-20191018-2102 docker]# docker image tag centos:latest techsupper/centos:v1
push
The push command is used to push an image to the registry. The following is the command to push an image to the registry:
[root@instance-20191018-2102 docker]# docker push <repository_name>/<image_name>:<tag>

Example:

[root@instance-20191018-2102 docker]# docker push techsupper/centos:v1
The following screenshot shows the result of the push command:

In the above command, techsupper is the custom repository name that already exists on the docker hub.
Note: Before you push the image, you must log in to the docker hub using the following login command:
[root@instance-20191018-2102 docker]# docker login
Once you hit the login command, it will ask the docker hub username and password one by one. Once logged in successfully, then you can push the images to the Docker repository.
rm
The rm command is used to remove one or more images from the Docker host machine. The following is the command to remove the images:
[root@instance-20191018-2102 docker]# docker image rm <image_name_or_id>
Example:
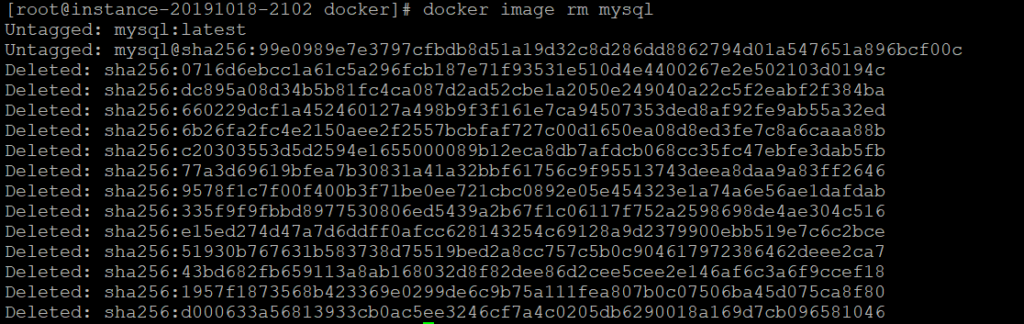
[root@instance-20191018-2102 docker]# docker image rm mysql
The following screenshot shows the result of the rm command:
save
The save command is used to save one or more images to a tar archive. This command is useful if someone having internet issues downloading the images from the internet. You can save the image/s as a tar file, transfer them to another’s systems to load from the tar file instead of downloading from the registry.
The following is the command to save the image as a tar archive:
[root@instance-20191018-2102 docker]# docker image save <image_name_or_id> -o <tar_image_name>.tar

Example:

[root@instance-20191018-2102 docker]# docker image save centos -o centos_image.tar
The save command will create the tar file in the current working directory if an absolute path is not provided.
load
The load command is used to load an image from the tar file. The following is the command to load the image from the tar file:
[root@instance-20191018-2102 docker]# docker image load --input <tar_image_name>.tar

Example:

[root@instance-20191018-2102 docker]# docker image load --input centos_image.tar
import
The import command is used to import the content from a tar archive to create a file system image. This tar file should be created using the export command of the container. The following is the command to create the filesystem image using the import command:
[root@instance-20191018-2102 docker]# docker image import <tar_file_name>.tar <image_name>:<tag>

Example:

[root@instance-20191018-2102 docker]# docker image import server001_bkp.tar server001:bkp
There is a difference between save/load and export/import. Refer to the article to understand the difference between them.
You can also look at the complete video to know about all the commands of Docker images:
Further readings
What are Docker images and their layers
How to create a docker container
Architecture and basic terminologies of Docker
How to create an NGINX docker container
Know about all commands of the Docker container
You can subscribe to my YouTube channel for further reading.