How to add parameters in BIP report in Oracle SaaS
In this article, I’ll demonstrate how to add parameters to the BIP report and the steps involved in it. Many times end users request to add parameters to the report so that data can be filtered as per need.
Prerequisites:
- Oracle Fusion SaaS Instance with necessary roles to create reports.
- Basic knowledge of SQL and creating BIP reports (Refer to my previous blog to learn how to create a Report and Data Model).
Syntax to add parameters
Adding parameters is a simple task in SQL code. We need to give a colon with parameter name (:p_name). Generally, we add parameters to filter the data, so we need to place the parameters in the where clause of the SQL query.
Ex: INVOICE_NUM = :P_INVOICE_NUM
Now let’s see the steps involved to add parameters to the report. First, we need to add parameters to the data model and those parameters will be automatically reflected in the report linked with the data model
Steps to add parameters
Following are the steps to add parameters to the data model:
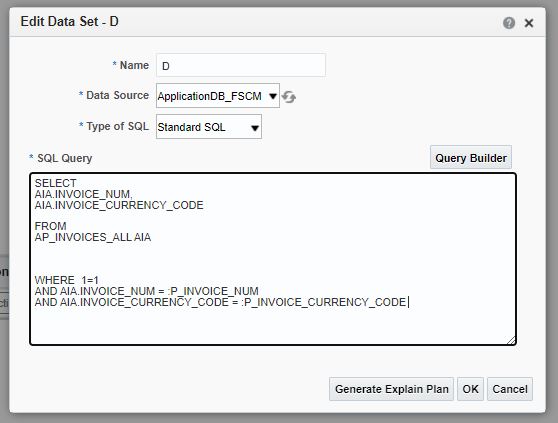
- Create a data model and add the SQL query with parameters as shown below, I have added 2 parameters in this data model (1. P_INVOICE_NUM, 2. P_INVOICE_CURRENCY_CODE). Click OK to validate the code as shown in the following screenshots:
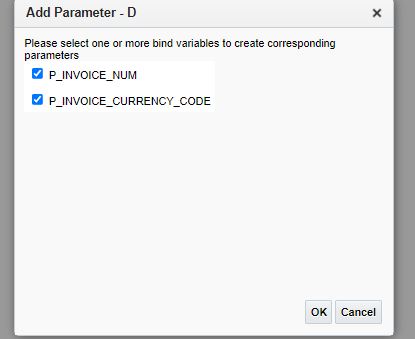
- After clicking OK, a prompt will be displayed as shown in the following screenshot, check the checkbox for the parameters added in the code. Click OK to add the selected parameters.
- After clicking ok, selected parameters will be added in the Parameters section as shown in the following screenshot:
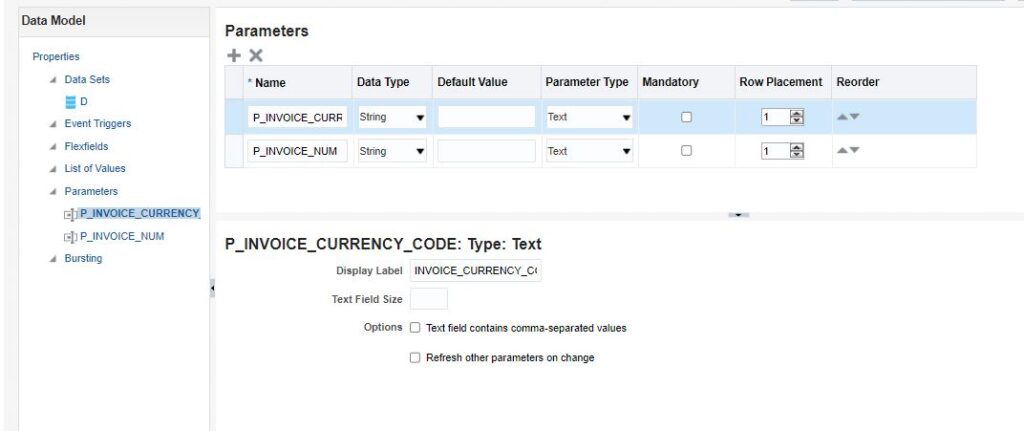
- In the above screen, if required we can use the following properties of each parameter:
- Name: This name should match with parameter name given in the SQL query.
- Data Type: Data type of the parameter.
- Default value: The value provided here will be taken as the default value and if required we can override it while running the report.
- Parameter Type: We have different types like Text, Menu, and Date.
- Mandatory: If the check box is checked then the parameter will become mandatory.
- Row Placement: This property is to specify in which row the parameter needs to be displayed.
- Reorder: This helps to reorder the parameters.
- Display Label: The value provided here will be displayed as a parameter label while running the report
- The text field contains comma-separated values: If the parameter contains comma-separated values then it has to be checked.
- Refresh other parameters on change: If there are any dependent parameters we have to check this value.
- After making necessary changes, save the data model.
Now, our data model is ready with the parameters. Let’s move and test the data model.
Testing Data Model
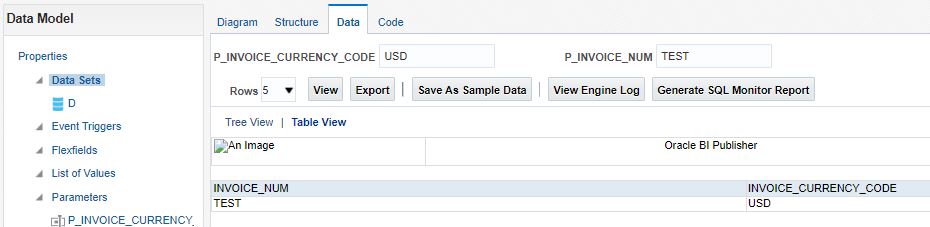
- Click on Data and pass the parameters’ values as shown in the following screenshot and click View to see the data. If there are any matching data with the passed parameters then data will be displayed.
Now we have successfully added the parameters to the data model and tested it successfully.
Note: These parameters will be automatically added to the report once they are added to the Data Model.
Testing Report
- Create a report and link it with the data model created. All the parameters will appear automatically in the report once the data model is linked. Provide the necessary values and click on Apply to view data.
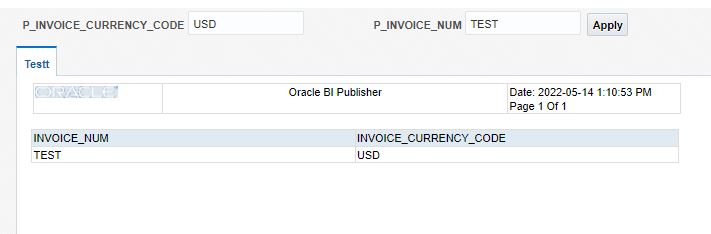
Now we have successfully tested the Report with parameters
You can look at our YouTube channel for Oracle Integration-related videos. Also, don’t forget to subscribe to our channel.
Further Readings
How to create a BIP report in Oracle SaaS
How to create and test custom ESS job in Oracle SaaS
Merging two CSV files into a single file in Oracle Integration
ERP Integration using File Based Data Import: Oracle Integration