Load data in ATP from BIP using OIC
In this article, I’ll develop a scheduled integration that will run a BIP report in fusion and insert the data from the file in the ATP table.
This use case requires five simple steps to complete:
- Create BI Publisher report and a table in ATP database
- Create SOAP connection
- Create ATP connection
- Create an Integration
- Activate the Integration
- Lets say we have created a simple data model and a report for that data model in fusion instance. We have also created a table in ATP database as per the columns in the BI Publisher report.
- Now to invoke that report from OIC we will need to have a SOAP connection. For more details on how to create a SOAP connection refer this blog.
- In order to place the BIP report output in ATP table we need to create the Oracle ATP connection for that we need the host, port, wallet details and ATP login credentials.


- Lets start by creating the scheduled integration. Give some name to the integration like INVOKE_BIP_ATP. For the initial step on how create the integration and add the RunBIPReport activity refer this blog.
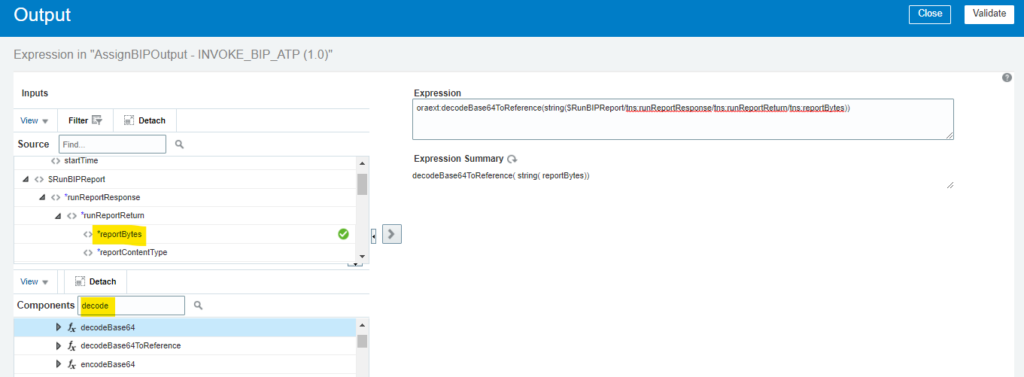
So, now you have configured the REST connection and we have the file in base64 encoded format. We need to decode this and convert it into a tabular(csv) format to insert into a table in database. To decode base64 reference, we can use an assign activity and use the function decodeBase64ToReference. Then click on Validate and Close.
Now in order to convert into a csv format we will make use of Stage activity.
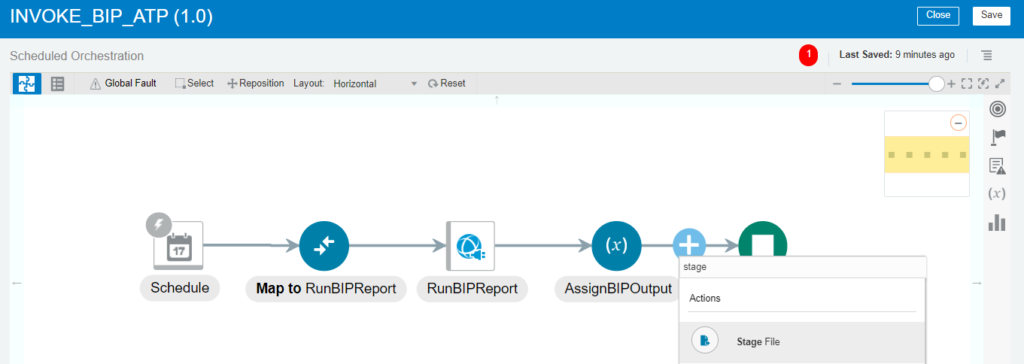
We will call the endpoint as ReadEntireFile then click on Next. Under configure operation we will choose Read Entire File as the Choose Stage File operation, select No for Configure File Reference and under Specify File the Reference select the Output variable from the variable of the assign activity.

Click on Next and then select sample delimited content ex. CSV for describing the structure of the file content. Click on Next, prepare the sample csv file based on the output of the BI Publisher report and upload that file here. Enter some name for Record Name and Recordset Name as Record as RecordSet. Click on Next and Save.

Now we need to loop through each recordset in the record and insert into the database table. For that we make use of for each loop. Give some name like ForEachTrxNumber and in repeating element map the Record and give some name to the Current Element like CurrElement.

Now we have each record on the for each element, we can invoke the ATP connection that we have created above in Step 3 and insert the records sequentially in the ATP table.
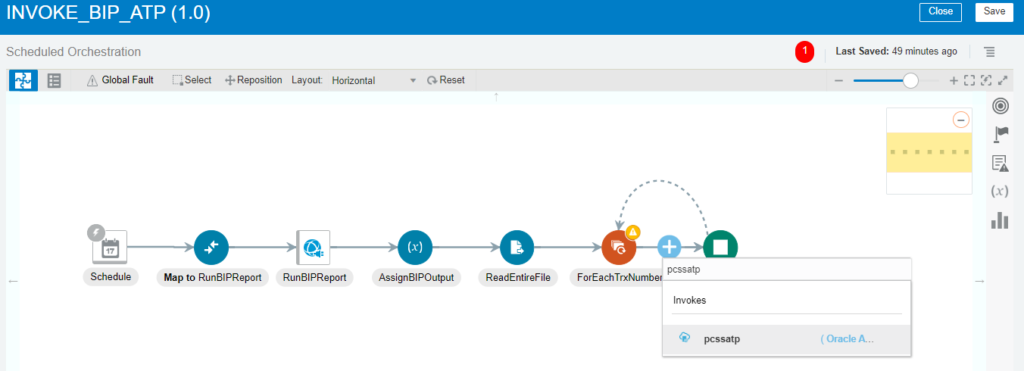
For that inside the for each loop we search for out ATP connection and name it as InsertIntoATPTable and select Run a SQL statement as an operation to perform. Click on Next and we type the INSERT query, click on validate SQL Query and once it is validated successfully we click on Next. Click on Next again and Done.

Now edit the mapper for InsertIntoATPTable and map the CurrElement columns to the InsertIntoATPTable request.

- Now the integration is ready to use. And it looks something like this.

Click on Save and Close. And activate the integration by clicking on the start button and enabling tracing and payload. The integration is ready for testing.
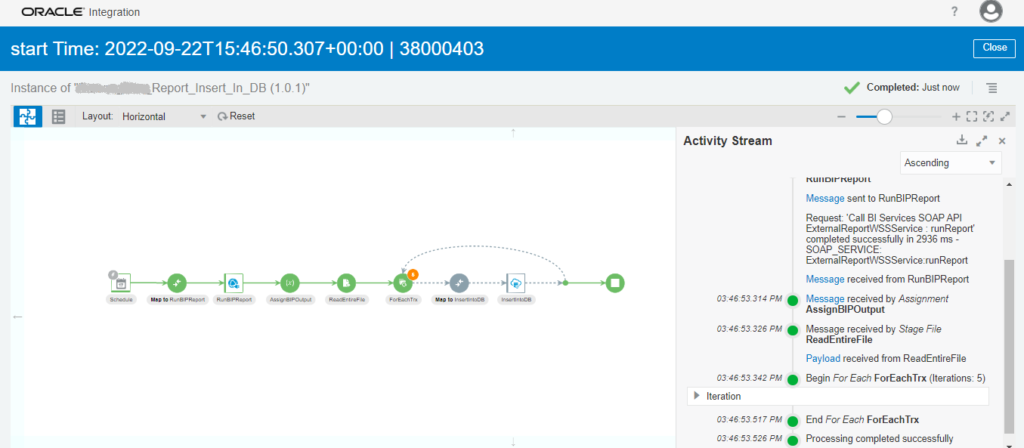
Voila, you have completed the integration run. That’s all about this post. Thank you!
If you like this article, please like, comment, and share. Request you to subscribe to my YouTube channel for more such videos and don’t forget to subscribe to our channel to get regular updates.
Further readings:
Place file in ATP from BIP using OIC
Place file in Object Storage from BIP using OIC
How to write files using OIC FTP adapter
Read files from Object Storage in Oracle Integration

