Create a simple web application: Visual Builder Cloud Service(VBCS)
Oracle Visual Builder Cloud Service (VBCS) is a visual development tool for creating web and mobile applications by simply dragging and dropping user interface (UI) components onto a page. You can create business objects with the click of a button, and you can add data by importing CSV files or XLS spreadsheets to your application. You don’t need any programming experience to develop an application.
A business object is a resource, such as an invoice or purchase order. Like a database table, a business object provides the structure for data used with business processes. Business objects are stored in a database.
Use Case for this article
- Create a VBCS application
- Create a Business Object for example Loan Business Object
- Create a page to show the List of Loans
- Create a page to apply for the Loan
- Create a page to update the existing Loan
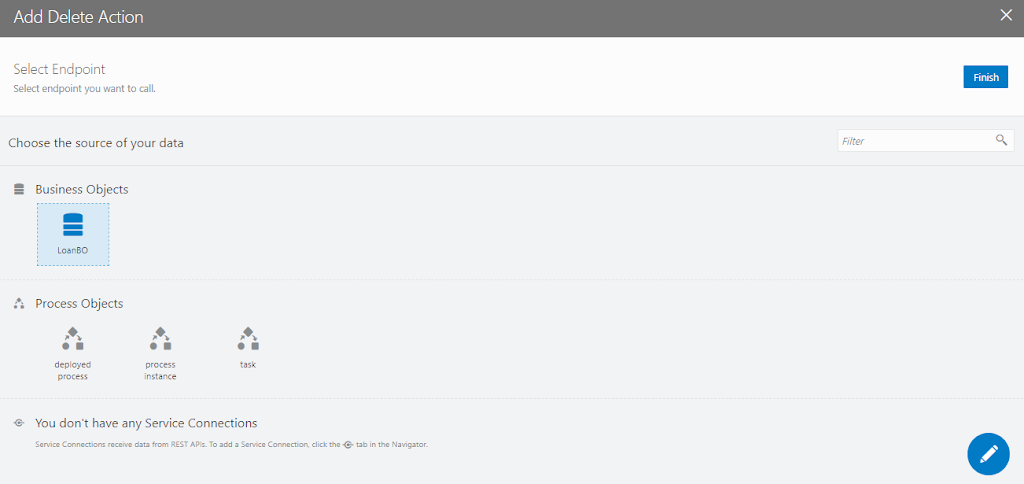
- Button to delete the existing Loan
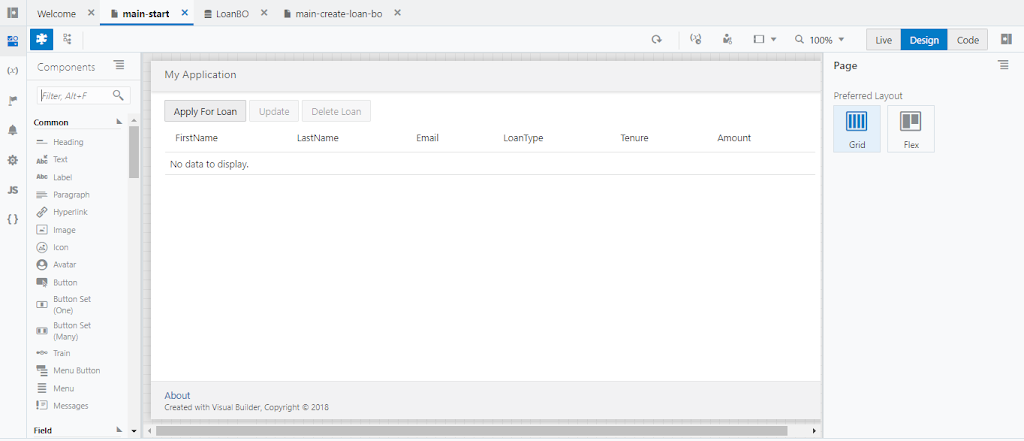
Post completion of this article, the main page will look like below
Let’s get started with the actual implementation and see how to achieve this.Create a VBCS application
- Open the Visual Builder and Click on the Create New button from the right corner. Enter below details and click the Finish button to create a new application
- Application Name: Enter application name as DemoApplication
- Application Id: Application id will be populated automatically based on application name however same can be edited
- Description: Enter the description as “This is demo application“
- Application template: Select Empty Application template

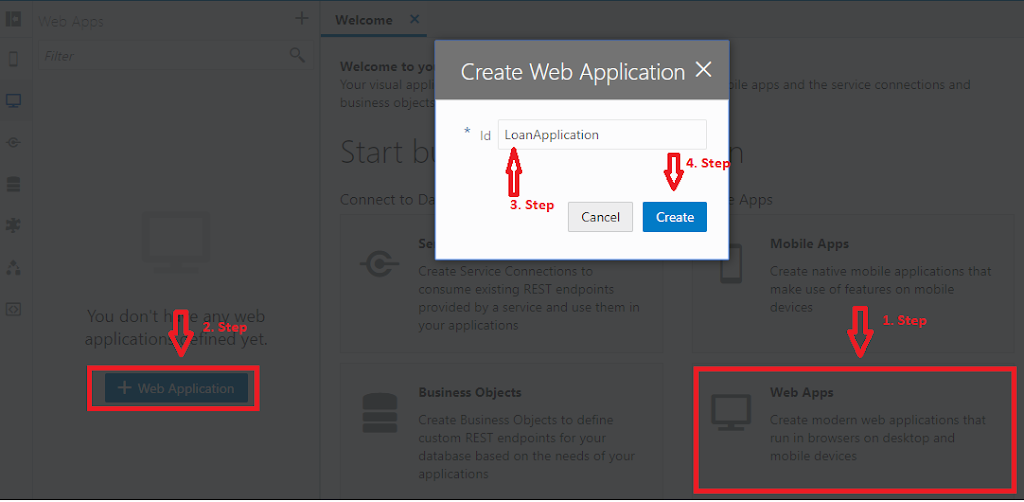
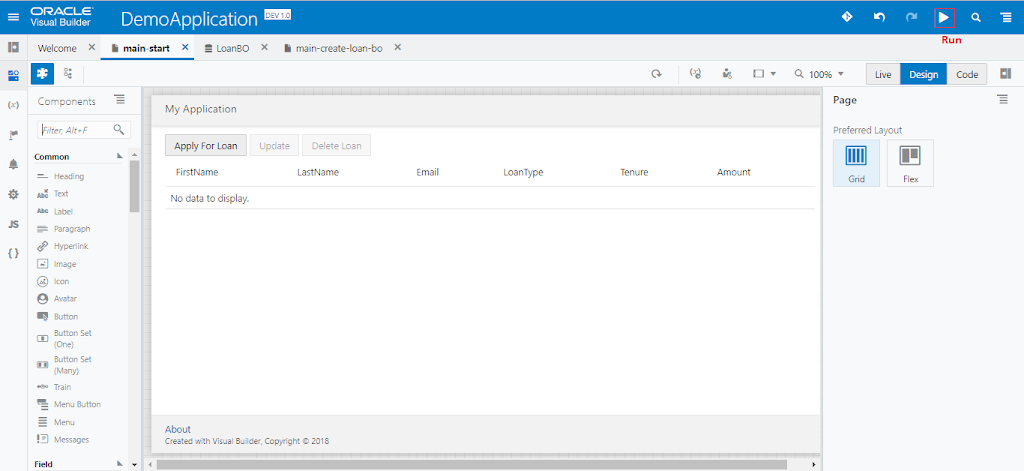
- Click on the Web Apps tile, + Web Application button. On the application popup, enter the Application name as “LoanApplication” and Click on the Create button
- Once application created, it will open the web app screen which will show the multiple panels as shown in the below screen shot

Create a Business Object for example Loan Business Object
- Let’s first create the Loan Business Object type to store the loan application data. To do so, Click on the Business Objects from the left panel, click on the + Business Object button. From the opened popup and enter the Label name as “LoanBO” and click on the Create button

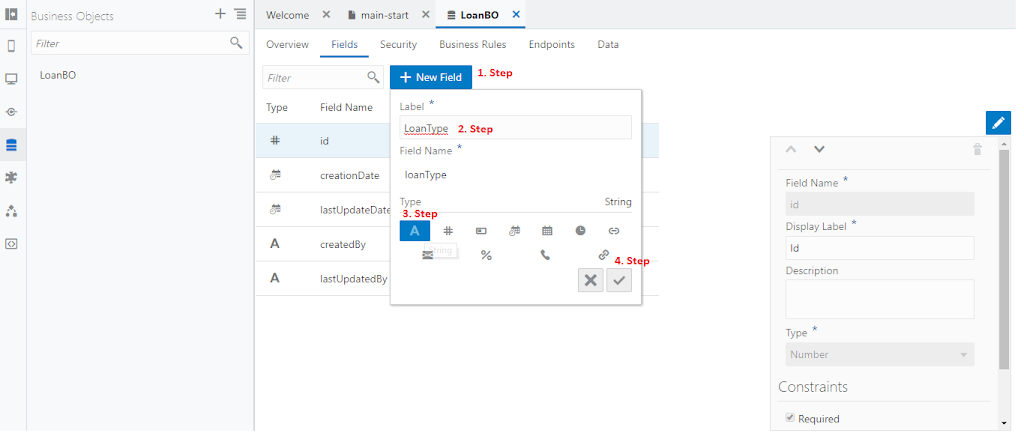
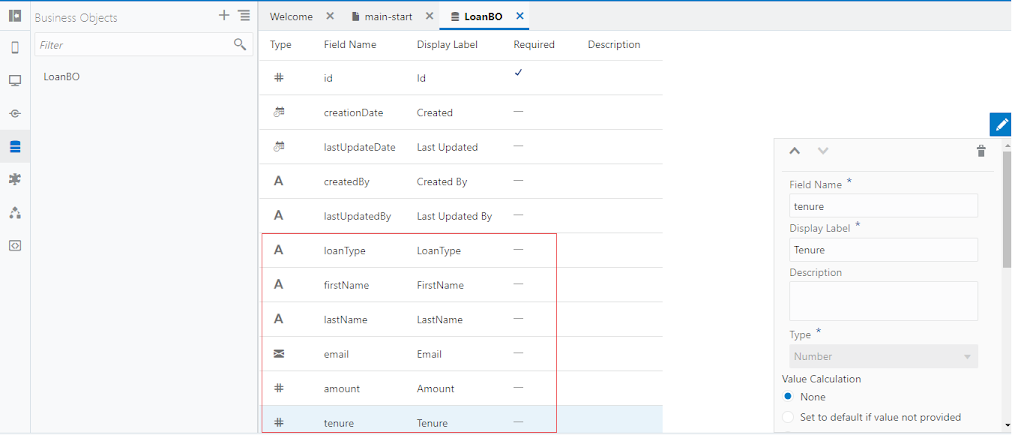
- Move to the Fields tab, click on the +New Field button, enter “LoanType” as a label name and select String as a data type. Once done click on the create button
- Repeat the same steps and create variables as below:
|
Variable Name
|
Data Type
|
|
FirstName
|
String
|
|
LastName
|
String
|
|
Email
|
Email
|
|
Amount
|
Integer
|
|
Tenure
|
Integer
|
Create a page to show the List of Loans
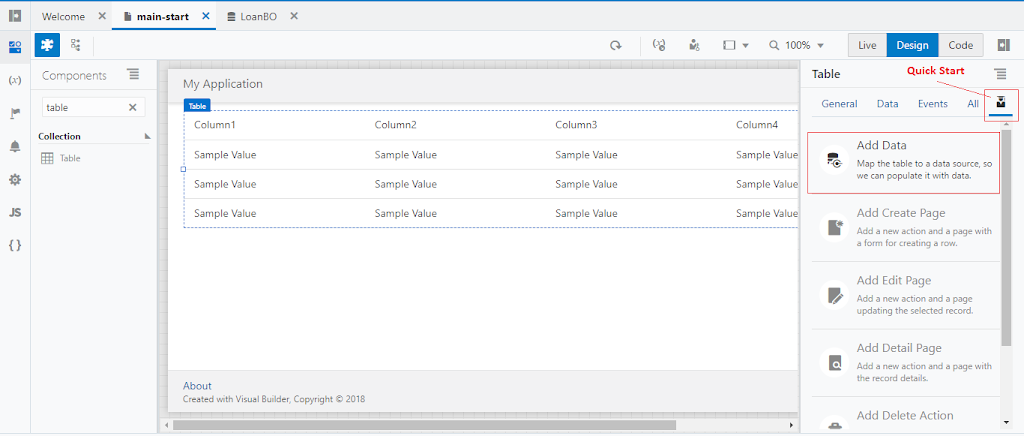
- Go back to the web application and open main-start page. From the Components pallet, search the Table and drop on the page

- Select the Table on the page, see the properties in the right panel. Click on the Quick Start and Add Data. The Add Data action will allow to map source of data for Table. In our case, we’ll show all the data which resides in our “LoanBO” Business Object
- Post clicking on the Add Data, a new popup will get open. Select the LoanBO under the Business Objects and select Next button
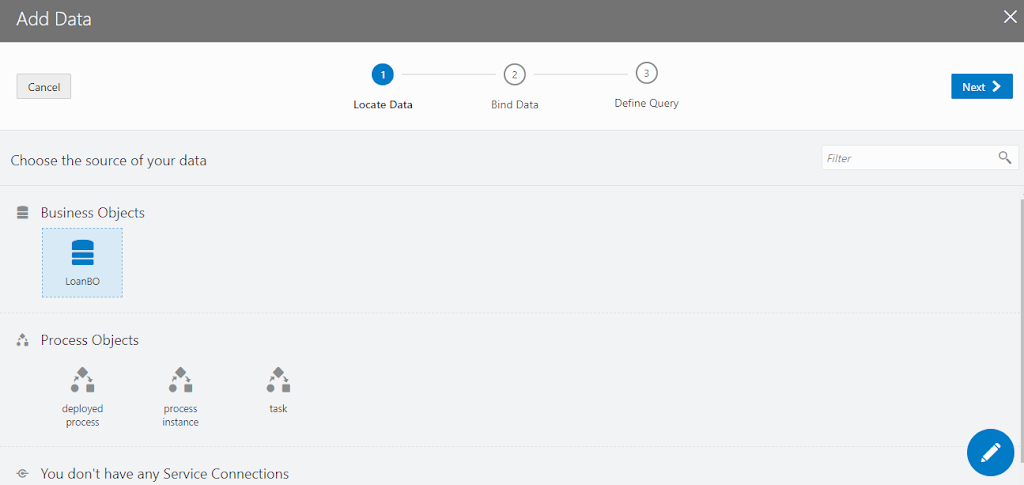
- Select below fields from left panel and click on Next button
- firstName
- lastName
- loanType
- tenure
- amount

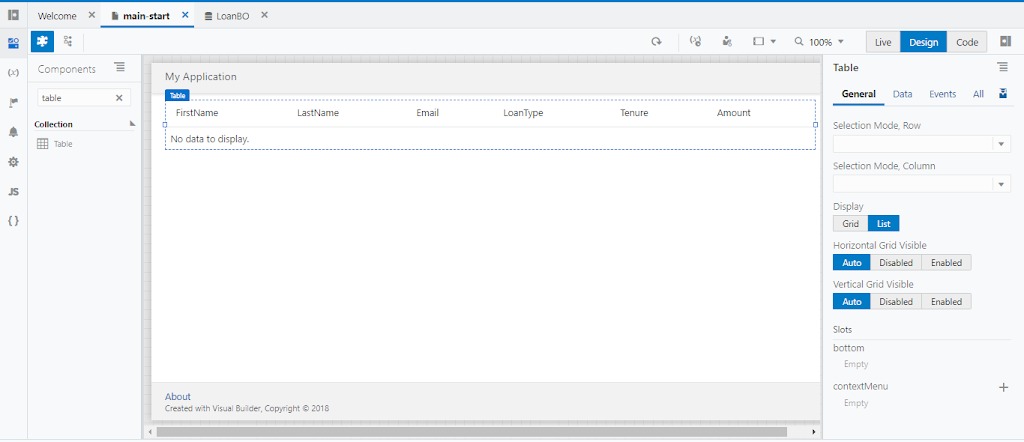
- Click the Finish button from the last screen. Once done, the page will look like below
Create a page to apply for the Loan
- Select the Table on the page again, see the properties from n the right panel. Click on the Quick Start and Add Create Page. The Add Create Page action will allow to create page to push data into the Business Objects. In our case, we’ll use LoanBO Business Object to create a page

- Post clicking on the Add Create Page, a new popup will get open. Select the LoanBO under the Business Objects and select Next button

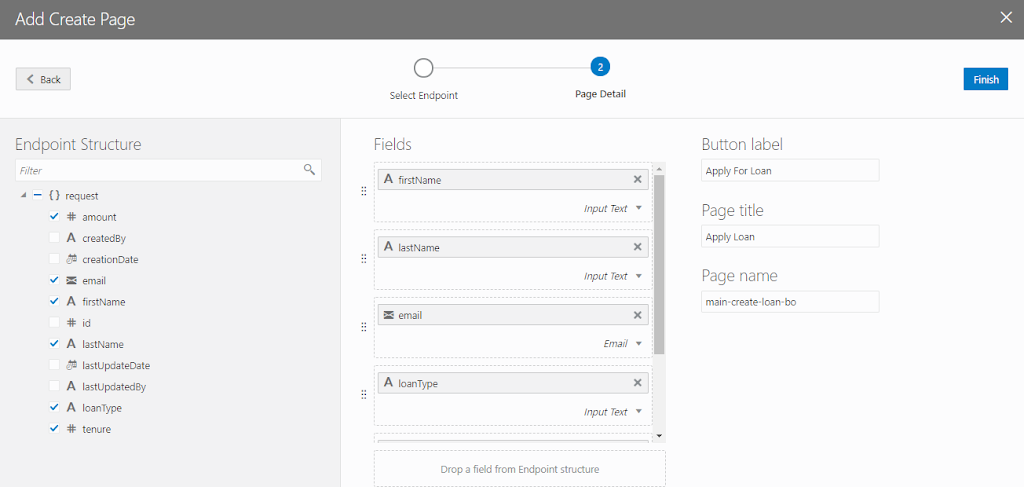
- Select below fields from left panel, Change the Button label to “Apply For Loan“,Change Page title to “Apply Loan” and click on Finish button
- firstName
- lastName
- loanType
- tenure
- amount
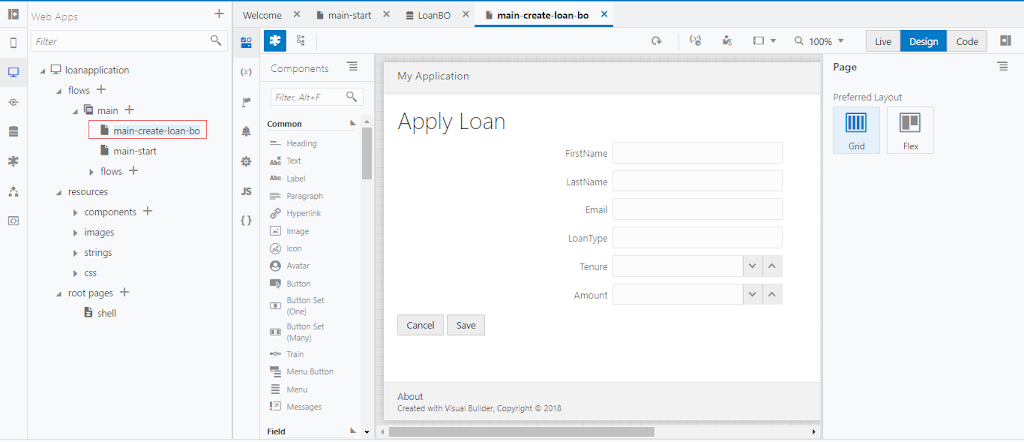
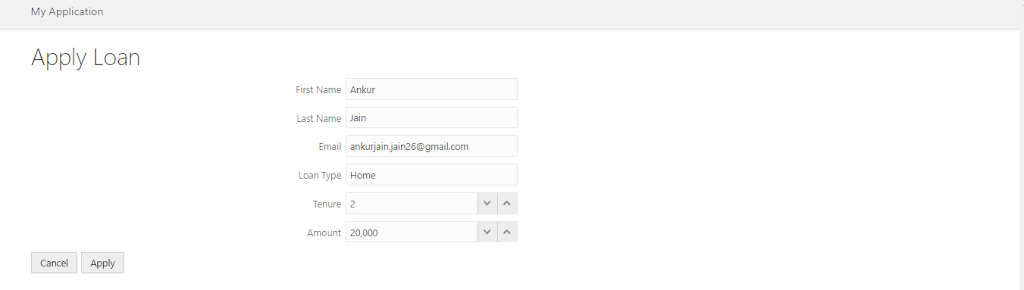
- Once finished a new page will be created and will be shown as below
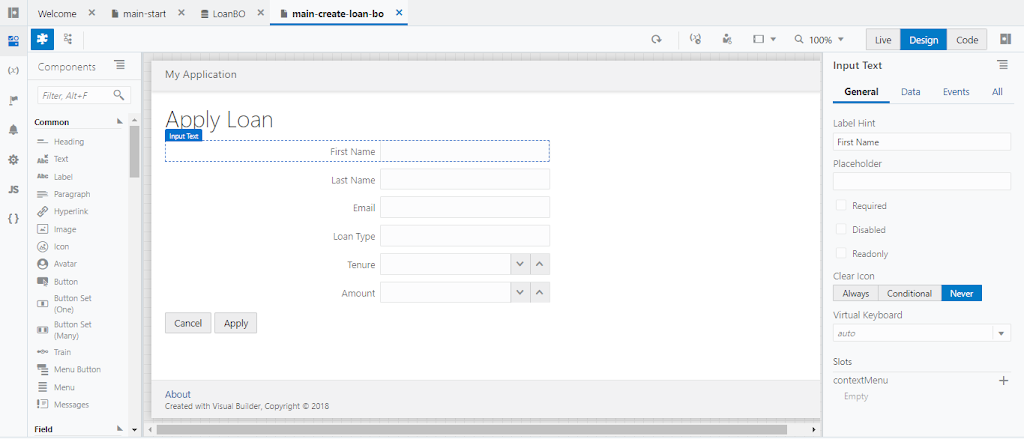
- Change the label of each Input box. To change the label, select the input box, select General from right panel and change Label hint
Create a page to update the existing Loan
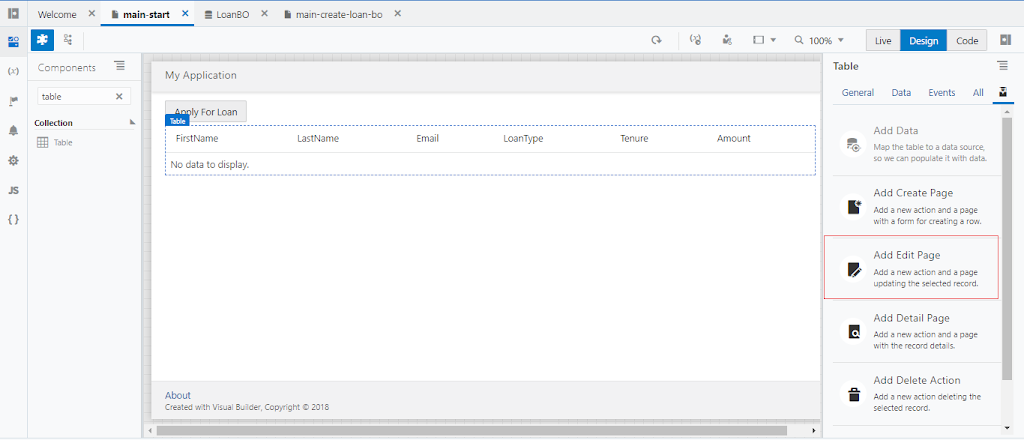
- Go back to the main-start page and select the Table. See the properties from the right panel. Click on the Quick Start and Add Edit Page. The Add Edit Page action will allow to edit the existing record of the Business Objects In our case, we’ll use LoanBO Business Object to edit a record
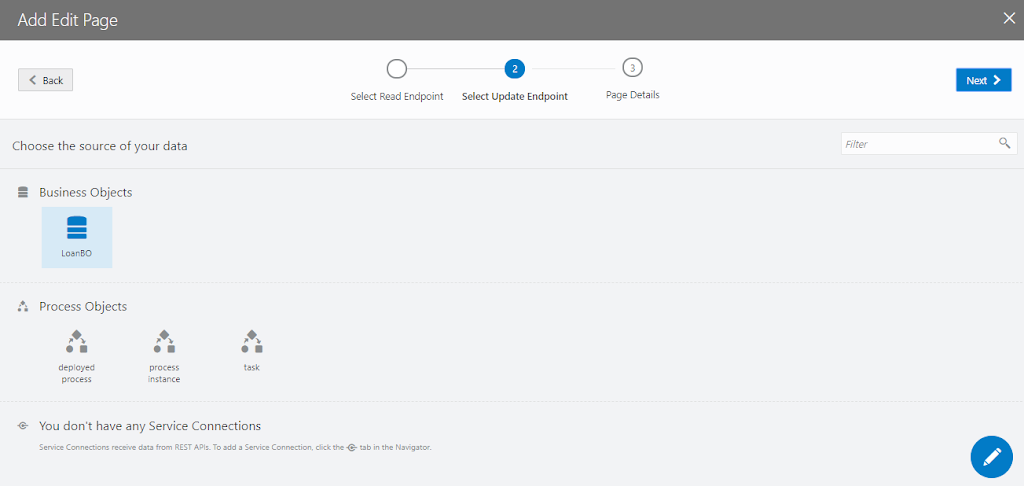
- Post clicking on the Add Edit Page, a new popup will get open. Select the LoanBO under the Business Objects and select Next button
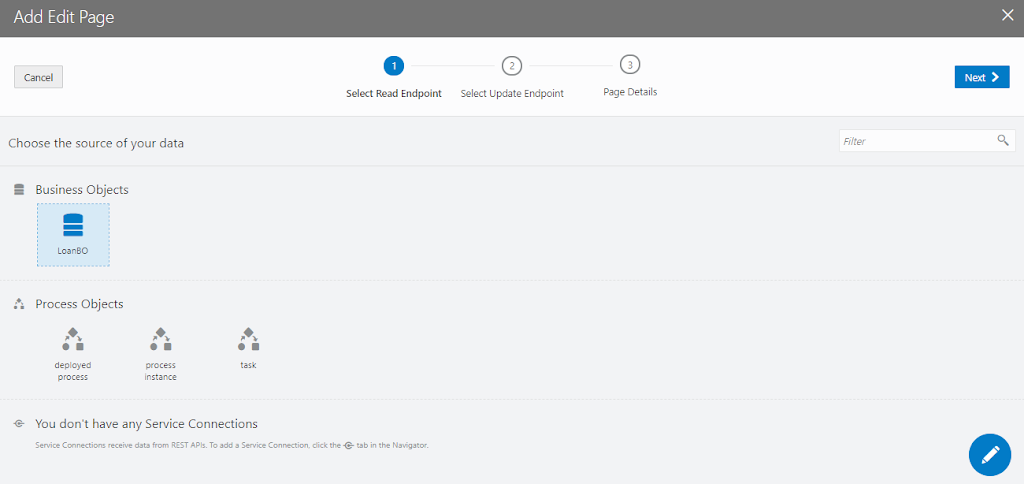
- Select the LoanBO under the Business Objects and select Next button
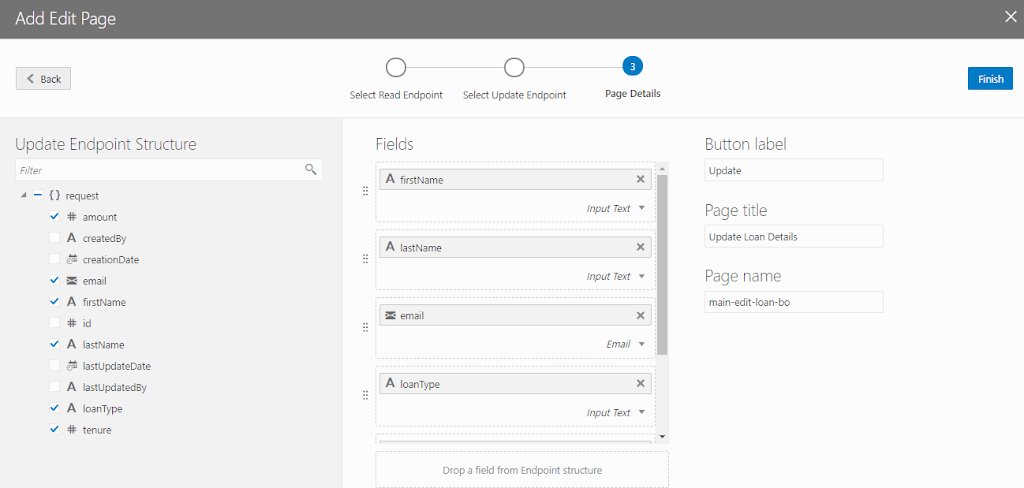
- Select below fields from left panel, Change the Button label to “Update“,Change Page title to “Update Loan Details” and click on Finish button
- firstName
- lastName
- loanType
- tenure
- amount


[…] Create a simple web application: Visual Builder Cloud Service(VBCS) […]
[…] Create a simple web application: Visual Builder Cloud Service(VBCS) […]
[…] Create a simple Web application in VBCS […]
[…] Create a simple web application: Visual Builder Cloud Service(VBCS) […]