
Working with the Train component in Oracle Visual Builder
In the article, I am explaining what is a Train Component and why we need to use it, and the steps to implement a Train component in Oracle Visual Builder
What is a Train Component and why is it used?
A Train component is a component which is very much used if you want to capture the data from users in multiple steps. For example: A employee needs to fill up an online form that provides details in multiple steps such as Personal Information, Address details, contact details, and so on.
Learn Oracle Visual Builder by example
Learn Oracle Visual builder step by step with 60+ sessions.
Steps to implement a Train Component:
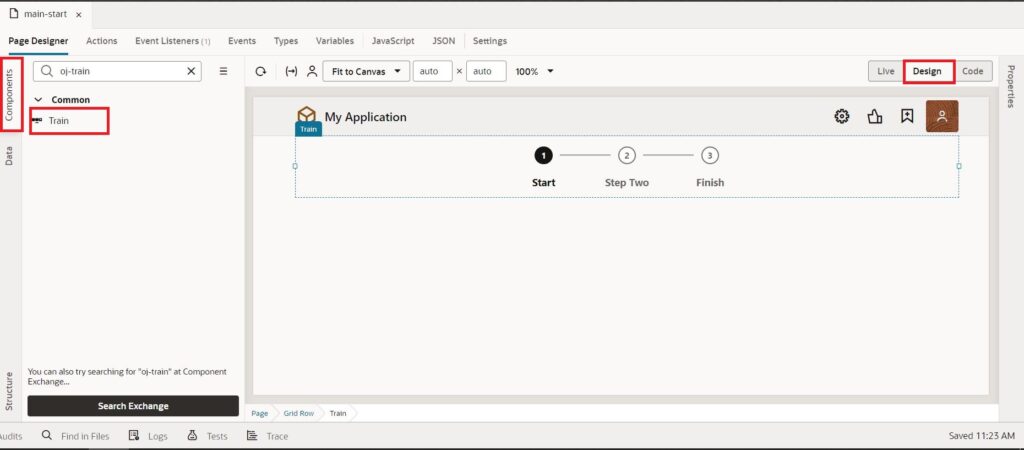
- After Creating a web application go to the main-start page, switch to the designer tab, and drag & drop the Train component from the Component pallet to the Design area.
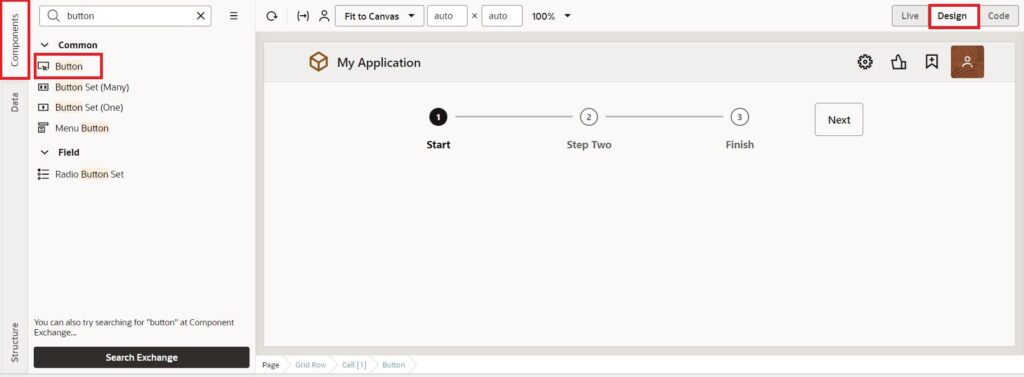
- To navigate to the next step we need to add a button. So drag & drop a button from the component pallet to the design area and add the label as Next.
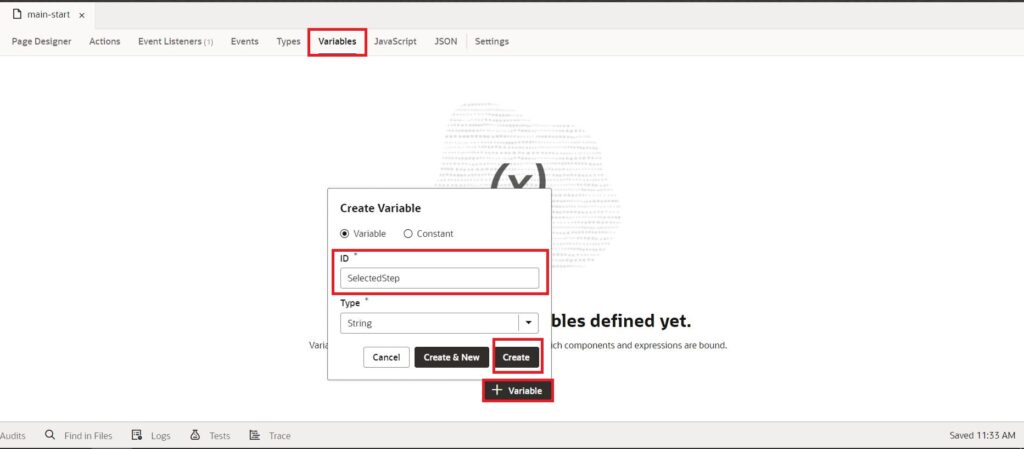
- In order to track the selected step create a variable and assign it to the train component. For this go to the Variables tab and create a variable as SelectedStep of String type and default its value to 0 as shown in the following screenshot:
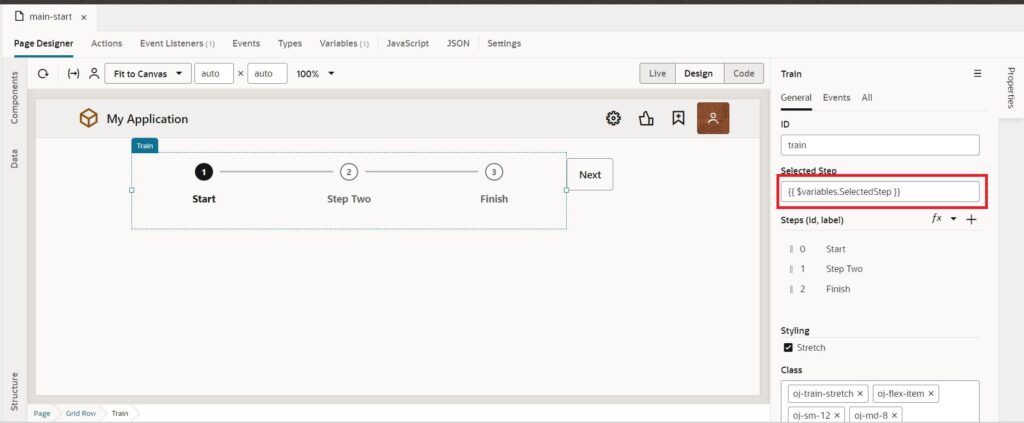
- Click on Train Component, go to Properties and assign the created variable to SelectedStep as shown in the following Screenshot:
The main purpose of this train component is to show the components based on the selected step conditionally. For this, we have <oj-bind-if>which will work based on the condition provided, and only when the condition is validated and meets the condition it will show the components, or else till then those components will be hidden.
To implement this, switch to the Code tab and add the following HTML code for each step:
<div class="oj-flex oj-sm-margin-5x-top">
  <div class="oj-flex-item oj-sm-12 oj-md-1"></div>
  <oj-train id="train" steps='[
    {
        "id": "1",
        "label": "Start"
    },
    {
        "id": "2",
        "label": "Step Two",
        "disabled": true
    },
    {
        "id": "3",
        "label": "Finish",
        "disabled": true
    }
]' class="oj-train-stretch oj-flex-item oj-sm-12 oj-md-8" selected-step="{{ $variables.SelectedStep }}"></oj-train>
  <div class="oj-flex-item oj-sm-12 oj-md-1">
    <oj-button style="margin-top:2vh" on-oj-action="[[$listeners.buttonAction]]">Next </oj-button>
  </div>
</div>

  <oj-bind-if test='[[ $variables.SelectedStep === "0" ]]'>
    <div class="oj-flex">
      <h6>Welcome to Step 1</h6>
    </div>
  </oj-bind-if>
  <oj-bind-if test='[[ $variables.SelectedStep === "1" ]]'>
    <div class="oj-flex">
      <h6>Welcome to Step 2</h6>
    </div>
  </oj-bind-if>
  <oj-bind-if test='[[ $variables.SelectedStep === "2" ]]'>
    <div class="oj-flex">
      <h6>Welcome to Step 3</h6>
    </div>
  </oj-bind-if>
With this, we are done with adding components to the designer Tab. To move further we have to add action to the Navigation button.
- Now click on the Next button, go to the Properties, switch to the Events tab, and create an action by clicking on +New Event and click On OjAction as shown in the following screenshot.

The whole train component is based on the variable SelectedStep, with which we need to perform our actions in the action chain.
We can check for the conditions as follows :
if(selectedStep ==="0"){ //step one condition
assign selectedStep to "1"
}else if(selectedStep ==="1"){ //step two condition
assign selectedStep to "2"
}else {
assign selectedStep to "3"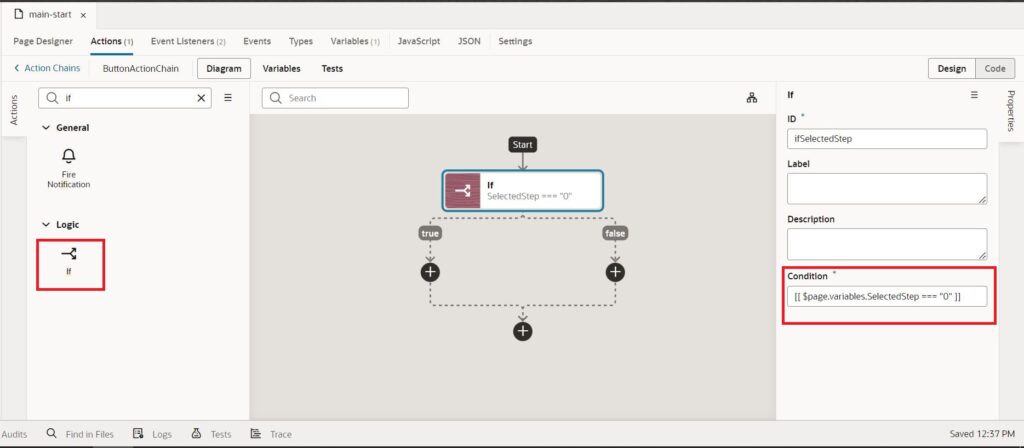
} - We need to implement the above condition in the action chain. So, drag and drop the If action to the start node of the action chain, and add the following condition in the conditions field as shown in the following screenshot:
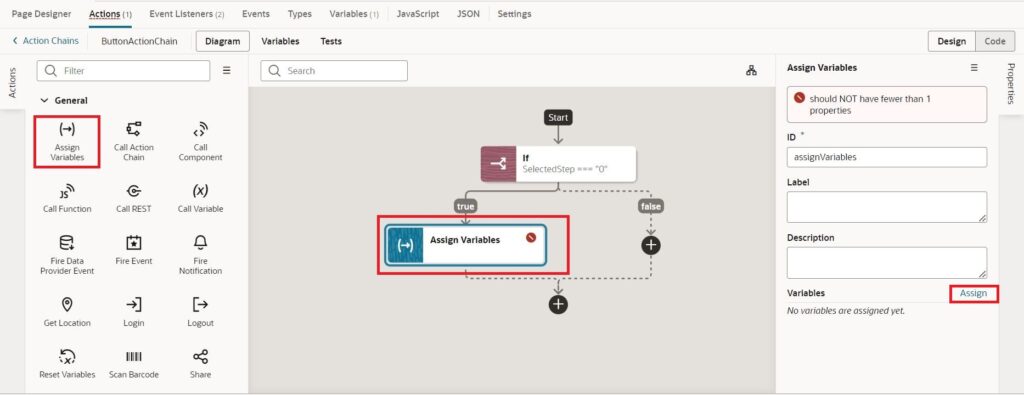
- If the SelectedStep is equal to “0” then to the success node drag and drop the Assign Variables action and click on the Assign link as shown in the following screenshot
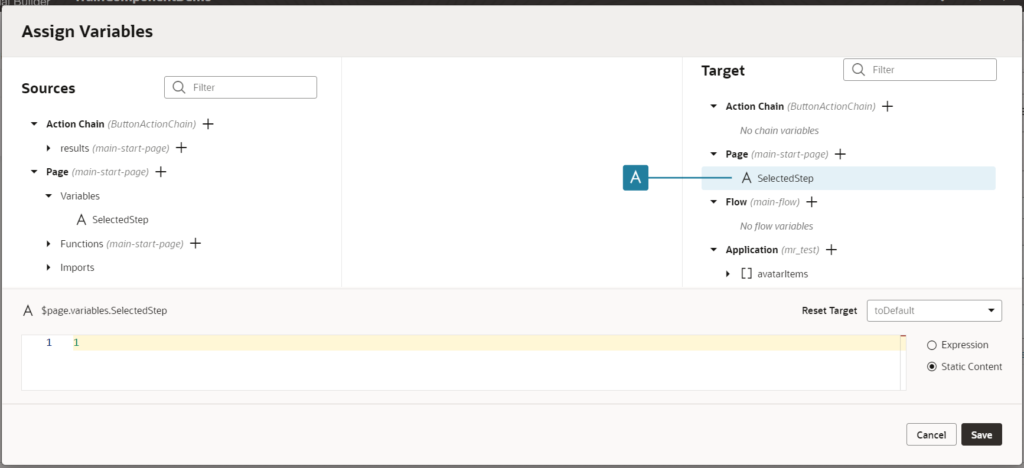
Assign the SelectedStep to 1 as shown in the following screenshot:
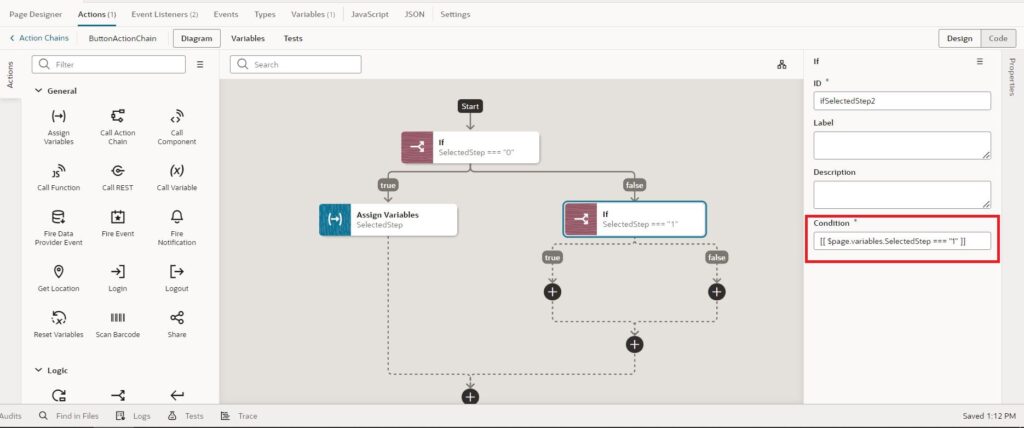
- If the SelectedStep is not equal to “0” then it will go to the false node of the action chain so drag and drop another IF action to the false node and check if the SelectedStep is equal to “1” as shown in the following screenshot:
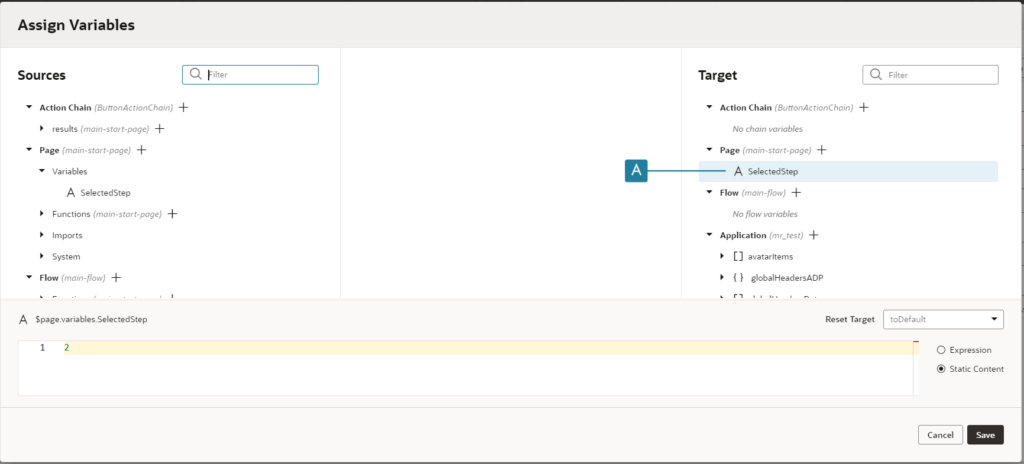
If the SelectedStep is equal to “1” then to the success node drag and drop the Assign Variables action and click on the Assign link as shown in the following screenshot:
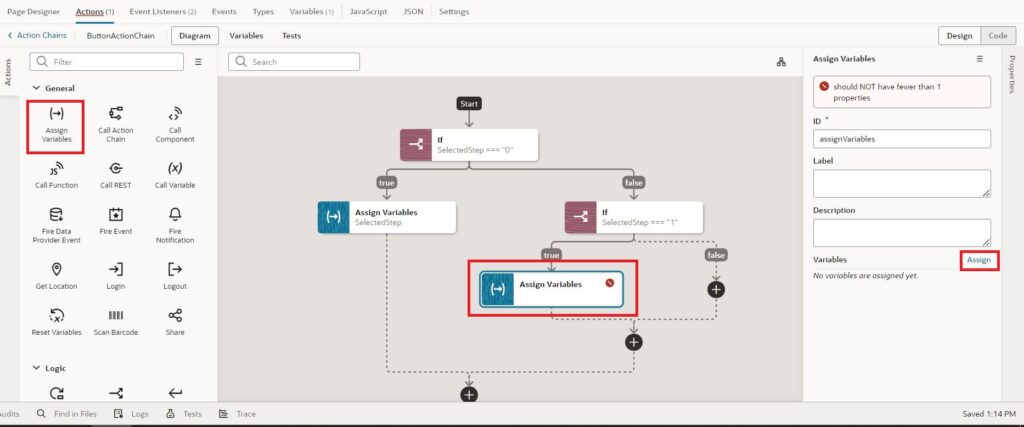
Assign the SelectedStep to 2 as shown in the following screenshot:
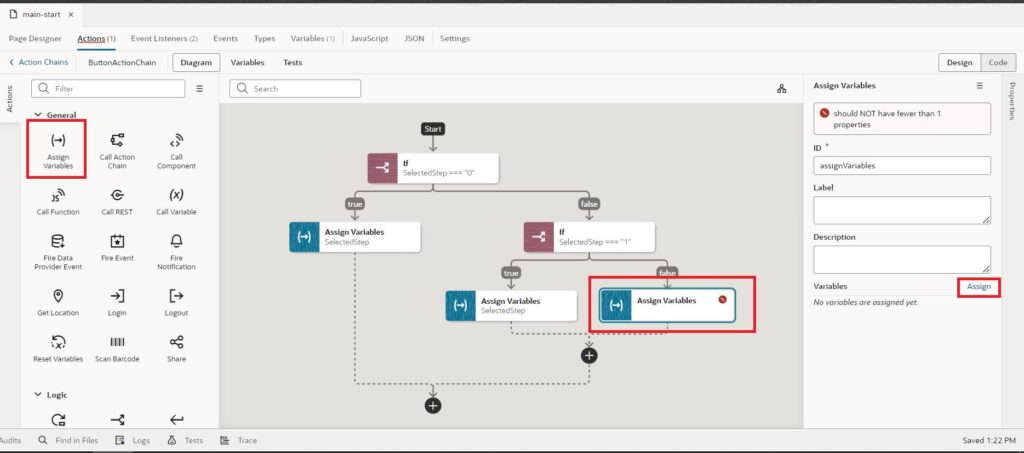
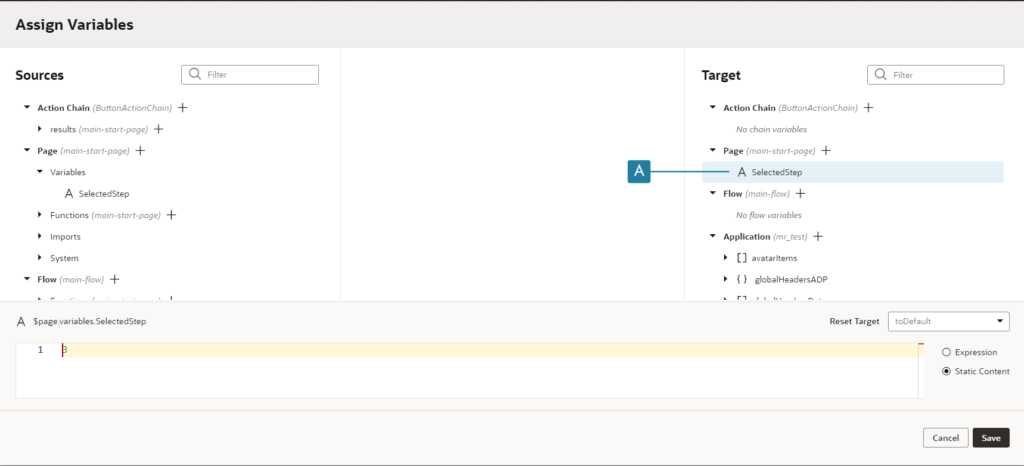
- If the SelectedStep is not equal to “1” then it will go to the false node and as we don’t have any more steps we can assume that the SelectedStep is equal to “2”, So drag and drop Assign Variables Action to the false node and assign the variable to 3 as shown in the following screenshot:
Now all the required configuration is completed. Let’s test this. Run the page, click on the Next button and the steps will load as expected.

This is how we can implement a Train component in Oracle Visual Builder.
If you liked the article, please like, comment, and share.
Please look at my YouTube channel for Oracle Integration-related videos and don’t forget to subscribe to our channel to get regular updates.
Further Readings
Scheduled parameters to maintain Last Run Date Time in Oracle Integration
How to Customize the Lock Screen in Oracle Visual Builder
Merging two CSV files into a single file in Oracle Integration
ERP Integration using File Based Data Import: Oracle Integration


