Edit Table Data Using the General Drawer Template in Oracle Redwood
This article demonstrates how to edit table data using the General Drawer Template in Oracle Redwood.
First, create a web application and add a Welcome page using a standard template.
Next, create an Employee business object and populate it with sample data. Finally, display the employee data on the Welcome page.
For step by step process of implementing the welcome page template, please refer Redwood welcome template
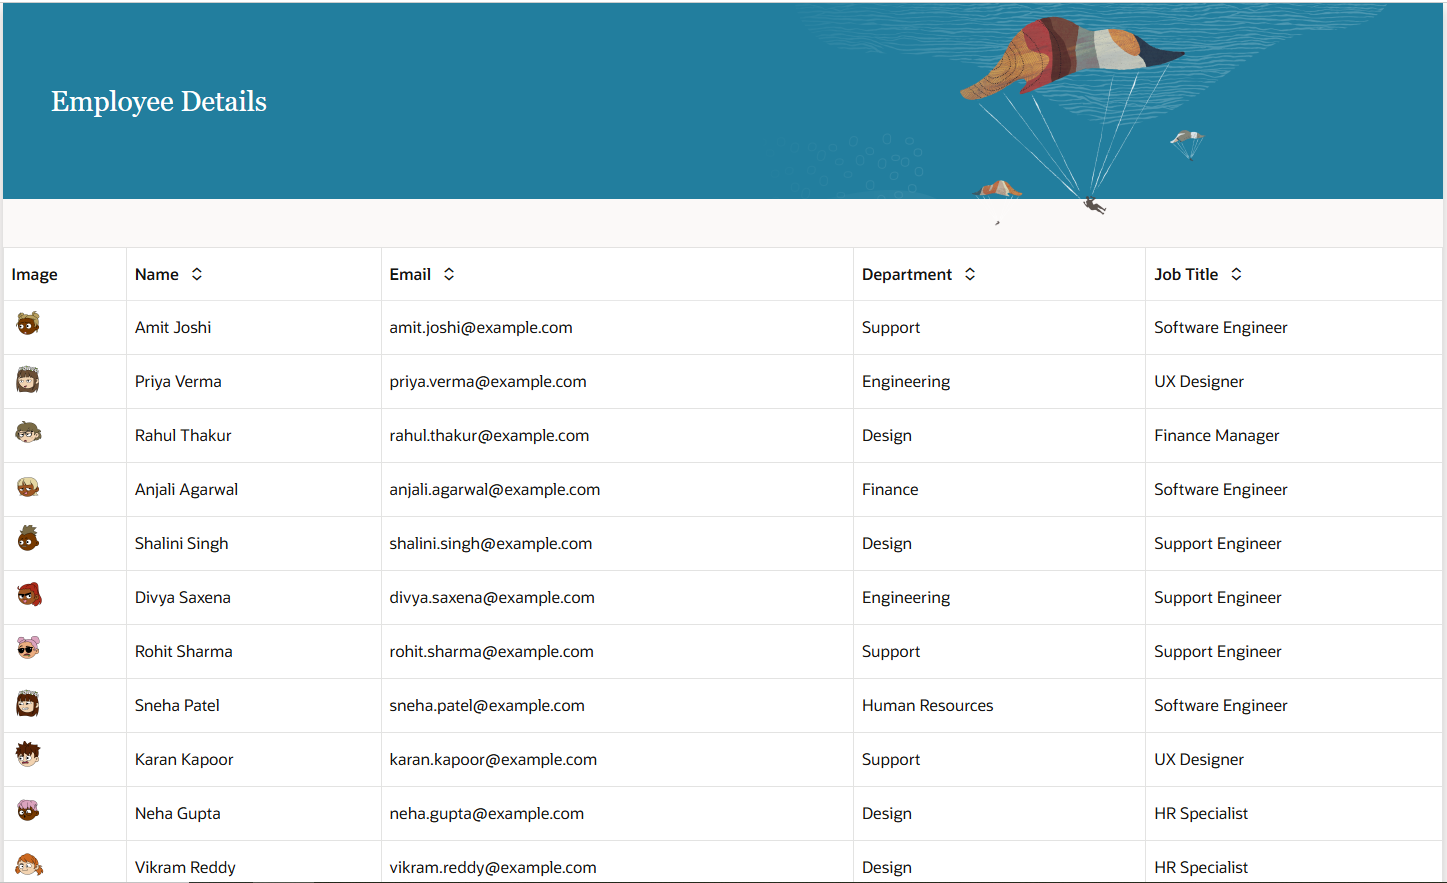
We have the following page implemented using the welcome page template
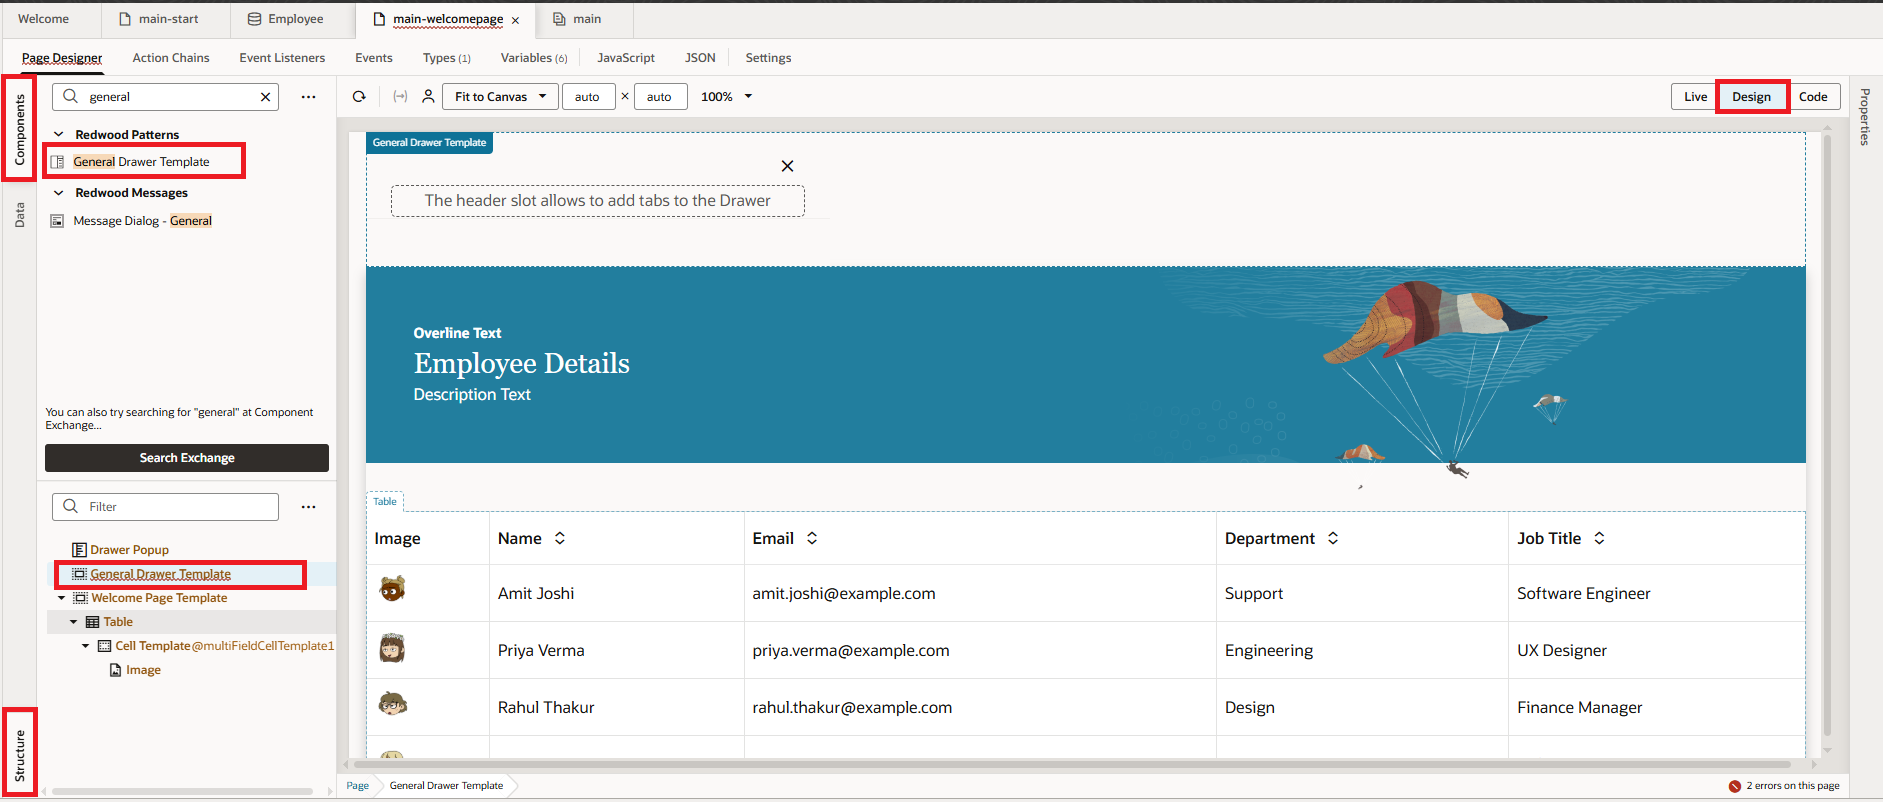
1. Now, open the page structure and drag the Drawer Popup from the Components palette. Place it in the structure before the Welcome page template, as shown in the following screenshot:
 2. Similarly, drag and drop the General Drawer Template inside the Drawer Popup, as shown in the following screenshot:
3. Now, add a few variables to store the current row’s Employee ID and to handle opening and closing the drawer, as shown in the following screenshot :
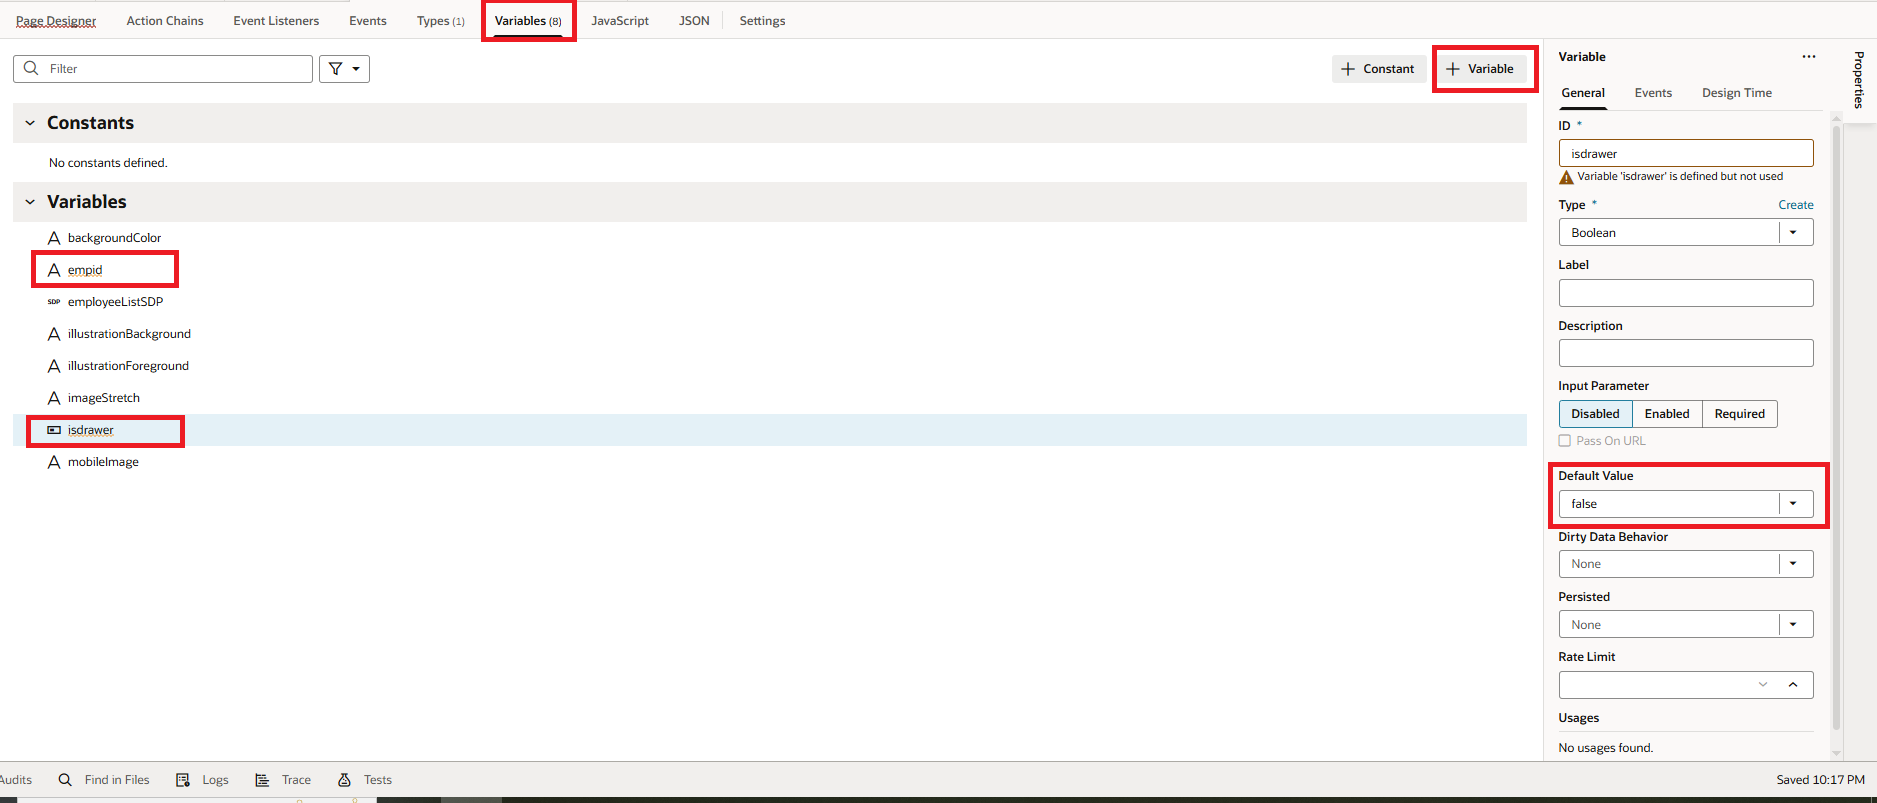
Variables: empid String, isdrawer Boolean (false by default).
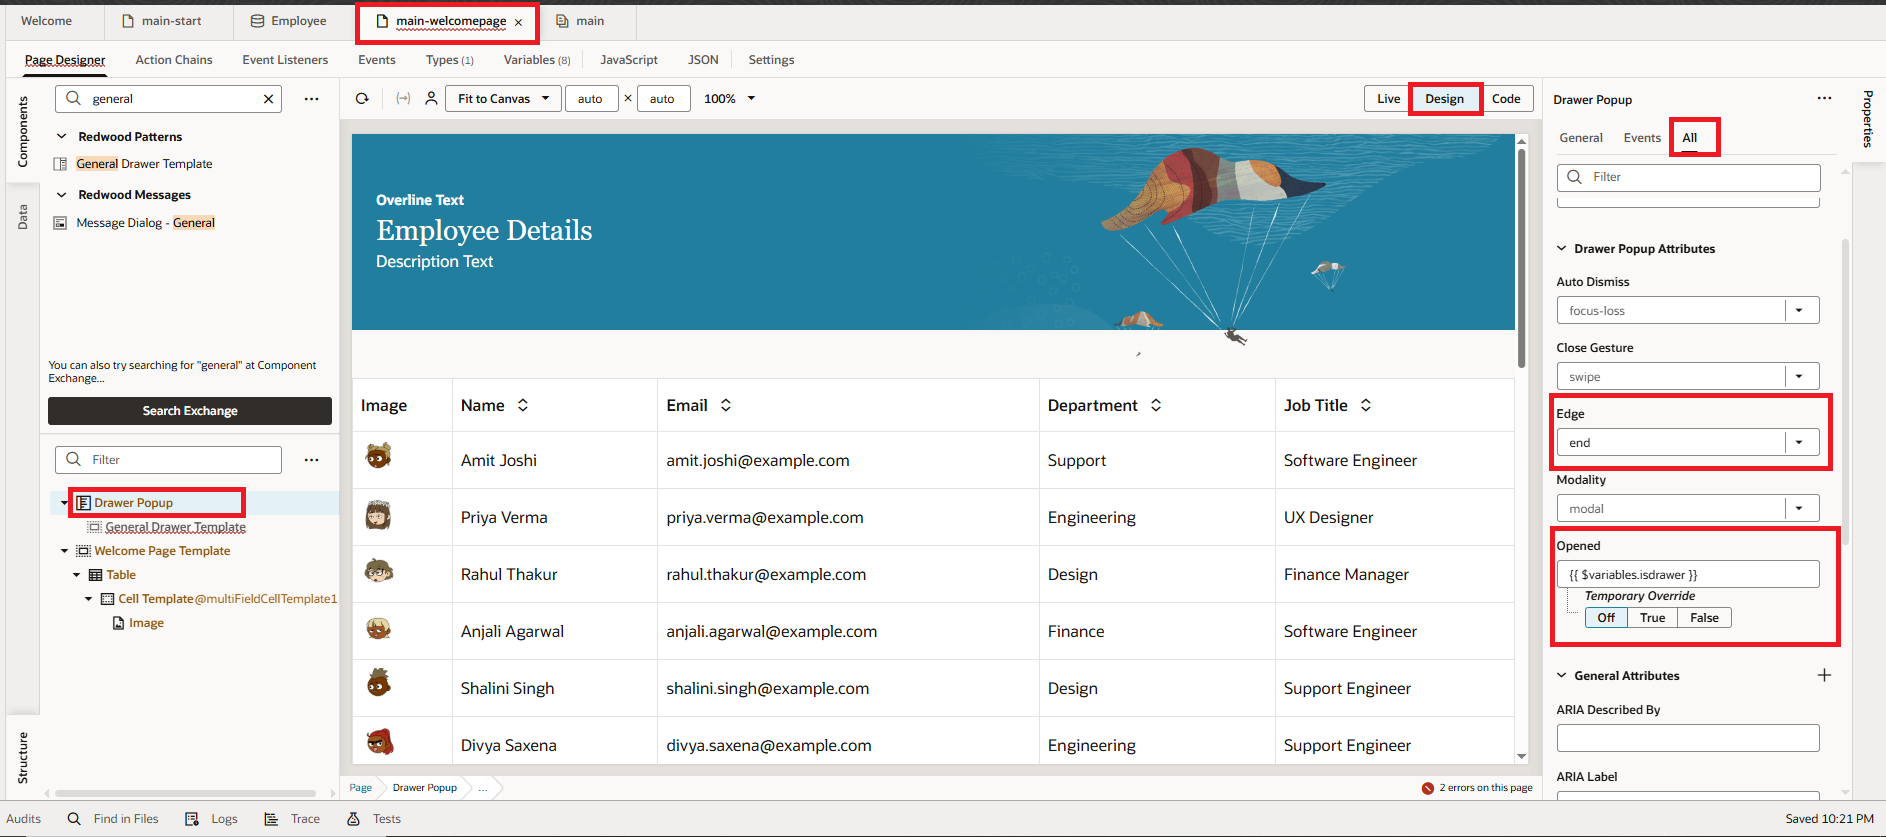
4. Go back to the Welcome page template. Click on Drawer Popup, open Properties, switch to All tab, provide Drawer title, and set Edge to End and Opened to isdrawer, variable as shown in the following screenshot:
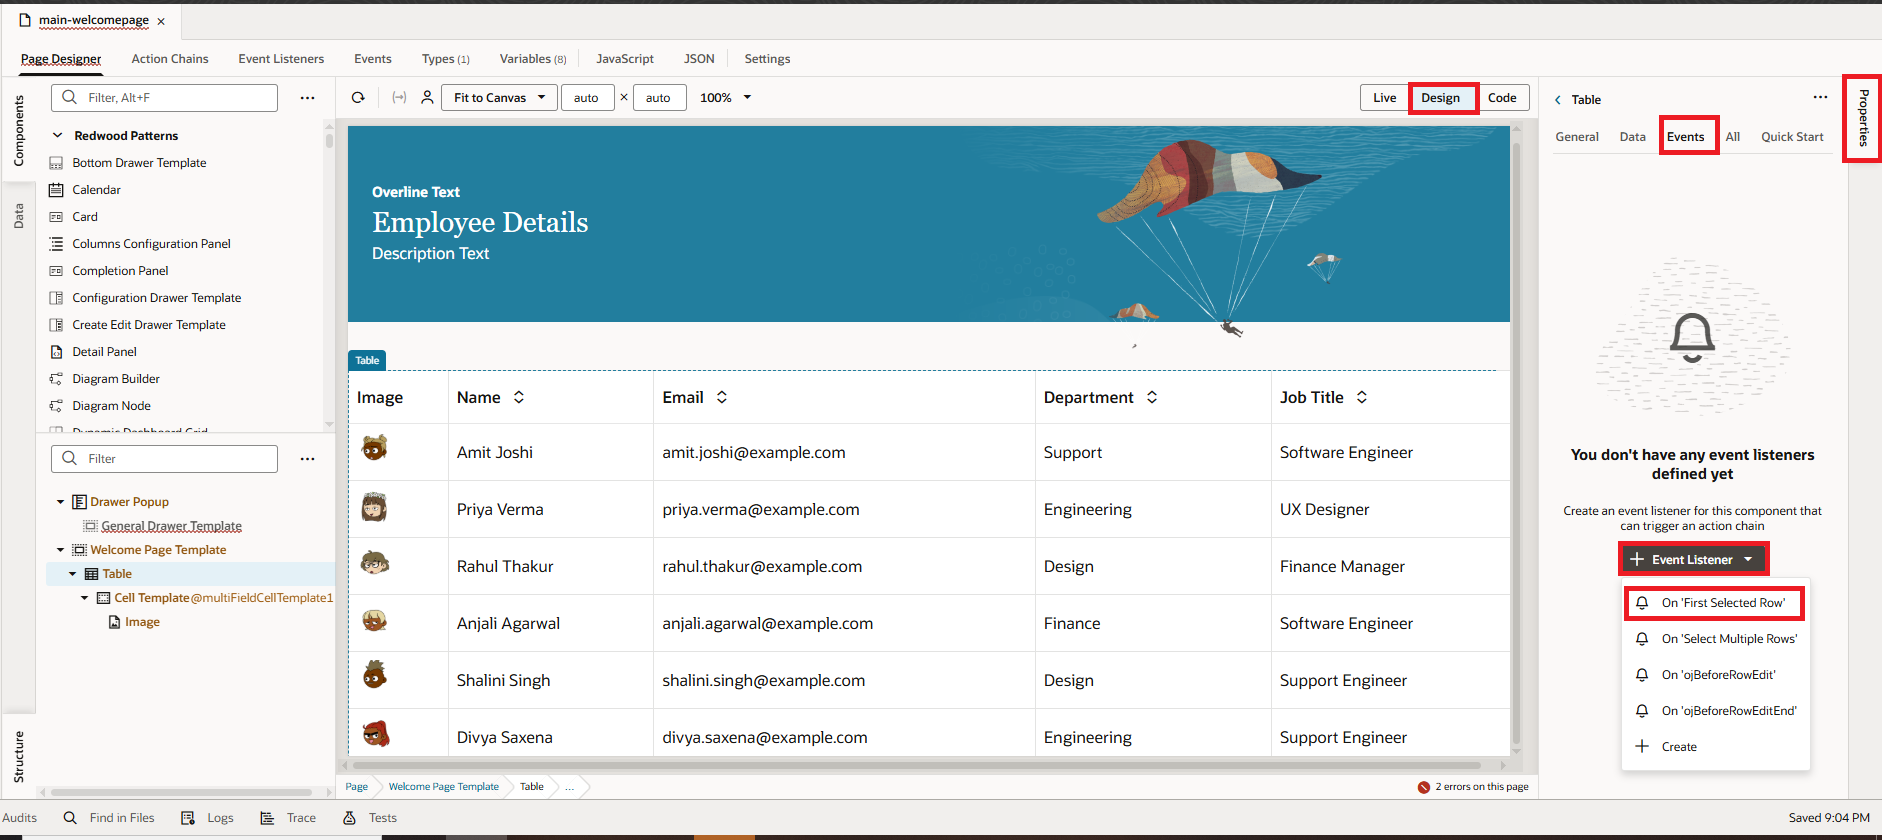
5. Let’s configure the Action Chain to retrieve the employee ID by accessing the currently selected row for editing. Click on the table, open Properties, switch to the Events tab, and click + Event Listener. Then select First Selected Row as the event, as shown in the following screenshot:
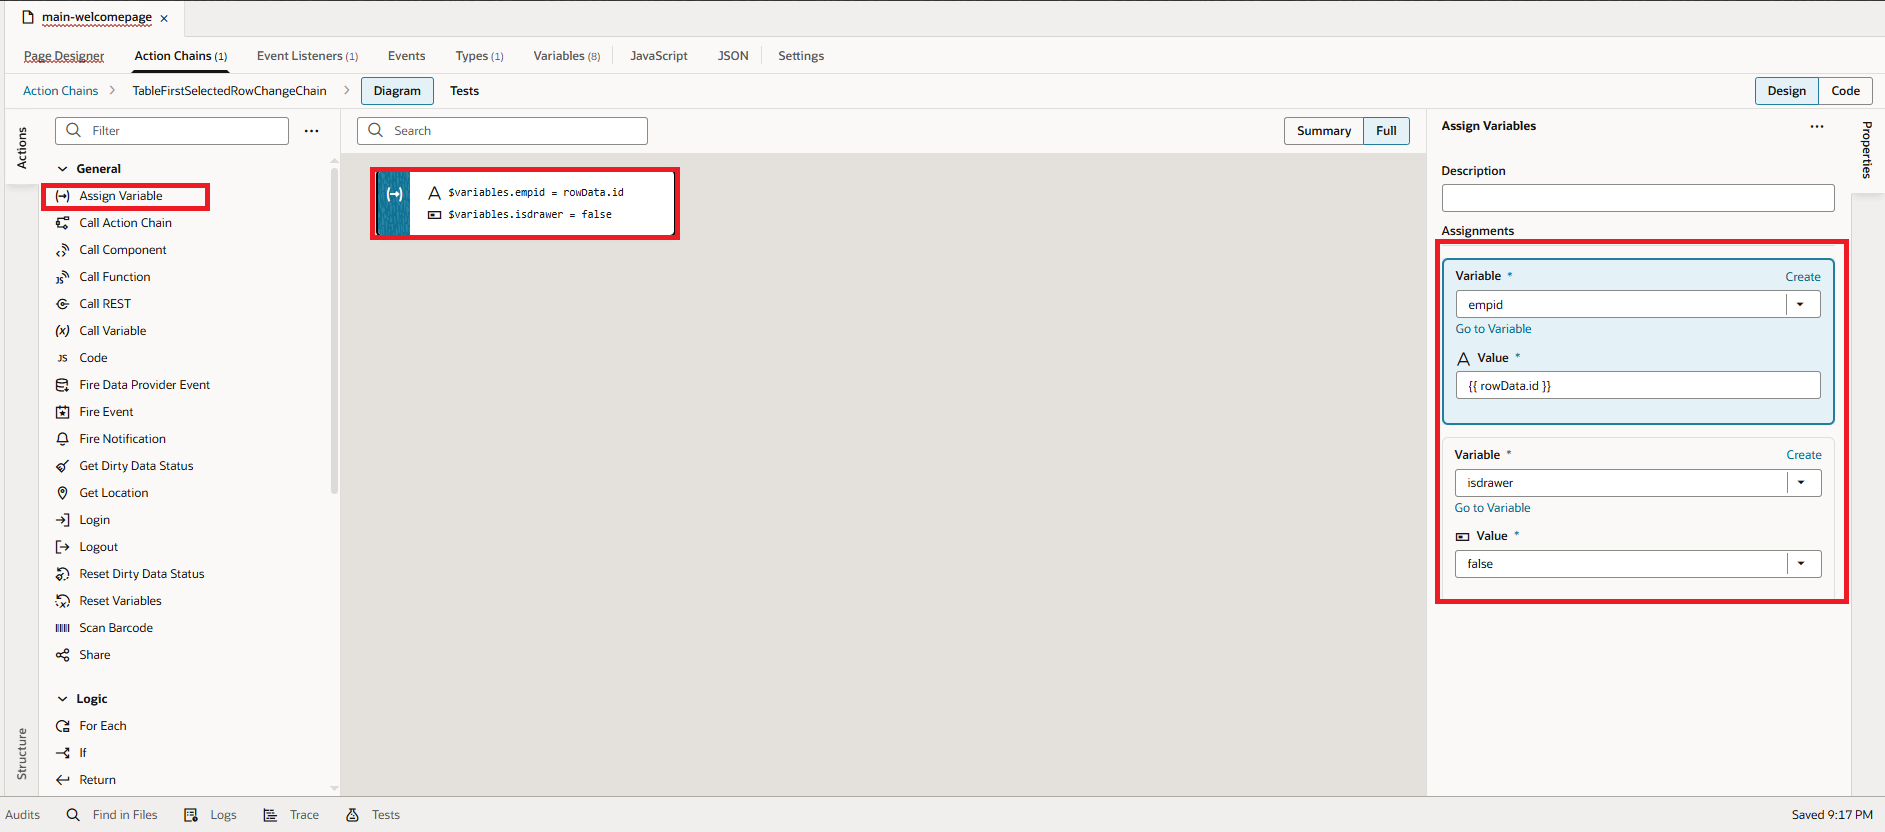
 6. Drag and drop the Assign Variable action, then map empid to rowData.id (Employee ID) and set isdrawer to true, as shown in the following screenshot:
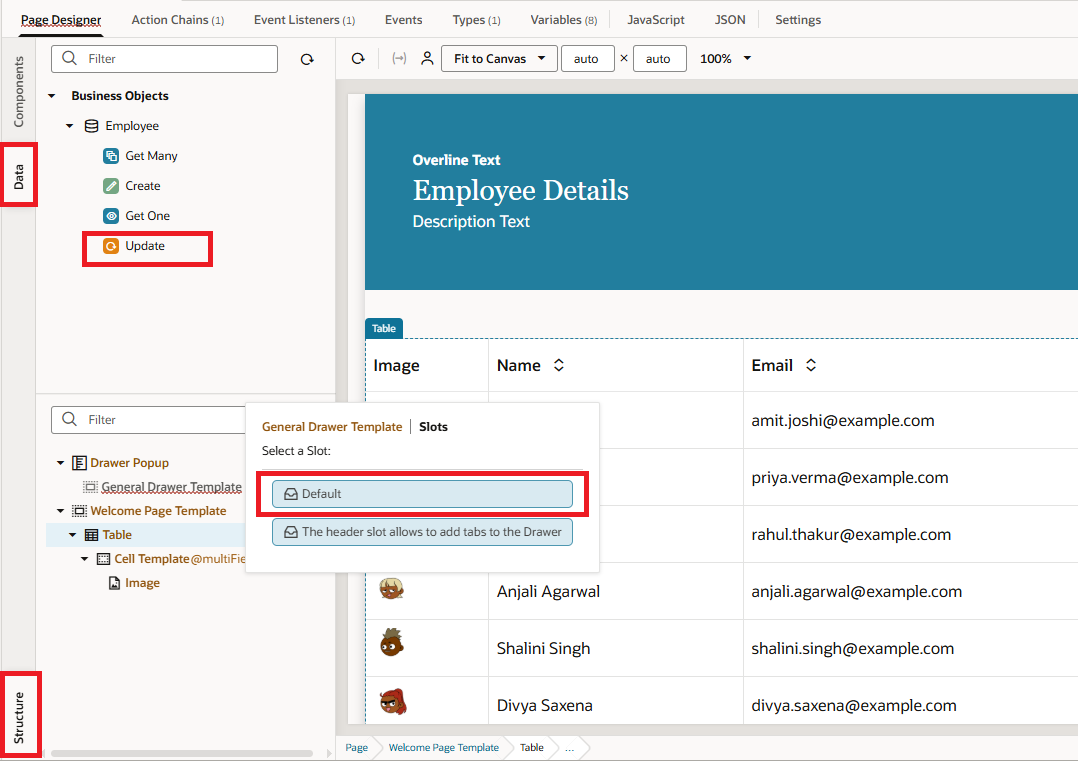
 7. Go to Page Designer, switch to the Data tab, and drag and drop the Update endpoint onto the General Drawer template and select Default slot under the Structure tab. Then select Form, as shown in the following screenshot:
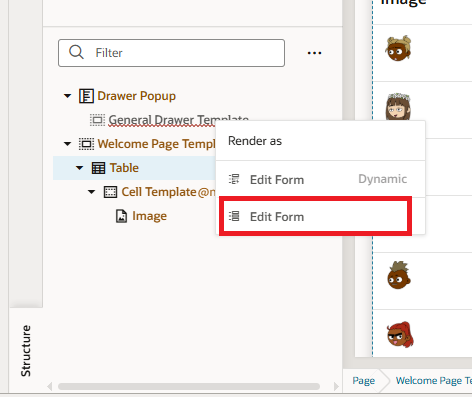
8. After this, we will see Render as popup in which we will click Edit Form as shown in the following screenshot:
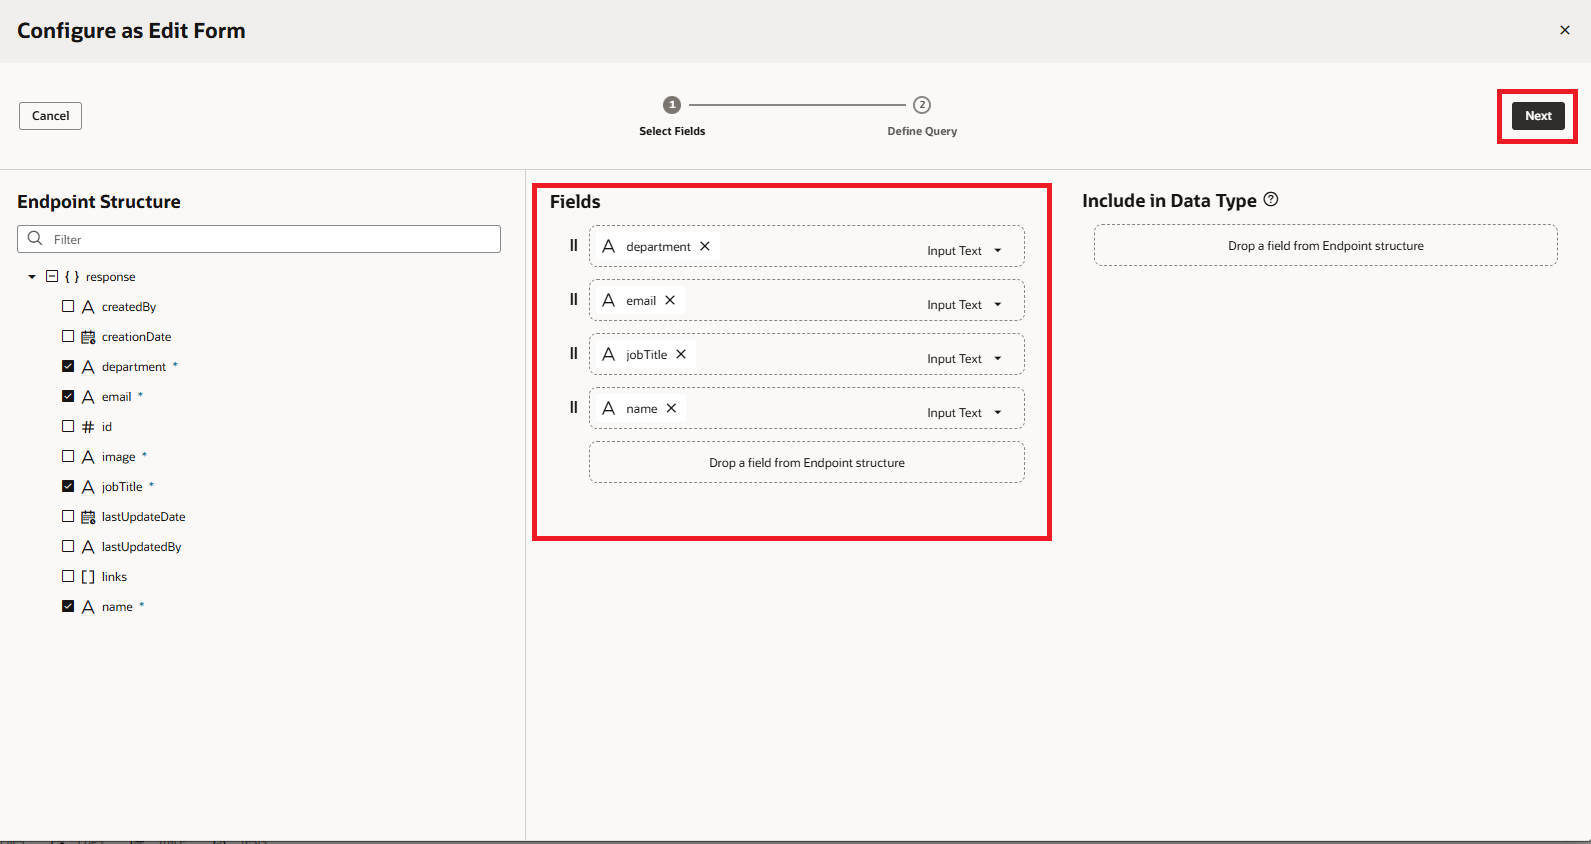
9. We will have to select the fields which we wish to edit and click on the Next button as shown in the following screenshot:
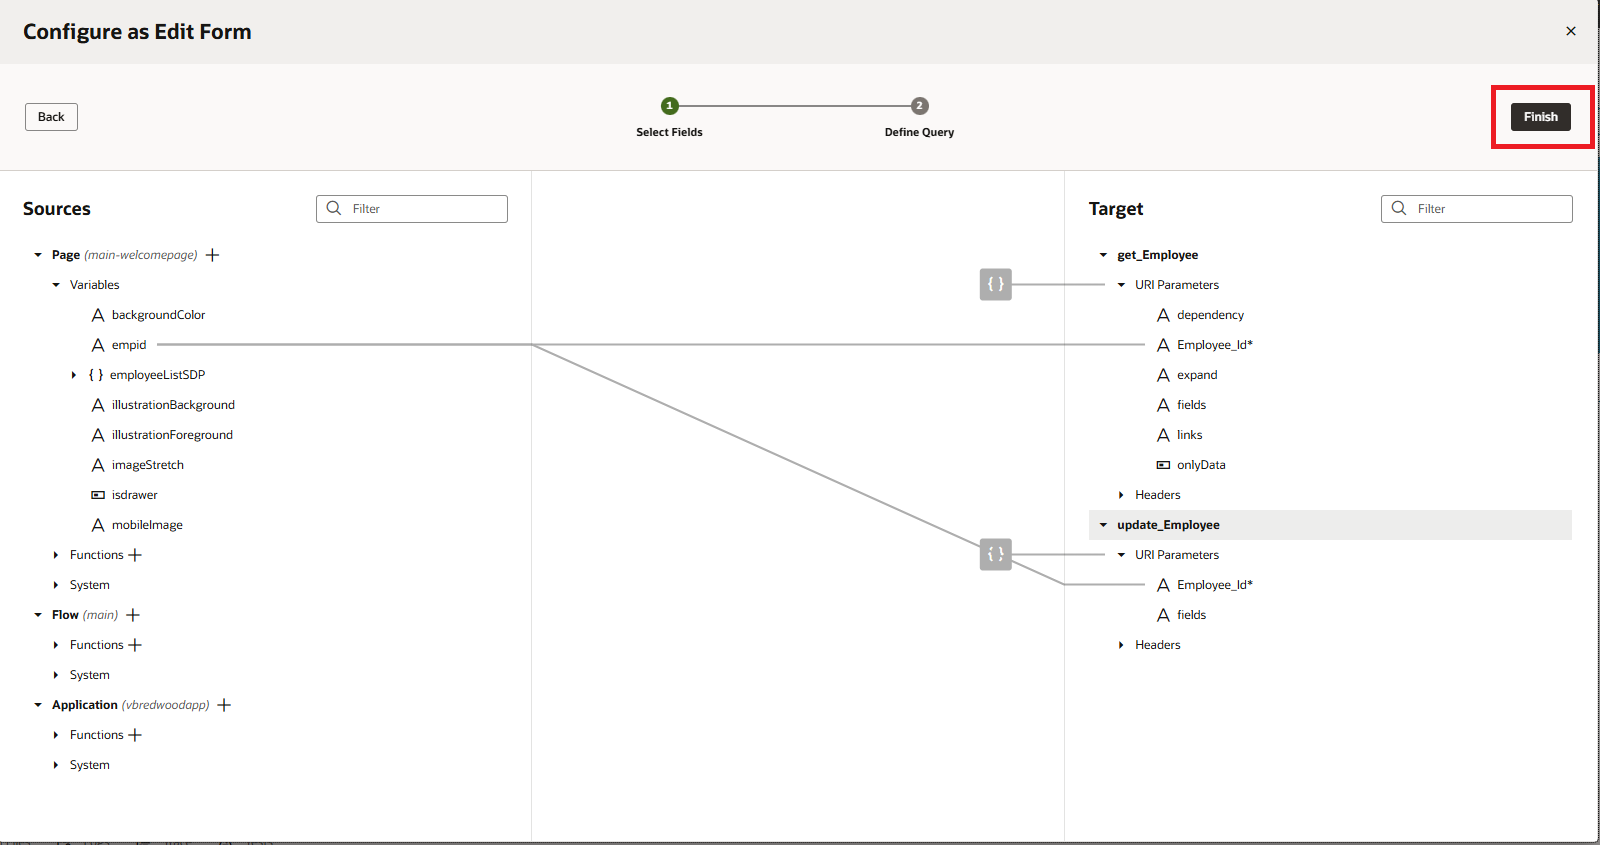
 10. Map empid from Source variables to the target as shown in the following screenshot:
Now let’s add some code to our form. Below the form, we already have a Save button created with an action chain, but we’ll align it beneath the form layout and add a Cancel button.
11. Go to Page Designer and switch to the Code view. You’ll see a toolbar with the Save button located below the oj-sp-general-drawer-template. Move this toolbar inside the oj-sp-general-drawer-template, then add a Cancel button alongside the Save button. Your final code should look like the following:
<oj-sp-general-drawer-template drawer-title=”Edit Employee”><oj-validation-group id=”employee-validation-group–1617611718-1″><oj-form-layout id=”oj-form-layout–1617611718-1″><oj-input-text value=”{{ $variables.employee.department }}” label-hint=”Department” required=”true”></oj-input-text><oj-input-text value=”{{ $variables.employee.email }}” label-hint=”Email” required=”true”></oj-input-text><oj-input-text value=”{{ $variables.employee.jobTitle }}” label-hint=”Job Title” required=”true”></oj-input-text><oj-input-text value=”{{ $variables.employee.name }}” label-hint=”Name” required=”true”></oj-input-text></oj-form-layout></oj-validation-group><oj-toolbar id=”oj-toolbar-for-oj-form-layout–1617611718-1″ chroming=”solid”><oj-button label=”Save” disabled=”[[ $variables.employeeEditFormStatus !== ‘ready’ ]]” on-oj-action=”[[$listeners.saveButtonClicked]]”></oj-button><oj-button label=”Cancel”></oj-button></oj-toolbar>
</oj-sp-general-drawer-template>
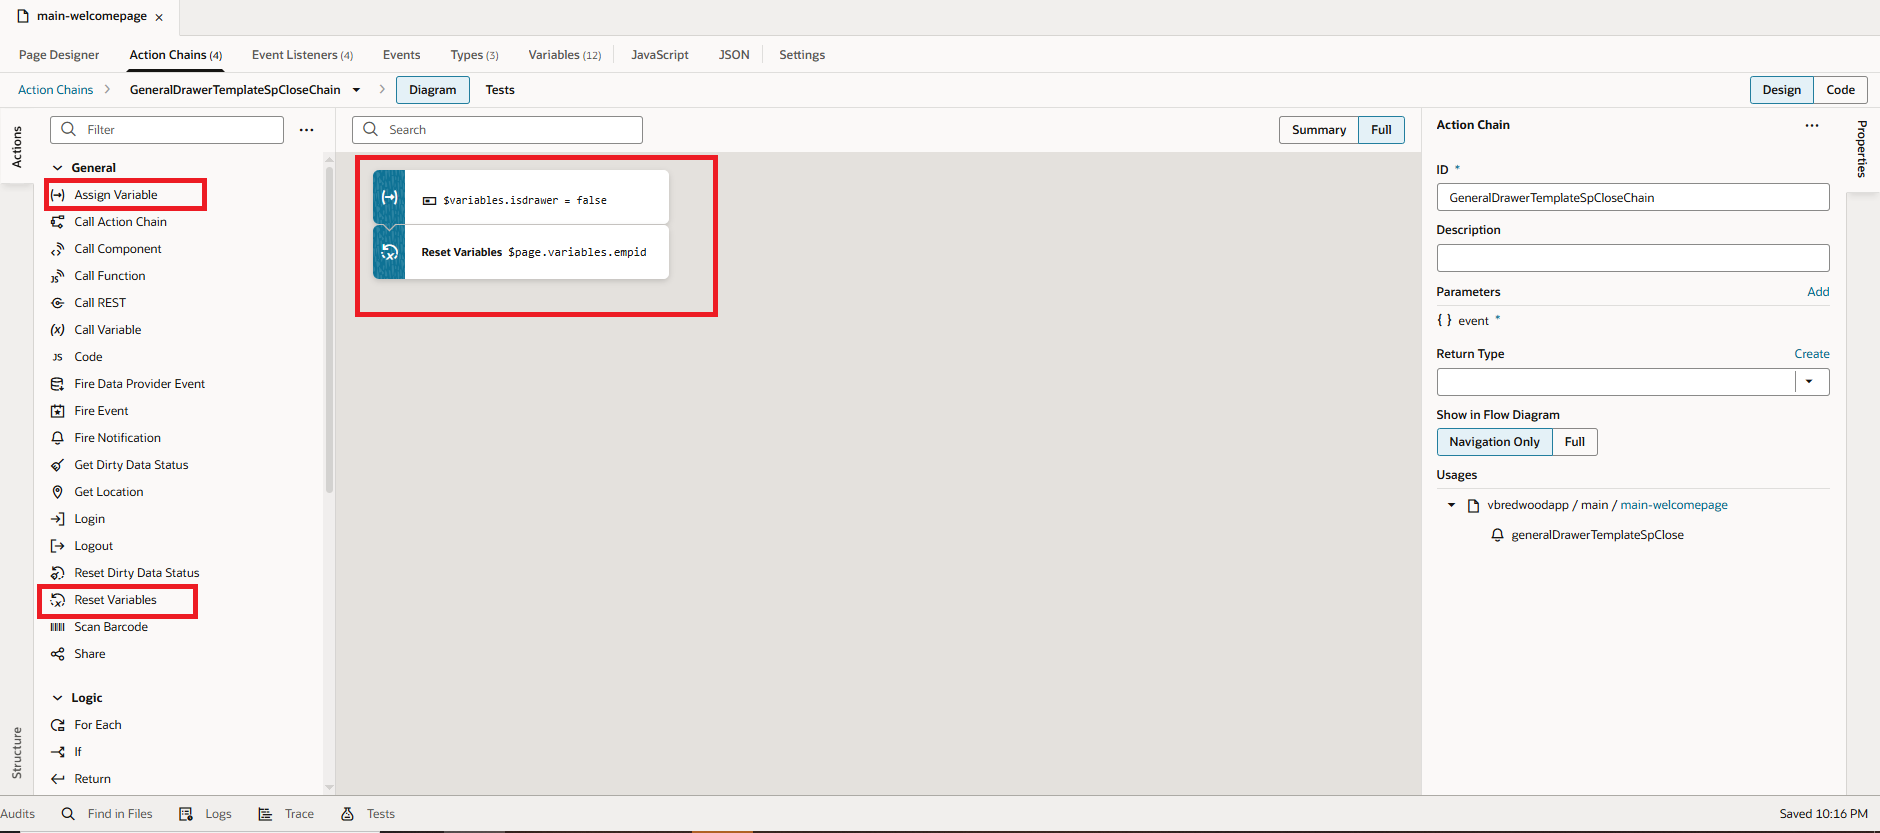
13. Drag and drop the Assign Variable action and set isdrawer to false. Then drag and drop the Reset Variable action and select empid, as shown in the following screenshot:
 14. We can map this same action to the Cancel button, or alternatively create a new action chain. I’m using the same action. To do this, go to the Cancel button properties, switch to the Events tab, click + Event Listener, and select + Create, as shown in the following screenshot:
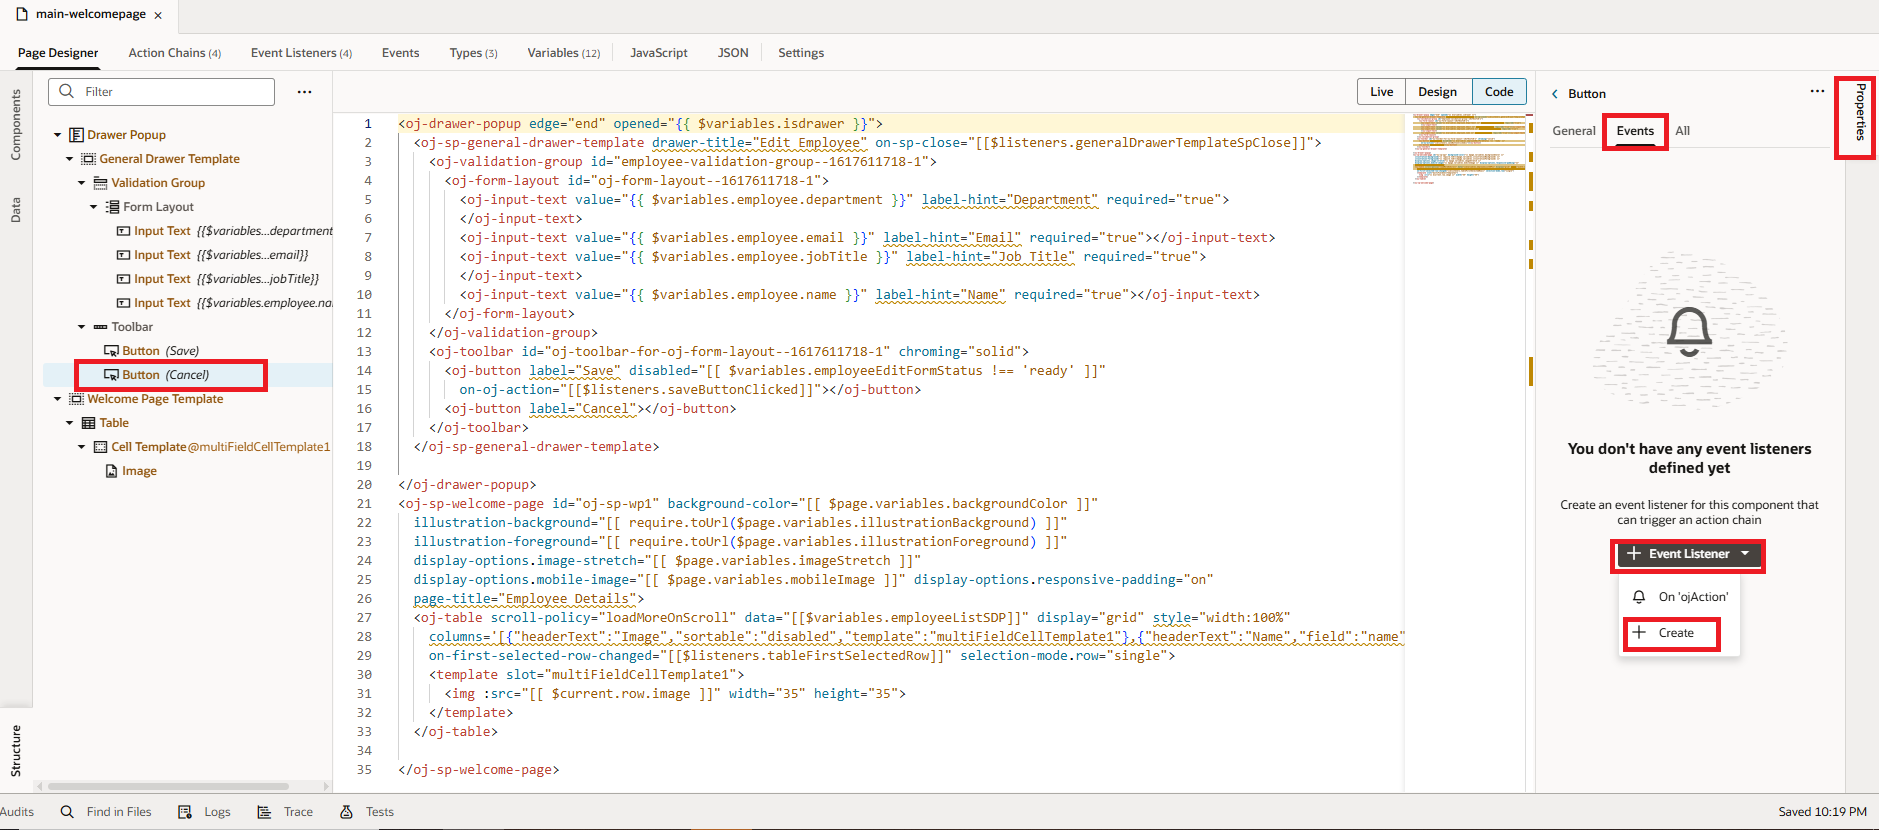
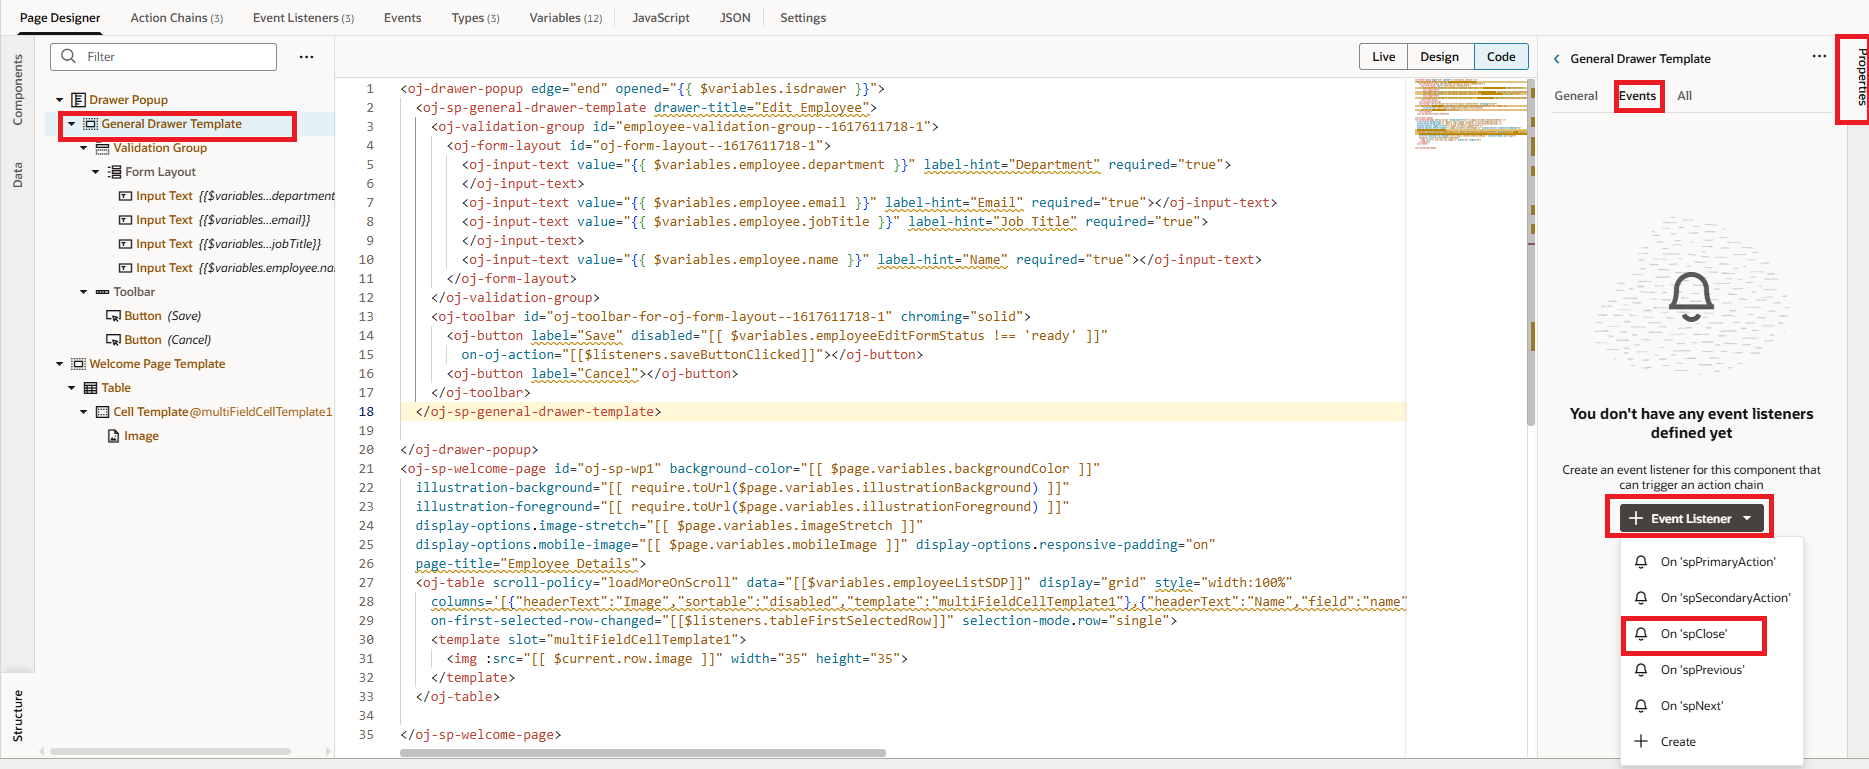
15. Under Select Event, choose ojAction and click Select. Then, in Select Action Chain, choose GeneralDrawerTemplateSpCloseChain and click Select Action Chain, as shown in the screenshots below:


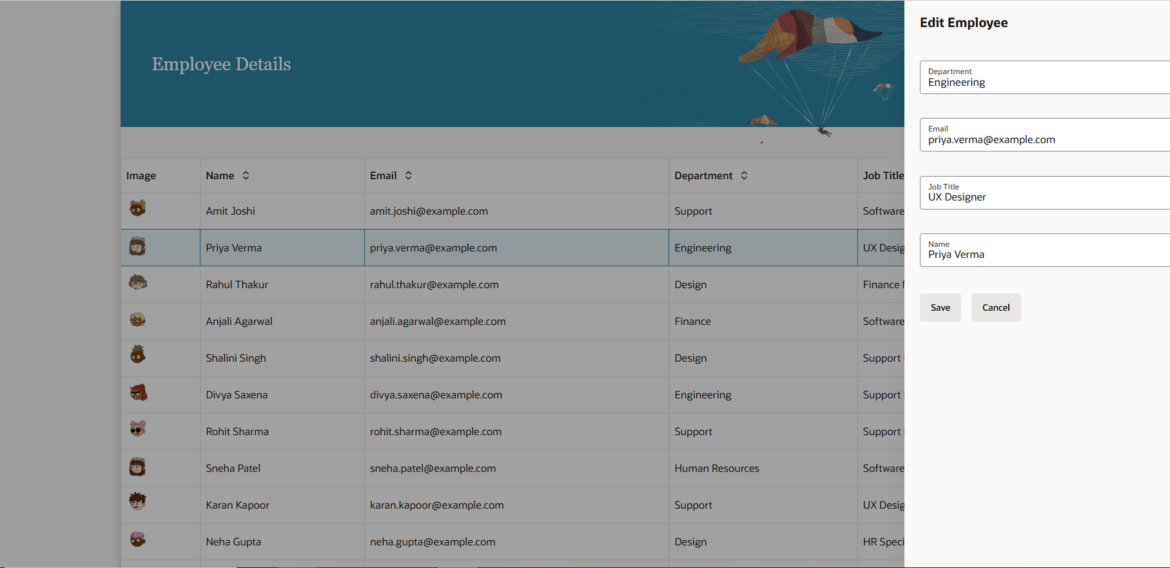
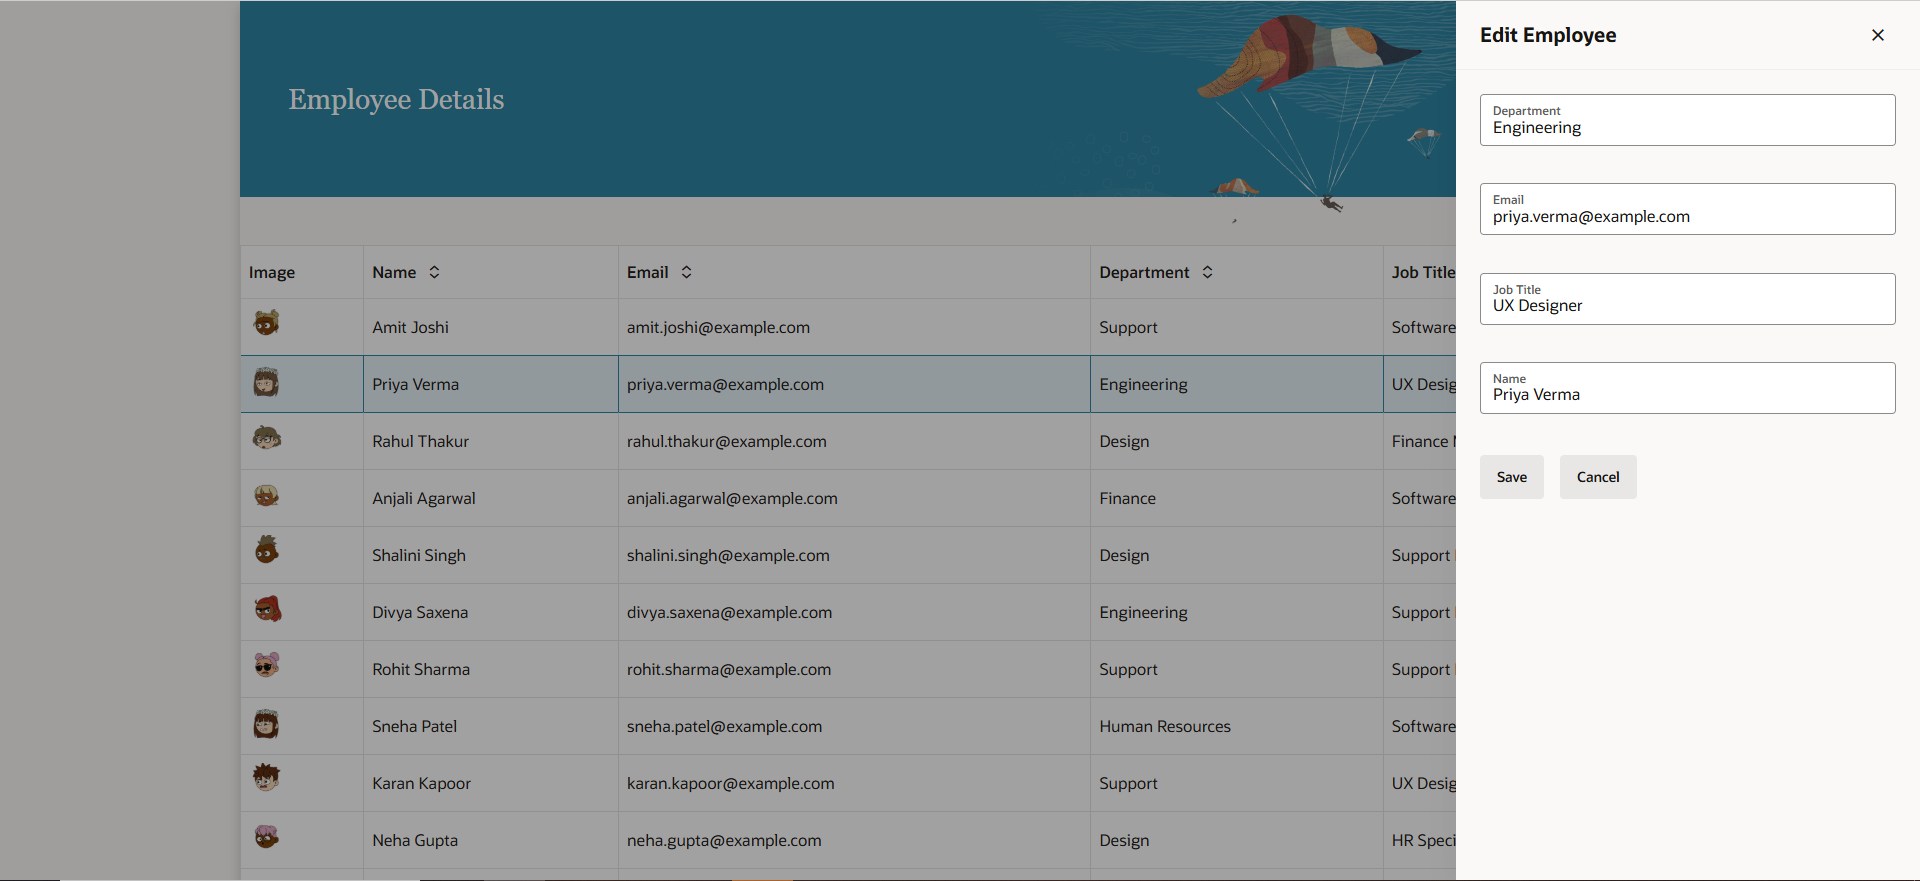
16. We have now completed the implementation of the Edit functionality using the General Drawer Template. Preview your application and click on an employee record—the current row data will be populated in a drawer popup. You can edit the details and click Save, or click Cancel to close the popup. The final screen view is shown below:
This is how we Edit Table Data with the General Drawer Template in Redwood.
If you liked the article, please like, comment, and share.
Please look at our YouTube channel for Oracle Integration-related videos, and don’t forget to subscribe to our channel to get regular updates.
Further Readings
Creating a search page using Oracle Visual Builder Redwood
Using Redwood General Overview Page Template in Oracle VBCS
Configuring Simple Create and Edit Page Template | Oracle Redwood
Configure General Drawer Template in Oracle Redwood
How to Customize the Lock Screen in Oracle Visual Builder
Merging two CSV files into a single file in Oracle Integration