Upgrade on premise ICS agent
In this blog, we are upgrading the agent from 18.1.3.0.0 to 18.4.3.0.1
Below are the steps to upgrade the on-premise agent
- Login into the ICS console and move to the Designer -> Agents page
- Click on the Download -> Connectivity Agent

- A file will be downloaded with name ics_conn_agent_installer_181022.0000.1074.zip
- Move the file on the server where the agent in up and running. In our case, we have moved the file to /home/AgentPatch/
- Unzip the installer and notice below files:
- cloud-connectivity-agent-installer.bsx
- cloud-connectivity-agent-patcher.zip
- Unzip the cloud-connectivity-agent-patcher.zip and notice below files
- cloud-connectivity-agent-ics.properties
- cloud-connectivity-agent-patcher.jar
- cloud-connectivity-agent-patcher.sh
- cloud-connectivity-agent-patching-scripts.zip
- apply-patch.jar
- apply-patch.sh
- updateicscredentials.sh
- cloud-connectivity-agent-checksum.properties
- Set the JAVA_HOME and PATH parameters. Only Oracle JDK version 1.7 and 1.8 are supported. Any other JDK such as Open JDK does not work.
- Notice the file cloud-connectivity-agent-patcher.sh. This is the file which needs to run to upgrade the agent with some parameters as below:
|
Parameter
|
Is Mandatory
|
Description
|
|
-agentInstallDir
|
Yes
|
The installation Agent directory in which agenthome resides
|
|
–icsUn
|
Yes
|
ICS user name
|
|
–icsPwd
|
Yes
|
ICS password
|
|
-patchZipFile
|
No
|
The complete path of the zip file in which BSX file is available. If the parameter not specified, a smaller-sized version of the ZIP file for exclusively upgrading the on-premises agent is automatically downloaded from Oracle Integration Cloud Service.
|
Run below command:
Here: /home/ICS_AGENT is the existing directory of ICS agent
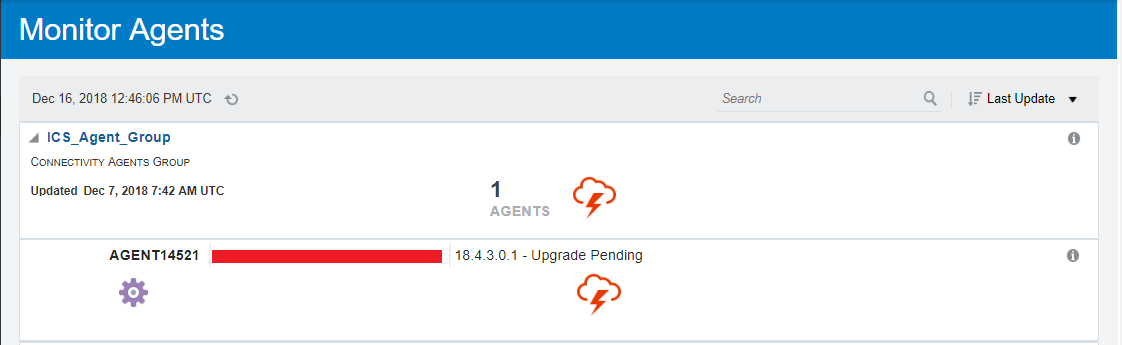
Once the command is fired the patching process will begin. The security certificate is downloaded if not already available and added to the keystore. Go the Agent Group page during patching and notice different statues(Upgrade Pending, Restart Pending, and Up to Date) as shown in the below screenshot

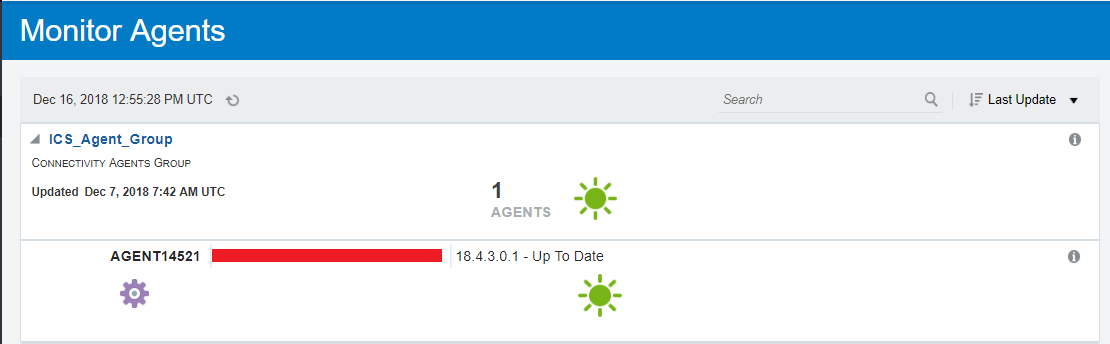
The on-premises agent is automatically restarted after the patch is applied. Once the patch ZIP file is available for extraction (either through the -patchZipFile parameter or through download from Oracle Integration Cloud Service), the remaining process takes around 10 to 15 minutes to complete. This time period includes restarting the on-premise agent. Once the agent is upgraded successfully, go the Agent groups page and see the upgraded version
That’s how the on-premise agent can be upgraded from an older version to the newer version.
Good work done and keep update more.I like your information's.
Spring Training in Chennai
Spring Hibernate Training
Spring Training in Tambaram
Hibernate Training in Chennai
Spring Hibernate Training
Struts Training in Chennai
WordPress Training in Chennai
Wonderful blog with great piece of information. Regards to your effort. Keep sharing more such blogs. Looking forward to learn more from you.
AWS Training in Chennai
AWS Training
Cloud Computing Courses
DevOps certification
Azure Training center in Chennai
Vmware Learning
Best AWS Training in Chennai
AWS Training institute in Chennai
AWS Training in Anna Nagar
Excellent info, I really appreciate your work. Continue sharing more with latest updates.
Ethical Hacking course in Chennai
Ethical Hacking Training Institute in Chennai
Hacking course in Chennai
ccna Training in Chennai
Salesforce course in Chennai
PHP Training in Chennai
Tally course in Chennai
Ethical Hacking course in OMR
Ethical Hacking course in Anna Nagar
Ethical Hacking course in Vadapalani