Datasource and JNDI configuration for DB adapter
To Complete this blog, you must have weblogic and oracle database up and running.
Below simple steps shows how to create Datasource.
1) Login into the weblogic console http://localhost:7101/console
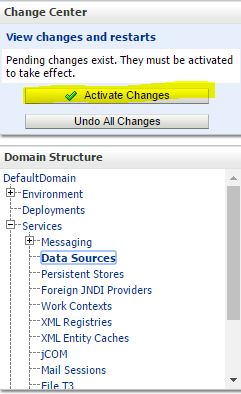
2) Click on lock and edit

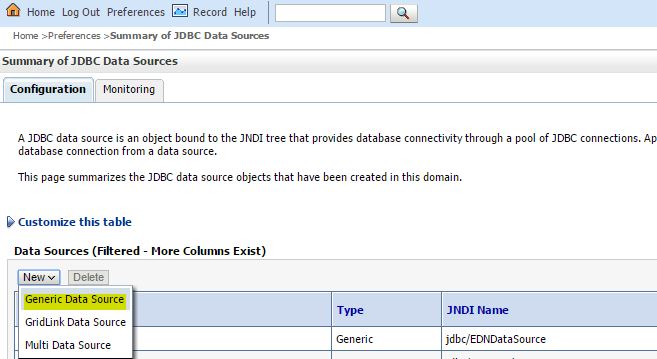
3) Expand Services and click on Data sources

4) Click New -> Generic Data Dource
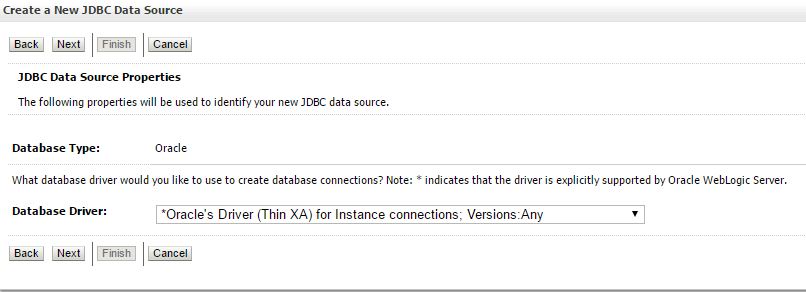
5) Enter below information and click Next
Name : HRDS
JNDI Name : jdbc/hrds
Database Type : Oracle

6) Select Database drive as per your need, let it be default as of now and click Next
7) Click Next
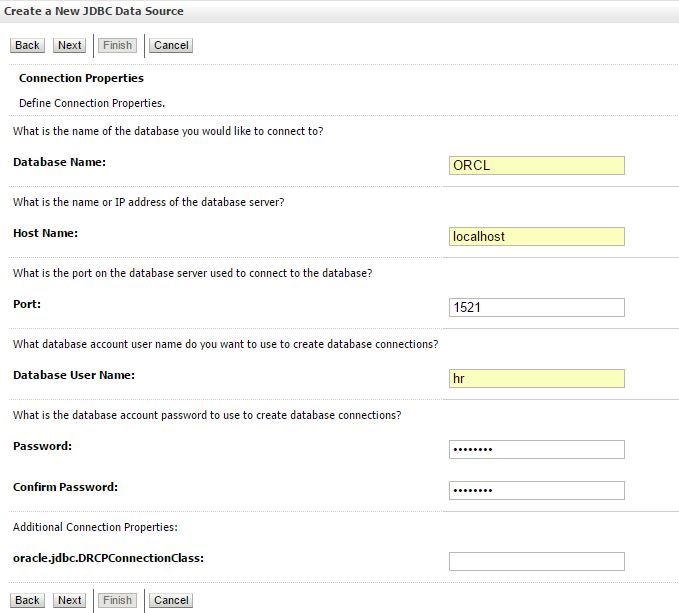
8) Enter the database details and click Next
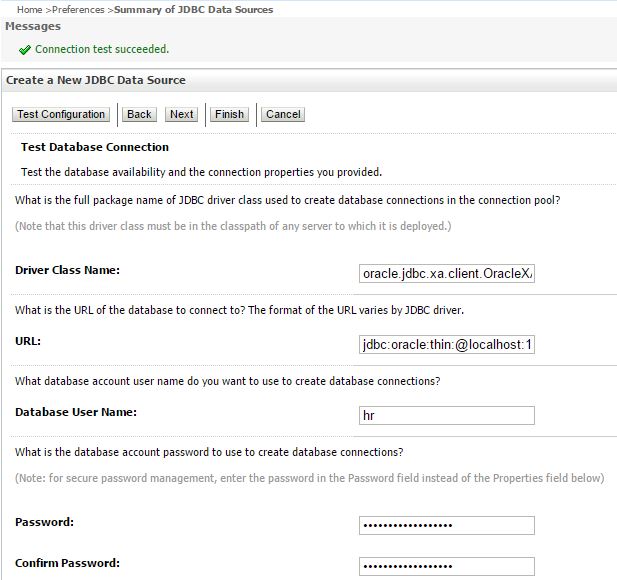
9) Click on Test Configuration button and click Next
10) Select the DefaultServer as target and click Finish

11) Click on Activate Changes button
You are done with datasoruce creation. Let’s proceed further with JNDI in DBAdapter
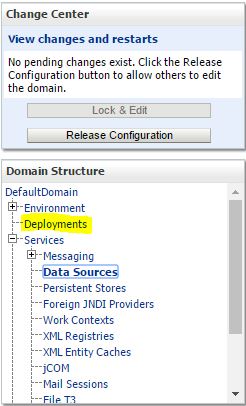
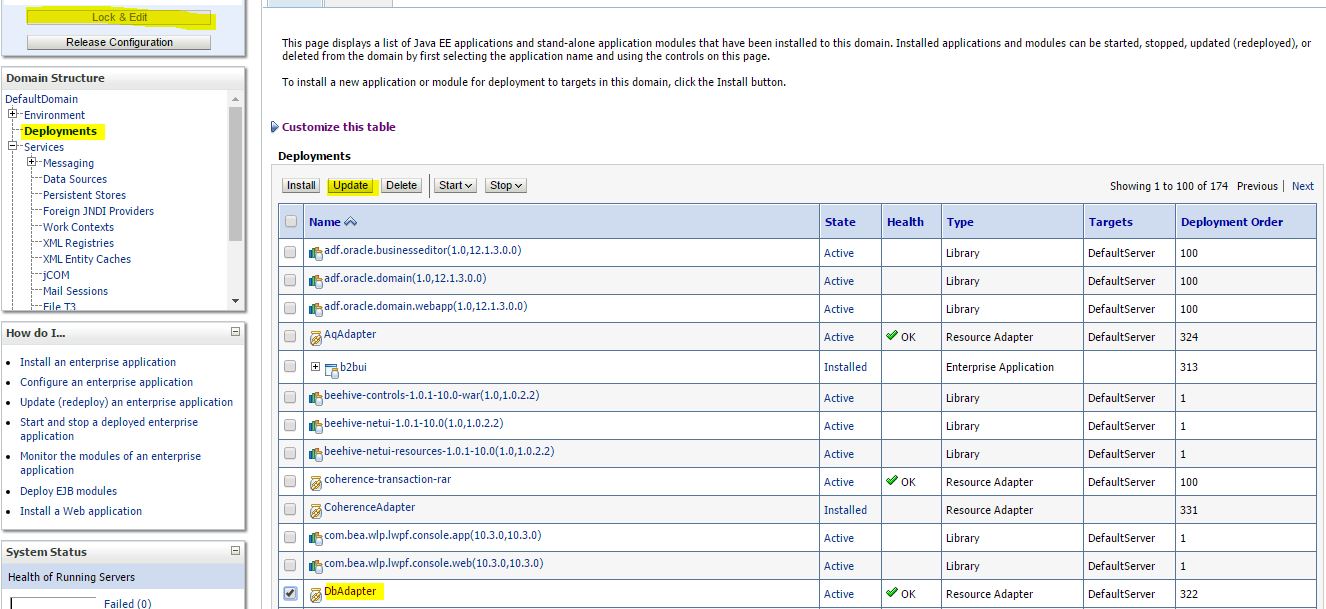
12) Click on Lock & Edit button and Click on Deployments from the left pane
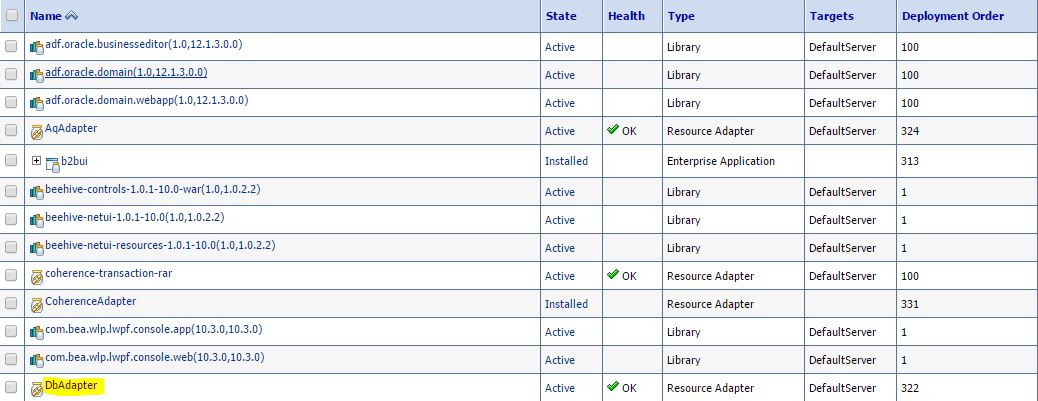
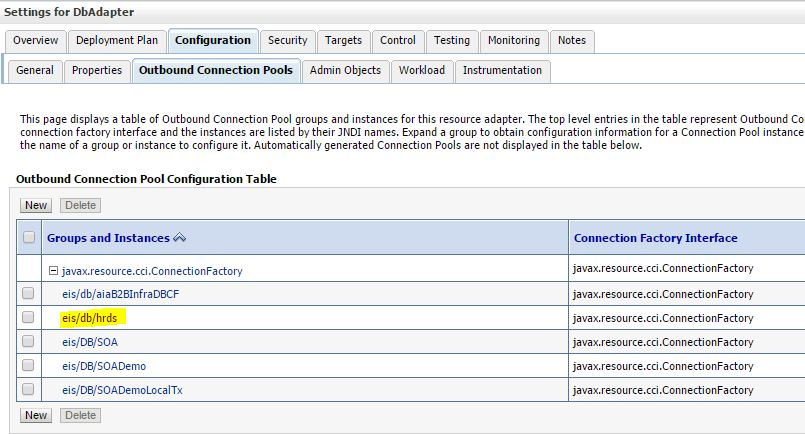
13) Click on DBAdapter
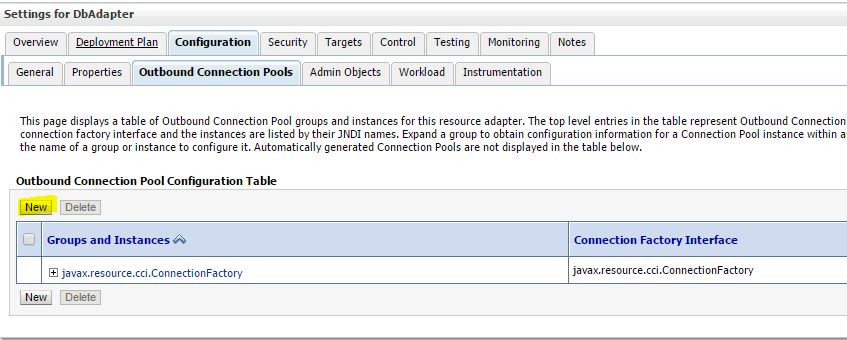
14) Click on Configuration Tab and Outbound Connection Pools and then click New
15) Check the javax.resource.cci.ConnectionFactory radio button and click Next
16) Enter JNDI Name and click Finish
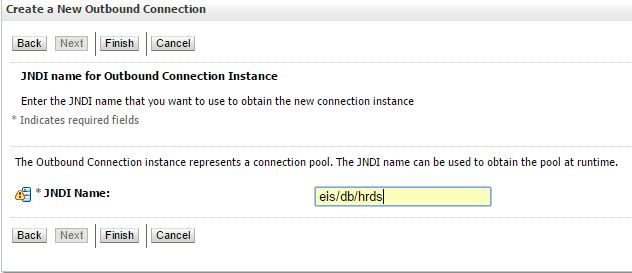
17) Expand the connection factory and click on the eis/db/hrds JNDI
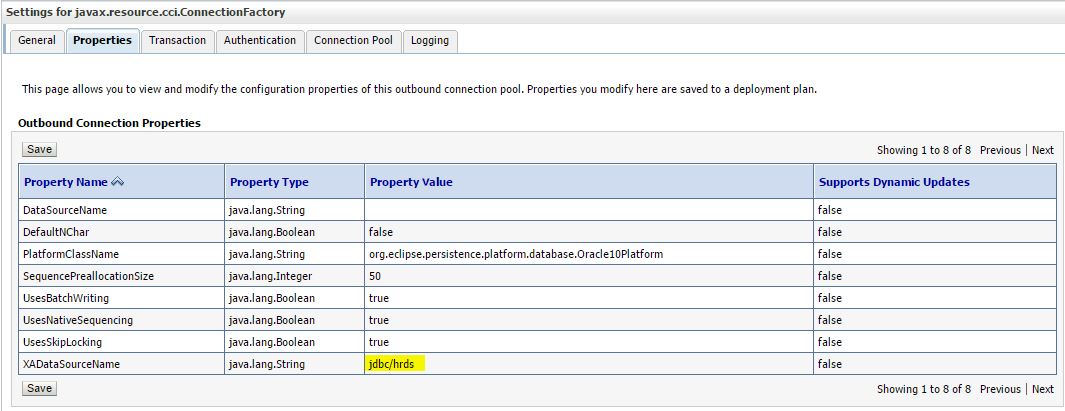
18) Enter the property value XADatasourceName as jdbc/hrds that we have created in the 5th step. press Enter after putting the value and then click Save button
19) Update the DBAdapter now. Click Lock & Edit button -> Deploments -> Check the DBAdapter -> Update
20) Click Next -> Finish and Activate Changes
You are done with Datasource creation and DBAdapter JDNI configuration.
Thanks a lot for a good blog. In this blog, I gain more knowledge about technology.
Struts Training in Chennai
Struts Training institutes in Chennai
struts Training in T Nagar
struts Training in OMR
WordPress Training in Chennai
WordPress Training
Spring Training in Chennai
Hibernate Training in Chennai