Integration on ICS to expose REST service
This blog is very useful for those who is keen to know, how to create REST services in ICS. This is very straight forward.


After this blog you have learned to how to develop REST service in ICS.
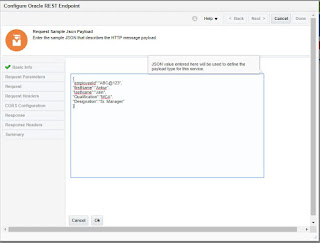
Use Case: Develop REST service that exposes the below json and inserts the same in Oracle DB table.
{
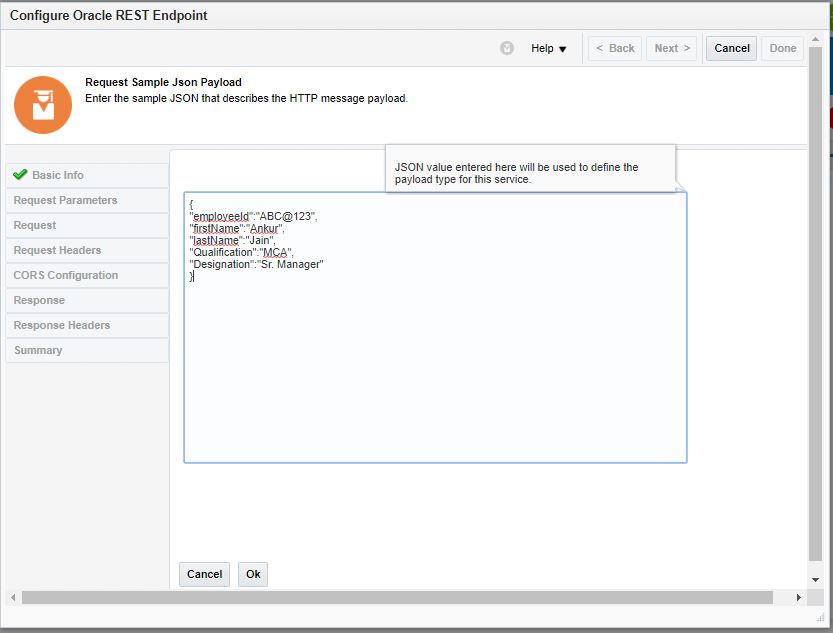
“employeeId”:“ABC@123”,
“firstName”:“Ankur”,
“lastName”:“Jain”,
“Qualification”:“MCA”,
“Designation”:“Sr. Manager”
}
“employeeId”:“ABC@123”,
“firstName”:“Ankur”,
“lastName”:“Jain”,
“Qualification”:“MCA”,
“Designation”:“Sr. Manager”
}
This Use case requires only simple 4 steps to complete:
- Create REST connection
- Create DB connection
- Create an Integration
- Activate the Integration
Let’s go step by step
- Create REST connection: The REST connection we are gonna to create will work as a Trigger point. We have already showcased the same in one of my blog. Please check it out before moving forward.
- Create DB connection: DB connection will work as a Target point. We have already showcased the same in one of my blog. Please check it out before moving forward.
- Create an Integration: Follow below steps to create an Integration
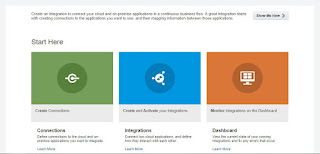
- Login into ICS console
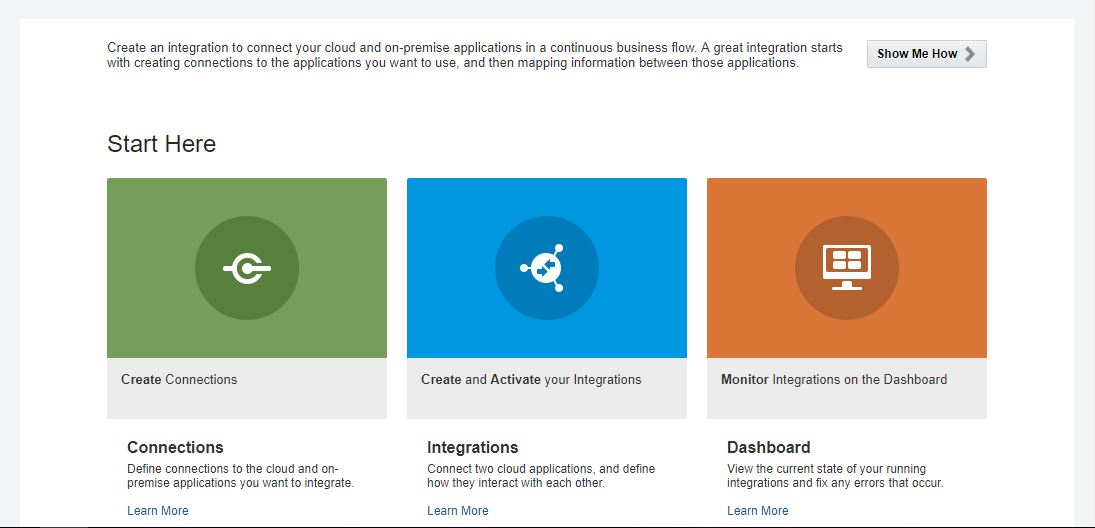
- Click on the Integration tile from ICS home page
- Click on Create button from upper right corner
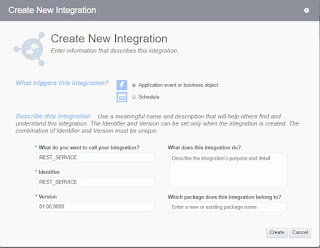
- Select Orchestration pattern from the dialog box

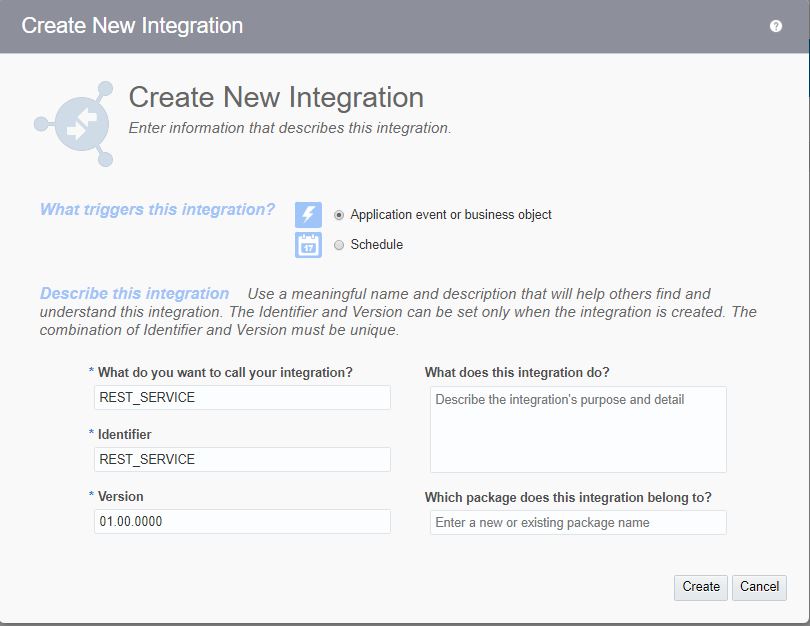
- Enter Below information and click on Create button
- Select Application event or business object radio button
- Enter Integration Name in What do you want to call your integration text box
- An Identifier would be picked up automatically from Integration name however you can edit it
- Let the Version as it is
- Enter the description in What does this integration do box
- Leave the package box as it is
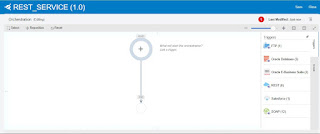
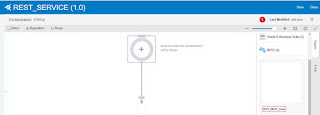
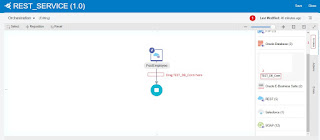
- Integration pane will look like
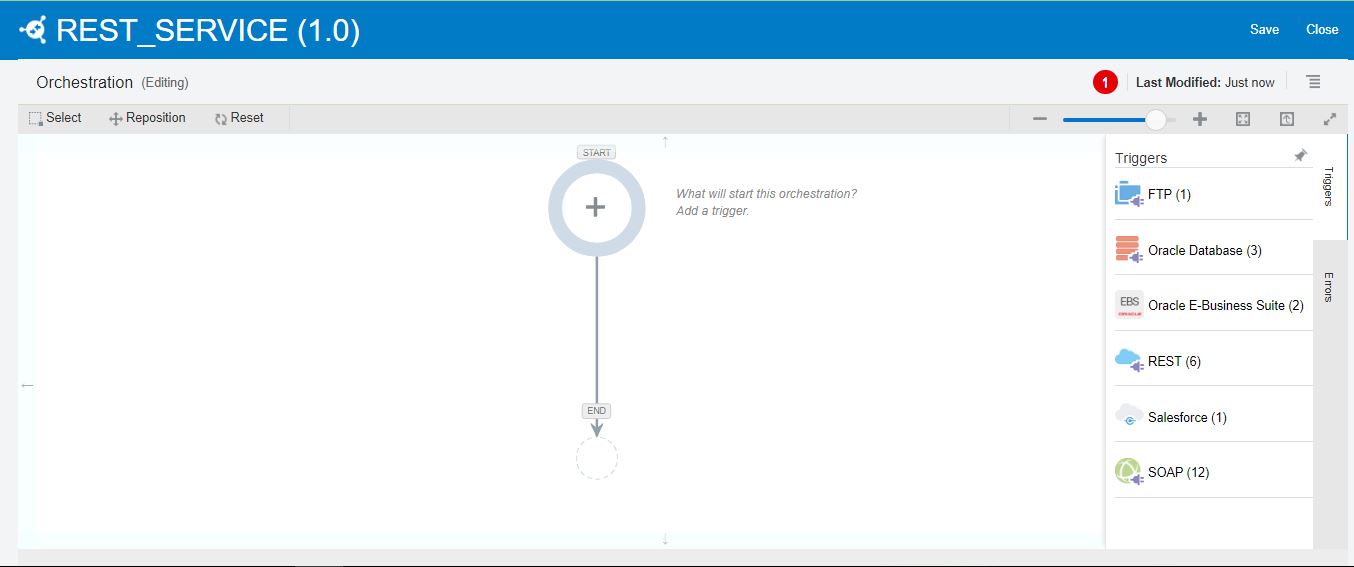
- Drag the TEST_REST_Conn Connection on the canvas from REST connection
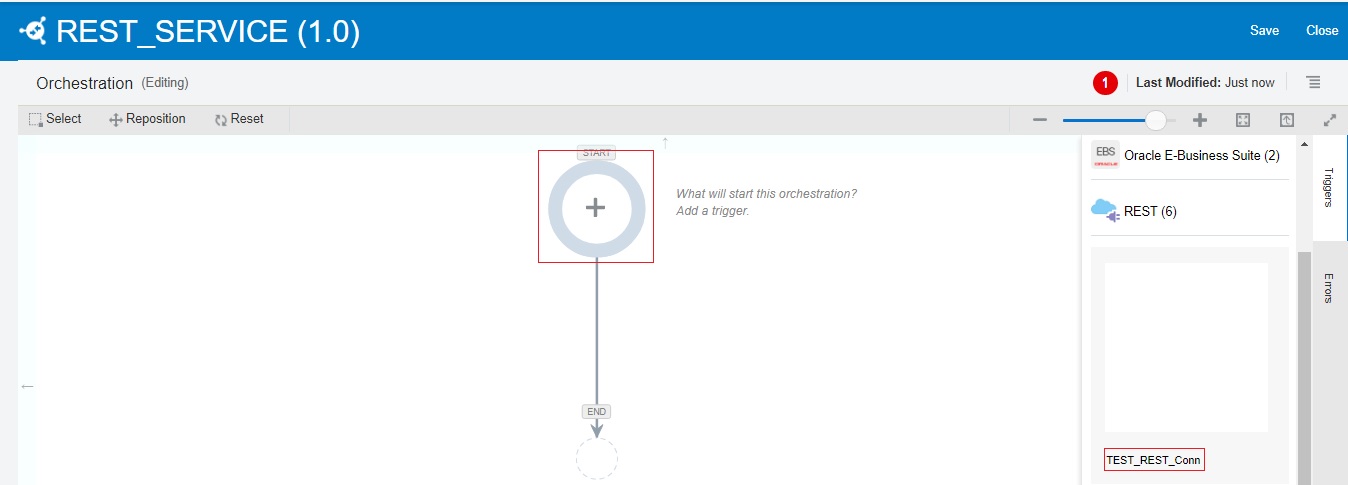
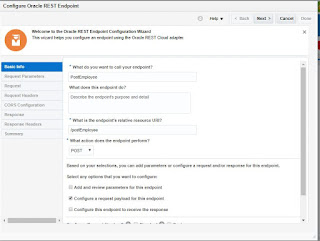
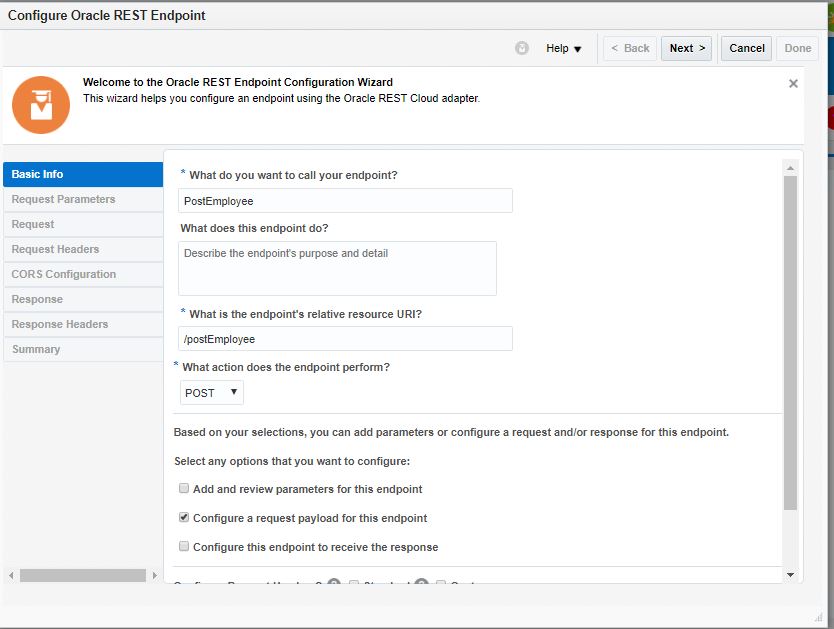
- Enter below information and Click Next
- Name of the end point
- Relative URI(must start with /)
- Select HTTP verb
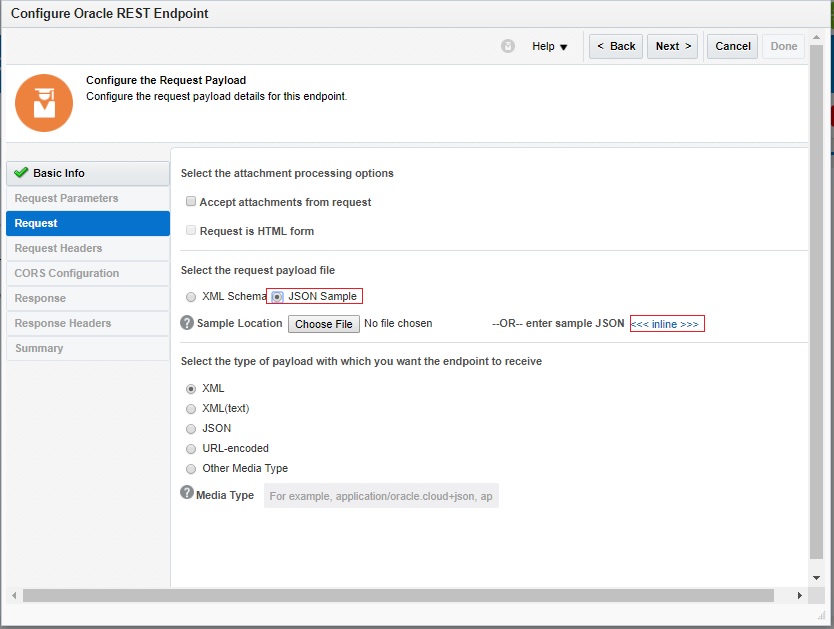
- Select Configure a request payload for this endpoint checkbox- This option allows us to assign payload in the next step
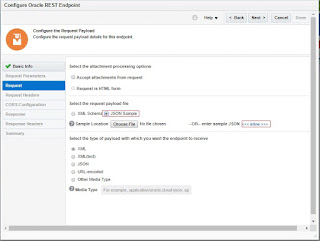
- Select Json Sample Radio button: This option allows us to take input in json format. Select inline link to give sample payload
- Enter payload and click OK
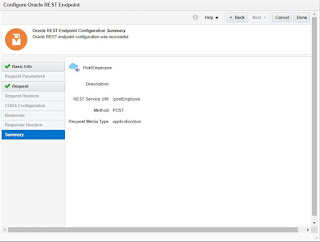
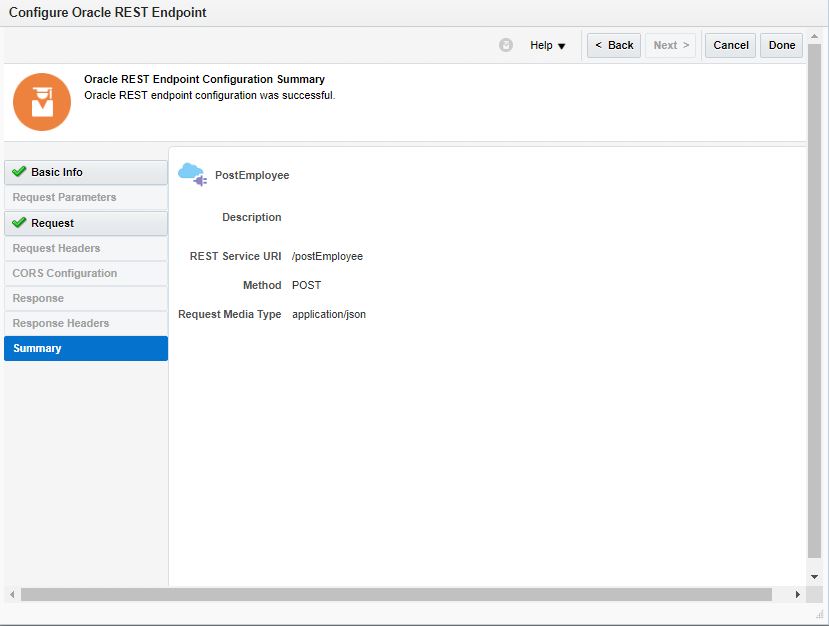
- Click Next and Done button
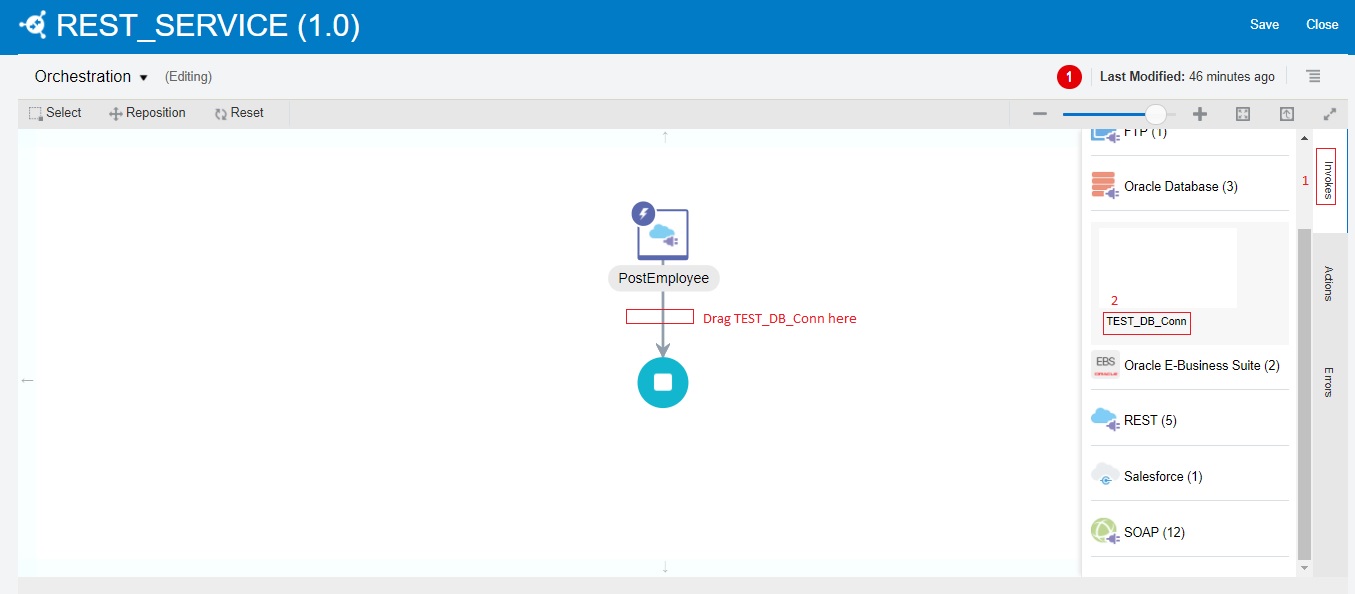
- Click Invokes from right navigation, Select Oracle Databases, drag and drop the TEST_DB_Conn below PostEmployee
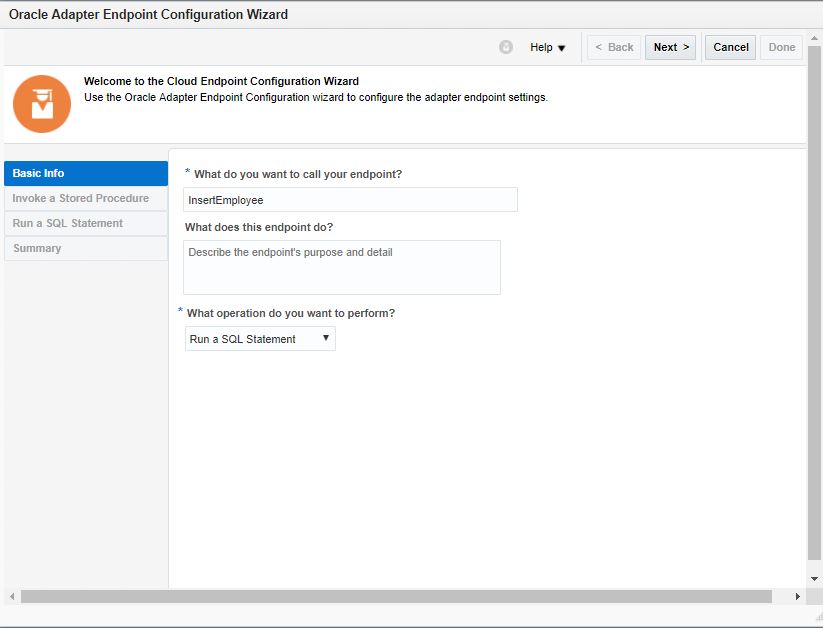
- Enter below information and Click Next
- Enter endpoint name in What do you want to call your endpoint
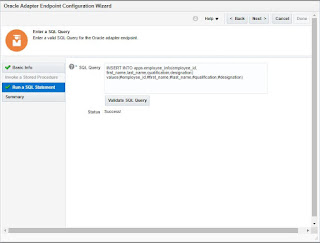
- Select Run a SQL Statement from What operation do you want to perform drop down
- Enter below insert query in SQL query box and Click Validate SQL query to validate the entered query and Click Next button
INSERT INTO apps.employee_info(employee_id, first_name,last_name,qualificatoin,designation) values(#employee_id,#first_name,#last_name,#qualification,#designation)
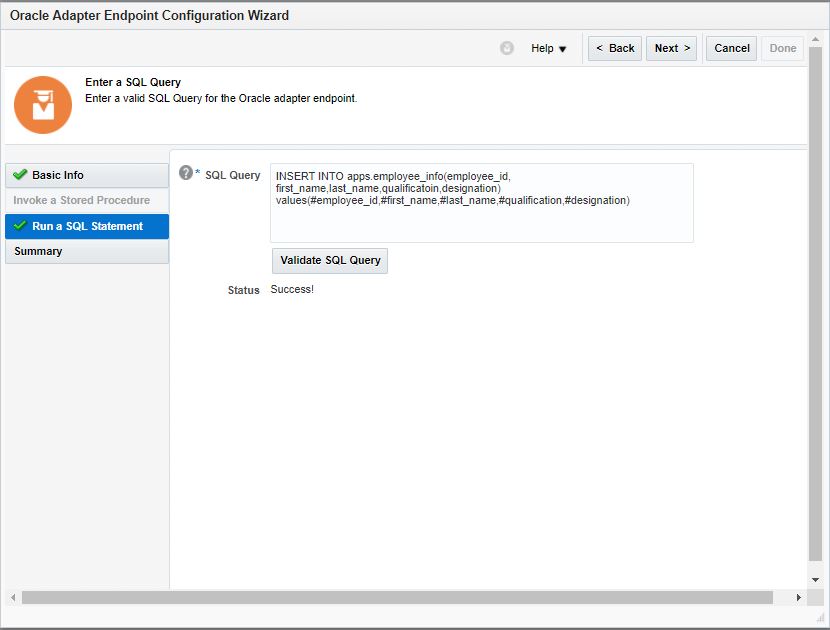
- Click Done
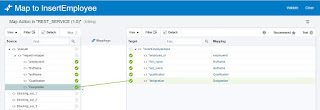
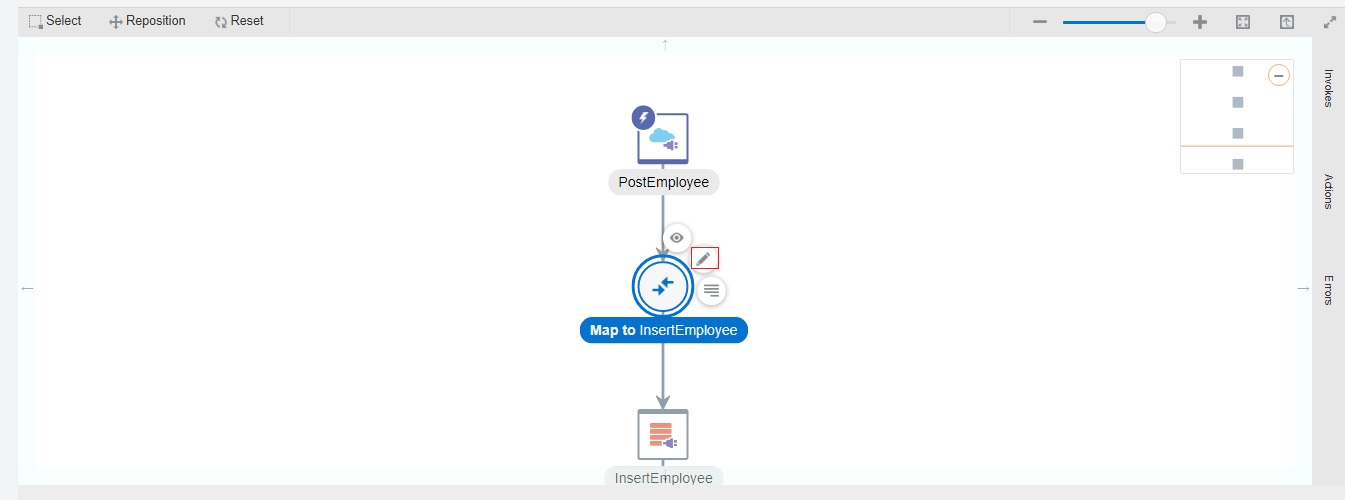
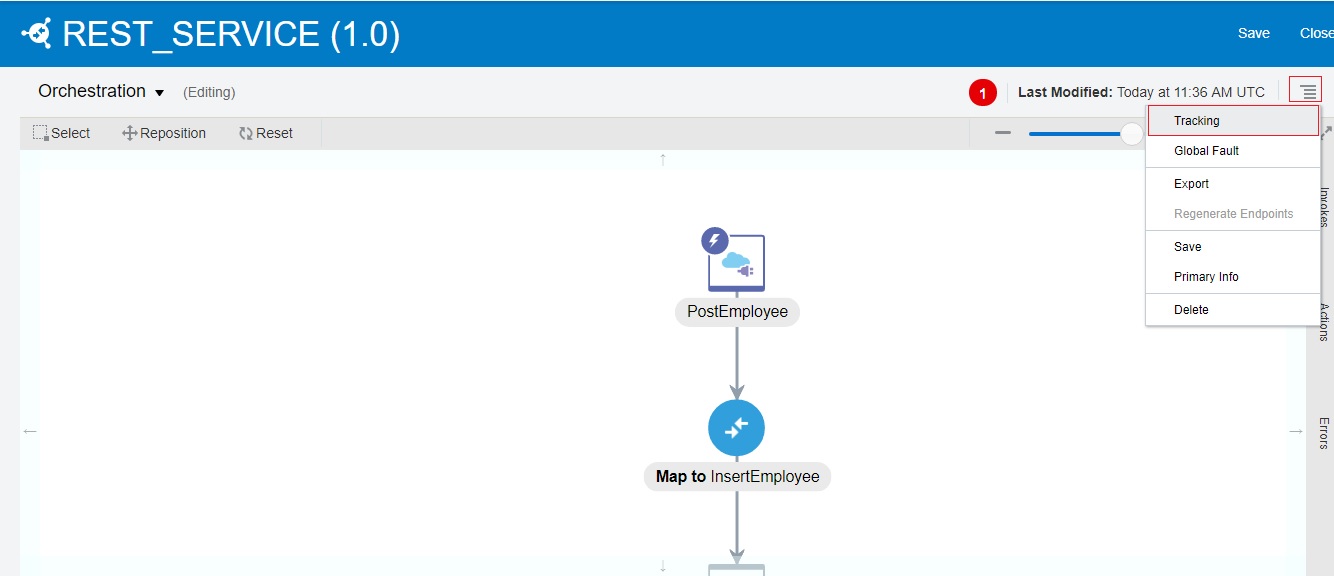
- Click on Map to InsertEmployee mapper and click Edit button
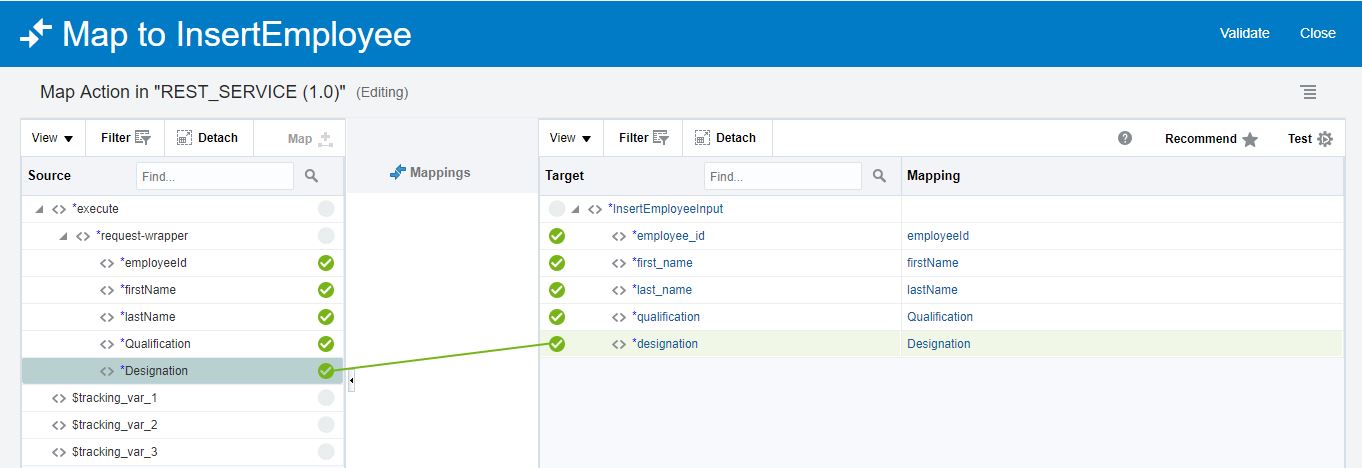
- Map the source and target field as shown in the below scree shot. Click Validate and Close button
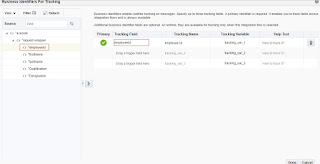
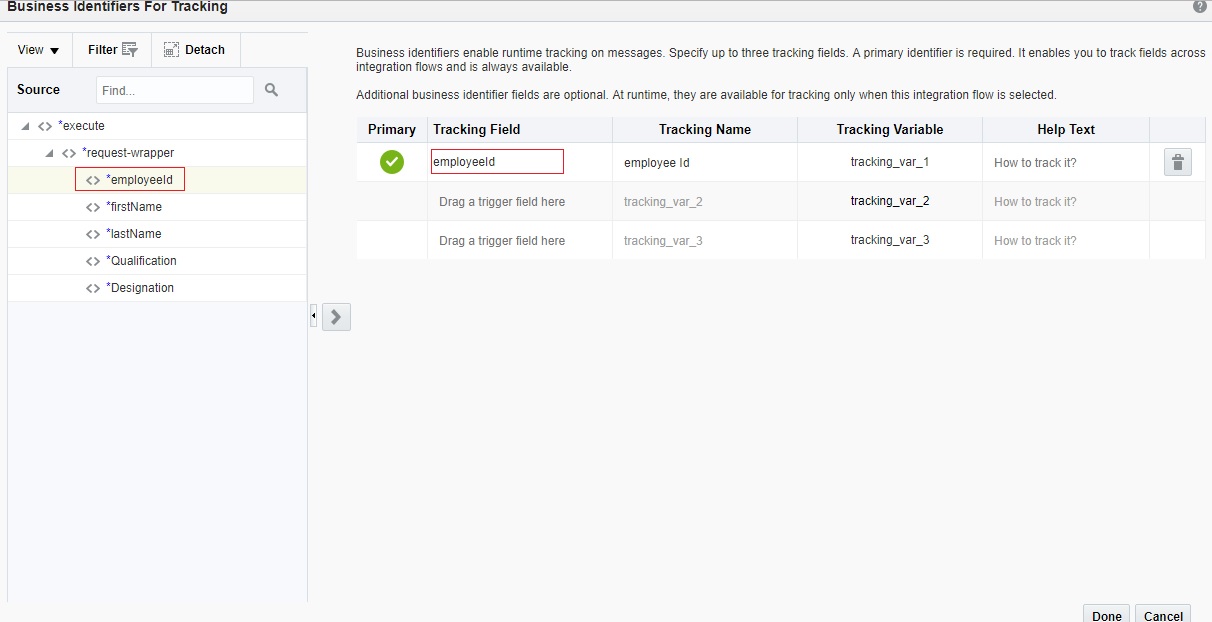
- Select Action icon and click on Tracking. This is mandatory step and can’t activate integration without this step. Basically this allows us to track the Instance with configured parameter. In our case we will select employeeId field.
- Drag & Drop the employeeId from left panel to first row in Tracking Field and click Done button
- Click Save and Close button from upper right corner
Now our integration is completed and now turn to activate the integration.
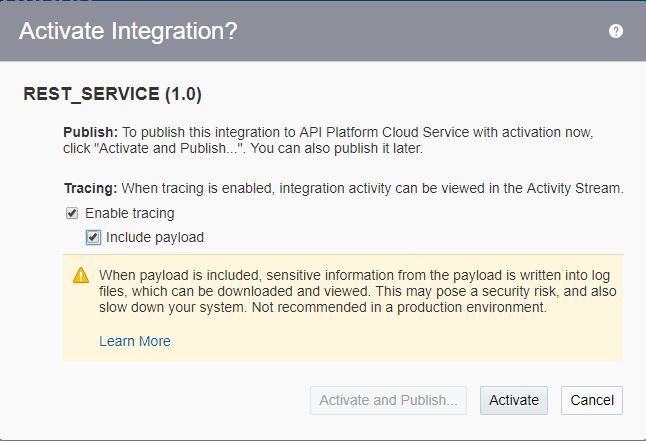
4. Activate Integration
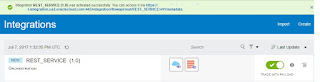
- Click on Activate button

- Select Enable tracking and Include payload check boxes button. This option is useful if we want to see payload in the logs. Click Activate button
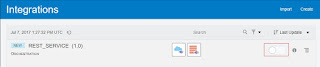
- As soon as, integration will be activated, ICS will show you the service end point on the upper side as shown in the below screen shot. Alternatively, you can click on the info icon near to the activate button that will show you the service end point.

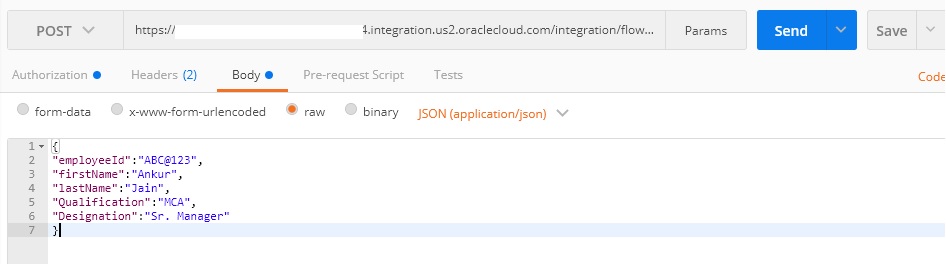
This is the time to test the service and see the data in database table. We will use POSTMAN tool to test the REST service
5. Test the REST service
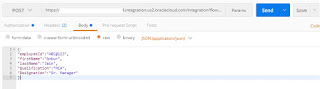
- Open postman tool
- Enter service end point
- We have to add Basic Auth as ICS service is automatically secured. We need to provide ICS console credentials.

- Enter payload and hit Submit button
- Open database and see record should be inserted into the database
That’s done !
Hi
Nice Post.
Thank you.
Could you also demonstrate how to integrate Oracle Storage Cloud Service to DBCS, please.
Hi Tarun,
Thanks for the appreciation. I'll try to write the same and will notify you.
Any Id where we can connect?
You can connect me on ankurjain.jain26@gmail.com
Regards,
Ankur
hello Ankur
Thank you very good blog and ICS examples , can you please publish JMS Adaptor based integration ( REST API –> On premise Weblogic JMS server using Connection agent ) I am facing some issues in getting end to end message in JMS Q : though my connection agent is working fine
Hi,
Since I have never used JMS adapter in ICS but would love to help you.
Could you please do the following:
1) Do telnet from ICS agent towards JSM server and share the results.
2) Share logs
Hello Ankur
I have installed ICS agent on same server as Weblogic, so accessing weblogic is not a problem , see the inline logs
————————-
ICS Agent and Weblogic port
——————————-
[adm@IN- ~]$ netstat -anp | grep 9001 ( ICS Agent Connection)
(Not all processes could be identified, non-owned process info
will not be shown, you would have to be root to see it all.)
tcp 0 0 ::ffff:127.0.0.1:9001 :::* LISTEN 16217/java
tcp 0 0 ::ffff:10.75.162.168:9001 :::* LISTEN 16217/java
tcp 0 0 fe80::250:56ff:fe9e:1e:9001 :::* LISTEN 16217/java
tcp 0 0 ::1:9001 :::* LISTEN 16217/java
[adm@IN ~]$ netstat -anp | grep 8001 ( Weblogic)
(Not all processes could be identified, non-owned process info
will not be shown, you would have to be root to see it all.)
tcp 0 0 ::ffff:10.75.162.168:8001 :::* LISTEN 5878/java
tcp 0 0 ::ffff:10.75.162.168:51840 ::ffff:10.75.162.168:8001 ESTABLISHED 14369/java
tcp 0 0 ::ffff:10.75.162.168:8001 ::ffff:10.75.162.168:51840 ESTABLISHED 5878/java
———————————–
ICS and ICS Connection agent log
———————————–
[2017-12-11T13:06:07.184+05:30] [AdminServer] [NOTIFICATION] [] [oracle.cloud.cpi.agent.transport.AQConsumer] [tid: Thread-48] [userId: ] [ecid: 99959ffc-c2e8-48f9-ac89-958e72c9611f-0000000a,0] [APP: agent-webapp] AQ Message received with ID 600c84a25a483a62e0539746220a70eb
[2017-12-11T13:06:07.184+05:30] [AdminServer] [NOTIFICATION] [] [oracle.cloud.cpi.agent.transport.AQConsumer] [tid: Thread-48] [userId: ] [ecid: 99959ffc-c2e8-48f9-ac89-958e72c9611f-0000000a,0] [APP: agent-webapp] Invoking adapter with a timeout of 300 seconds
Can I connect you directly on mail as well , as it seems there is restriction on number of characters when I post log
Yes please..
Regards,
Ankur
Just sent you mail at ankurjain.jain26@gmail.com, can you please check
Hi,
What is the ICS and Agent version you are using ?
Regards,
Ankur
Hi Ankur,
I want to store whole JSON payload into a database(CLOB column)
Can you please suggest some ways to do it.
Thanks,
Shiny
Thanks for sharingcustom erp solutions