Oracle Service Bus : Insert operation using Database Adapter
Let’s have a quick example, how to make this possible using the Oracle Service Bus 12c.
After this example, how must have learned to:
1) How to use DB adapter to insert data into the table
2) How to create REST service
3) How to test the DB adapter and REST service.
The basic pre-requisite to compete this example:
1) You must have Jdeveloper 12c with integrated weblogic with SOA
2) You must a Oracle database installed on your machine
3) Create a table structure, like below:
Download the project from here
Download the Emp_Details script from here
Let’s have a quick steps to complete the example:
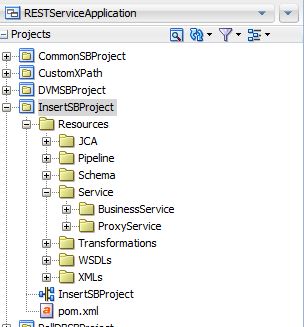
1) Create a Service Bus application with Service Bus project.
2) Project structure will like below. This is standard and you should follow the folder structure in your projects like this.
3) Let’s create a outbound DB adapter. Whatever Business Service we create in the Service Bus, they are outbounds. Right click on the right swim lane and insert DB adapter.
4) Enter the Business Service Name as InsertBS and select the Service Directory as shown in the below screen:

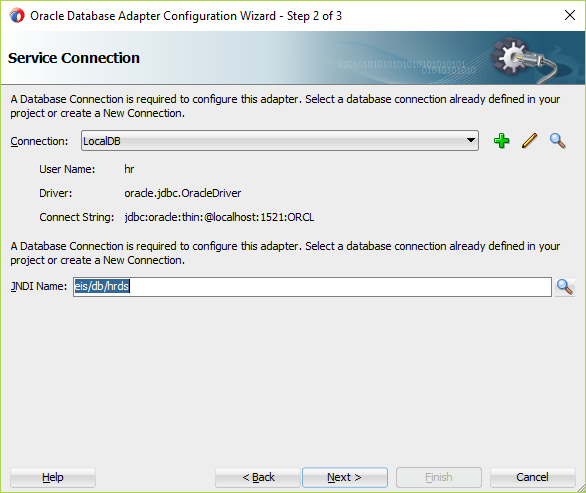
5) Enter the JNDI name, that you have created in your weblogic console. If you don’t have, then create the JDNI in the weblogic. You may follow the blog to create the JDNI in weblogic. Weblogic must be up and running to create a JNDI.
In our case, our JNDI name is eis/db/hrds. Let’s enter the same and click Next button
6) In this window, Select an operation that you want to perform in your database. In our case, we are inserting the data only, so select the Perform an Operation on Table radio button and select Insert Only option.

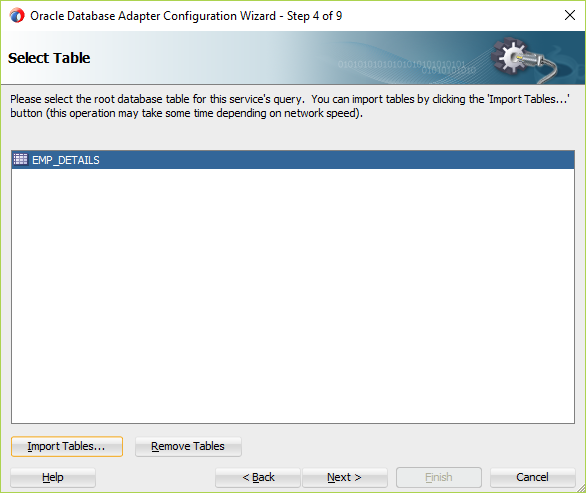
7) This screen allows to you to select the table that you are gonna to use to insert data. In our case we do have one table called Emp_Details. Let’s select the table. Click on the Import Tables button from the bottom of the wizard. Click on Query button from the opened window and select Emp_Details table, click OK

8) This window will show you the relationship with the tables if it has. Simple click Next
9) This windows allows you, what all columns you will use to insert data. Let’s have as it is and click Next.

10) This window allows you to set some options. Let’s leave all the default values as it is and click Next.
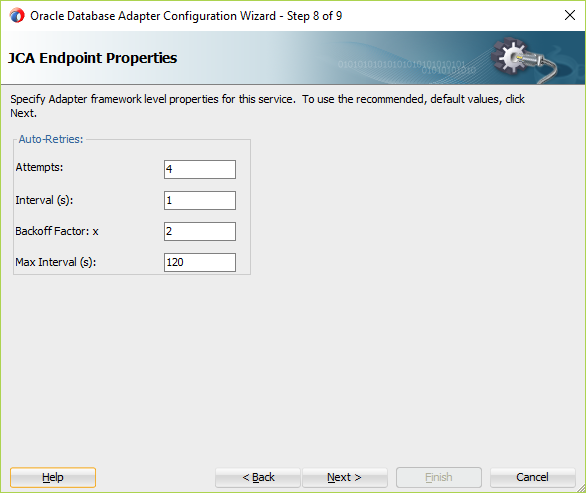
11) This window gives you the option to set some parameter values. You can set the values as per you need. These parameters are basically used when your business service is not reachable, and you want your service to auto retry with n number of times. Let’s keep the values as it is and select Next and Finish.
Sometimes you will see the error in you project just after you create Business Service, simply refresh the project and error will go away.
Let’s move the files in the respective folders as shown in the below screen:

Database adapter is ready now. You can directly test the Database adapter. Let’s run the Business Service. Right click on the Business Service and click Run
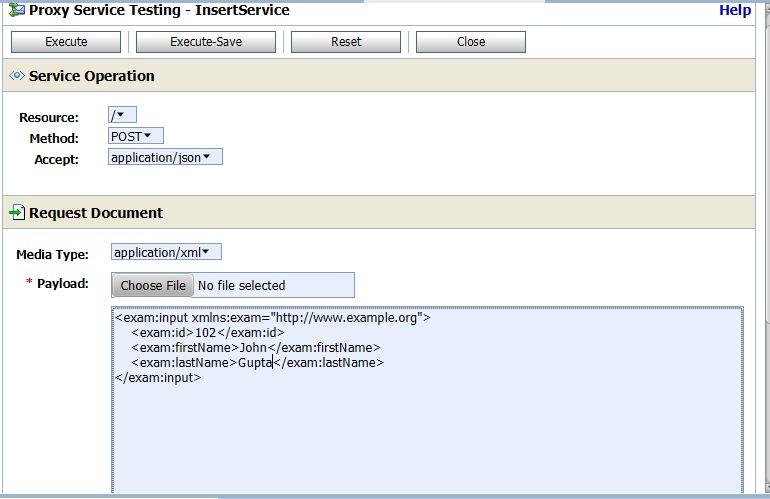
Enter the values and click Execute button
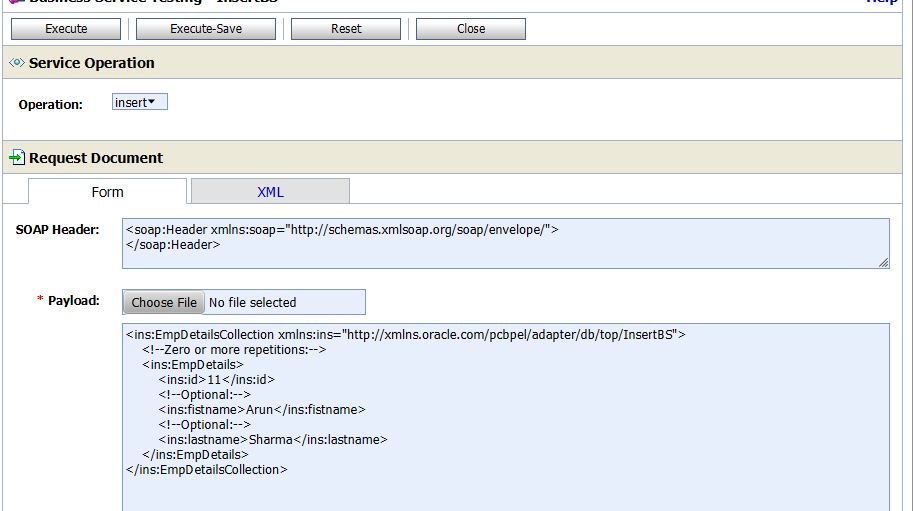
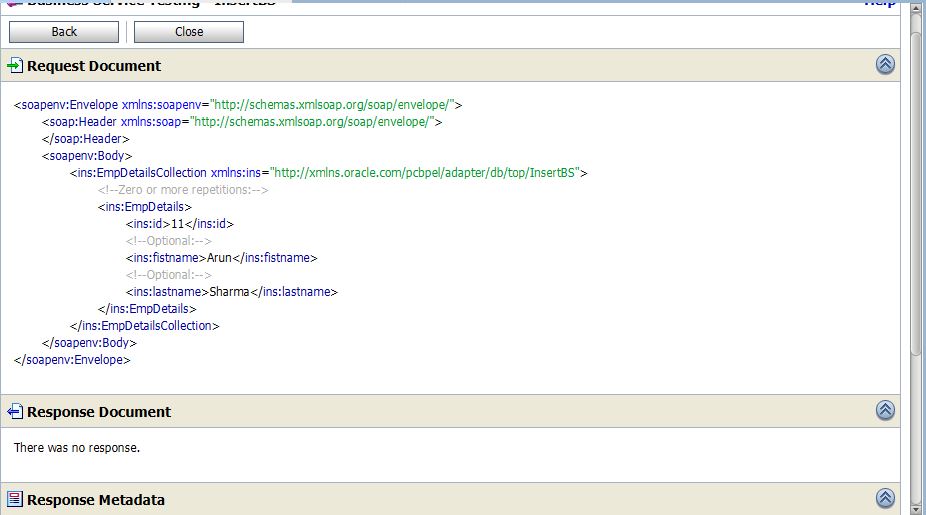
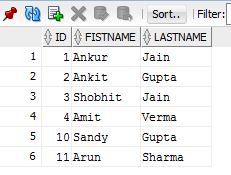
Check the Emp_Details table that data have been inserted successfully or not.
Let’s create REST service that will be used to send input.
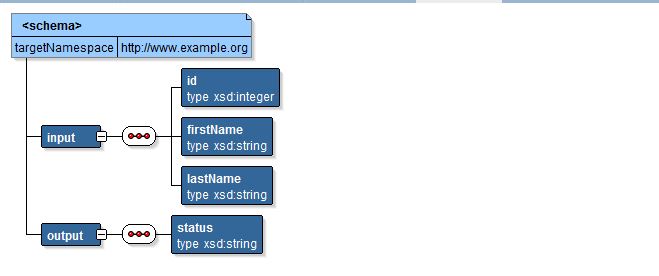
Create a schema file with the below structure:
12) Let’s create a inbound adapter. Right click on the left swim lane and insert REST adapter. Enter Name of the Rest Service as InsertService. Click on the + sign from the Operation Bindings section to create a operation

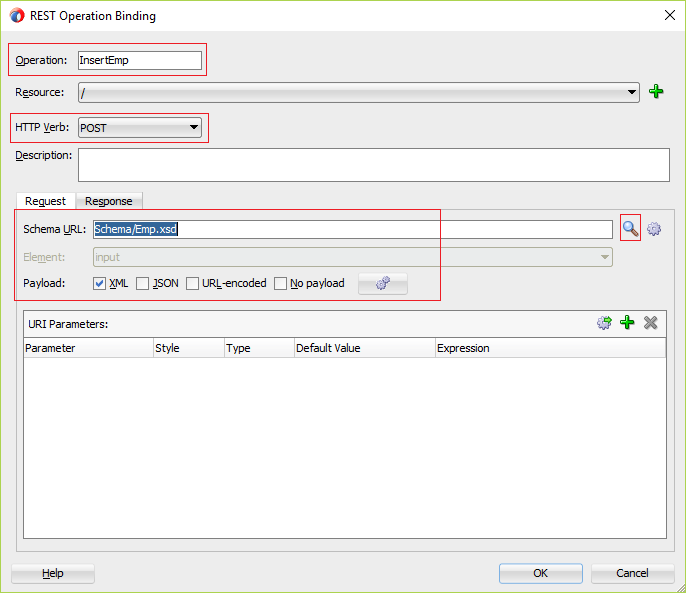
13) Opened window, allows you to create REST service operation. Let’s name the operation InsertEmp. Select the POST from the HTTP Verb drop down. Select the Emp.xsd and select input element
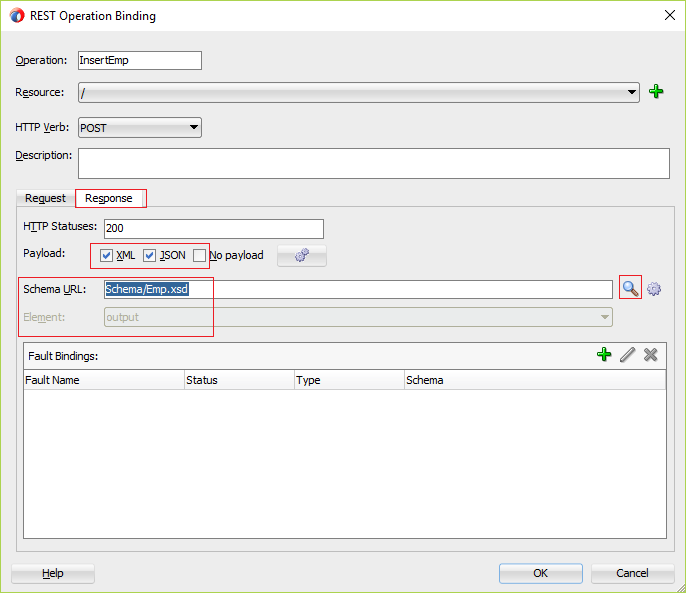
14) Move to the Response tab. Check XML and JSON checkbox, if you need output in both formats else you can select any one. In our case let’s check both the checkbox. Select Emp.xsd and select output element from this and click OK twice.
Proxy service is ready. Let’s move the WSDL and proxy service into the respective folders.
15) It’s time to insert pipeline that is your message flow. Right click in the Middle swim lane and click Pipeline. Enter Name and select Location for the pipeline. Click Next

16) In this window, select the WSDL checkbox and select the InsertService.wsdl, Uncheck the Expose as a Proxy Service click Finish

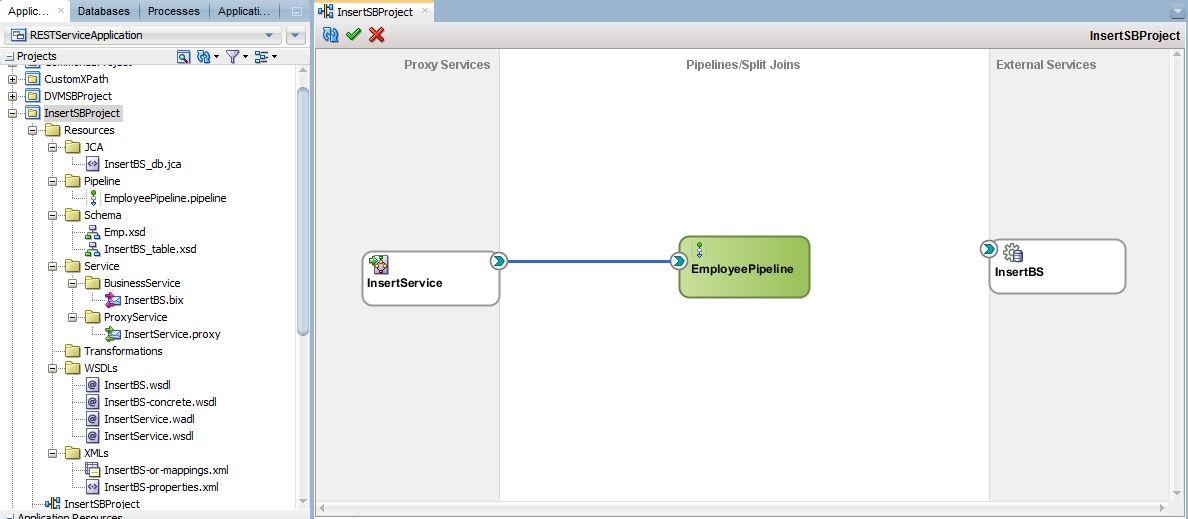
17) Wire InsertService and EmployeePipeline together. Your composite will look like after this step:
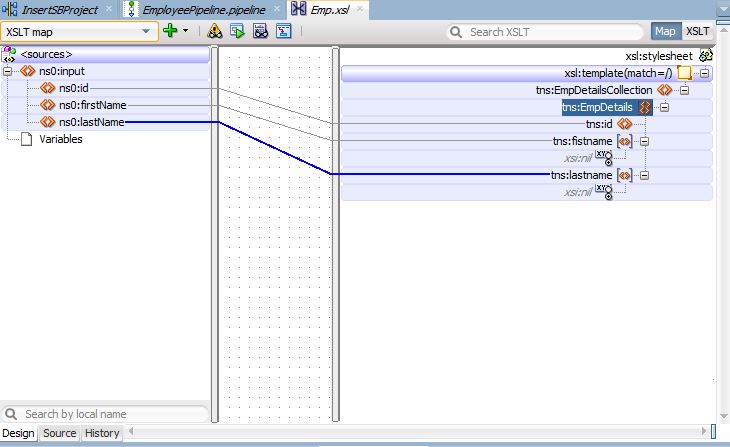
18) Let’s create a XSLT transformation. XSLT will be used to convert the REST service request into the business service input. Create a XSL map and name it Emp.xsl. Select the input element of the Emp.xsd from the Primary Source section and EmpDetailsCollection element of the InsertBS_table.xsd from the Target section. Click OK

19) Map the elements like below
20) Double click on the EmployeePipeline. Drag and drop the PipelinePairNode from the component pallet. Drop the Publish activity under the Request pipeline and select the InsertBS business service as shown in the below screen shot:
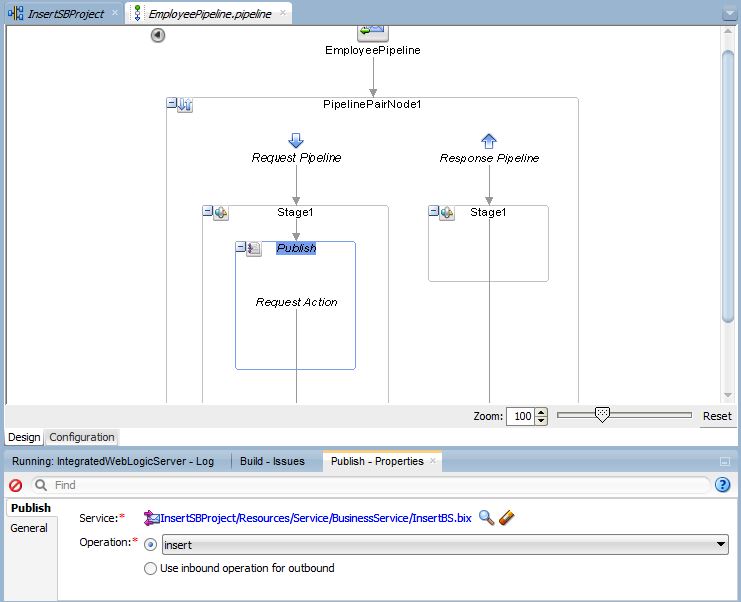
In this case we have used Publish activity to call the business service. Publish activity is used when the business service doesn’t return any output. It works with asynchronous services. Our InsertBS is asynchronous as it doesn’t return any response.
21) Drop the Replace activity under the Publish activity. This replace activity will be used to send input to the business service.
Configure the Replace properties as:
a) Location: body
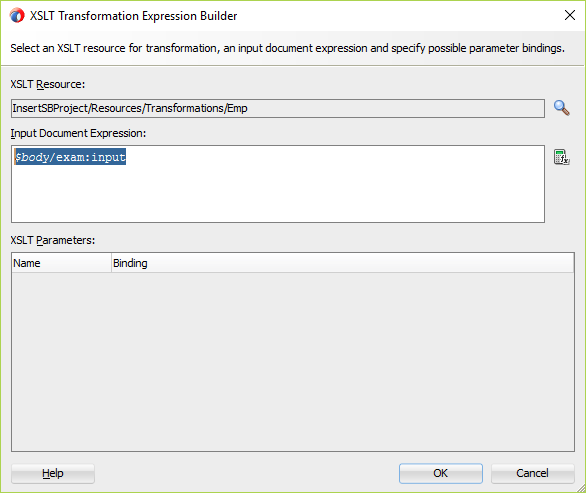
b) Value: Select XSLT Resource, select Emp.xsl that we have created in the previous step. As soon as you will select the XSLT, wizard will demand for the XSLT input. In our case, insert the the $body/exam:input expression
c) Replace Option: Select node contents option

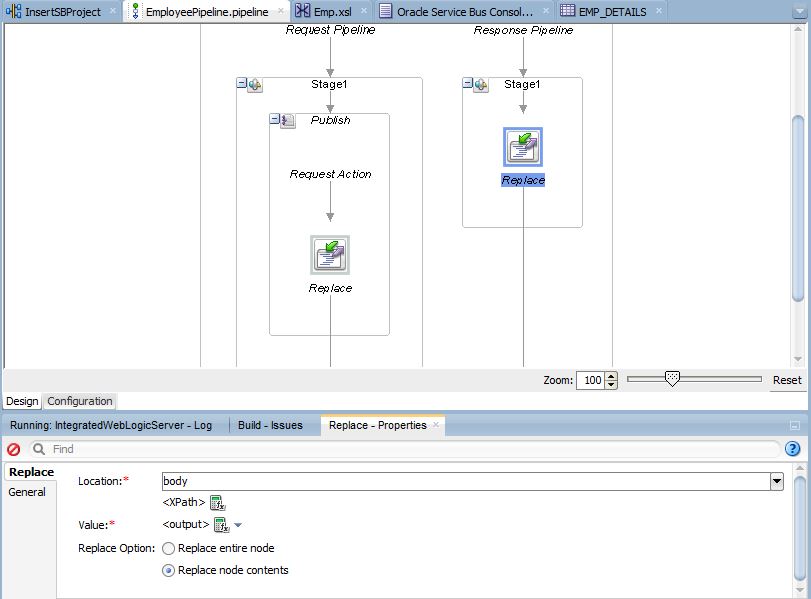
22) Now drop the Replace activity under the Response pipeline. Enter the properties:
a) Location: body
b) Value: Select Expression and enter the expression
<output>
<status>Success</status>
</output>
c) Replace Option: Select node contents option
Your configuration is done. After this step your pipeline will look like
It’s time to test the service. Right click on the REST service and click Run
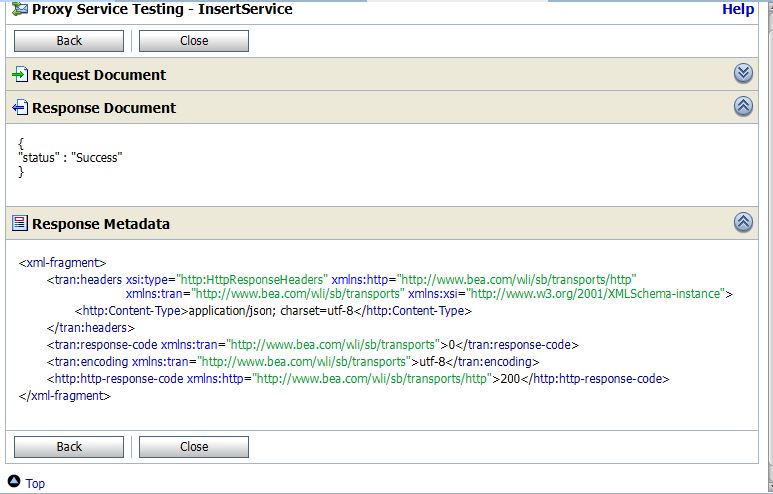
Check the table that data got inserted or not.
More examples:
REST Service with DB adapter Oracle Service Bus
File adapter in Oracle Service Bus
Consume Secure SOAP service in OSB
Secure REST service in Oracle Service Bus using OWSM
Nice post
Hi, how can I contact you? I could do a class of OSB 12c with Xquery and JCA by teamviewer or if you can not upload the source code of the example. I remain attentive to your comments. Greetings.
Thankyou for sharingerp software companies