OSB Domain Creation
1) To begin the domain configuration, navigate to the ORACLE_HOME/oracle_common/common/bin directory and start the WebLogic Server Configuration Wizard and run the below command:
./config.sh
2) On the Configuration Type screen, select Create a new domain. In the Domain Location field, specify your Domain home directory.

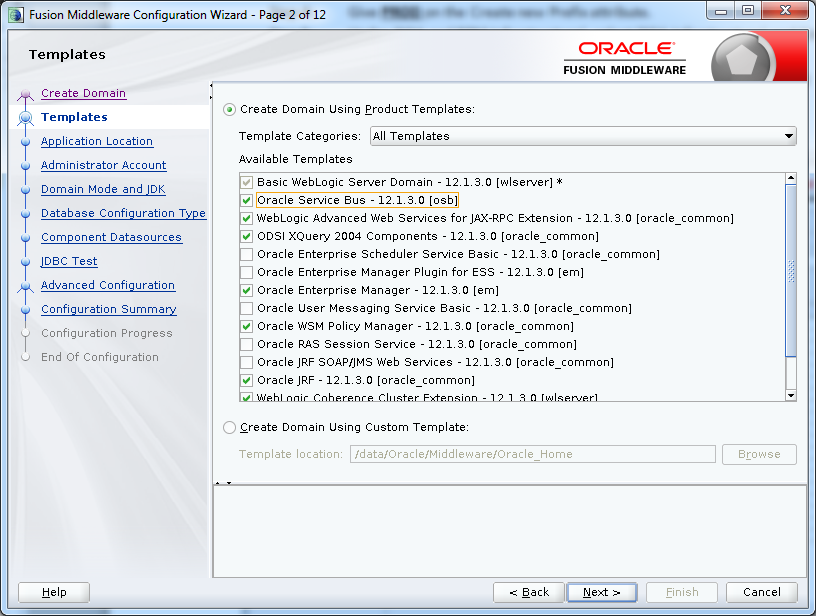
3) On the Templates screen, make sure Create Domain Using Product Templates is selected, then select the following templates:
Oracle Service Bus – 12.1.3.0 [osb]
Selecting this template automatically selects the following as dependencies:
- WebLogic Advanced Web Services for JAX-RPC Extension – 12.1.3 [oracle_common]
- Oracle Enterprise Manager – 12.1.3.0 [em]
- Oracle WSM Policy Manager – 12.1.3.0 [oracle_common]
- Oracle JRF – 12.1.3.0 [oracle_common]
- WebLogic Coherence Cluster Extension – 12 1.3.0 [wlserver]
- ODSI XQuery 2004 Components – 12.1.3.0 [oracle_common]
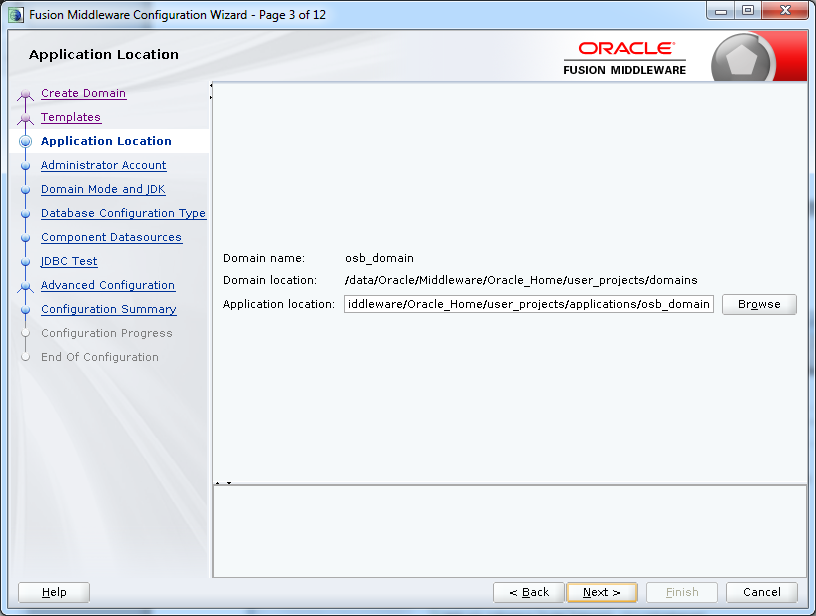
4) On the Application Location screen, select the location in which you want to store your applications associated with your domain. This location is also referred to as the Application home directory. Let the default value as it is and click Next.
5) Enter the password for weblogic user and click Next

6) On the Domain Mode and JDK screen:
- Select Production in the Domain Mode field.
- Select the Oracle HotSpot JDK in the JDK field.

7) Select RCU Data to activate the fields on this screen. The RCU Data option instructs the Configuration Wizard to connect to the database and Service Table (STB) schema to automatically retrieve schema information for the schemas needed to configure the domain.
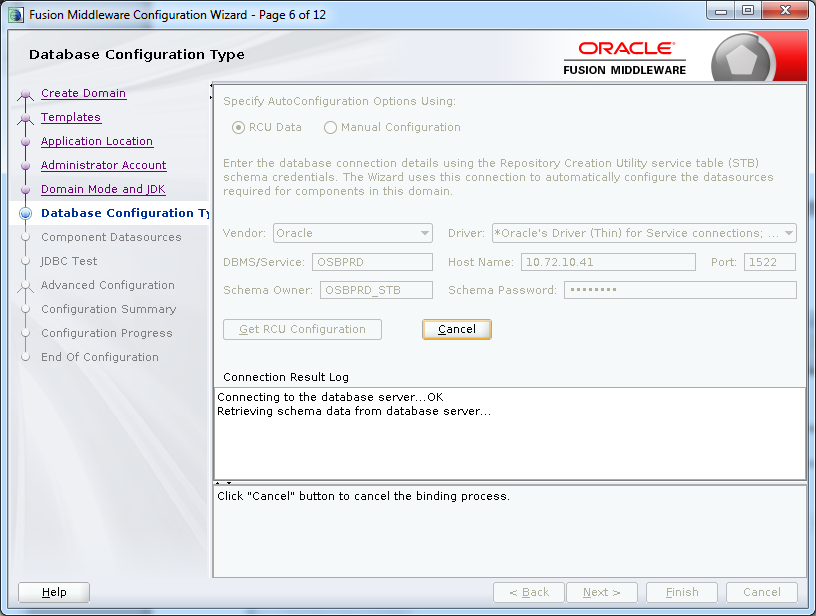
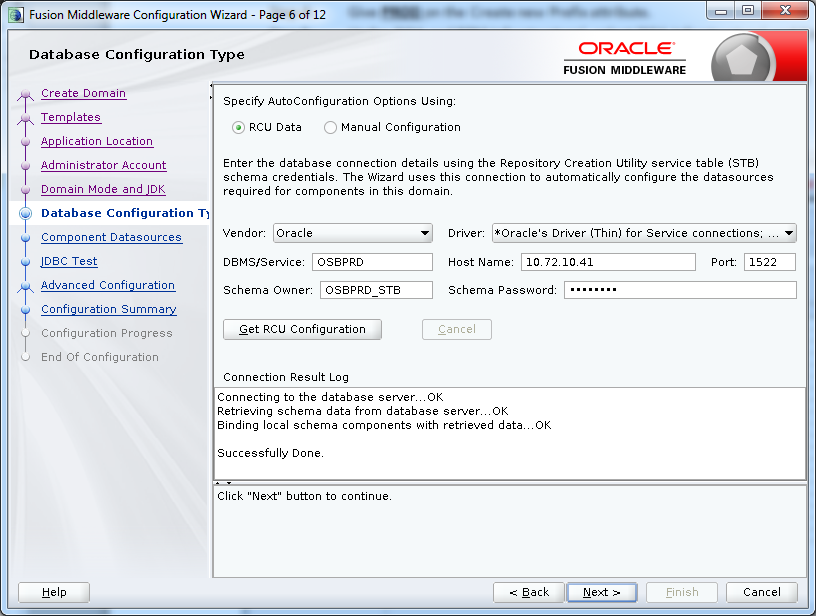
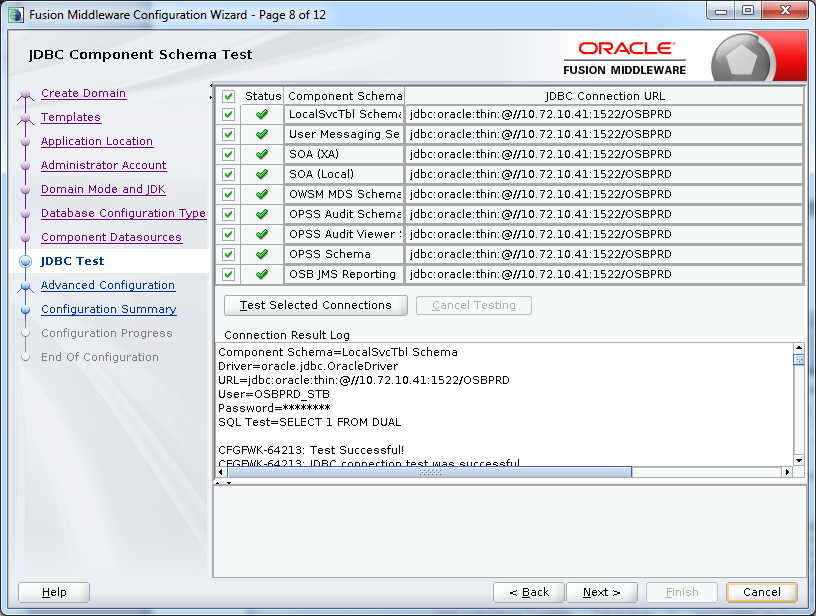
8) Click Get RCU Configuration when you finish specifying the database connection information. The following output in the Connection Result Log indicates that the operating succeeded:

Verify that the values on the JDBC Component Schema screen are correct for all schemas. If you selected RCU Data on the previous screen, the schema table should already be populated appropriately.
To complete domain configuration for the topology, select the following options on the Advanced Configuration screen:
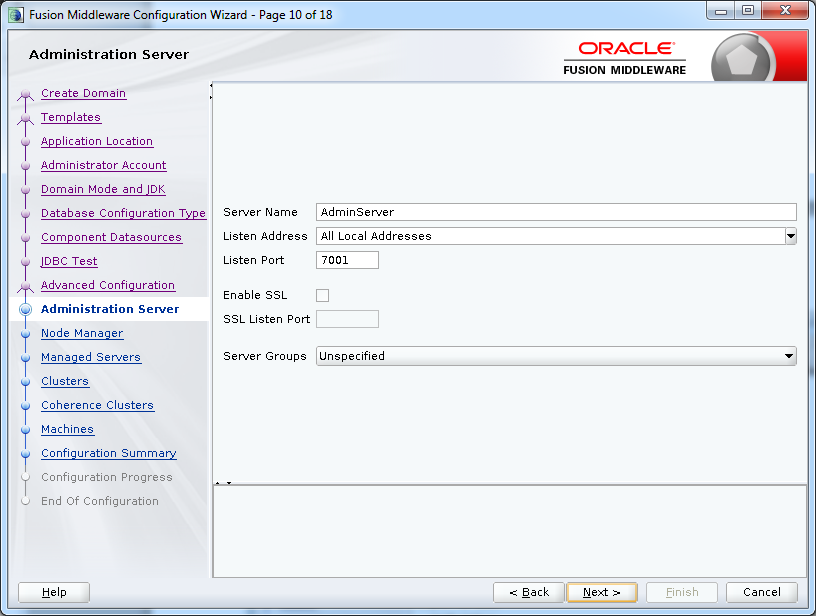
- Administration Server: This is required to properly configure the listen address of the Administration Server.
- Node Manager:This is required to configure Node Manager.
- Managed Server, Clusters and Coherence
This is required to configure the Oracle Service Bus Managed Server.

On the Administration Server screen, select the drop-down list next to Listen Address and select “All Local Addresses.” and click Next
The Node Manager screen can be used to select the type of Node Manager you want to configure, along with the Node Manager credentials.
Select Per Domain Default Location as the Node Manager type, then specify the Node Manager credentials.

On the Managed Servers screen, a new Managed Server named osb_server1 is created:
In the Listen Address drop-down list, select All Local Addresses. Verify that OSB-MGD-SVRS-COMBINED is selected in the Server Group.
If you want to have OWSMPM in a different server from the OSB server, select OSB-MGD-SVRS-ONLY. This targets only OSB but not OWSMPM to the server.

Click Next as we are not doing clustering as part of this article

Click Next

Use the Machines screen to create a new machine in the domain. A machine is required in order for the Node Manager to be able to start and stop the servers.
Click Add to create a new machine.
- Specify UnixMachine_1 in the Name field.
- In the Node Manager Listen Address field, select All Local Address.
- Verify the port in the Node Manager Listen Port field.
- The port number 5556, shown in this example. Replace this port number with your own port number as needed.

Use the Assign Servers to Machines screen to assign the Administration Server and Managed Servers to the new machine we just created:

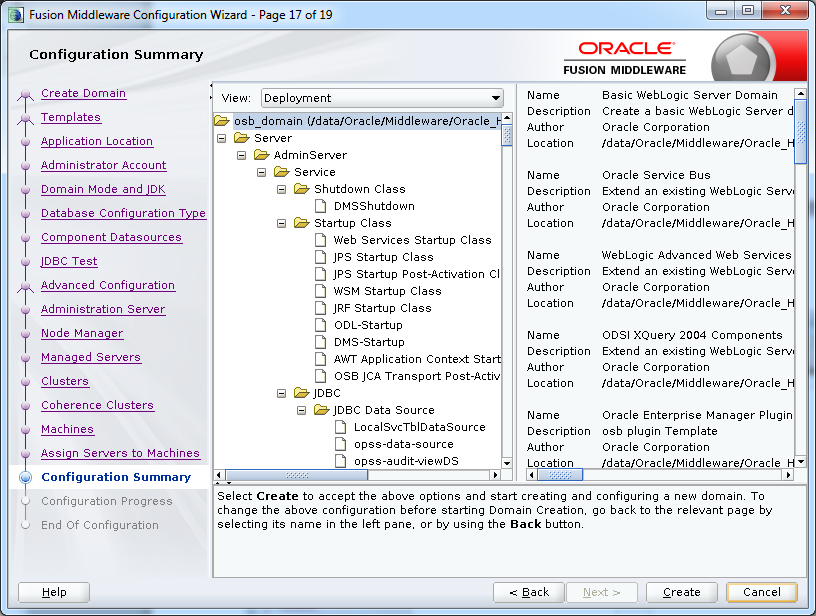
The Configuration Summary screen contains the detailed configuration information for the domain you are about to create. Review the details of each item on the screen and verify that the information is correct.
Screen shows the domain creation progress. Click Next

The Configuration Success screen will show the following items about the domain you just configured:
- Domain Location
- Administration Server URL

You must make a note of both items as you will need them later; the domain location is needed to access the scripts used to start the Node Manager and Administration Server, and the URL is needed to access the Administration Server.
Click Finish to dismiss the configuration wizard.
Follow the oracle blog to know more..
Hi Ankur,
How to automate "OSB Domain Creation" using command prompt.In any response file have please help us
Hi Thiru,
Try WLST command to create domain using command prompt.
Regards,
Ankur
I need .py file for domain creation pls help us
Thankyou for sharingerp software