OSB Schema Creation Using Repository Creation Utility (RCU)
The RCU or the Repository Creation Utility is an Oracle utility that creates the schemas required for Oracle products to work along with the Weblogic server and OSB. We have to create the schemas needed by OSB using this utility. The RCU will be run from the Oracle middleware directory where the weblgic server installed.
In my previous blog i have installed the Oracle Service Bus 12.1.3.
RCU comes bundled with Oracle SOA Suite 12c installation and can be run from the $MIDDLEWARE_HOME/oracle_common/bin folder. For windows its rcu.bat and for Linux its rcu.sh.
Before installation, make sure database is up and running.
1) Install Xming on the machine from where you want to make the installation. Xming is used to work with the user interface during installation.
2) Xming must be up and running on the machine from where you want to make the installation
3) Enable GUI using putty via Connection-> SSH->X11

4) Login into the putty with the suitable privileges. Navigate to oracle_common/bin and execute RCU
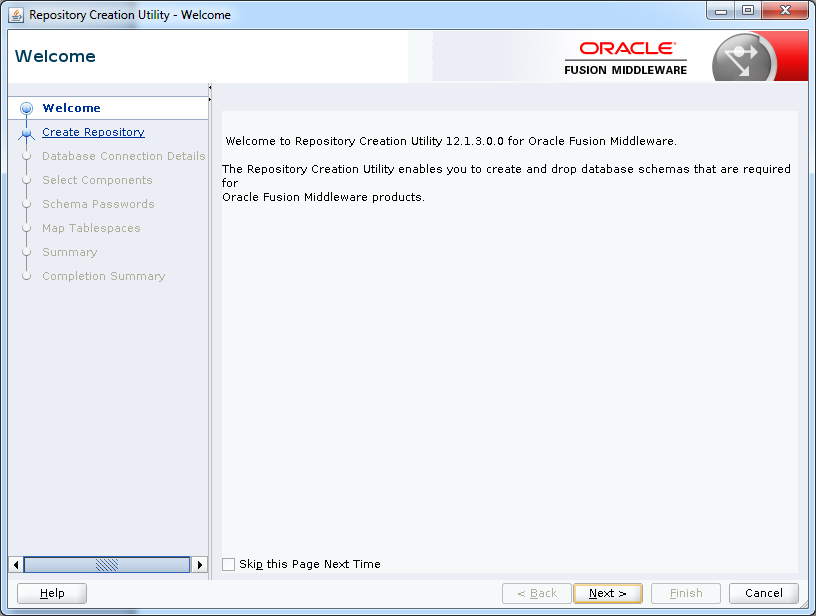
5) Click Next on the welcome screen
6) Select “System Load and Product Load” under “Create Repository” section and click Next.
There are more options compared to the previous version 11g.
Select a Method of Schema Creation
- System Load and Product Load: Use this option if you have SYSDBA credentials.
- Prepare Scripts for System Load: This option will generate an SQL script, which can be provided to your database administrator.
- Perform Product Load: Select this option to load and create procedures, functions, tables, indexes and other objects within schema and run any action if you have a user with limited database privileges.
- Drop Schema: Drop Schemas that are already created in the database.

7) Provide the database connection details for RCU to connect to your database. You must provide the following information:
- Database Type
- Host Name
- Port
- Service Name
- Username
- Password
- Role

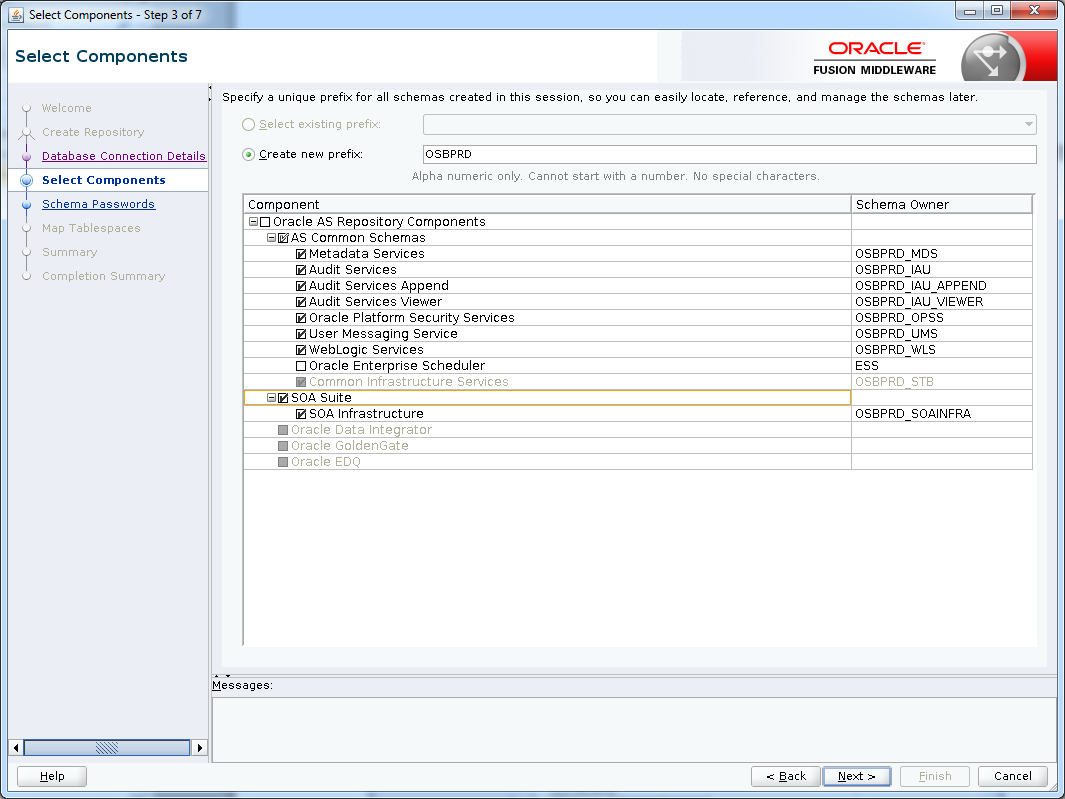
8) Select Create new prefix, specify a custom prefix(OSBPROD), then select the SOA Suite schema. This will automatically select SOA Infrastructure, along with the following schemas as dependencies:
- Metadata Services
- Audit Services
- Audit Services Append
- Audit Services Viewer
- Oracle Platform Security Services
- User Messaging Service
- WebLogic Services
9) Provide a password for your schema and click Next

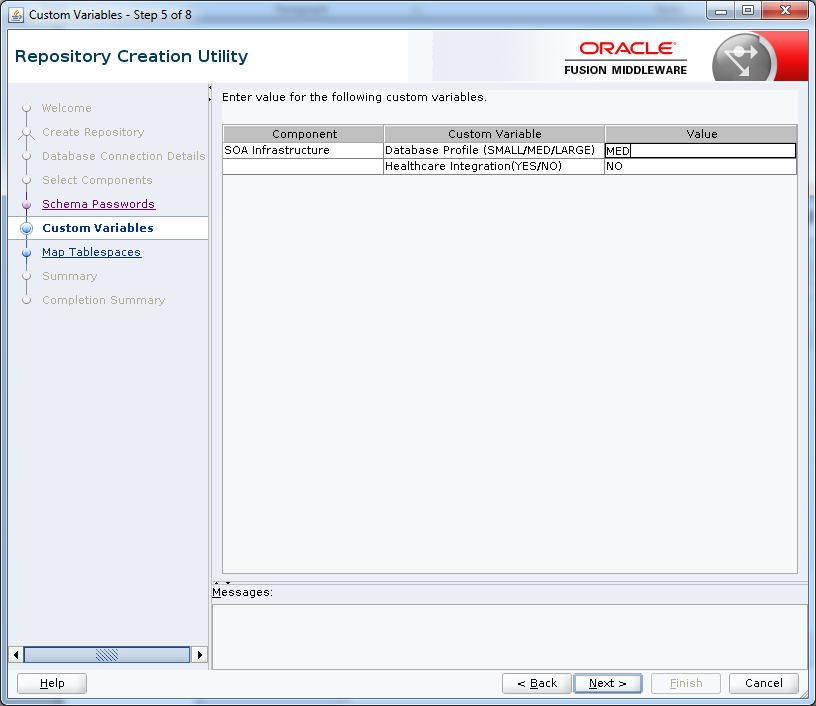
10) Specify the custom variables for the SOA Infrastructure schema. For the Oracle Service Bus standard installation topology, accept both default values for the Database Profile (SMALL) and Healthcare Integration (NO). But we have changed Database Profile value to MED as per the requirement.
Remember: you can use this screen for
The Database Profiles custom variable SMALL or MEDIUM and LARGE.
- If you enter SMALL or MEDIUM as the database profile, that means the RCU performs no special actions when the schema is created. this options should be selected for informational purposes only.
- If you enter LARGE as the database profile, that means the RCU creates the SOA Infrastructure schema using an Oracle database feature called Interval Partitioning. which improves the efficiency of the database when large numbers of composite applications must be processed.
- If you have Healthcare Integration set the value to Yes. If you do not set this value now, the Healthcare Integration user interface will not work properly
11) Verify the default table spaces and click Next. Customize table spaces by clicking Manage Table Spaces if required.

12) Click OK to confirm table space creation.

13) Verify the details on the summary screen and click Create

14) Schema creation is in progress
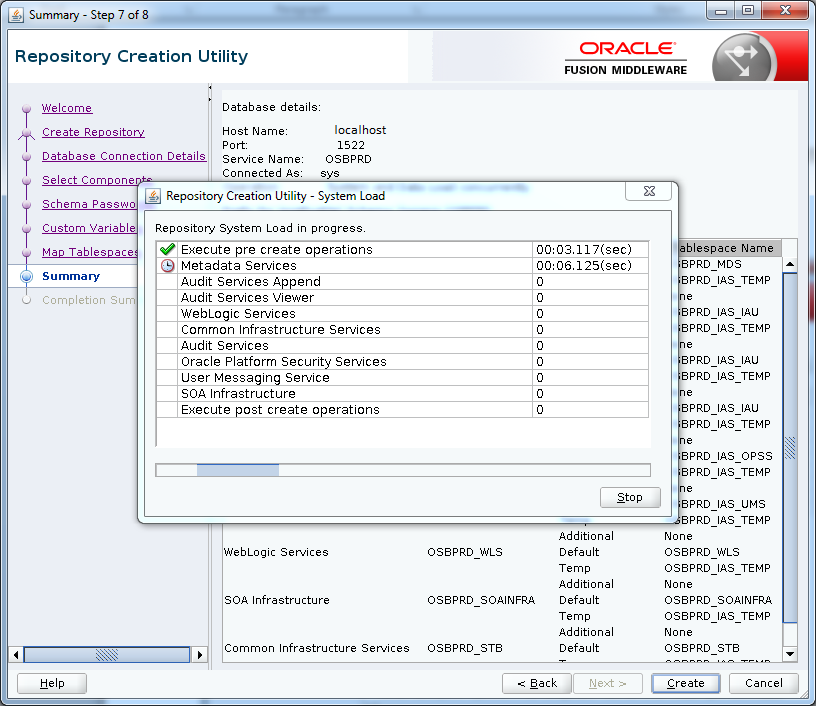
15) Verify the status of schema creation for each component and click close.

For more information, please look the oracle blog
Good contentcustomized erp solutions in india