Leverage Microsoft Email Adapter to send email using Oracle Integration Cloud (OIC) (Part-1)
Though Oracle Integration Cloud provides Notification Activity which is used to send an Email notification to any number of recipients at a time. However, there is such a situation where the Notification activity doesn’t full fill the purpose.
Configure MS Email adapter in Oracle Integration Cloud

For example: If there is a requirement where the email notification is required along with attachment then in that case, Notification activity will not full fill the purpose. In such scenarios, the MS email adapter will help to send an email along with Attachments.
We are splitting the article into two parts:
In the first part, we’ll show how to send email notification using the MS email adapter
In second part, we’ll show how to send email notification along with attachment using MS email adapter.
In the first part, we’ll create scheduler integration which will send a notification to the single recipient.
Below are the high-level activities which need to perform to achieve the use case
- Configure MS Email adapter in Oracle Integration Cloud
- Create Scheduled Integration
Important Blogs to learn more about Oracle ICS / OIC
Configure MS Email adapter in Oracle Integration Cloud
Follow the blog to see how to configure MS email adapter.
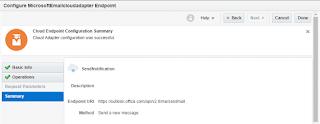
While configuring the email adapter, we had provided https://outlook.office.com/Mail.ReadWrite offline_access as a scope. Since we are sending an email instead of reading email then scope must be changed. So in this case scope will be https://outlook.office.com/Mail.Send offline_access
Create Scheduled Integration
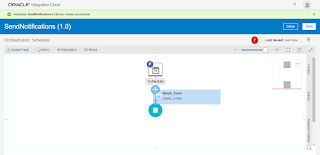
- Create a scheduled integration with name SendNotifications. Follow the blog to see how to create scheduled integration
- Drop the MS email adapter connection just below the Schedule activity

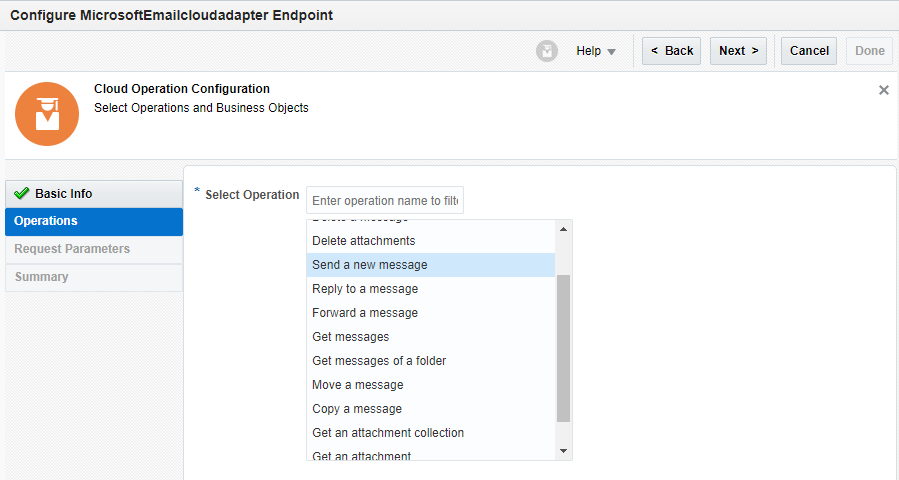
- Enter any name in What do you want to call your endpoint and click Next
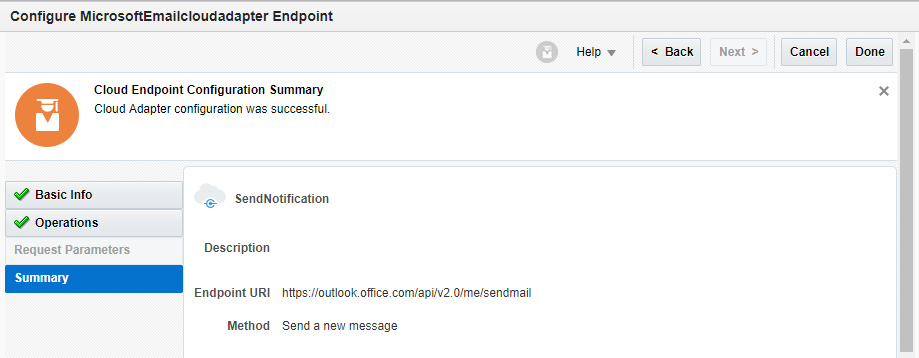
- Select Send a new Message Operation and click Next
- Click Done button on Next screen to complete configuration wizard
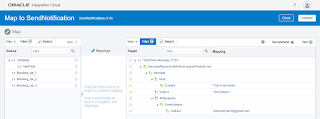
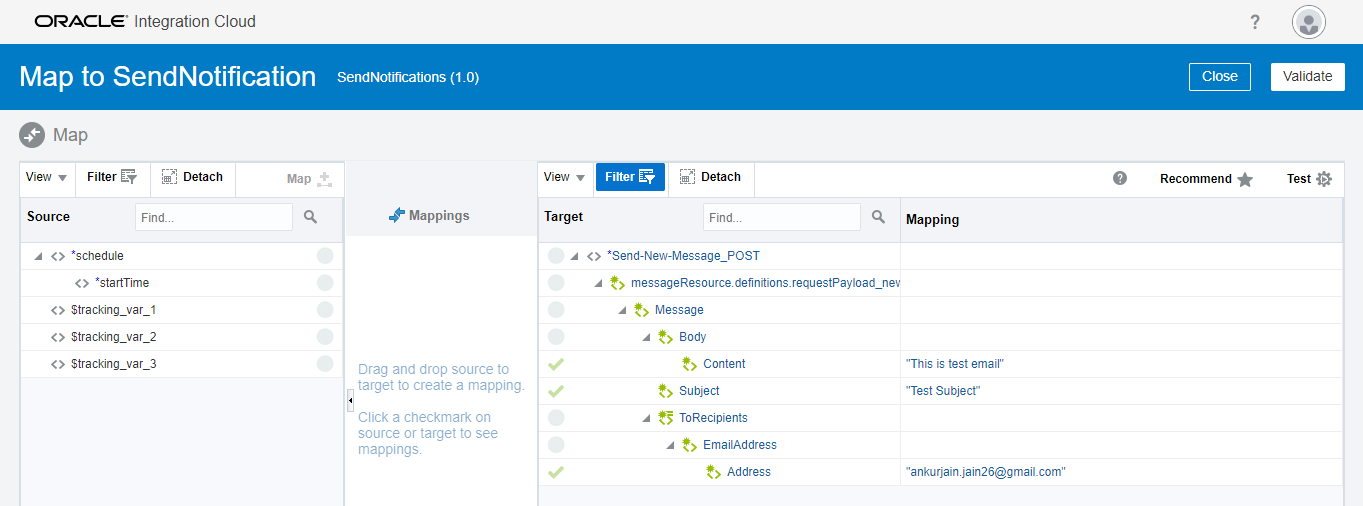
- Open the Mapper, expand Message object and map values in the below attributes. Hard code the value as of now
- Body -> Content
- ToRecipients -> EmailAddress -> Address
- Subject
- Save and Activate the Integration
- Submit the Integration and see the notification should reach to the configured Recipient
hi Ankur,
Great Blog, really helpful, just one question can you please tell how can I add multiple addresses in the ToRecipients list
ToRecipients element is repeating element. Right click on the ToRecipients and from the menu click repeating element which will add one more ToRecipients. That extra element will allow to add one more recipients.
Regards,
Ankkur
Thanks Ankur, Appreciate it!!
I have gone through your blog, it was very much useful for me and because of your blog, and also I gained many unknown information, the way you have clearly explained is really fantastic. Kindly post more like this, Thank You.
Air hostess training in Chennai
Air Hostess Training Institute in chennai
air hostess academy in chennai
air hostess course in chennai
Hi Ankur,
Nice blog. I followed similar steps but I am receiving below error when run
<![CDATA[{"error":"invalid_request","error_description":"AADSTS90009: Application 'c809e14d-6a0f-4a3a-aef3-a479c0a52612'(api://8c5bc533-85e7-4ecd-941f-0c41a3bdcab0) is requesting a token for itself. This scenario is supported only if resource is specified using the GUID based App Identifier.
I think probably tenant ID needs to be passed like POST https://login.microsoftonline.com/{tenant}/oauth2/v2.0/token. But, I am not sure how that can be done. Please help if I am missing something here.
Thanks
Manju