Create an XML file in Oracle Integration Cloud
In the previous article, I have showcased how to read XML files using FTP adapter. This article will show how to create XML files using FTP adapter.
Important Blogs to learn more about Oracle OIC
Use Case: Expose a REST API which will write XML file on FTP.
Post this blog, below XML file will be created on FTP location
<?xml version=”1.0″ encoding=”UTF-8″ ?>
<employees>
<employee>
<name>ankur</name>
<skills>ICS</skills>
</employee>
<employee>
<name>jain</name>
<skills>java</skills>
</employee>
</employees>
Let’s see how to achieve this use case
- Create a FTP connection: Please go through the article to see how to create FTP connection
- Create a REST connection. Please go through the article to see how to create REST connection
- Go the the Integrations and click on the Create button from the upper right coner and select “App Driven Orchestration“
- Enter the Integration name as “WriteXMLFile” and click on the Create button.
- Select inline drag REST connection on the Integration canvas as a Trigger point
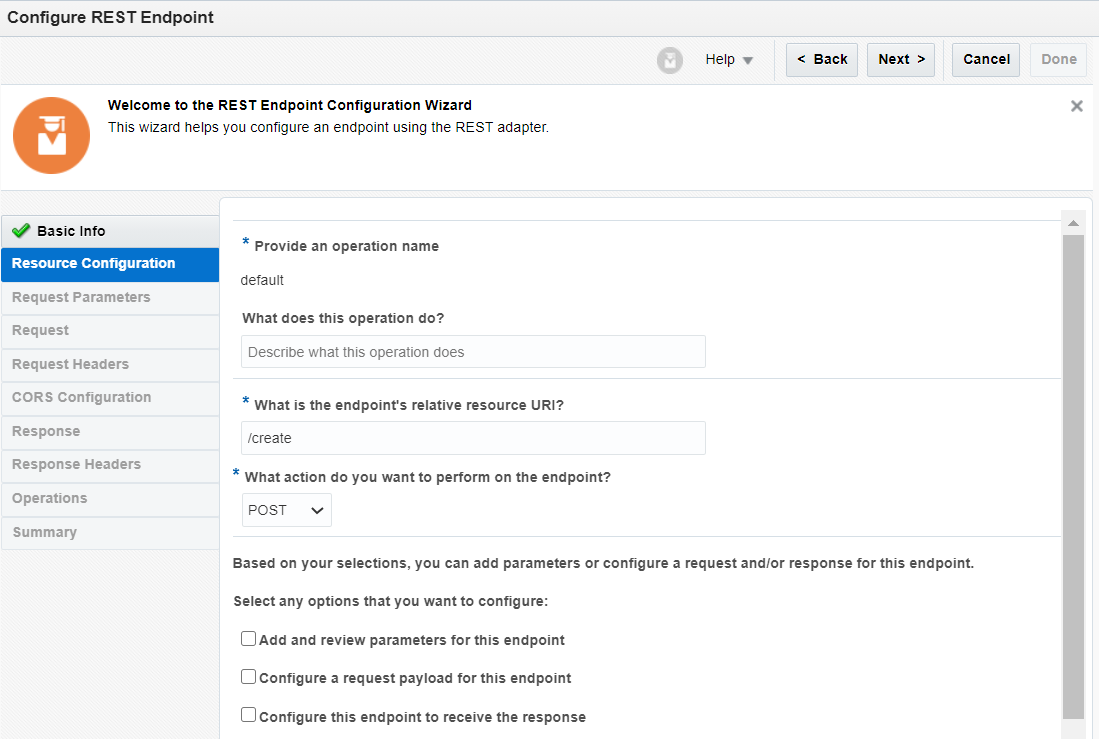
- Enter below information and click on the Next button
- Name of the end point: WriteXML
- Enter below information and click on the Next button
- What is the endpoint’s relative resource URI: /create
- What action do you want to perform on the endpoint: POST
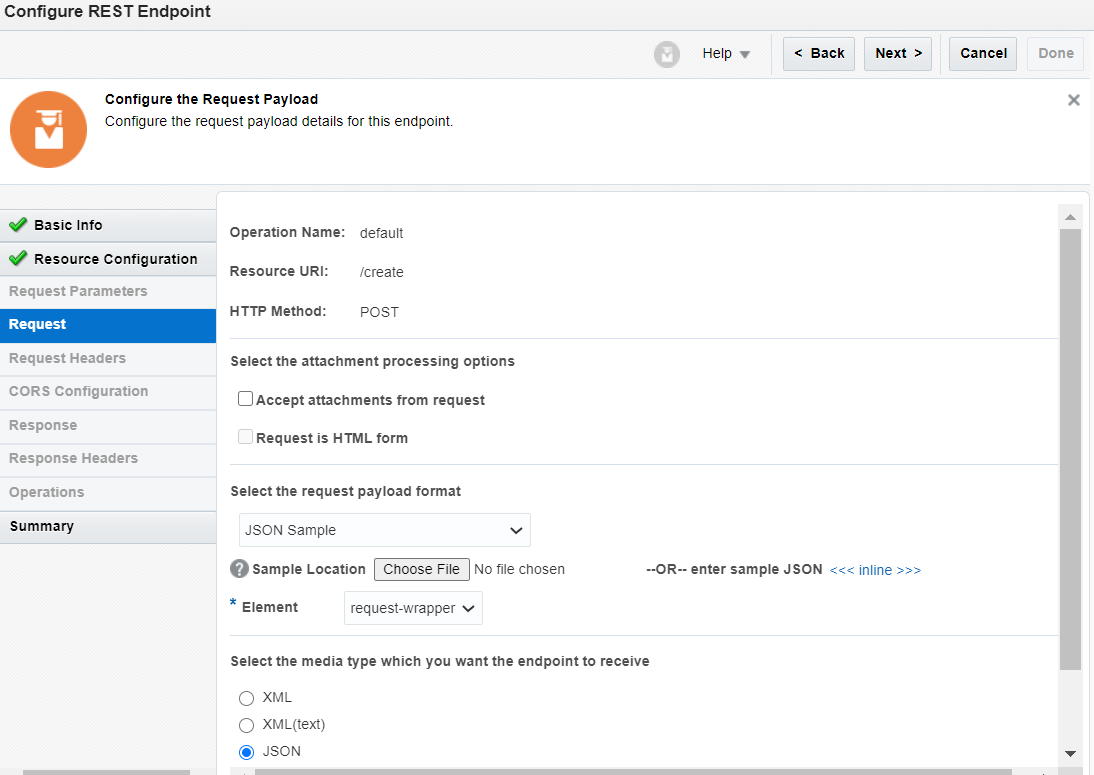
- Select Configure a request payload for this endpoint checkbox- This option allows us to assign payload in the next step
- Select JSON Sample from the Select the request payload format drop down and then Select <<<inline>>> link to configure sample payload and enter below payload
{
“employee”:[
{
“name”:”ankur”,
“skills”:”ICS”
},
{
“name”:”Anil”,
“skills”:”Java”
}
]
}
“employee”:[
{
“name”:”ankur”,
“skills”:”ICS”
},
{
“name”:”Anil”,
“skills”:”Java”
}
]
}
- Click Done button from the Next Screen to complete the wizard
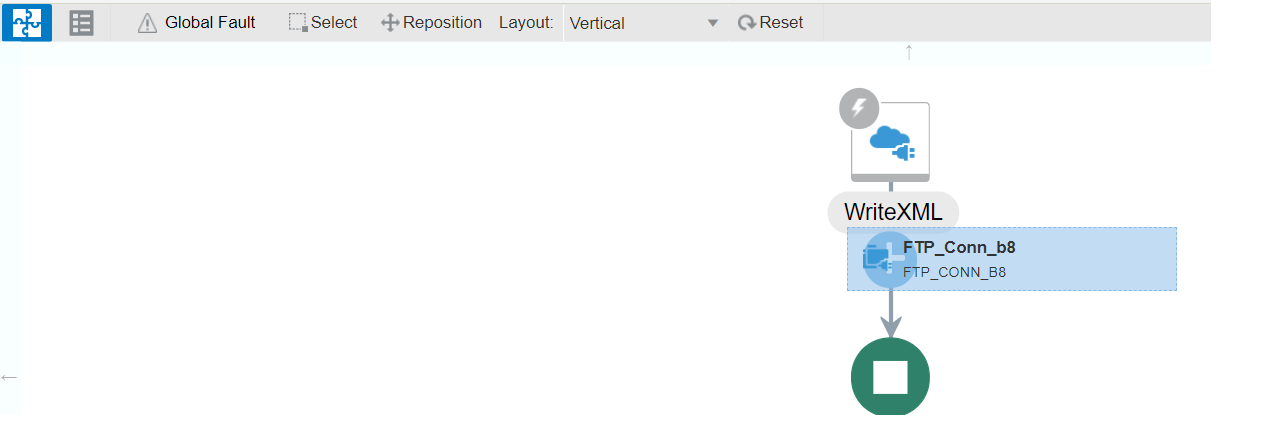
- Drop FTP connection just below the REST adapter
- Enter the endpoint name as “WriteXMLFile” and click on the Next button
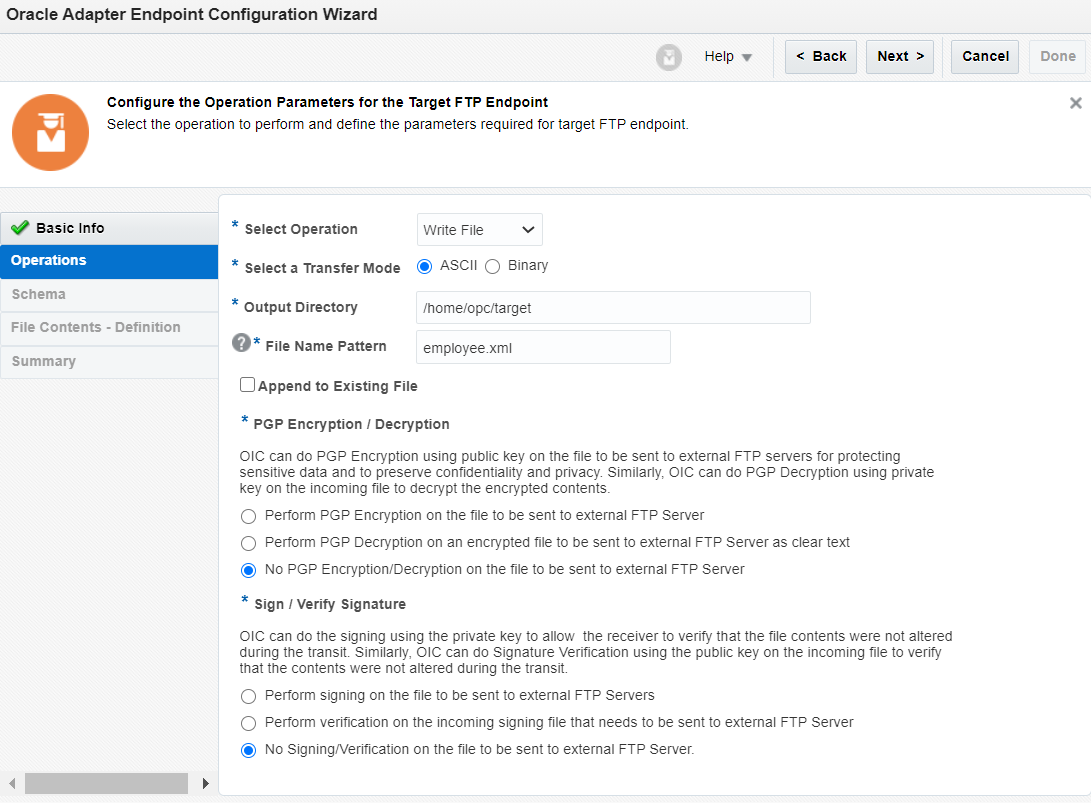
- Enter below information and click on the Next button
- Select Operation: Write File
- Select a Transfer mode: ASCII
- Output Directory: Enter the directory as /home/opc/target
- File Name Pattern: Enter employee.xml
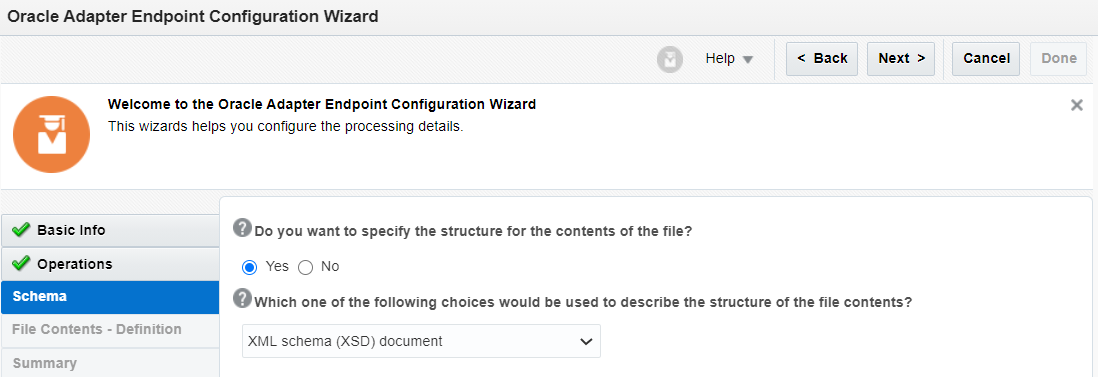
- Select “Yes” from Do you want to specify the structure for the content o the file? and select “XML schema (XSD) document from the drop down.
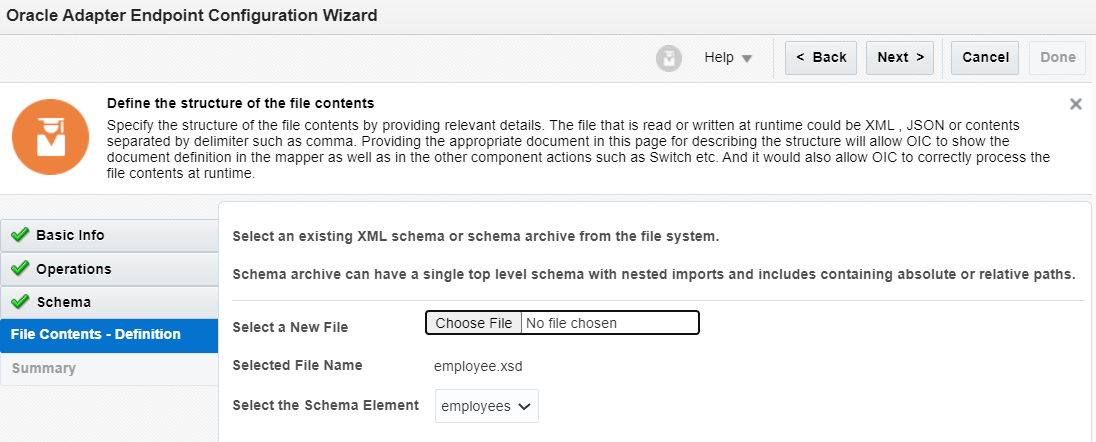
- Save below xsd in file and browse
<xs:schema attributeFormDefault=”unqualified” elementFormDefault=”qualified” xmlns:xs=”http://www.w3.org/2001/XMLSchema”>
<xs:element name=”employees”>
<xs:complexType>
<xs:sequence>
<xs:element name=”employee” maxOccurs=”unbounded” minOccurs=”0″>
<xs:complexType>
<xs:sequence>
<xs:element type=”xs:string” name=”name”/>
<xs:element type=”xs:string” name=”skills”/>
</xs:sequence>
</xs:complexType>
</xs:element>
</xs:sequence>
</xs:complexType>
</xs:element>
</xs:schema>
- Click Done on Next screen to finish the wizard
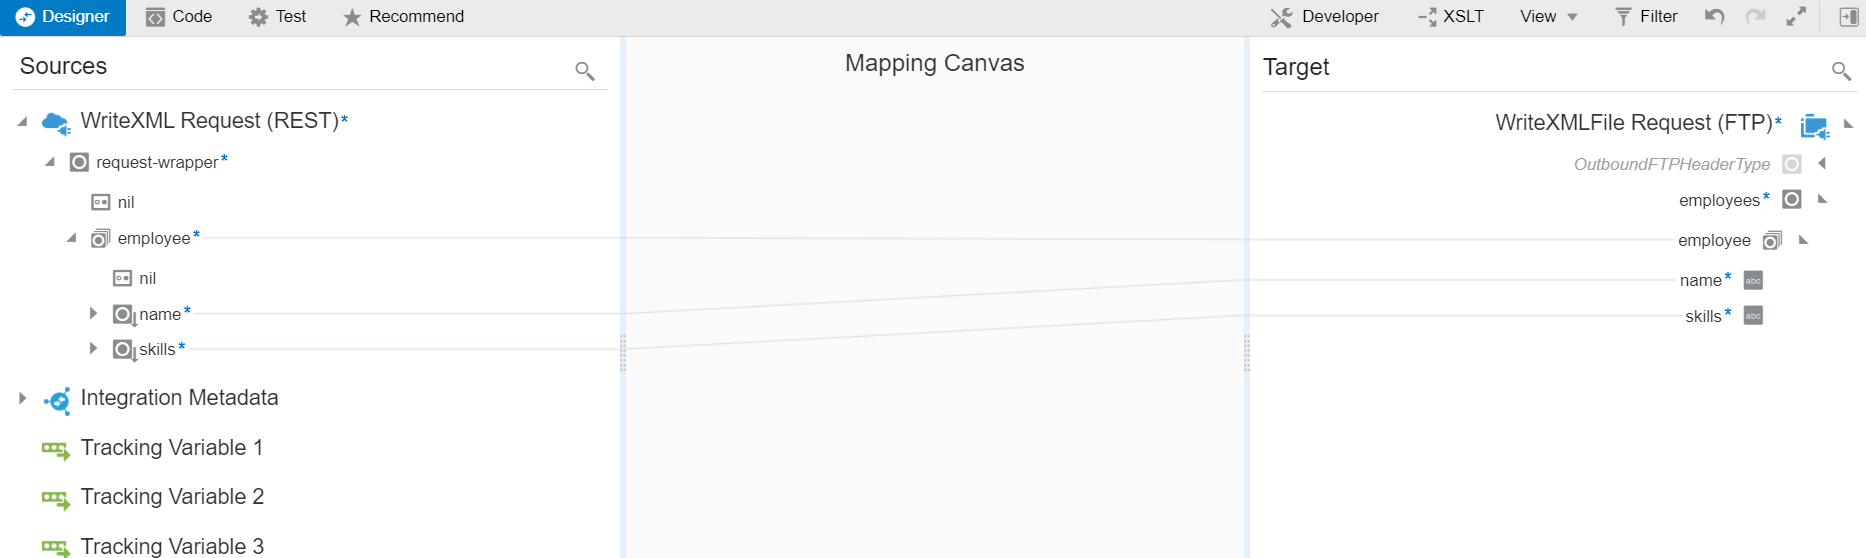
- Edit the WriteXMLFile mapper and map source and target element
- Required configuration has been completed. Let’s save, close and activiate the integratoin now.
- Test the Integration using the inbuit tool by clicking on the Run icon and click on Test
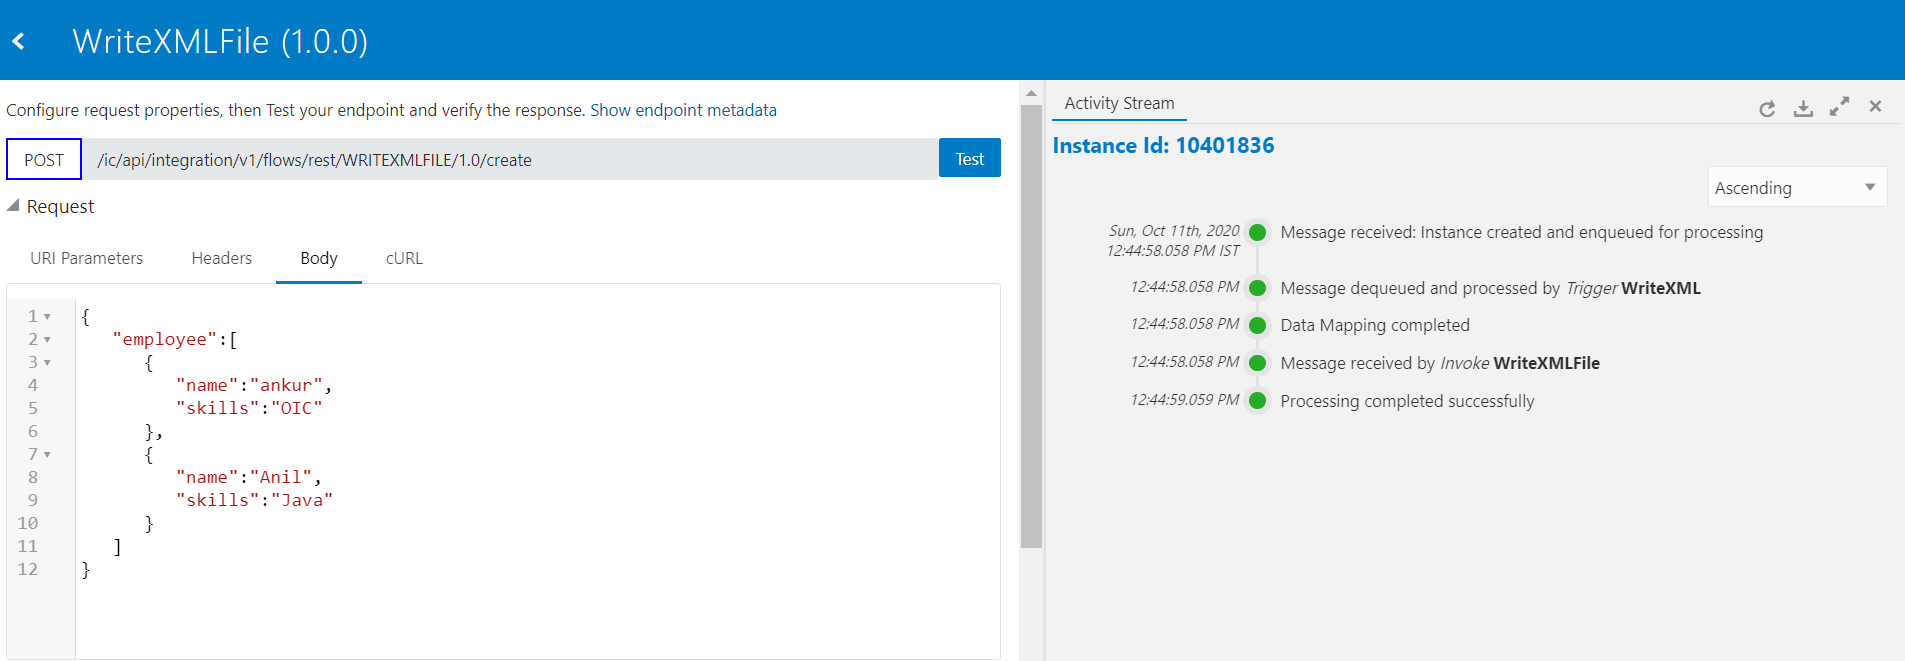
- Open the FTP location and see the employee.xml should be created
Look at my YouTube channel for OIC related video and Subscribe to YouTube channel to get the latest updates.

Wow,great information. I am sure the information on your blog will help others,Thanks.
javascript training in chennai
javascript course in chennai
Hibernate Training in Chennai
core java training in chennai
Spring Training in Chennai
QTP Training in Chennai
Manual Testing Training in Chennai
JMeter Training in Chennai
I gathered lots of information from your blog and it helped me a lot. Keep posting more.
Salesforce Training in Chennai
salesforce training institute in chennai
Salesforce Course
ccna Training in Chennai
Ethical Hacking course in Chennai
PHP Training in Chennai
Web Designing Training in Chennai
Salesforce Training in Anna Nagar
Salesforce Training in Vadapalani
Salesforce Training in Thiruvanmiyur