Access Sharepoint online REST APIs
SharePoint APIs are secured using the OAuth framework. So an access token is required to make rest calls to SharePoint APIs to pull/push data.


There are many ways to authenticate the SharePoint API:
- User Policy
- Add-In policy
- User + Add-In-Policy
In this article, we’ll how to register an Add-In on SharePoint online which will provide client id and secret. The client id and client secret will be used to authenticate the SharePoint APIs.
So Let’s go ahead and see how to register an Add-In and generate client id and secret
- .Enter below URL in the browser which will open the form to generate client id and secret
https://<sitename>.sharePoint.com/_layouts/15/appregnew.aspx
Replace the <sitename> with the actual Share Point site name
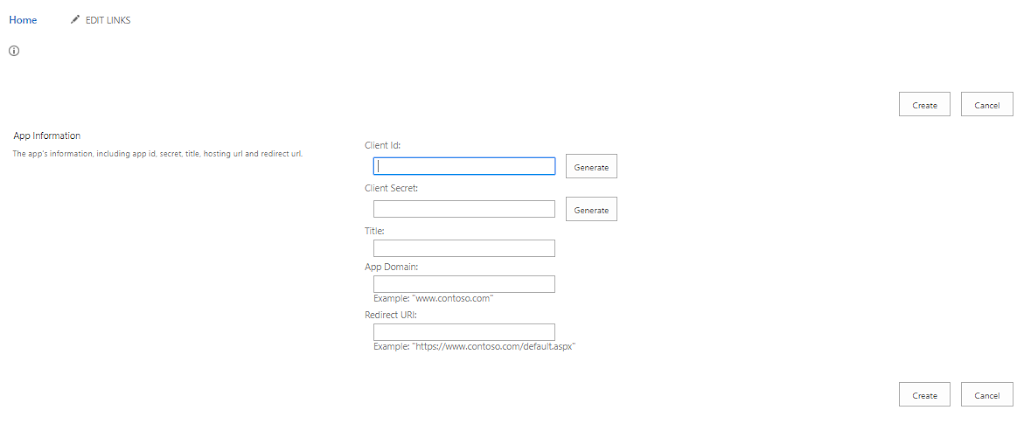
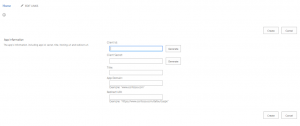
- On the App Information page enter below information and click Create button
- Client Id: Click on the Generate button which will generate the Client id
- Client Secret: Click on the Generate button which will generate the Client Secret
- Title: Any title of your choice
- App Domain: localhost
- Redirect URL: https://localhost
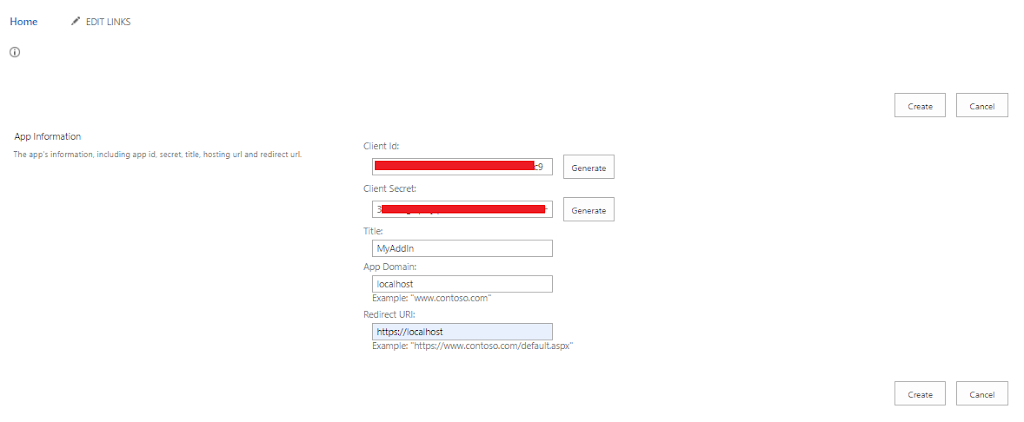
- Keep the client id and secret secure and Click on the Ok button

Using the above steps we have registered an Add-In, which has provided client id and secret
Below steps will be used to grant the permission to Add-In
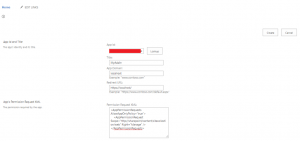
- Enter below URL in the browser which will allow granting Add-In permission
https://<sitename>.sharepoint.com/_layouts/15/appinv.aspx
Replace the <sitename> with the actual Share Point site name
- Enter the client id in the App Id box which was generated in the earlier step and click on the Lookup button. This will search the registered Add-In and all information will be populated automatically
- Enter the below XML in the Permission Request XML text box
<AppPermissionRequests AllowAppOnlyPolicy=”true”>
<AppPermissionRequest Scope=”http://sharepoint/content/sitecollection/web” Right=”Manage” />
</AppPermissionRequests>

Notice the Right attribute in which we have configured the value Manage which will help to read/write into the SharePoint site
- Click on the Create button
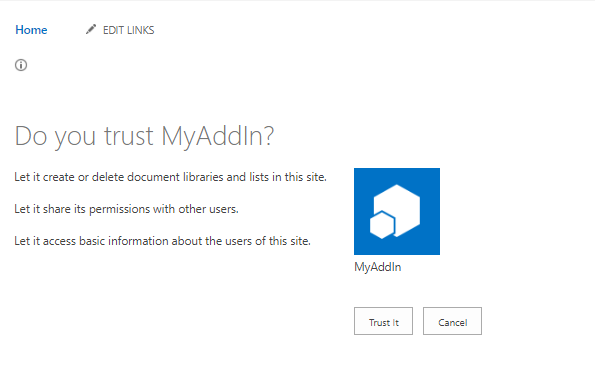
- Post clicking on the Create button the page will be redirected to the page where we have to Trust the add-in to manage the site
Now we have generated the client id and client secret. Let’s try to call SharePoint API to create a folder on the SharePoint Site
There are three steps to call the SharePoint APIs:
- Generate the Tenant Id
- Generate the Access token
- Call the SharePoint API to create a folder
Generate the Tenant Id
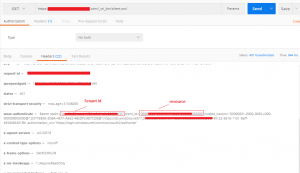
- Enter below URL in the POSTMAN which is of type GET. Add Authorization header with value Bearer and hit the Submit button
https://<sitename>.sharepoint.com/_vti_bin/client.svc/
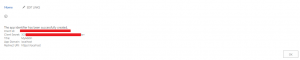
Once the request is submitted, switch the header tab of response and see the Tenant Id and resource value

Generate the Access token
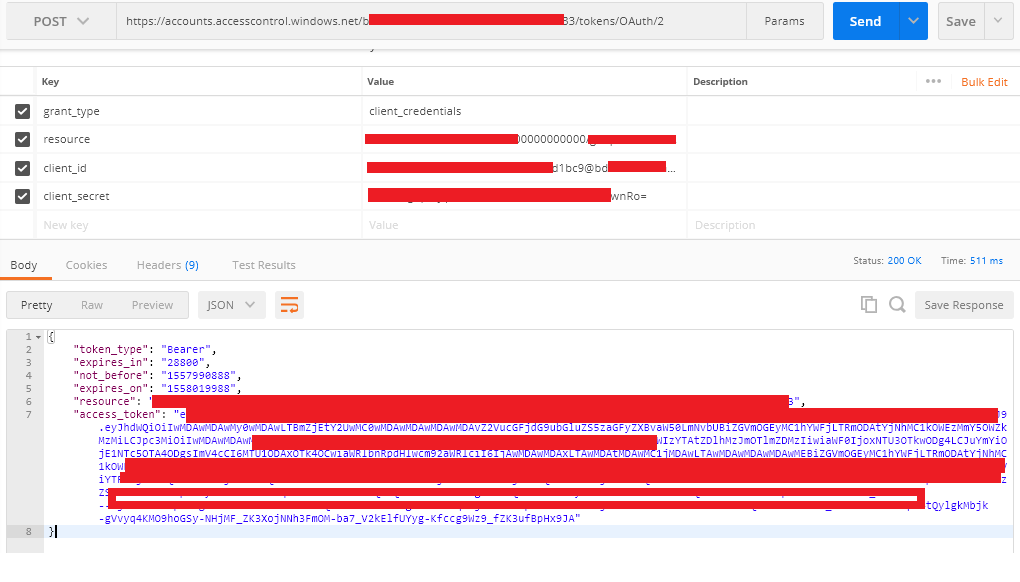
- Hit below API in POSTMAN to generate an access token
URL:
https://accounts.accesscontrol.windows.net/<TenantID>/tokens/OAuth/2
HTTP Verb: POST
Headers:
|
Key
|
Syntax
|
Value
|
|
grant_type
|
client_credentials
|
client_credentials
|
|
client_id
|
ClientID@TenantID
|
A23dcc-313dd-2d1a-003f-11065ww1s11@ewdvf432-hdsa-4f80-b3a0-d9e31f11fd33
|
|
client_secret
|
Client secret
|
Abcde32tFg13+njytr4Khg+asgytwlkn12765nM=
|
|
resource
|
resource/SiteDomain@TenantID
|
00000003-0000-0ff1-ce00-000000000000/online.sharepoint.com@ewdvf432-hdsa-4f80-b3a0-d9e31f11fd33
|
Call the SharePoint API to create a folder
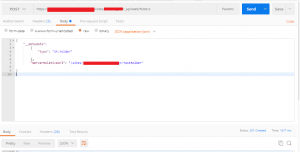
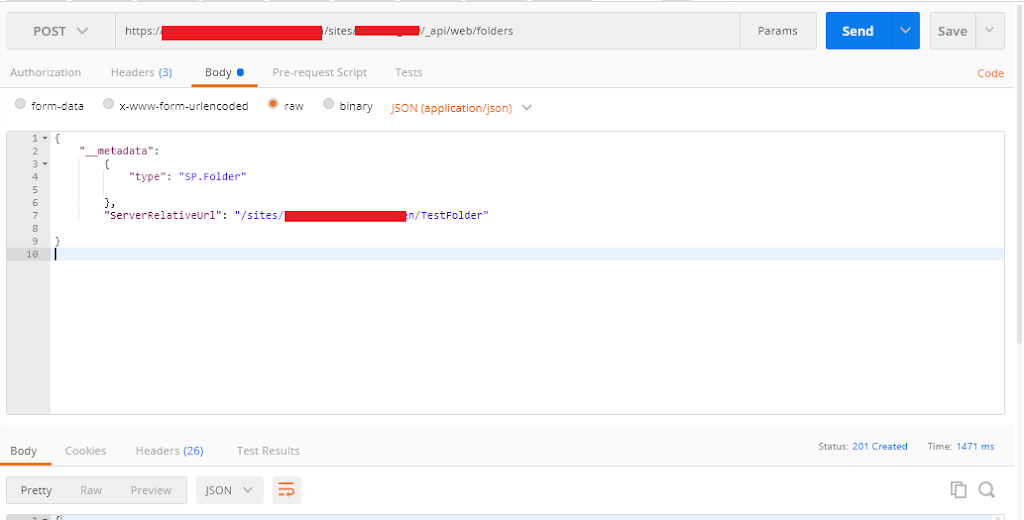
- Hit below API in POSTMAN to create a folder
URL:
https://<sitename>.sharepoint.com/sites/<site>/_api/web/folders
HTTP Verb: POST
Headers:
|
Key
|
Value
|
|
Authorization
|
Bearer <access_token>
|
|
Content-Type
|
application/json;odata=verbose
|
|
Accept
|
application/json;odata=verbose
|
Request Body:
{
“__metadata”:
{
“type”: “SP.Folder”
},
“ServerRelativeUrl”: “/sites/<sitepath>/TestFolder”
}
