A Simple application from Scratch: Oracle Process Cloud
Are you a beginner in Oracle Process Cloud Service and want to learn how to play with this and create processes, forms, etc. So here is the article for you to learn step by step. This guide will only take 30 minutes to complete.
In this article, we will create a simple Leave Requisition process in Oracle Process Cloud Service(PCS) which can help to understand the basics of PCS.
To begin with, you would be needing access to Oracle Process Cloud Service and Sign in Credentials. If you don’t have it right now, create a free 30 days free trial from here
Let’s go ahead and create the process
- Login into the Oracle Process Cloud Service and Click on the Create button
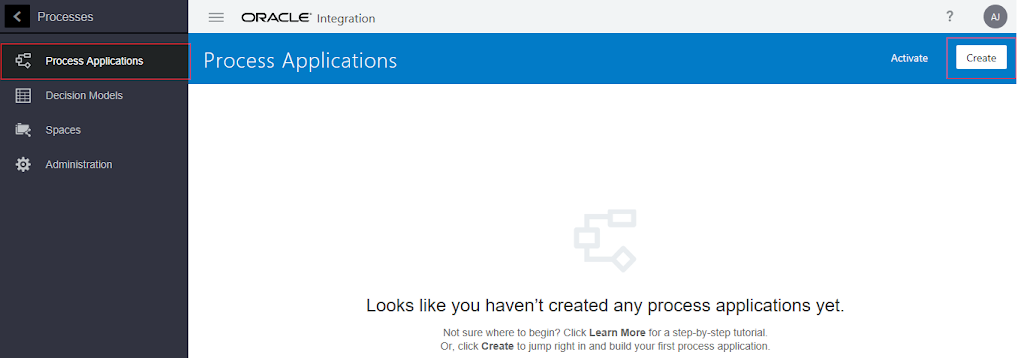
- Click on the Create an Application tile
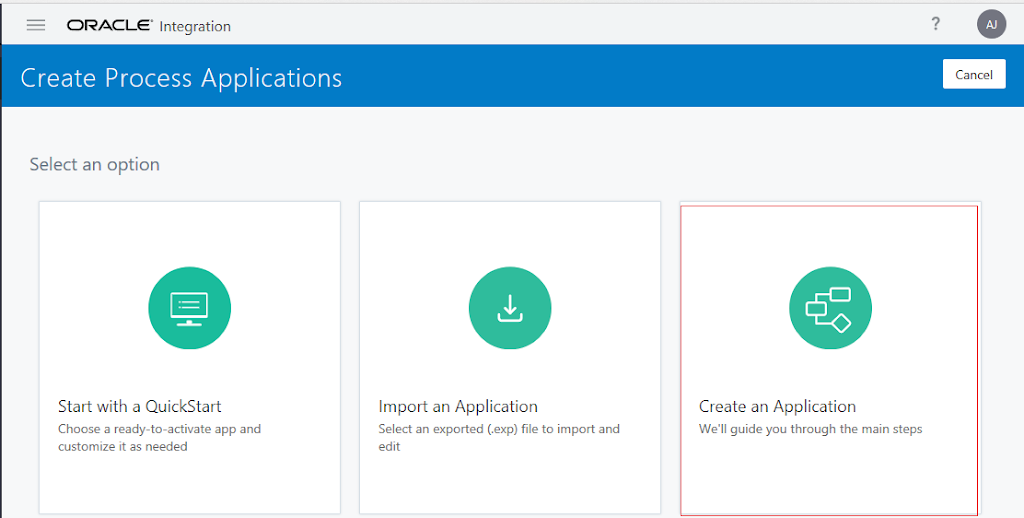
- Enter information as below and Click on the Create
- Name: Enter name of the application of your choice(LeaveRequisitionApp)
- Space: Select the existing Space or Click on New Space(if required)
- New Space: Enter the space name as “HumanResource”
- Description: Enter description optionally
- Open Immediately: Check the checkbox

- Select the Start with a form pattern
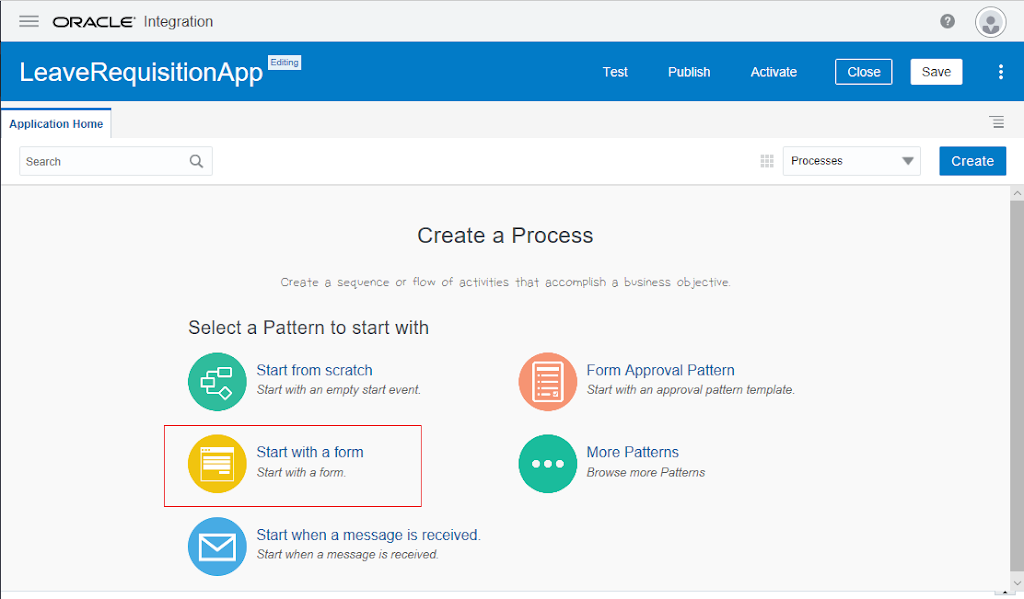
- Once selected, a Create Process popup will come up which will allow you to enter the Process name(LeaveProcess) and the pattern will be selected automatically which we selected in the previous step. Click on the Create button

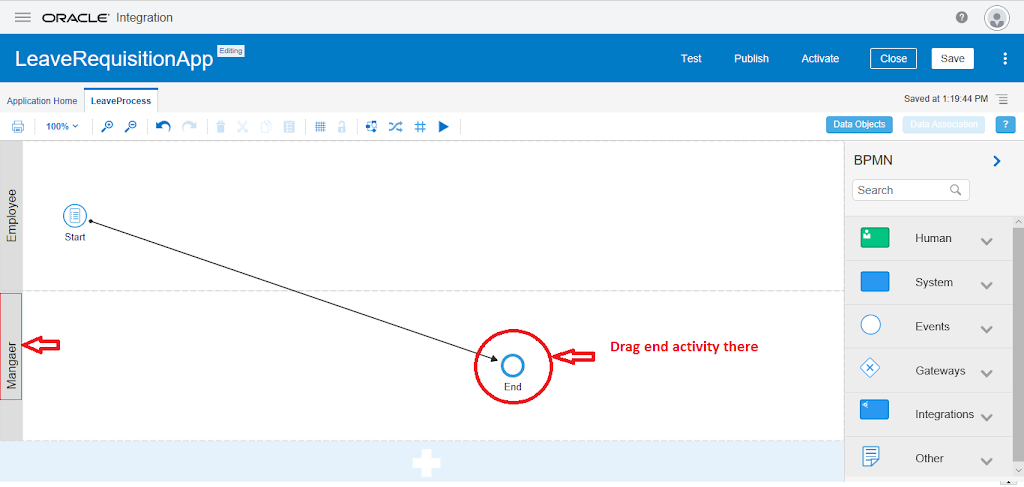
- The process will be opened with the default start and end activity. In the LeaveProcess tab, double-click the gray vertical bar on the left, enter Employee in the role field, and press Enter

- Below the Employee swimlane, click on Create New Lane to add a new lane

- In new Swimlane double-click the gray vertical bar on the left, enter Manager in the role field, and press Enter and drop the End activity in Manager Swimlane
- Expand Human in the Elements Palette, and drag and drop the Approve task to the Manager swimlane in the process flow diagram
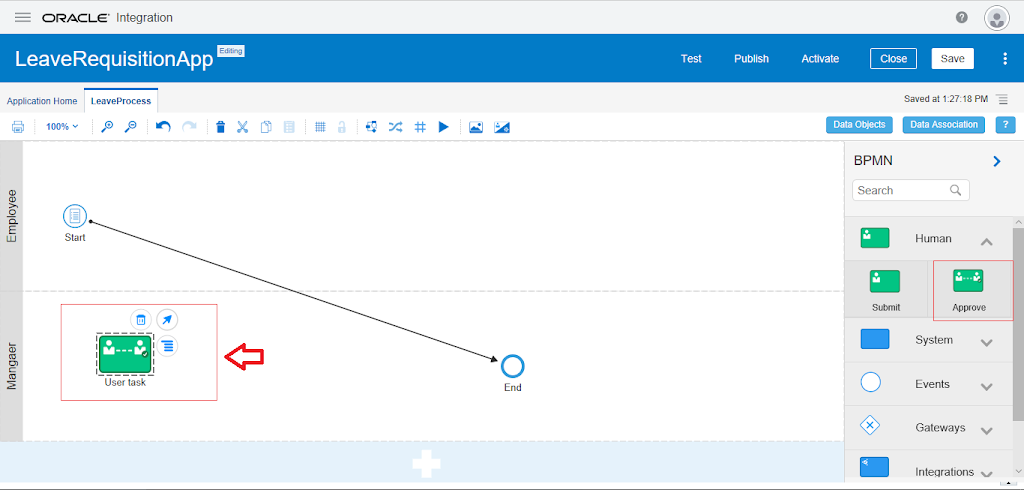
- Select the arrow between the start and end activity and drop on the User Task. Select the User Task, pick the Add Sequence Flow and drag the sequence flow onto the end activity. Once done, the process flow will look like below

Let’s add a web form to the business process with leave request details.
- In the LeaveProcess tab, click Start, click Menu, and select Open Properties

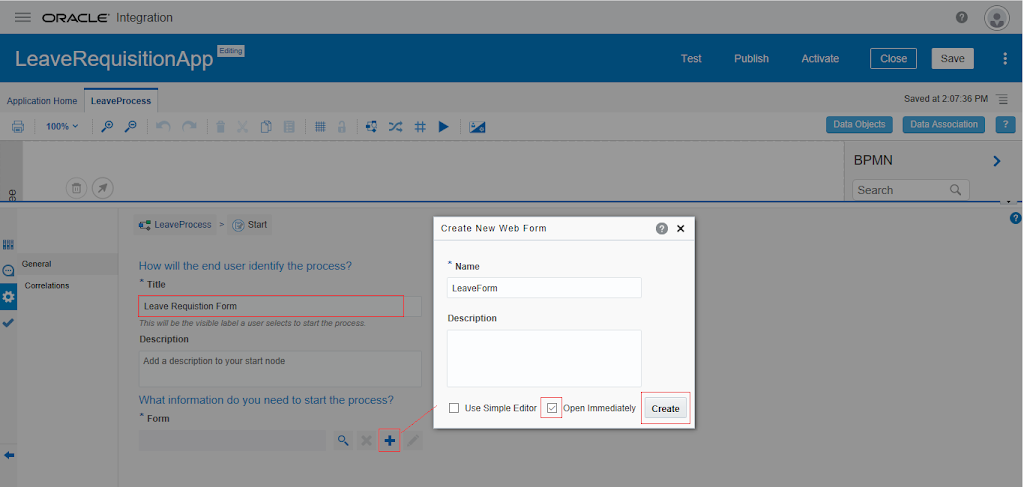
- Enter Title as “Leave Requisition Form”, click + button corresponding to the Form field.
- On the opened popup, enter the form name as “LeaveForm“, select Open Immediately checkbox and click on the Create button
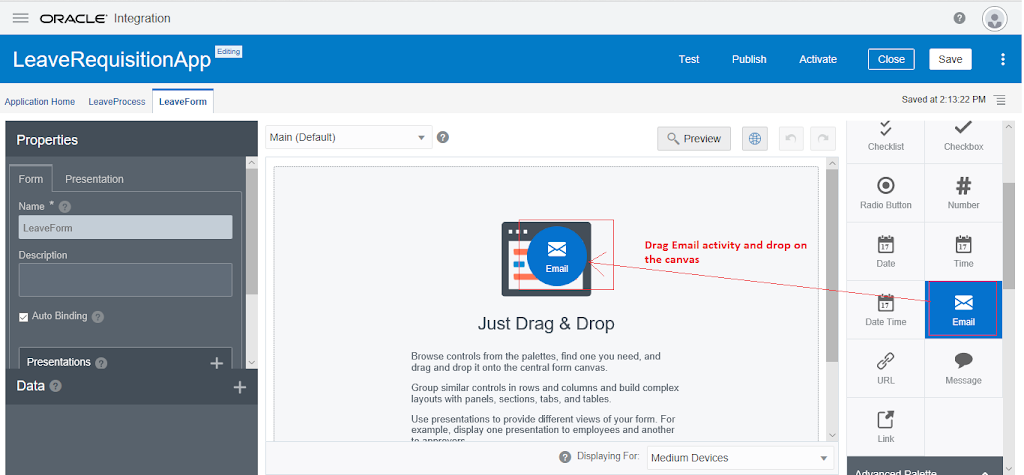
- In the Web Form Designer, drag and drop the Email control from the Basic Palette to the form’s canvas
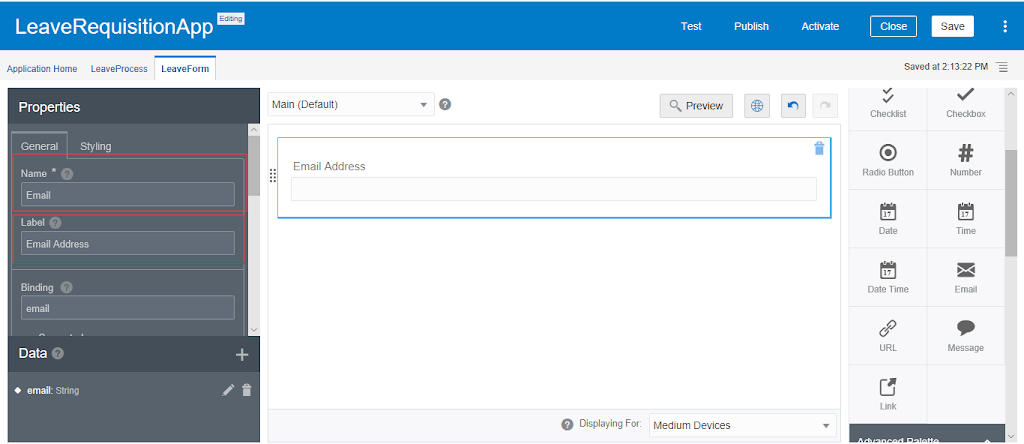
- Select the control and see how the tabs in the Properties pane change to General and Styling. The General tab is selected by default. Click Name and enter “Email“, and then click the Label and enter “Email Address”
- Drag and drop the following controls from the Elements Palette onto the canvas and configure them as follows:
|
Control Name
|
Name
|
Label
|
|
Date
|
From
|
From
|
|
Date
|
To
|
To
|
|
TextArea
|
Reason
|
Reason
|
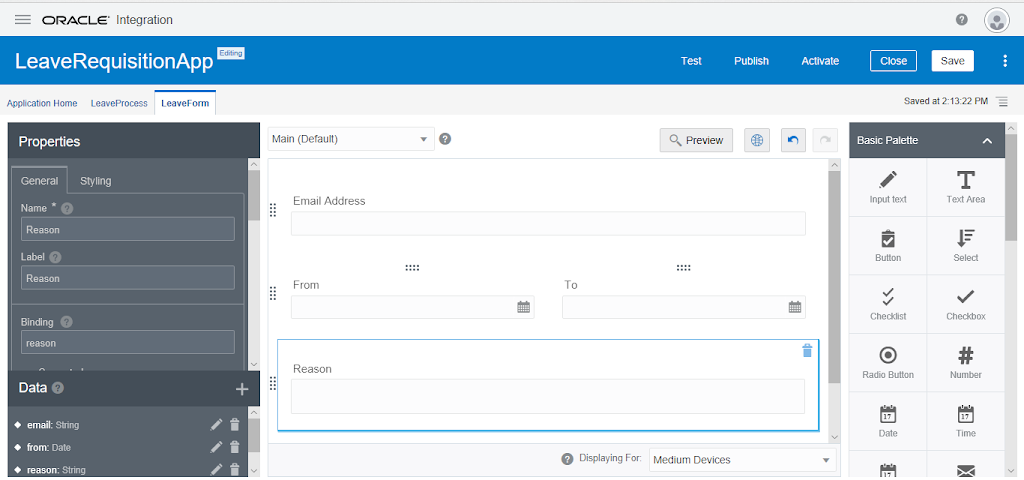
Select the Save button and Close the form
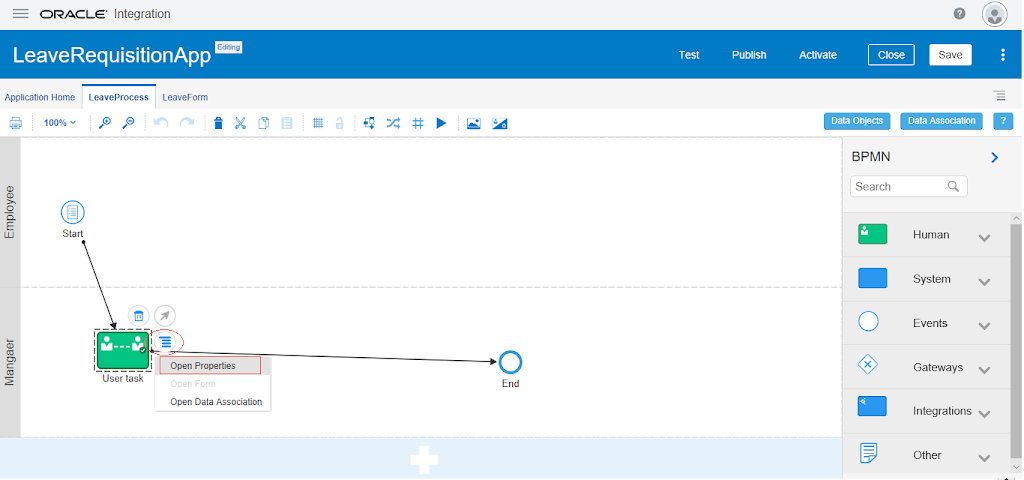
- Open the LeaveProcess tab, click User task, click Menu, and then click Open Properties
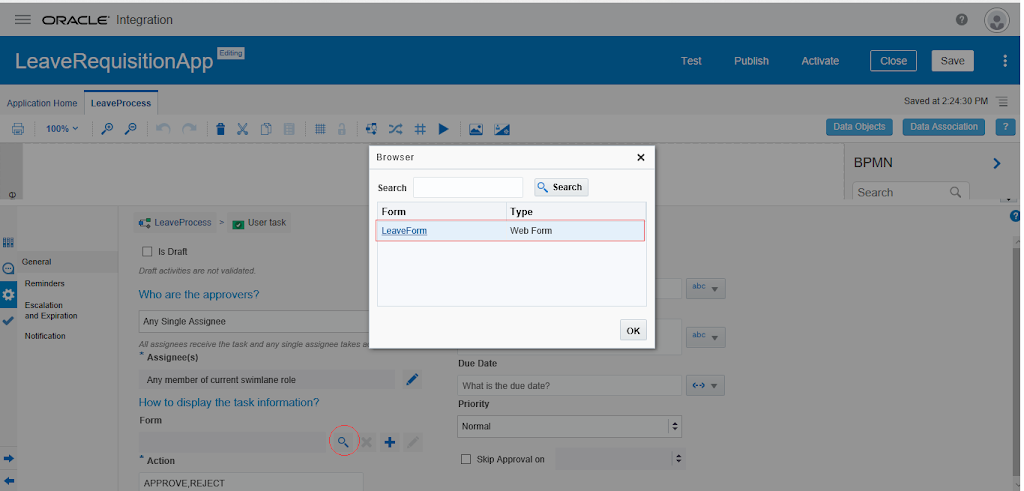
- In the General tab, Click Browse to search from the Form field and select the form (LeaveForm)
- Select Expression Editor corresponding the Title Field
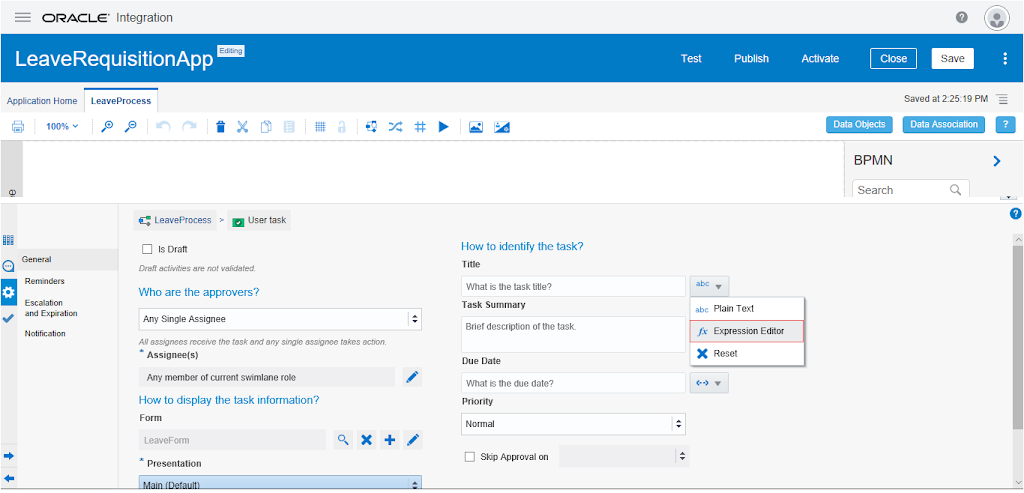
- In the Expression Mode enter below expression:
“Leave Request From “+LeaveForm.from

- Enter the below expression in the Task Summary field:
“Hi, The Leave Travel Request has been raised between ” + LeaveForm.from + ” to ” + LeaveForm.to + ” for the reason ” + LeaveForm.reason
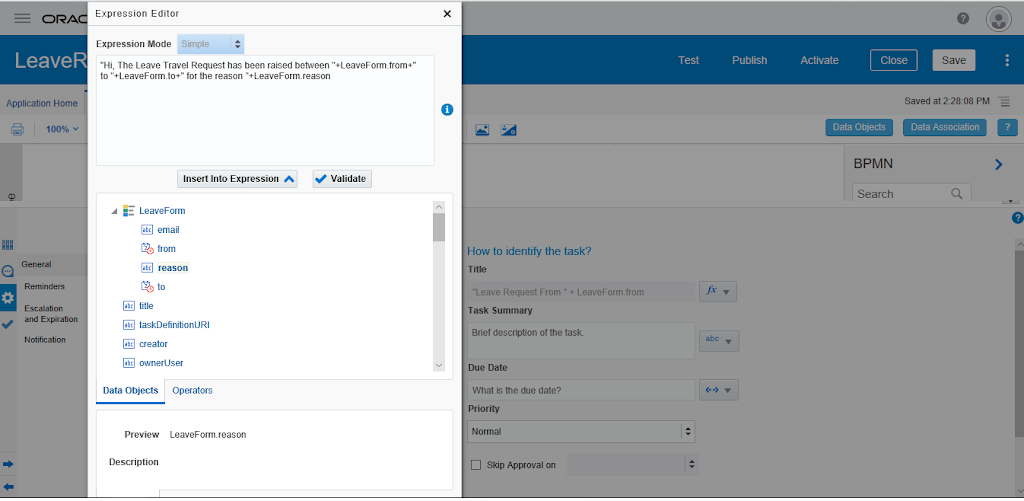
- Click the Save button
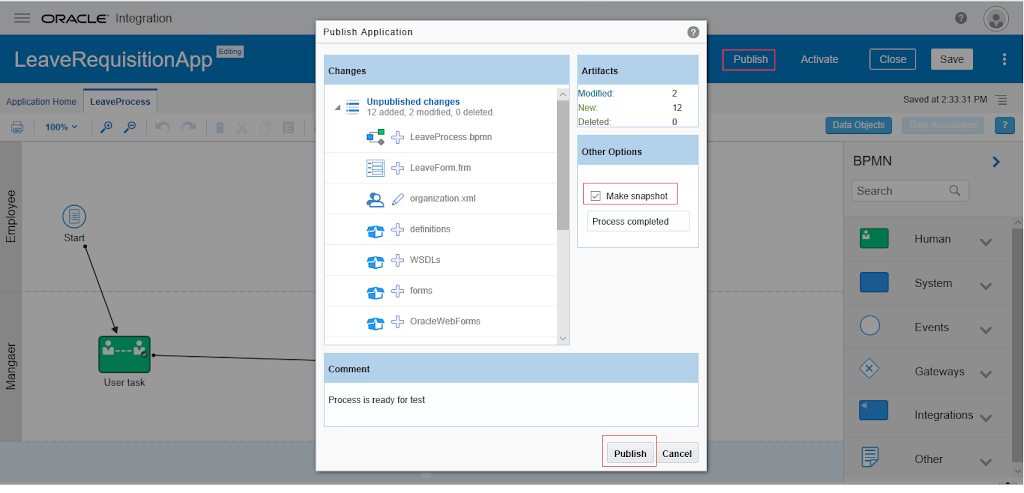
The Process has been completed now. It’s time to test the process. Before we test the process, we have to publish the Process.
- Click on the Publish button, enter below information and click on the Publish button
- Select Make snapshot checkbox
- Enter the snapshot name as Process Completed
- Enter the comment
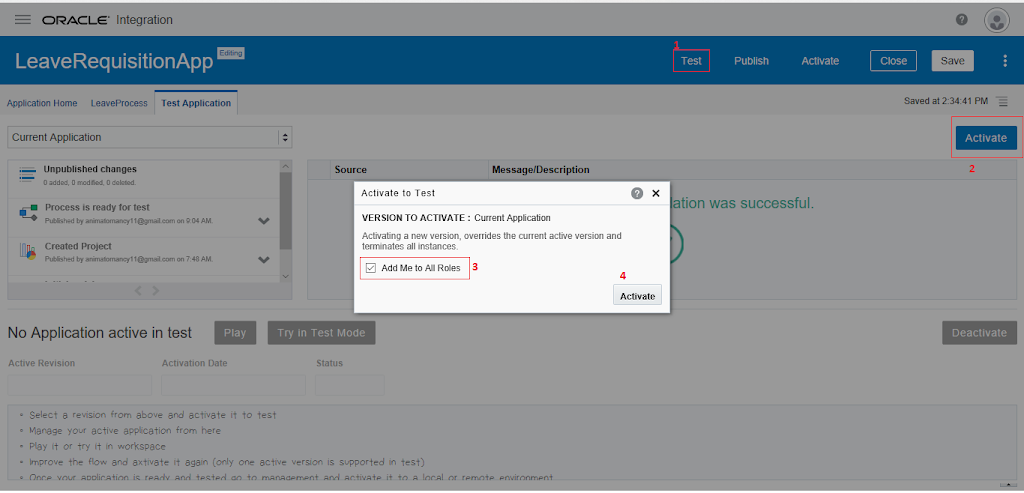
- Click on the Test button, then click Activate. From the opened popup select the “Add Me to All Roles” checkbox and click on the Activate button
- Once Activated, the Play button will be active now. Click on the Play button
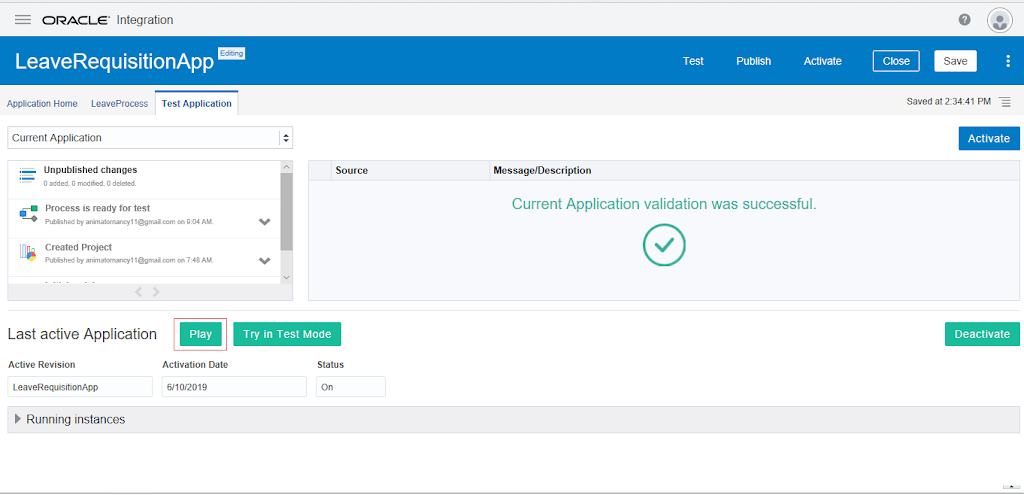
- From the Application Player tab, click on the “LeaveProcess” process
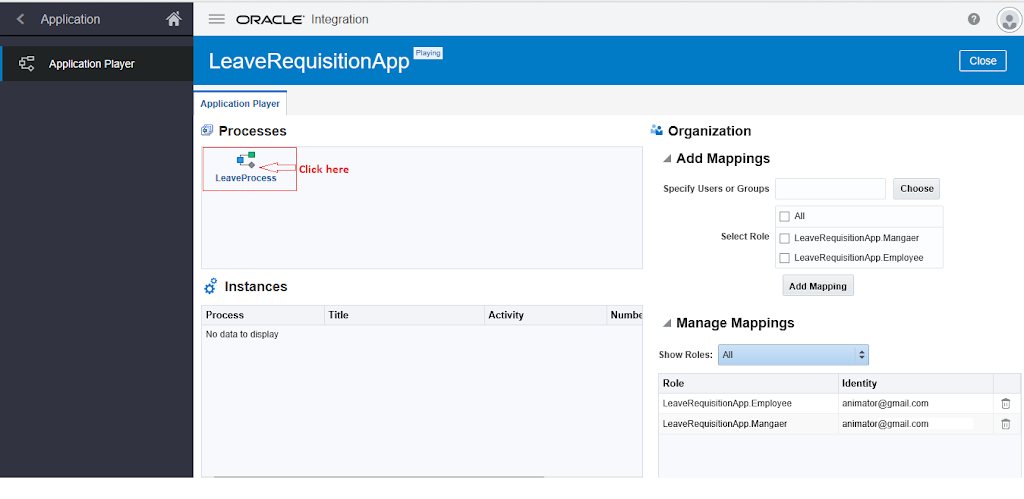
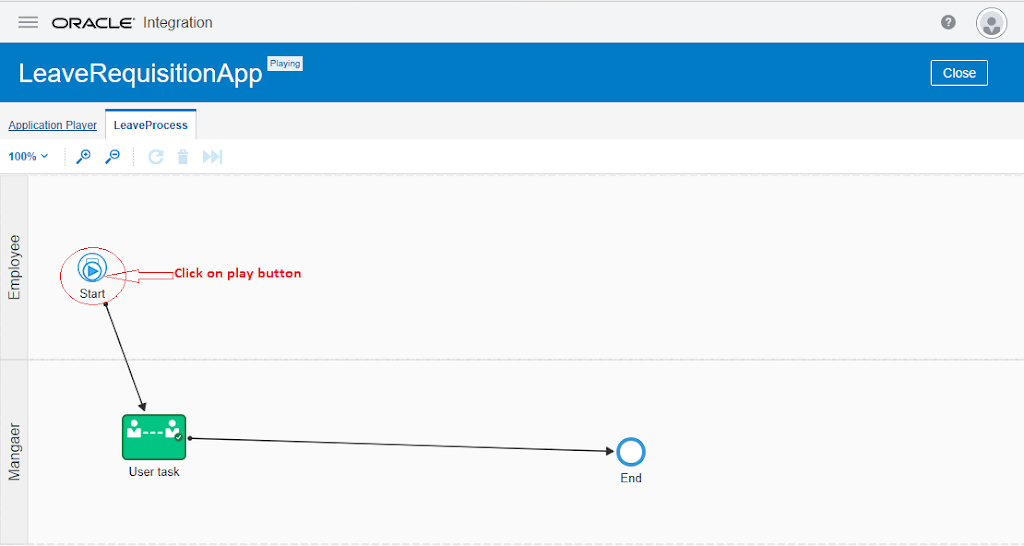
- Notice the Play icon on Start activity. Click on the Play icon
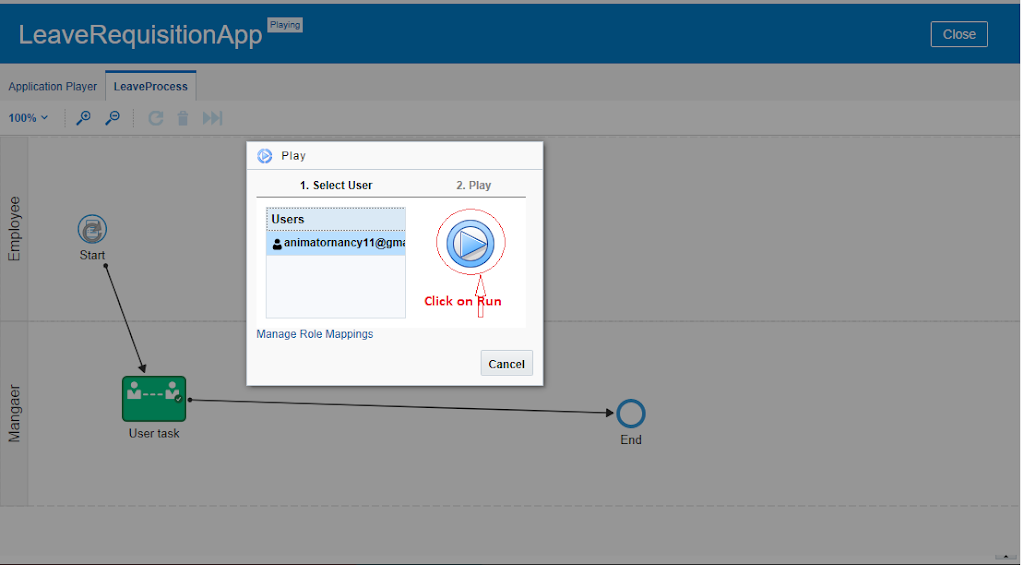
- Click on the Run button. This will open the form
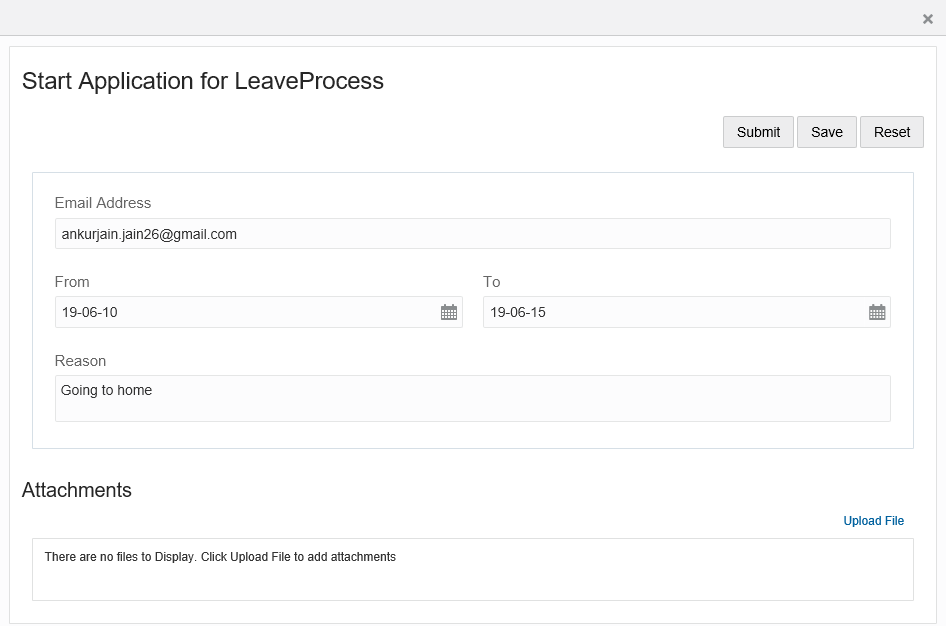
- Enter the information and click on the Submit button
- The Application Player runs the business process. As it passes through each flow element and sequence flow, it outlines the path(in red) it takes through the process. It stops when the process instance reaches a flow element that requires input

- Click on the Play icon of the User Task and Click on the Launch Form
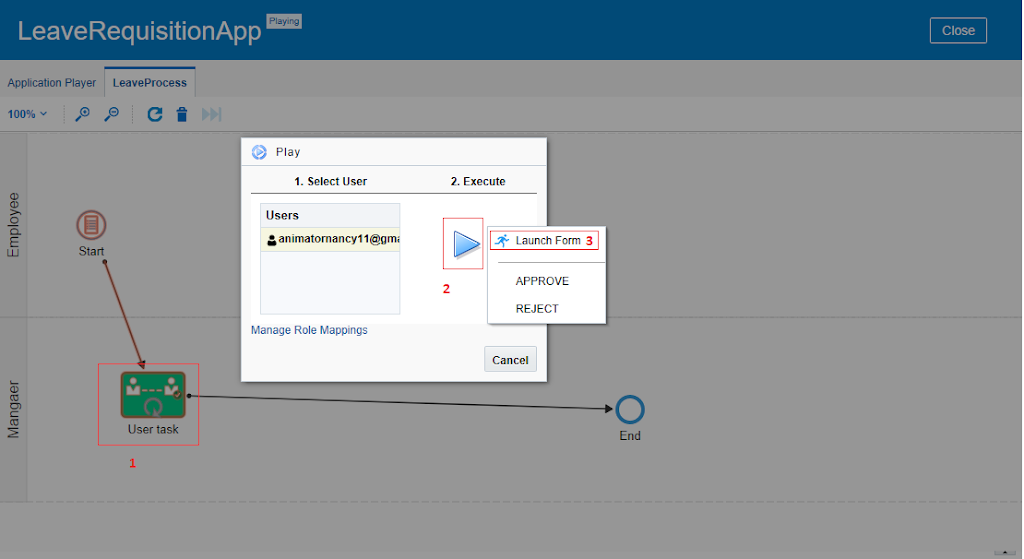
- Notice the Values submitted by the Employee in the Previous form. Simply close the form now

- Again, click on the Play icon of the User Task and Click the Approve button

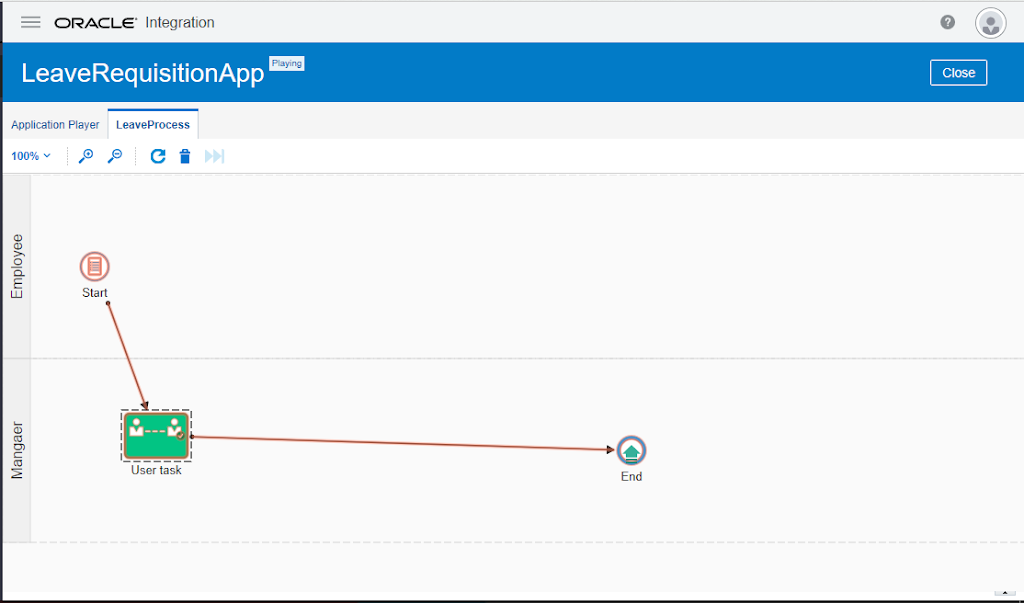
- Red path showing the process has been completed now


I really enjoyed this article. I need more information to learn so kindly update it.
clinical sas training in chennai
clinical sas course
clinical sas Training in Anna Nagar
SAS Training in Chennai
SAS Training Institute in Chennai
Placement Training in Chennai
soft skills training in chennai
core java training in chennai
Learned a lot from your post and it is really good. Share more tech updates regularly.
Ethical Hacking course in Chennai
Ethical Hacking Training in Chennai
Hacking course in Chennai
ccna course in Chennai
Salesforce Training in Chennai
AngularJS Training in Chennai
PHP Training in Chennai
Ethical Hacking course in Tambaram
Ethical Hacking course in Velachery
Ethical Hacking course in T Nagar