How to provision an Autonomous Database on the Oracle Cloud
In this article, I’ll demonstrate how to provision a free-tier autonomous database instance and the steps involved in it.
What is Autonomous Database
An autonomous database is a cloud database that uses machine learning to automate database tuning, security, backups, updates, and other routine management tasks traditionally performed by DBAs. Unlike a conventional database, an autonomous database performs all these tasks and more without human intervention.
Prerequisites:
Below are pre-requisites to complete this article:
- Oracle Cloud Account. If you don’t have one please refer to this video for creating an Oracle Cloud Free Tier account.
Steps to create free tier Autonomous Database Instance:
- Login into the Oracle Cloud account.
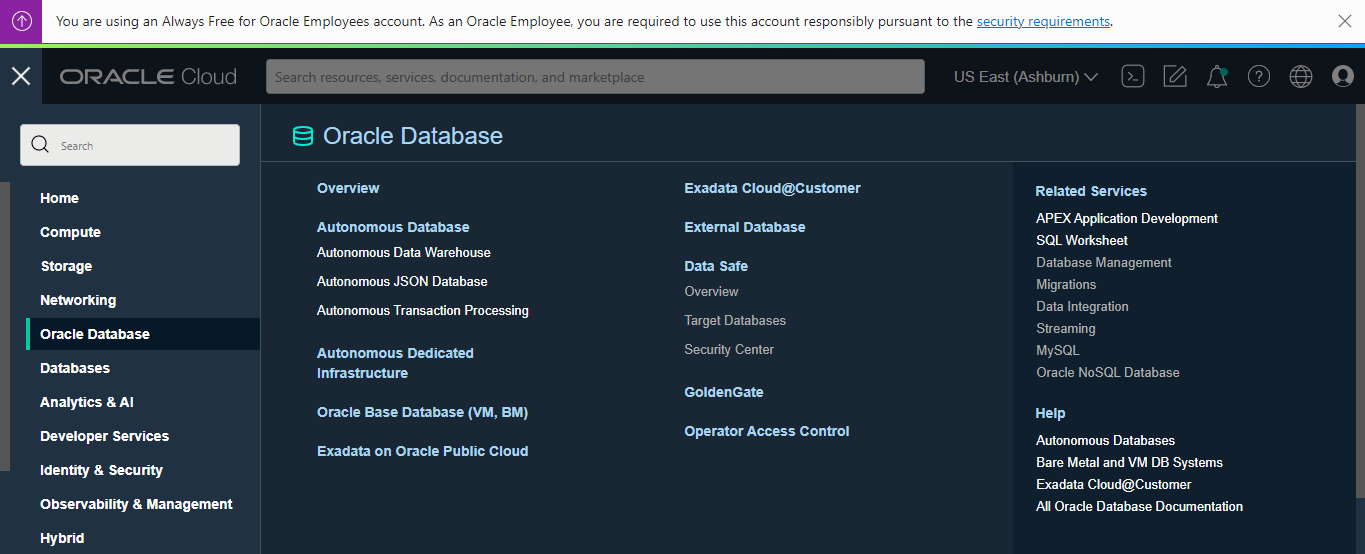
- From the top left hamburger menu select Oracle Database and click on Autonomous Database
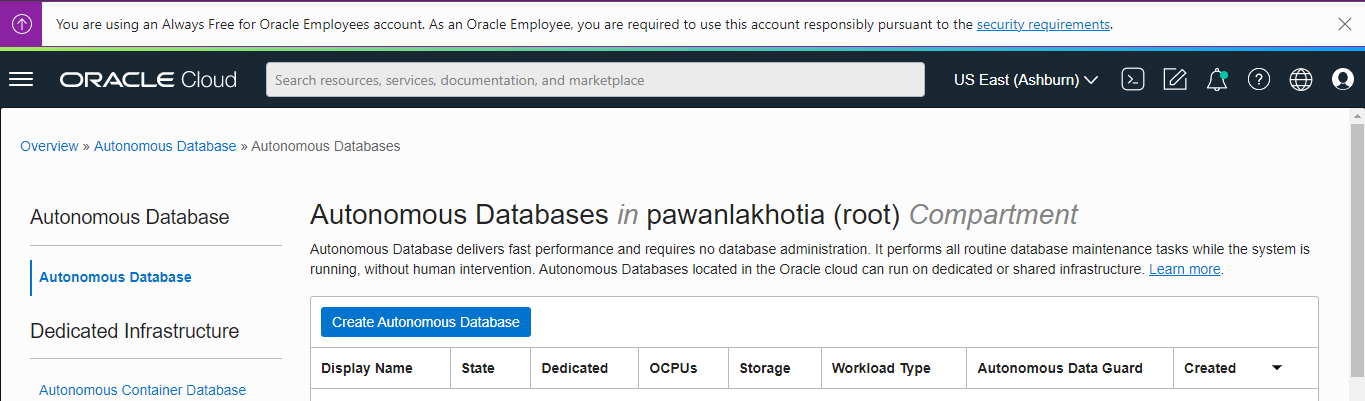
- Click on the Create Autonomous Database button as shown in the following screenshot:
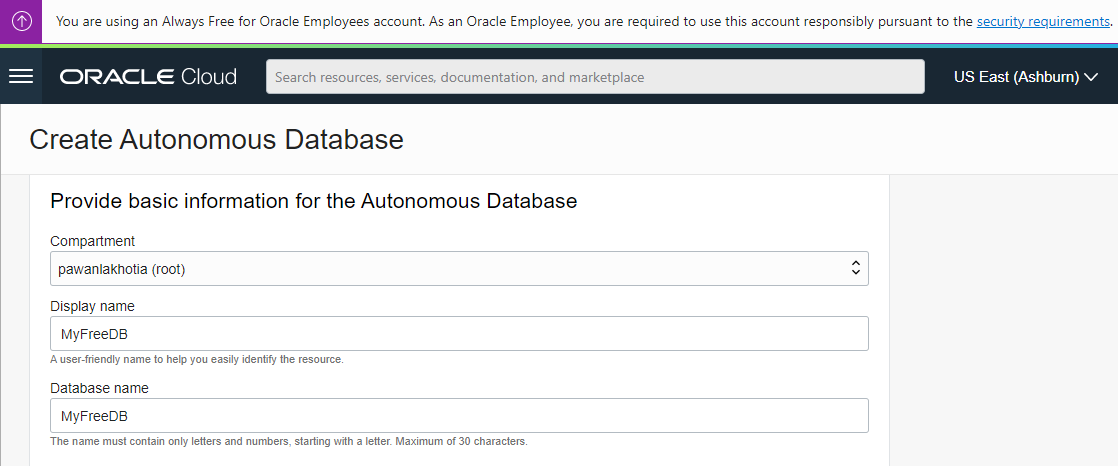
- Enter the following fields
- Compartment: Select the existing compartment in which you want to provision an ATP instance.
- Display name: This is the name of the database.
- Database name: This name will be used as the permanent ID for this database.
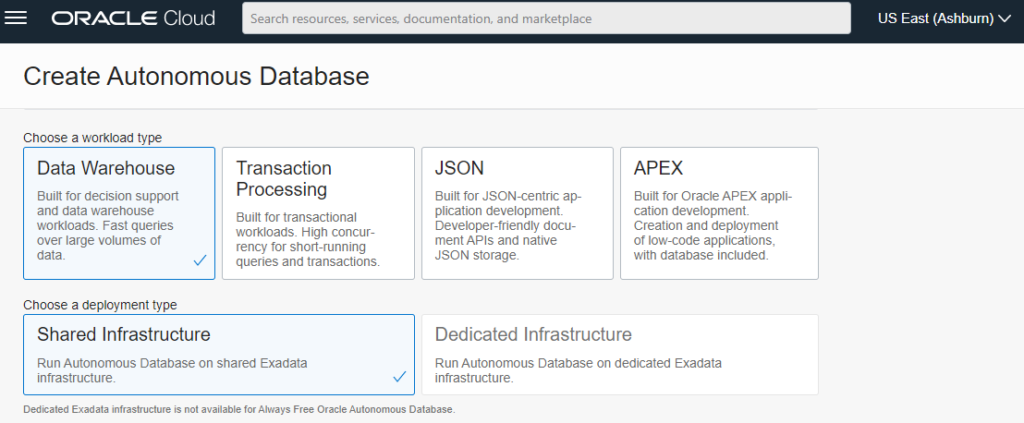
- Choose a workload type
- If you are creating an ADW instance then select Data Warehouse.
- If you are creating an ATP instance then select Transaction Processing.
- Choose a deployment type. For a free tier account, select Shared Infrastructure.
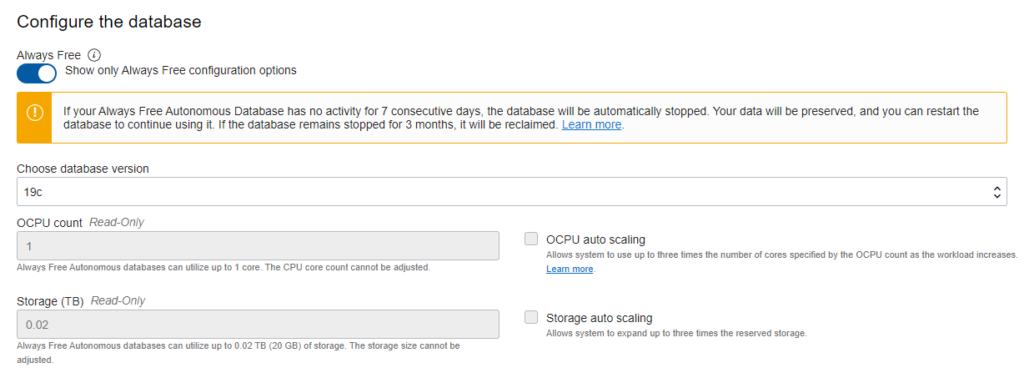
- Make sure the Always Free selector is turned on if you are creating a free ATP instance.
- Under Configure the database section, select the appropriate database version as 19c or 21c.
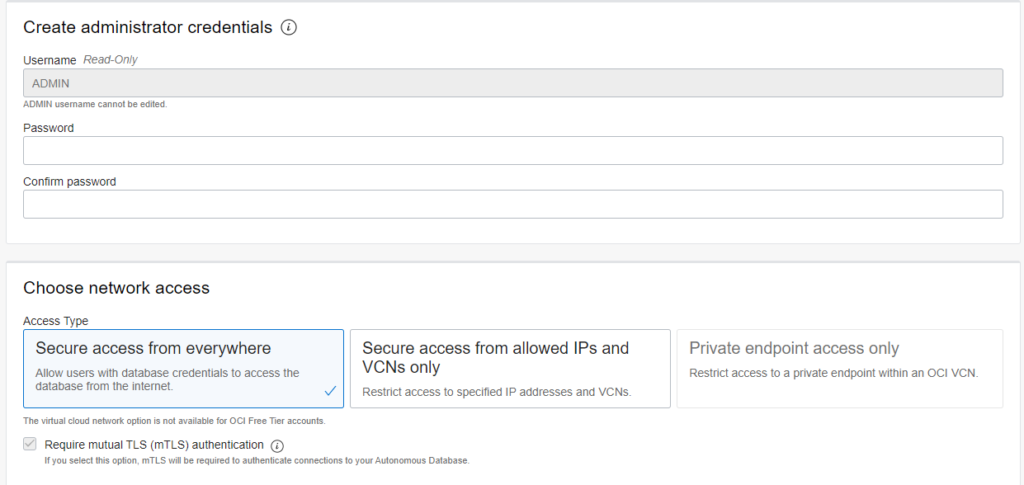
- Under Create administrator credentials section, create a strong password for ADMIN user.
- Under network access – choose the appropriate Access Type.
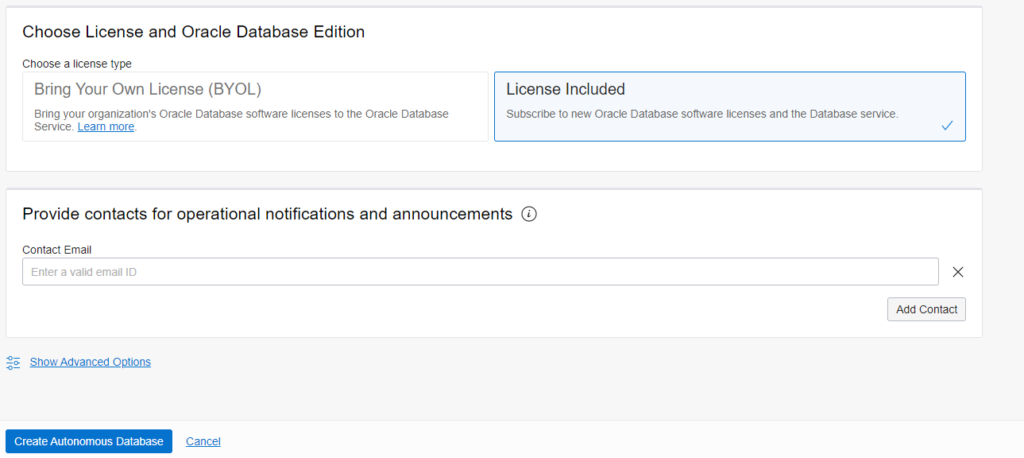
- Choose License Type as license required. Bring Your Own License option will not be enabled for free tier.
- Click the Create Autonomous Database button.
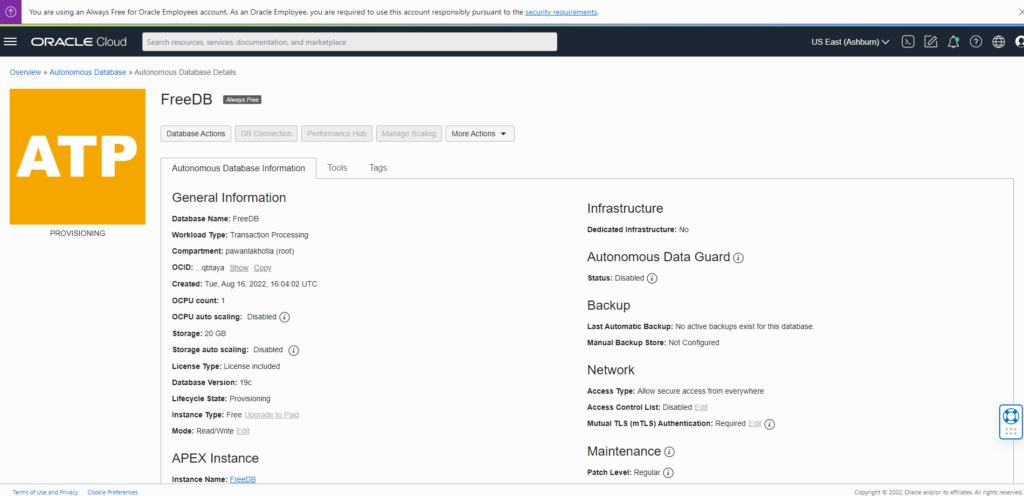
Your new ATP instance will be provisioned. The orange ATP box will turn green once it has been provisioned and is available to use.
Now once the instance is provisioned you can connect to it using the web-based UI or you can use SQL Developer to connect the ATP instance.
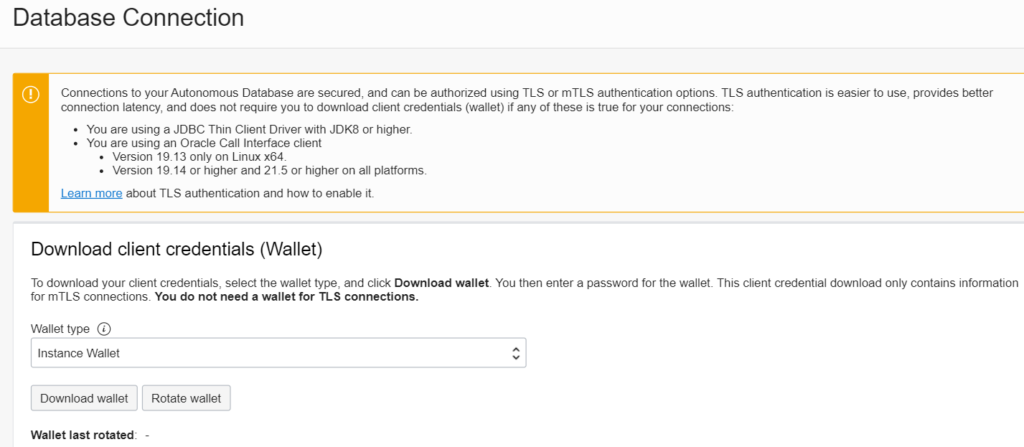
In order to connect using the SQL Developer application, you need to download the oracle credentials wallet file. For that click on Database actions from the ATP details page and under download, client credentials select the wallet type as Instance Wallet and click on Download Wallet.
Open the SQL Developer software and click on New Database Connection.
Enter the name of the Database and under user info input the user name and password that we had set in step 9 above.
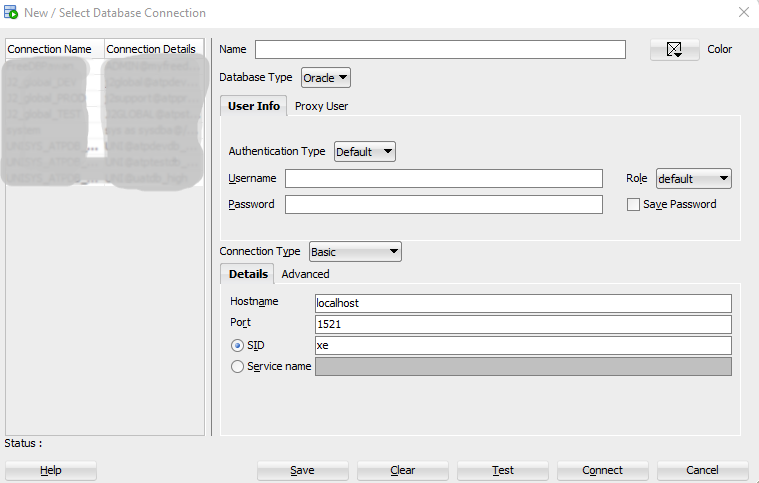
Select the connection type as cloud wallet and under details browse and select the configuration file as the cloud wallet zip file.
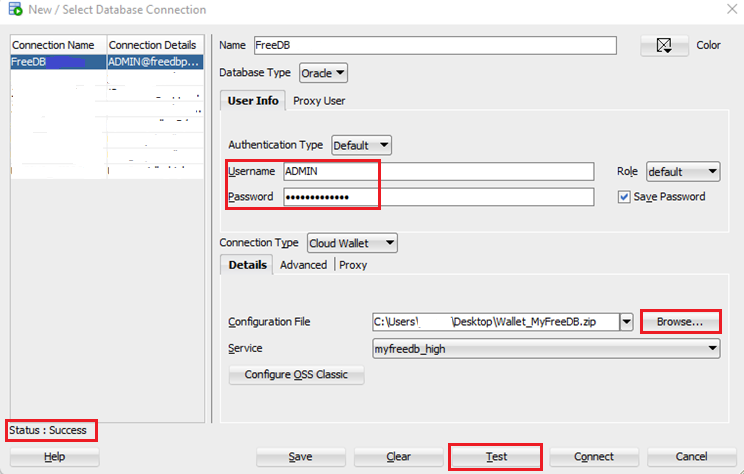
Click on the Test button to test the connection. Once the connection is made it will show the status as Success. Then click on Connect.
Voila! Your new Always Free Oracle Autonomous Database is running. You can test by running a simple query like ‘SELECT SYSDATE FROM DUAL’ and can start building your application.
NOTE: ADMIN user is not recommended for normal operations. To create another user from the Autonomous Database click on Database Actions > Administration > database users. You can create a new user and give the required roles.
Request you to subscribe to my YouTube channel for regular updates.
Further readings:
What Is an Autonomous Database?

Your article helped me a lot, is there any more related content? Thanks!
Thank you for your sharing. I am worried that I lack creative ideas. It is your article that makes me full of hope. Thank you. But, I have a question, can you help me?
Sure please ask your question buddy
Thank you for your sharing. I am worried that I lack creative ideas. It is your article that makes me full of hope. Thank you. But, I have a question, can you help me?
Thanks for sharing. I read many of your blog posts, cool, your blog is very good.