How to show a table in a select single component in Oracle Visual builder
In this article, I am going to demonstrate how can we embed a table in a select single component in oracle visual builder.
What is the use of showing a table in a select single?
The main purpose of using a table in a select single component is to identify the exact value while selecting. For example, we have Employee data that has details like firstName, lastName, and email and we have to select the firstName from the select single component.
Now if we have duplicates in firstName it would create confusion in selecting a correct value. Then in that case, if we show the data in tabular format with other details like lastName and email then the user can easily point out the required value easily. In order to achieve this, we have to show a table in a select single component.
We can also show all the data of a particular employee as a list view in a select single component which we will demonstrate in our further blogs.
Following are the steps to complete this use case:
- First, create an Employees Business Objects with the following three fields:
- First Name
- Last Name
- Go to the Data tab and click on + Row to add some rows to Business Object.
For more detail on the creation of Business Objects please refer to our antecedent blog which includes the steps to create Business Objects.
- Go to the main-start page under mail flow, navigate to Page Designer, and drag & drop the Select (Single) component from the component pallet to the Design area.
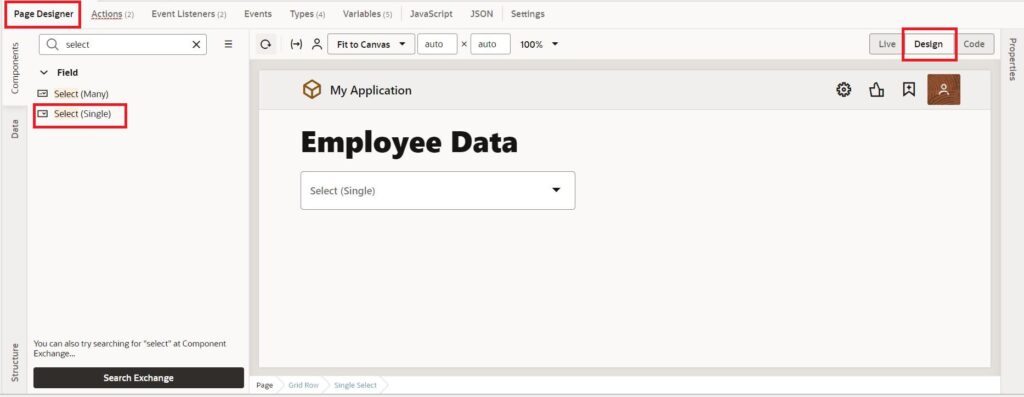
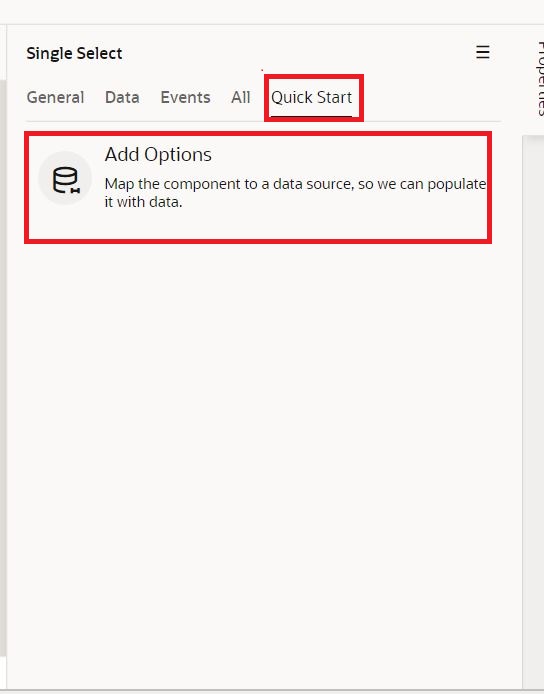
- Click on the Select Single component to see the properties and change the label to Employee Data. To add data to the Employee Data LOV switch to Quick Start, and click on Add Options.
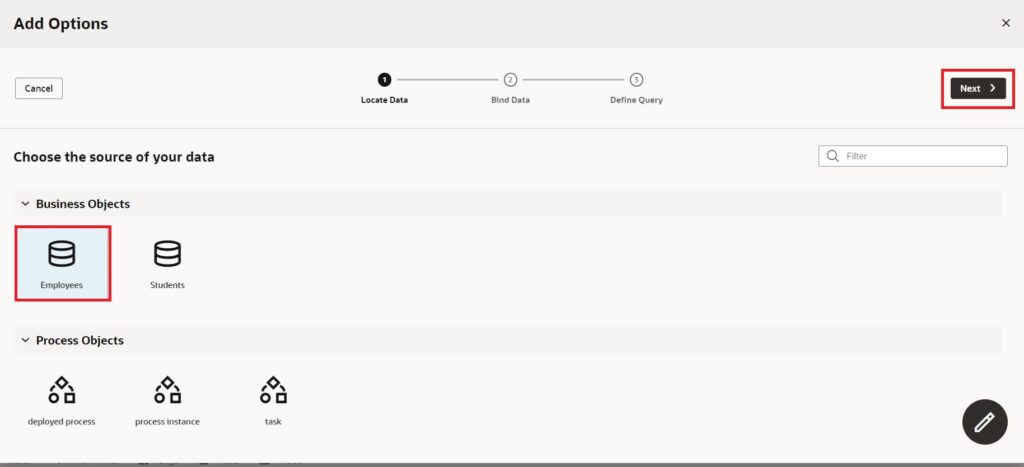
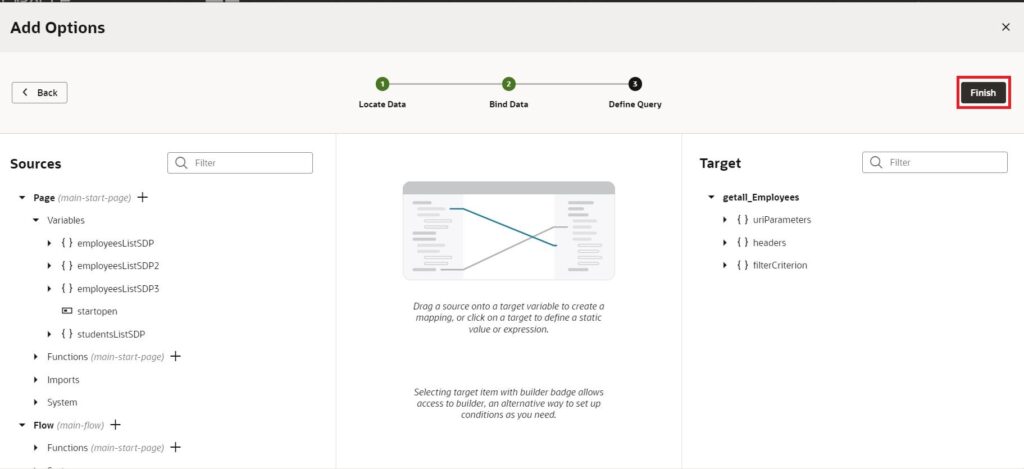
- Select the Employees business object and click on the Next button.
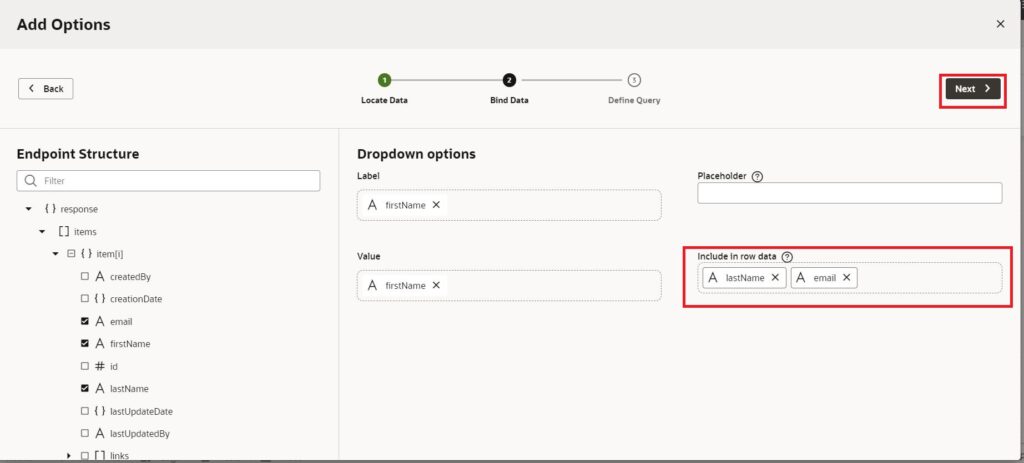
- Select the label and value from the response. Along with this, select the fields to Include in row data fields which are to be shown in the table and click on the Next button followed by the Finish button as shown in the following screenshots:
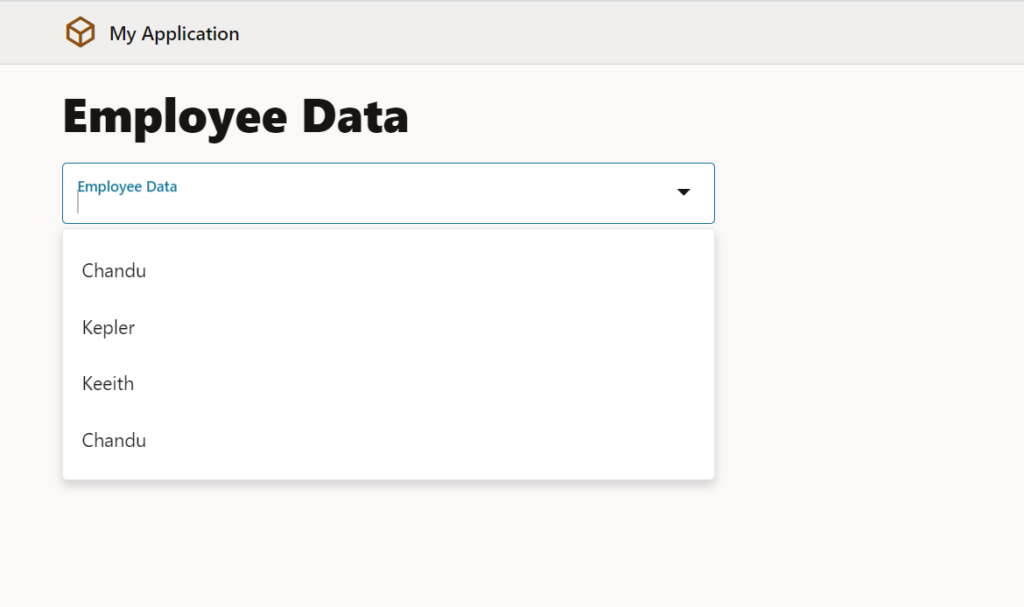
Now when we go to the browser and check the data in Employees Data LOV you can see only values of firstName instead of all data in form of a table as shown in the following screenshot:
- To show data in tabular format, go to the Page Designer, and switch to Code mode to specify a
templatein thecollectionTemplateslot of theoj-select-singleas shown in the following code:
<oj-select-single label-hint="Employee Data"
    class="oj-flex-item oj-sm-12 oj-md-5"
    data="[[$variables.employeesListSDP4]]"
    item-text="firstName">

    <template slot="collectionTemplate">

    </template>
</oj-select-single>- Drag and drop a Table inside the collection template as shown in the following code.
  <oj-select-single label-hint="Employee Data" class="oj-flex-item oj-sm-12 oj-md-5"
    data="[[$variables.employeesListSDP4]]" item-text="firstName">

    <template slot="collectionTemplate">
      <oj-table scroll-policy="loadMoreOnScroll">

      </oj-table>

    </template>
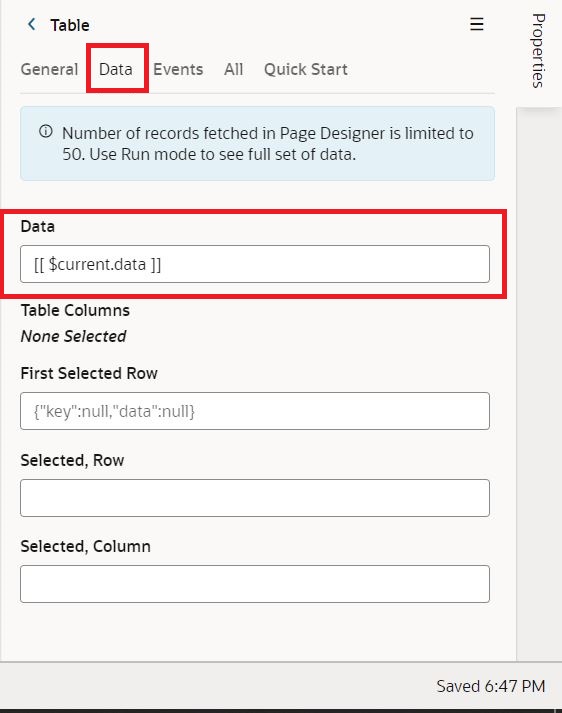
</oj-select-single>- To add data to the table click on the table, go to Properties and switch to the Data tab and select current. data as shown in the following screenshot:
- Now we need to add the columns for the table. For this, I am giving columns along with the templates as shown in the following code:
 <oj-select-single label-hint="Employee Data" class="oj-flex-item oj-sm-12 oj-md-5"
    data="[[$variables.employeesListSDP4]]" item-text="firstName">

    <template slot="collectionTemplate">
      <oj-table scroll-policy="loadMoreOnScroll" data="[[ $current.data ]]" columns='[
{"headerText":"First Name","field":"firstName","id":"firstName",
"template":"firstNameTemplate"},
{"headerText":"Last Name","field":"lastName","template":"lastNameTemplate"},
{"headerText":"Email","field":"email","template":"emailtemplate"}
]' selection-mode.row="single">

        <template slot="firstNameTemplate" data-oj-as="cell">
          <span>
                <oj-bind-text value="[[cell.data]]"></oj-bind-text>
              </span>
        </template>
        <template slot="lastNameTemplate" data-oj-as="cell">
          <span >
                <oj-bind-text value="[[cell.data]]"></oj-bind-text>
              </span>
        </template>
        <template slot="emailtemplate" data-oj-as="cell">
          <span >
                <oj-bind-text value="[[cell.data]]"></oj-bind-text>
              </span>
        </template>
      </oj-table>

    </template>
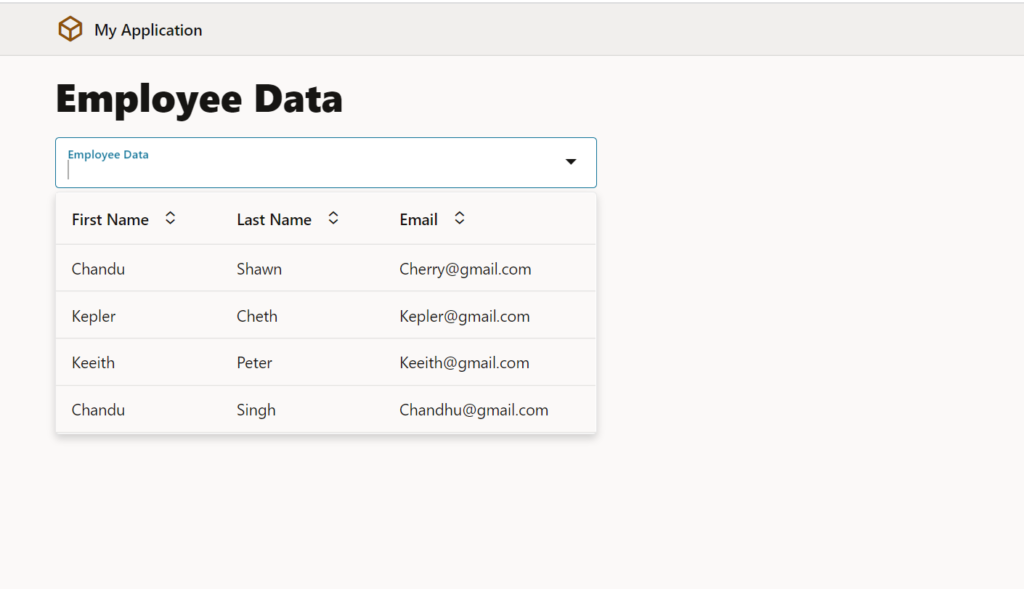
</oj-select-single>- With this, we are done with adding data to the table. Now preview the application and you should be able to see the table in the Employee Data LOV as shown in the following Screenshot.
This is how we embed a table inside a select single component in Oracle Visual Builder.
If you liked the article, please like, comment, and share.
Please look at my YouTube channel for Oracle Integration-related videos and don’t forget to subscribe to our channel to get regular updates.
Further Readings
Scheduled parameters to maintain Last Run Date Time in Oracle Integration
How to Customize the Lock Screen in Oracle Visual Builder
Merging two CSV files into a single file in Oracle Integration
ERP Integration using File Based Data Import: Oracle Integration