
Working with Tree Navigation in Oracle Visual Builder
In this article, We’ll help demonstrate how to work with Tree Navigation in Oracle Visual Builder.
Tree views display information hierarchically, with each item having multiple subitems.
- There is a hierarchical relationship among the nodes in the node tree.
- Parent, and child, are terms used to describe the relationships between them.
- Nodes are arranged in node trees, with the root at the top.
- Except for the root, each node has exactly one parent. It is possible for a node to have more than one child
LEARN ORACLE Visual builder END TO END
AN END-END-END ORACLE visual builder COURSE THAT WILL HELP YOU TO LEARN Visual builder QUICKLY.
CLICK HERE TO BUY THIS COURSE.
The structure expected by the tree Navigation component in VBCS is:
    {

      "id": "id",
      "label": "Label",
      "icon": "icon Name",
      "node": "parent",
      "items": [
        {
         "id :"id",
         "label": "Label",
         "icon": "icon Name",
          "badge": 13
        },
       {
        "id": "id",
        "label": "Label",
        "icon": "icon Name"
       }

      ]
     }
- Create a VB application along with a web application.
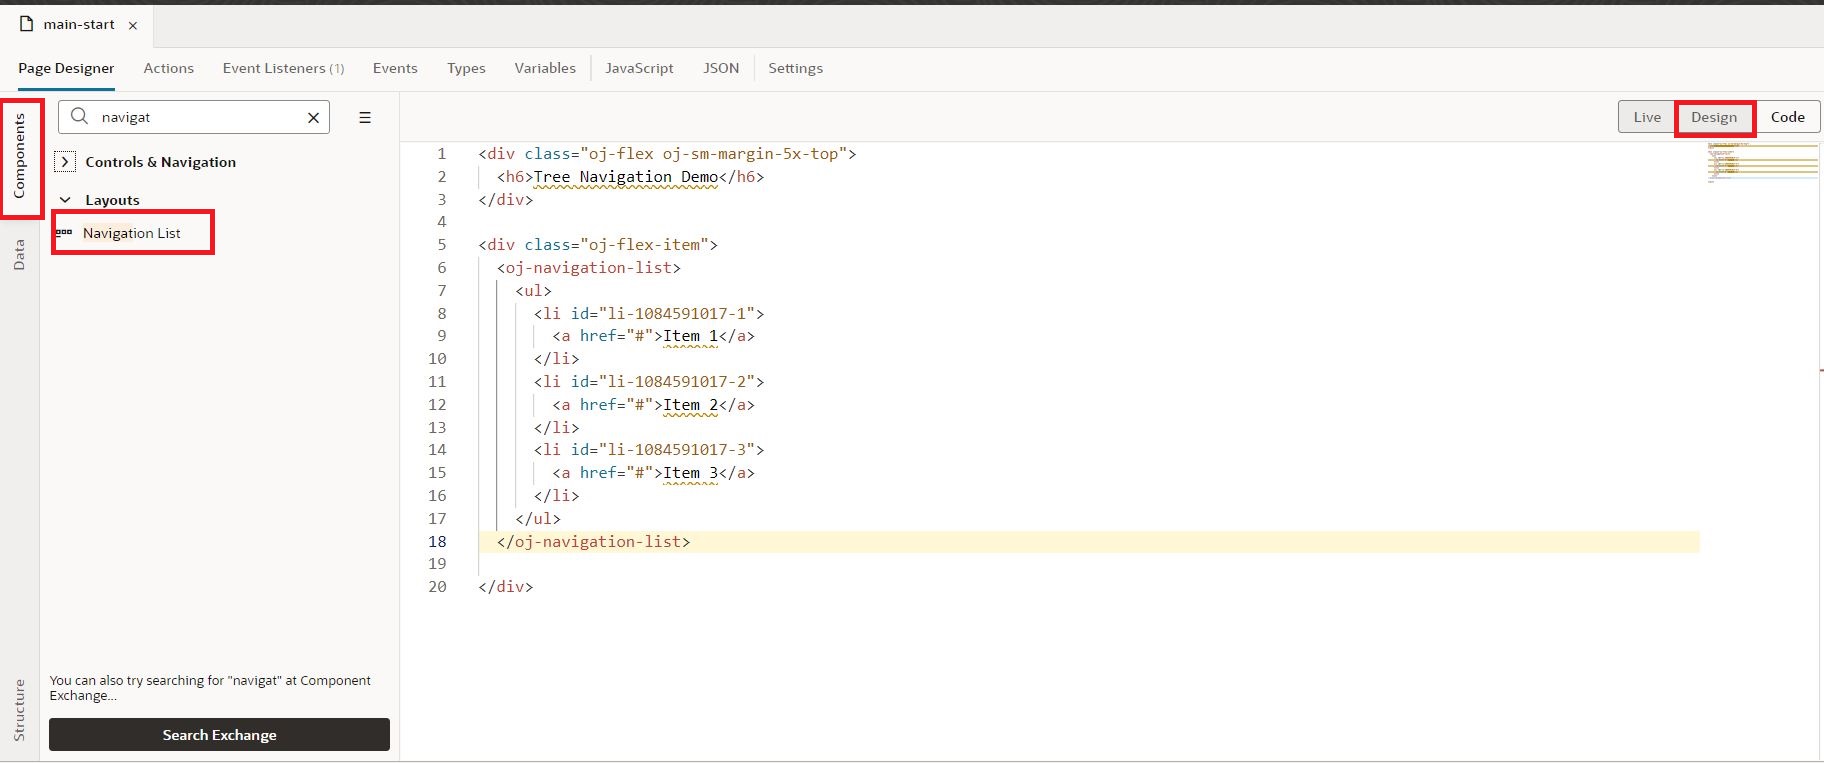
- Click on main-start, switch to the Designer tab, and drag and drop a Navigation List from the component pallet to the Design area as shown in the following screenshot:
3. Switch to the JavaScript tab and add the following piece of code to import the data providers in the define section as shown in the following screenshot:

4. Add the following piece of code in order to provide the data to the tree Navigation component.
 let navigationMenu = [

    {

      "id": "home",

      "label": "Home",

      "icon": "home",

      "node": "parent"

    },

    {

      "id": "gettingstarted",

      "label": "Getting Started",

      "icon": "education",

      "node": "parent",

      "items": [

        {

          "id": "download",

          "label": "Download",

          "icon": "download",

          "badge": 13

        },

        {

          "id": "quickstart",

          "label": "Quick Start",

          "icon": "clock"

        }

      ]

    },

    {

      "id": "cookbook",

      "label": "Cookbook",

      "icon": "book",

      "node": "parent",

      "items": [

        {

          "id": "sample1",

          "label": "Sample 1",

          "icon": "list"

        },

        {

          "id": "sample2",

          "label": "Sample 2",

          "icon": "form-layout",

          "badge": "New"

        }

      ]

    },

    {

      "id": "library",

      "label": "Library",

      "icon": "library",

      "node": "parent",

      "items": [

        {

          "id": "articles",

          "label": "Articles",

          "icon": "custom-article-header"

        },

        {

          "id": "audios",

          "label": "Audios",

          "icon": "music"

        },

        {

          "id": "videos",

          "label": "Videos",

          "icon": "video-block"

        },

        {

          "id": "magazines",

          "label": "Magazines",

          "icon": "library-books"

        }

      ]

    }

  ];


  var PageModule = function PageModule() {

    this.metadata = {

      navigationMenu: navigationMenu

    };

    PageModule.prototype.getMetadata = function () {

      return this.metadata;

    };

    PageModule.prototype.getNavigationContent = function (metadata) {

      if (this.navigationContent === undefined) {

        this.navigationContent = ko.observable(new ArrayTreeDataProvider(

          this._getNavigationData(

            metadata.navigationMenu), {

          keyAttributes: 'attr.id'

        }));

      }

      return this.navigationContent;

    };

    PageModule.prototype._getNavigationData = function (menu) {

      var navData = [],

        self = this;

      for (var i = 0; i < menu.length; i++) {

        var menuItem = {};

        var origMenuItem = menu[i];

        if (typeof origMenuItem === "object") {

          menuItem["attr"] = {

            "id": origMenuItem.id,

            "name": origMenuItem.label,

            "icon": origMenuItem.icon,

            "badge": origMenuItem.badge,

            "node": origMenuItem.node

          };

        }

        if (origMenuItem.items && origMenuItem.items.length > 0)

          menuItem["children"] = this._getNavigationData(origMenuItem.items);

        navData.push(menuItem);

      }

      return navData;

    };


    PageModule.prototype.itemSelectable = function (context) {

      return context['leaf'];

    };

    this.navlistExpanded = new keySet.ObservableKeySet();

  };
5. Now move to the designer tab and change the code for the navigation component according to the JS structure that we have provided. To match the above format our code should be modified as follows:
  <oj-navigation-list data="[[ $functions.getNavigationContent($functions.getMetadata()) ]]"

    root-label="[[ $application.user.email ]]" drill-mode="collapsible"

    item.selectable="[[ $page.functions.itemSelectable ]]" id="tree-navigation">

    <template slot="itemTemplate" data-oj-as="item">

      <li>

        <a style="cursor: pointer">

          <oj-bind-if test="[[item.data.attr.node]]">

            <i :class="[[ 'oj-navigationlist-item-icon oj-ux-ico-' + (item.data.attr.icon ? item.data.attr.icon : 'box')]]"></i>

            <oj-bind-text value="[[item.data.attr.name]]"></oj-bind-text>

          </oj-bind-if>

          <oj-bind-if test="[[!item.data.attr.node]]">

            <i :class="[[ 'oj-typography-body-md oj-navigationlist-item-icon oj-ux-ico-' + (item.data.attr.icon ? item.data.attr.icon : 'box') +  ' oj-sm-padding-1x-start']]"></i>

            <span class="oj-typography-body-md">

              <oj-bind-text value="[[item.data.attr.name]]"></oj-bind-text>

              </span>

          </oj-bind-if>

          <oj-bind-if test="[[item.data.attr.badge]]">

            <span class="oj-badge oj-navigationlist-item-end" style="color:aqua" ><oj-bind-text value="[[item.data.attr.badge]]"></oj-bind-text></span>

          </oj-bind-if>

        </a>

      </li>

    </template>

  </oj-navigation-list>
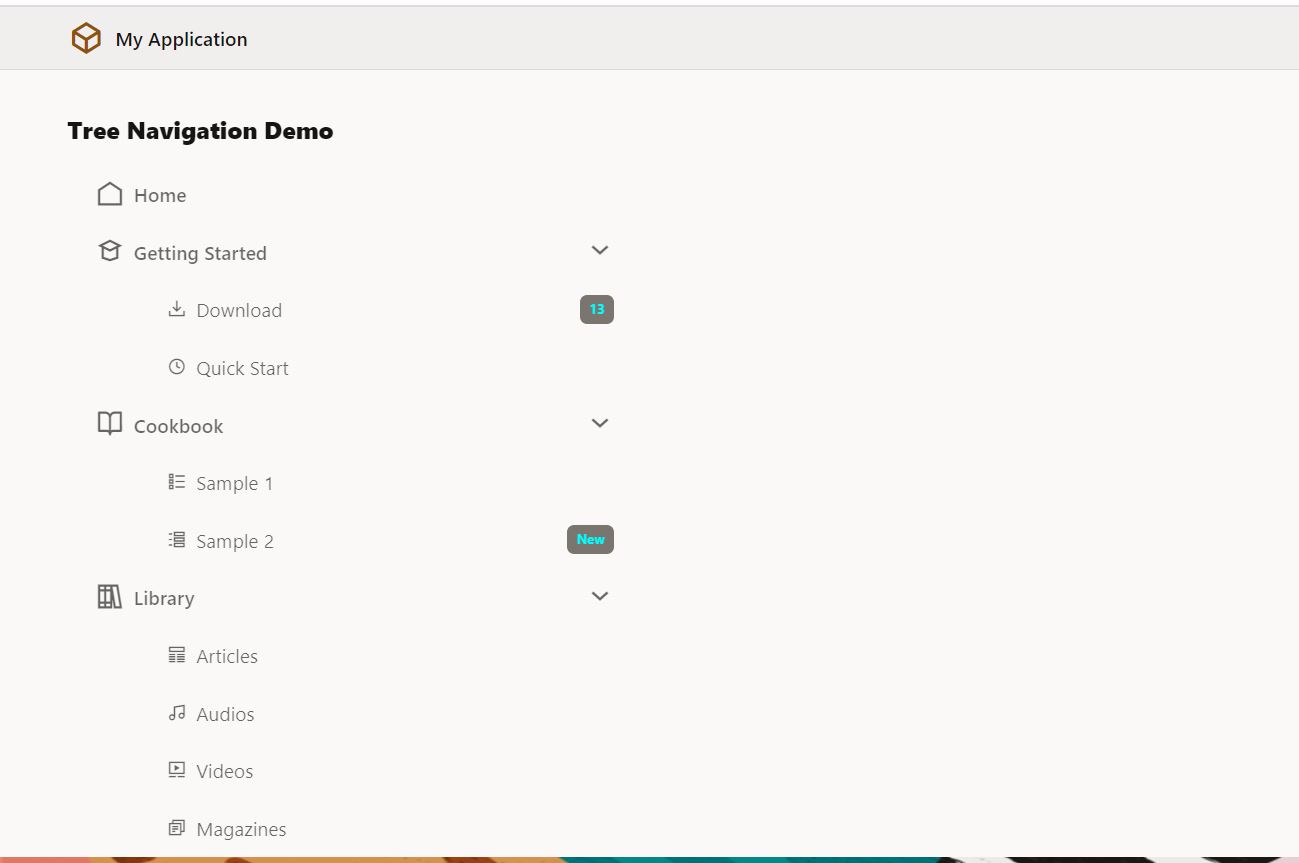
This is how we work with Tree Navigation in Oracle Visual Builder
If you liked the article, please like, comment, and share.
Please look at my YouTube channel for Oracle Integration-related videos and don’t forget to subscribe to our channel to get regular updates.
Further Readings
Scheduled parameters to maintain Last Run Date Time in Oracle Integration
How to Customize the Lock Screen in Oracle Visual Builder
Merging two CSV files into a single file in Oracle Integration
ERP Integration using File Based Data Import: Oracle Integration


