The split join is very useful tool in Oracle Service Bus to process message in parallel. Split join is useful to reduce the response time as it process the message in parallel.
There are two types of split join in Oracle Service Bus:
1) Static Split Join
2) Dynamic Split Join
In this blog, we will discuss about Static Split-Join. In Static Split-Join, we have fixed number of parallel branches that we need to determine at design level only.
Let’s take a use case.
Consider we have a SOAP services with two operations EmpDetailsOP and JobDetailsOP.
EmpDetailsOP:
Request
<soapenv:Envelope xmlns:soapenv=”http://schemas.xmlsoap.org/soap/envelope/” xmlns:exam=”http://www.example.org”>
<soapenv:Header/>
<soapenv:Body>
<exam:Request>
<exam:id>2</exam:id>
</exam:Request>
</soapenv:Body>
</soapenv:Envelope>
Response
<soapenv:Envelope xmlns:soapenv=”http://schemas.xmlsoap.org/soap/envelope/”>
<Body xmlns=”http://schemas.xmlsoap.org/soap/envelope/”>
<ns2:EmployeeResponse xmlns:ns2=”http://www.example.org”>
<ns2:firstName>Ankit</ns2:firstName>
<ns2:lastName>Gupta</ns2:lastName>
</ns2:EmployeeResponse>
</Body>
</soapenv:Envelope>
JobDetailsOP:
Request
<soapenv:Envelope xmlns:soapenv=”http://schemas.xmlsoap.org/soap/envelope/” xmlns:exam=”http://www.example.org”>
<soapenv:Header/>
<soapenv:Body>
<exam:JobRequest>
<exam:id>2</exam:id>
</exam:JobRequest>
</soapenv:Body>
</soapenv:Envelope>
Response
<soapenv:Envelope xmlns:soapenv=”http://schemas.xmlsoap.org/soap/envelope/”>
<Body xmlns=”http://schemas.xmlsoap.org/soap/envelope/”>
<ns2:JobDetailResponse xmlns:ns2=”http://www.example.org”>
<ns2:jobTitle>Business</ns2:jobTitle>
<ns2:salary>34000</ns2:salary>
</ns2:JobDetailResponse>
</Body>
</soapenv:Envelope>
Will use split join and combine the response of both the operations as below:
<soap-env:Envelope xmlns:soap-env=”http://schemas.xmlsoap.org/soap/envelope/”>
<soap-env:Body>
<ns1:EmpResponse xmlns:ns1=”http://www.example.org”>
<ns1:firstName>Ankur</ns1:firstName>
<ns1:lastName>Jain</ns1:lastName>
<ns1:jobTitle>Engineer</ns1:jobTitle>
<ns1:salary>12000</ns1:salary>
</ns1:EmpResponse>
</soap-env:Body>
</soap-env:Envelope>
Let’s go step by step example:
1) Create a SB project and name it SplitJoinSBPro
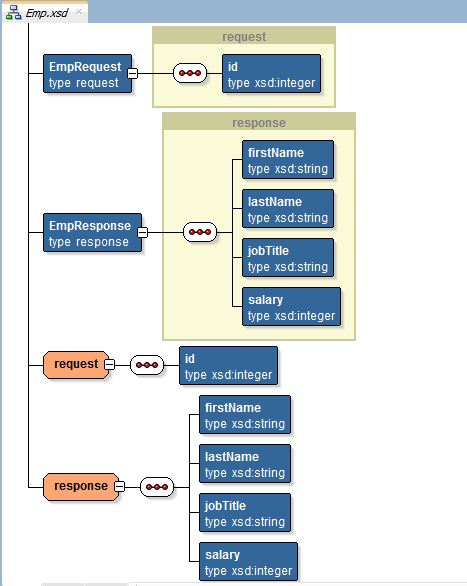
2) Create a schema and name it Emp.xsd
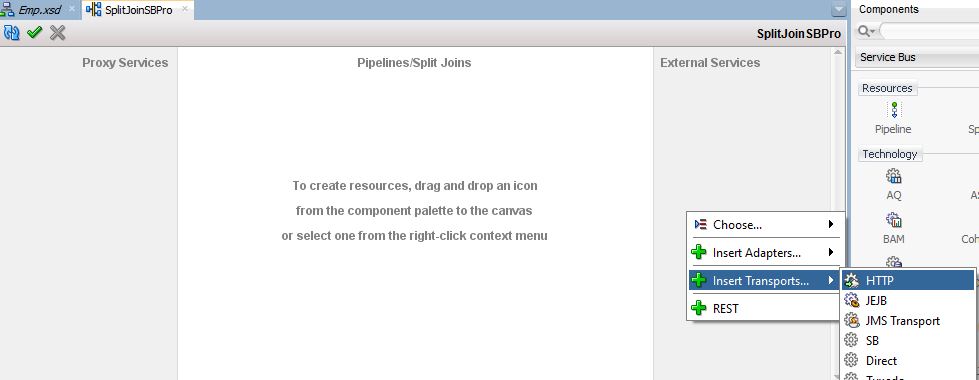
3) Open the SplitJoinSBPro composite and add the HTTP business service. Right click on the External Swim lane and add Insert Transports -> HTTP
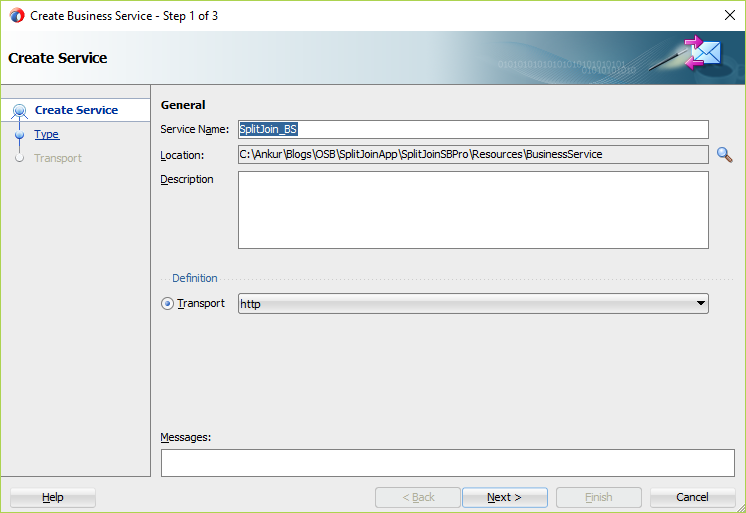
4) Click on the WSDL radio button, Click on the Browse WSDLs, and give the WSDL location
5) Click Next and Finish
6) Click Next and Finish
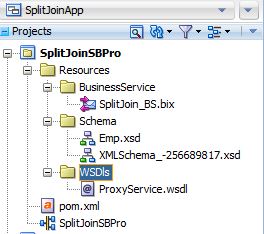
7) Let’s move the resources into the respective folder. This is not mandatory but to organize the resources into the the folders as below:
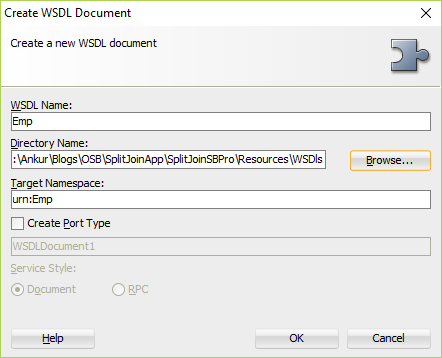
8) Let’s create a WSDL that will be used to create Split Join. Right click on the project, New -> WSDL document and click OK.
9) Create a WSDL structure like below. If you don’t know how to create WSDL then follow the
blog
Source of the WSDL
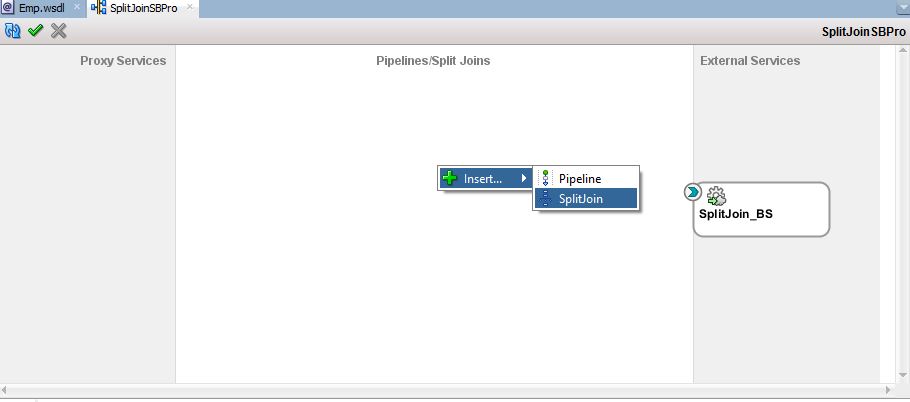
10) Right click on the Pipelines/Split Joins swim lane, Insert -> SplitJoin
11) Enter Service Name a EmpSplitJoin and click Next
12) Select Emp.wsdl using Browse WSDLs button and click OK
13) Enter the Proxy Name as EmpSplitJoin_PS and click Finish
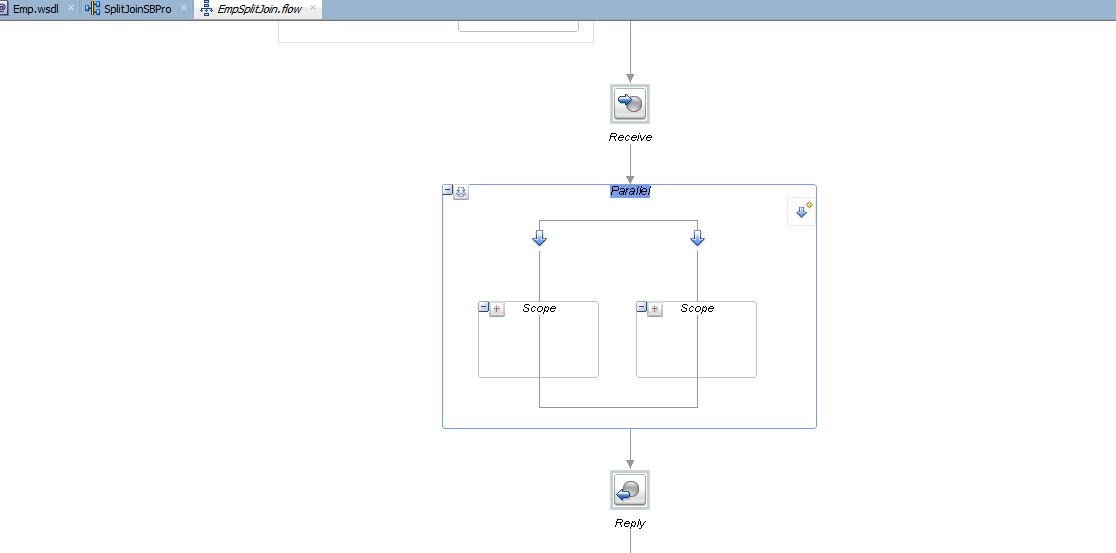
14) Double click on the EmpSpliJoin from the middle pane
15) Drop the Parallel activity from the component pallet just below the Receive activity
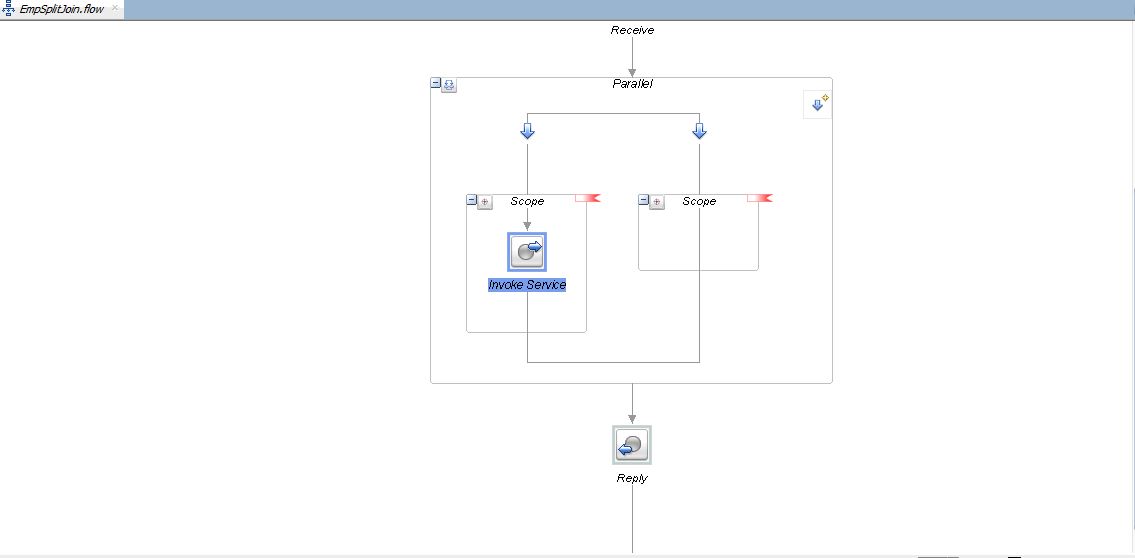
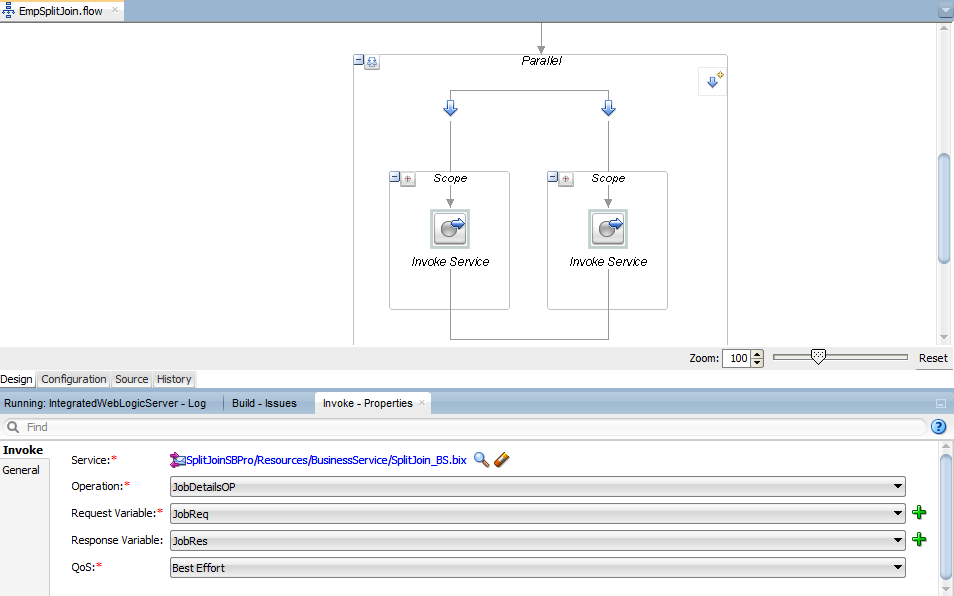
16) Drop the Invoke Service activity from the component pallet under the first Scope
17) Set the Invoke Service properties like below. Choose the EmpDetailsOP from the Operation drop down.
Note: Need to create Request and Response Variable using + icon.
18) Drop the Invoke Service activity from the component pallet under the second scope and set the properties like below:
19) We need to set the value of EmpReq and JobReq variable value with the incoming request id.
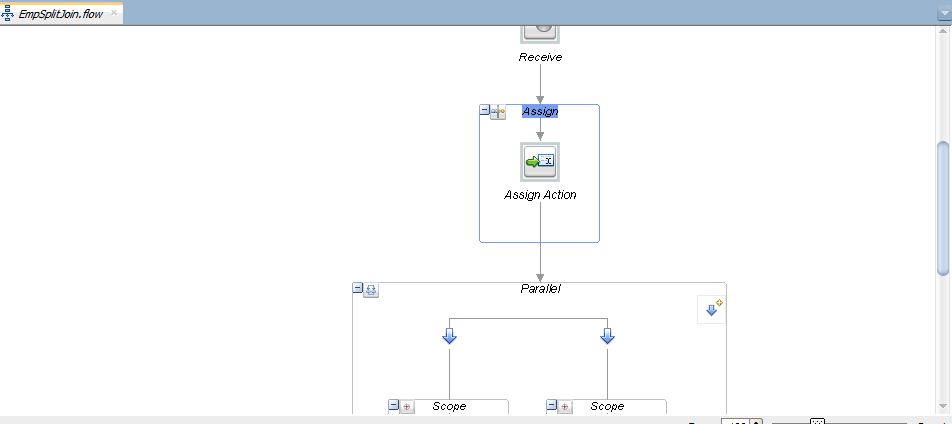
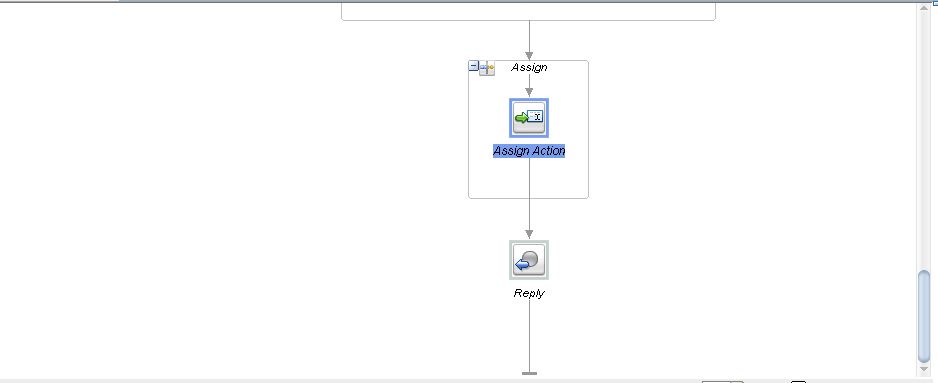
20) Drop the Assign activity just below the Receive activity
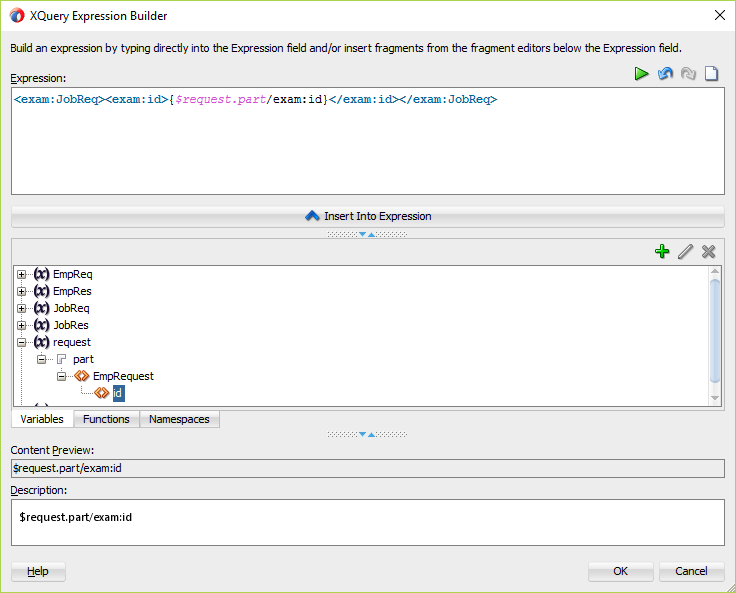
21) Open the Assign Action property. Add the expression:
<exam:EmpReq><exam:id>{$request.part/exam:id}</exam:id></exam:EmpReq>
22) Select EmpReq.part variable from the Variable drop down
23) Same we need to set the value of JobReq variable. Again drop the Assign activity below the Assign activity we added in above 2 steps. And set the expression like below:
<exam:JobReq><exam:id>{$request.part/exam:id}</exam:id></exam:JobReq>
24) Select JobReq.part variable from the Variable drop down
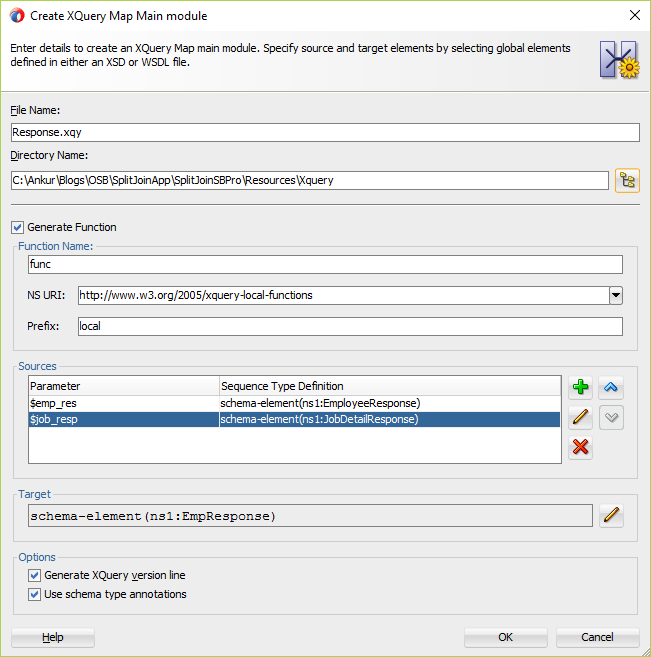
25) Let’s create a XQuery that will be used to combine the result of both operations. Right click on the Project -> New -> Xquery File Ver 1.0. In this XQuery two sources need to add. One for EmployeeResponse and other is JobDetailResponse. Target would be EmpResponse of Emp.xsd
26) Wire the elements like this
27) Drag and Drop the Assign activity just above the Reply activity
28) Set the properties of Assign activity. Select the XQuery Resource from the Value. Browse the Response.xqy and set the variables as below:
29) Select the response.part variable from the Variable drop down
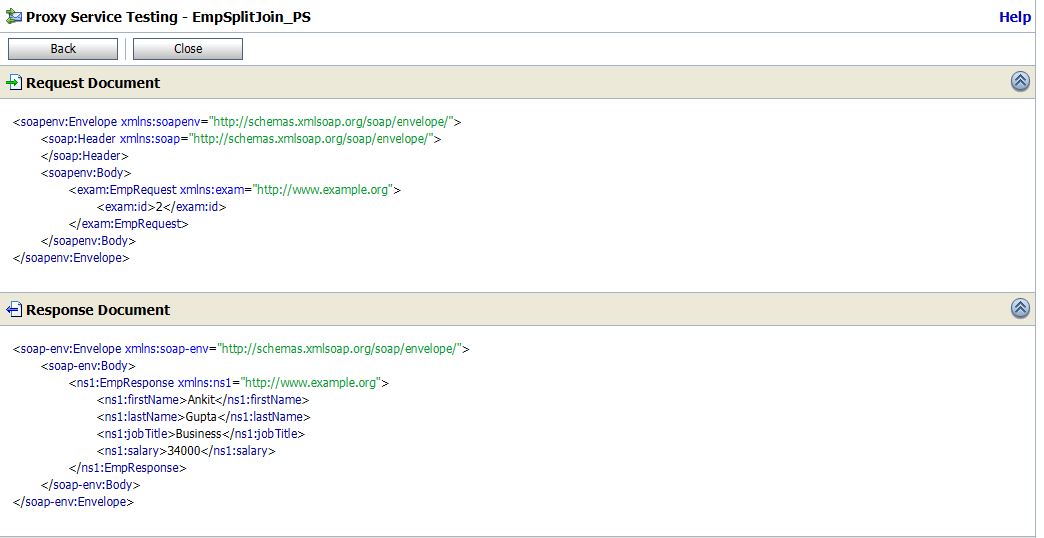
It’s all done. Let’s run the proxy service and see the response.
Request
Response


Thanks for sharing Good Information
Oracle SOA Online Training India
After we download the project , which option should we choose while importing it in jdevloper
Thankyou for sharingerp software companies