Create an Oracle Linux instance on Oracle Cloud Infrastructure Compute Classic (OCI)
This blog will help us to create an Oracle Linux in Compute Classic. In this article, we’ll create an instance from an Oracle provided Oracle Linux image and boot the instance from a persistent disk.
To complete this blog, we must have the subscription to Compute Classic.
Let’s begin and create an Oracle Linux instance.
- Log in to Oracle Cloud my service application at https://cloud.oracle.com/sign_in. Upon successful login, my services page would be displayed
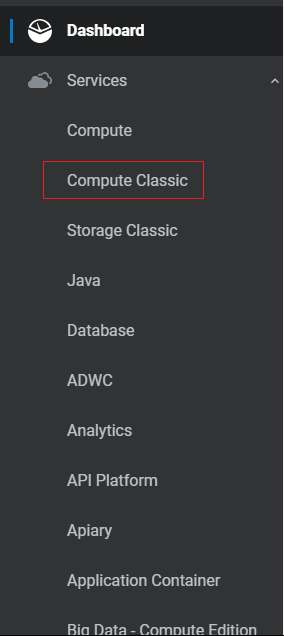
- Click the menu from the upper left corner of the page and Select Compute Classic
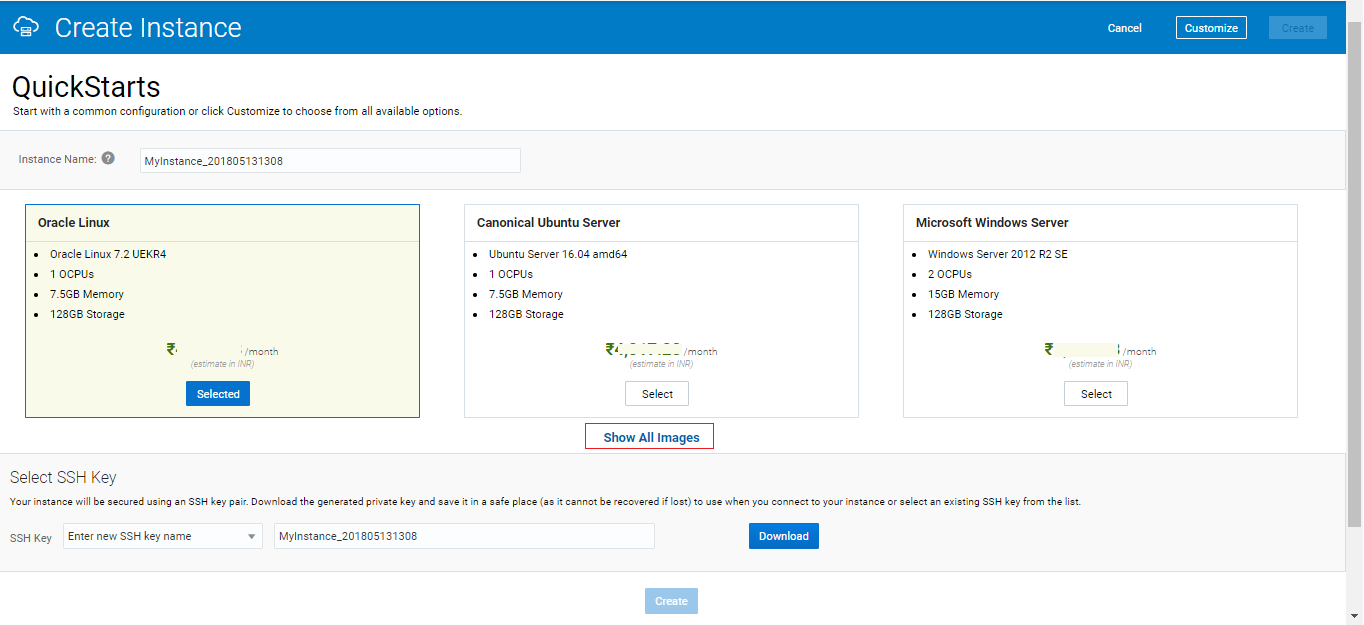
- Click Create Instance button

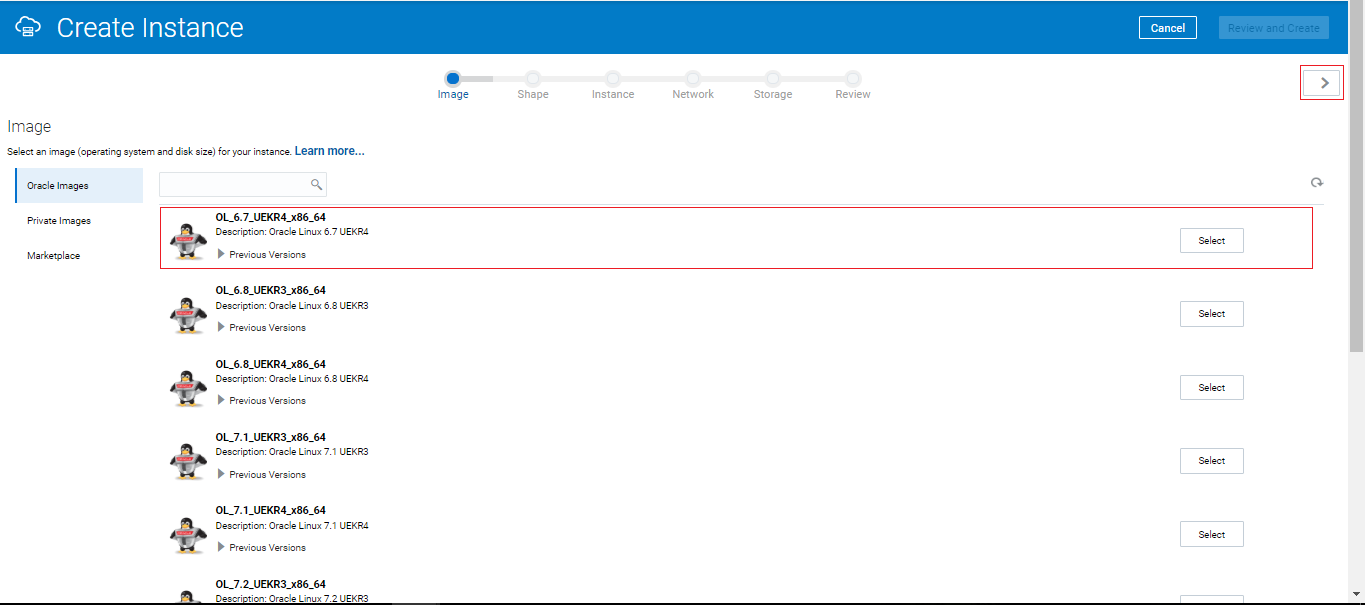
- Click on Show All Images
- On the Image page, select an image depending on the choice. For now, we are selecting OL_6.7_UEKR4_x86_64 and click Next
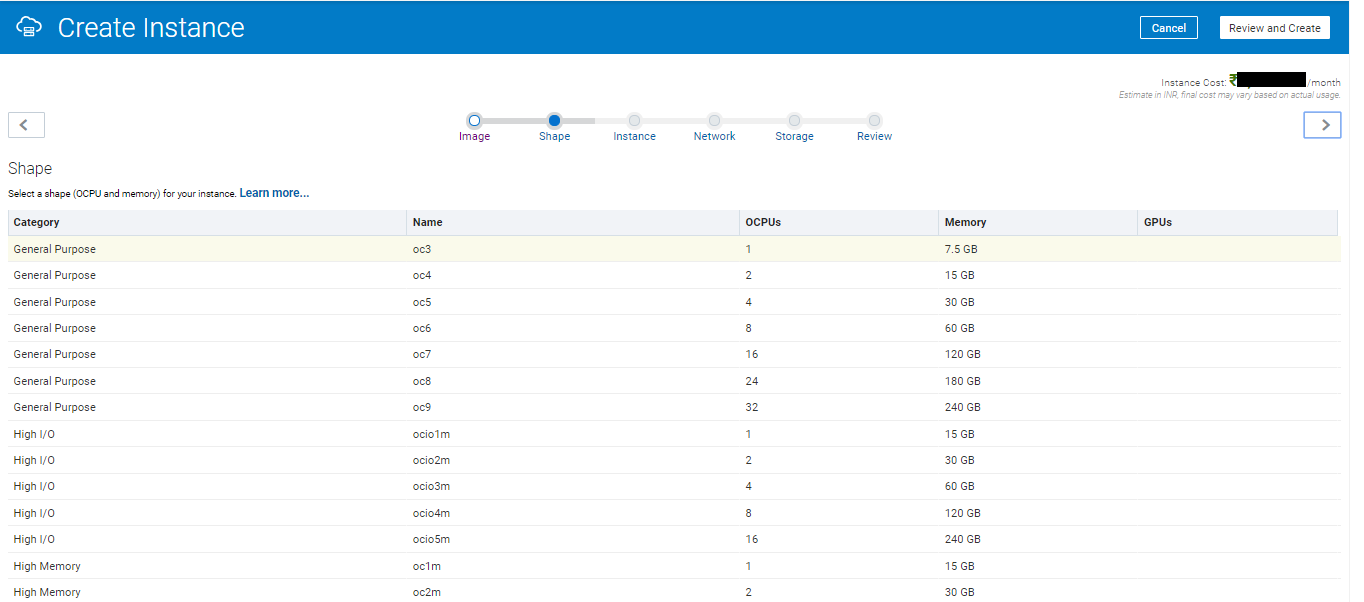
- On the Shape page, select an appropriate shape for the instance. The shape determines the number of CPUs and RAM that the instance will have. For the purpose of this tutorial, select oc3 (OCPUs: 1, Memory: 7.5 GB). Click the button to go to the next page
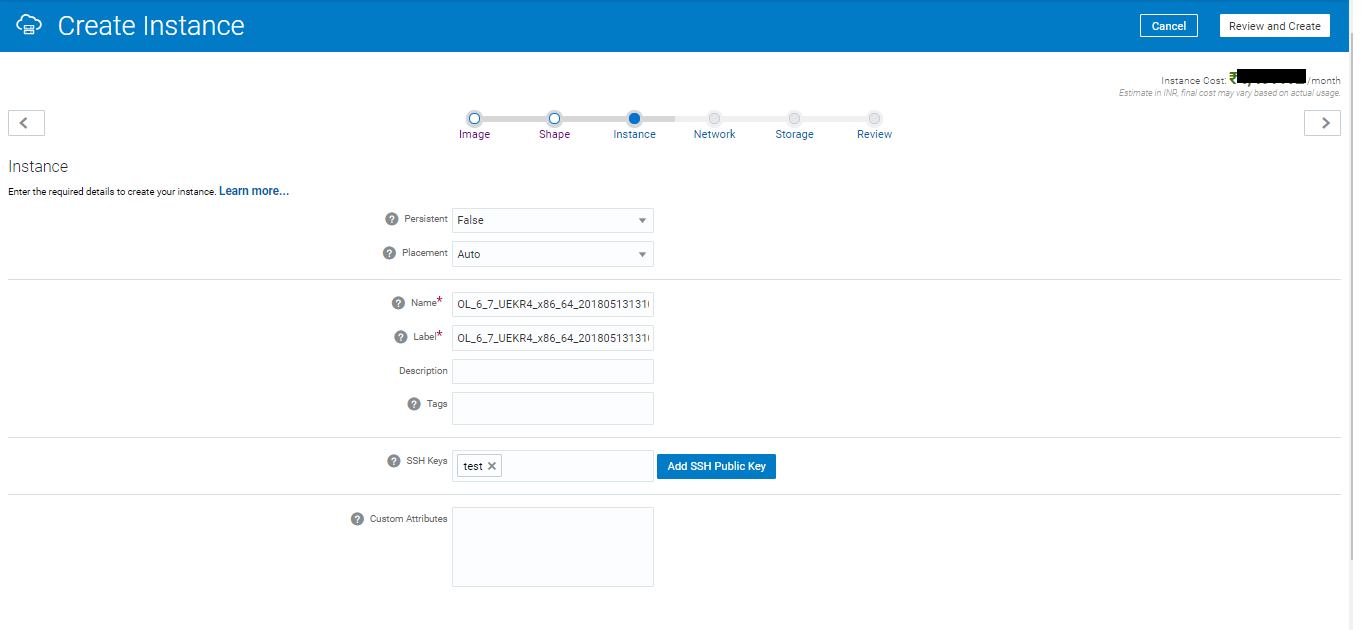
- On the Instance page, select or enter the following, and then click the button to go to the next page
- Persistent: Select true, if you want to persist the instance when the orchestration is suspended
- Placement: Select the domain where the instance would be created. Let it be the default(Auto) for now
- Name: Enter a unique name, or retain the default
- Label: Enter a unique label to help identify the instance, or retain the default. The label is used to list the instance on the Instances page
- Description(Optional): Enter a description, if required
- Tags(Optional): Specify a tag to help identify the instance
- SSH Keys: Click this field or start typing to see a list of available SSH public keys. To add a new SSH public key:
- Click Add SSH Public Key button
- Enter a name for the SSH public key
- Click Select File and navigate to the folder where the SSH public key is saved, or paste the public key in the Value field
- Click Add
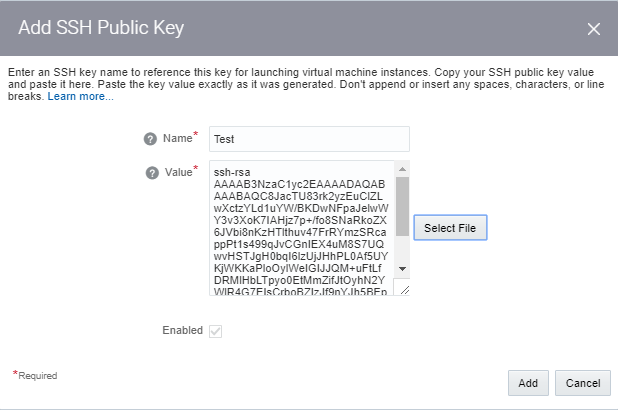
- The SSH public key is added and appears in the list of SSH keys that we want to associate with the instance
- Custom Attributes(Optional): This field allows us to customize the instance by providing additional information specific to each instance
- On the Network page, enter or select the following. Once done, click the button to go to the next page
- DNS Hostname Prefix: Enter a string that will be used as a prefix in the domain hostname for the instance.
- Network Options: Select whether you want to configure an interface on the shared network or one or more interfaces on IP networks. Select both options.
- IP Network Options
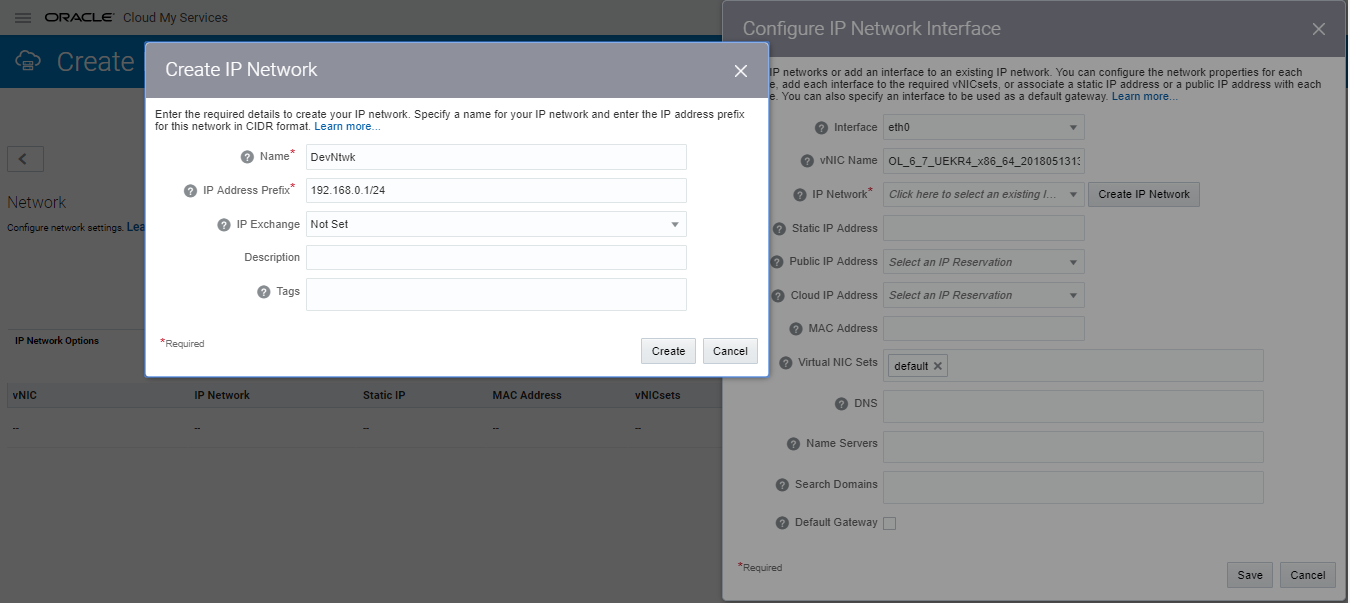
- Click Configure Interface button. In the Configure IP Network Interface dialog box, select or enter the following and then click Save
- Interface: Select the interface that you want to add to the specified IP network. We can select any interface from eth0 to eth7. After we select all the interfaces that we want to add to IP networks, the first available interface is assigned to the shared network. We can’t add, delete, or modify interface allocations after an instance is created. Let’s select eth0
- vNIC Name: Retain the default vNIC name
- IP Network: Specify the IP network that we want to add this interface to. When we add an instance to an IP network, the specified interface of the instance is assigned an IP address on the specified IP network. To create new IP Network Click Create IP Network and enter below details
- Name: Name for the IP network.
- IP address prefix: It should be in Classless inter-domain routing(CIDR) format. For example, enter 192.168.0.1/24
- Static IP Address: We can specify a private IP address for this interface. The private IP address must be unused and it must belong to the subnet of the selected IP network. For this blog, leave the blank
- Public IP Address: We can select an available public IP address for this interface. When the instance is created, we can configure security rules and access control lists for your IP network to enable access to this IP address over the public Internet. If we don’t select an IP reservation now, we can associate a public IP address with this interface later by creating or updating an IP reservation. Let’s leave this field blank for now
- Cloud IP Address: We can select an available cloud IP reservation for this interface. When the instance is created, this IP address can be accessed by other Oracle Cloud services without being accessible over the public Internet. If we don’t select a cloud IP address now, we can associate a cloud IP address with this interface later by creating or updating an IP reservation. Let’s leave this field blank for now
- MAC Address: Specify the MAC address if it required. Let’s leave this field blank for now
- Virtual NIC Sets: We can select the Virtual NIC (vNIC) sets to which to add this interface. Let’s leave this field blank for now
- DNS: We can specify DNS A record names for the instance. Let’s leave this field blank for now
- Name Servers: You can enter the name servers that are sent through DHCP as option 6. Let’s leave this field blank for now
- Search Domains: You can enter the search domains that should be sent through DHCP. Let’s leave this field blank for now
- Default Gateway: We can select this option if we want to use this interface as the default gateway
- Shared Network Options
- Public IP Address: To associate a permanent public IP address with the instance, select Persistent Public IP Reservation. If we select an Auto-Generated public IP address, the IP address persists while the instance is running, but will change every time on reboot. If we have already created an IP address reservation, select it from the list. Otherwise, create one using below steps:
- Click Create IP Reservation button
- In the Create Public IP Reservation dialog box, enter a name for the IP reservation and then click Create
- The IP reservation will be created and selected
- Security Lists: We can add the instance to one or more security lists. When we add an instance to a security list, we can control access to or from that instance by creating security rules that use the specified security list as a source or destination. For now, leave this field set to the “default” security list

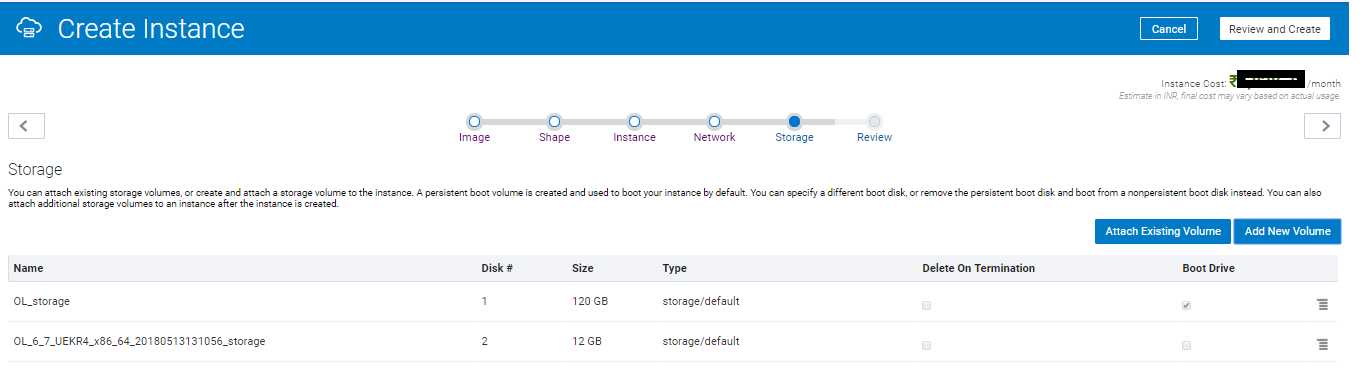
- On the Storage page, to use a persistent boot disk, accept the default settings and click the button to go to the next page.
If some extra storage is required to the instance, we can do the following:
- We can attach the existing volume using Attach Existing Volume.
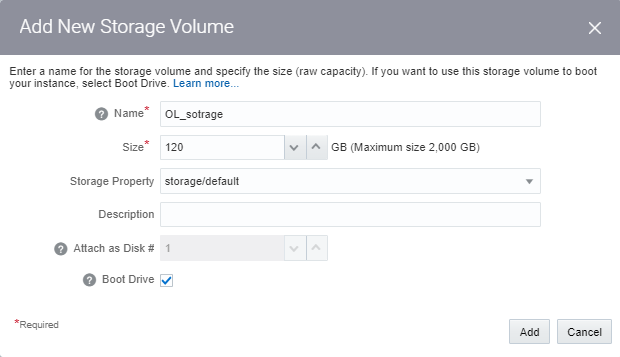
- We can create new volume by clicking Add New Volume. Click Add New Volume to create the new volume and do the following:
- Name: Enter Name of the volume
- Size: Enter the disk size in GB
- Storage property: For storage volumes that require low latency and high IOPS, such as for storing database files, select storage/latency. For all other storage volumes, select storage/default
- Attach as Disk: Accept the default disk number or enter a higher number. The disk number that specified determines the device name. The disk attached at index 1 is named /dev/xvdb, the disk at index 2 is /dev/xvdc, the disk at index 3 is /dev/xvdd, and so on
- Boot Drive: Select this option to use the specified storage volume as the boot disk. When this option selected, the disk number is automatically set to 1
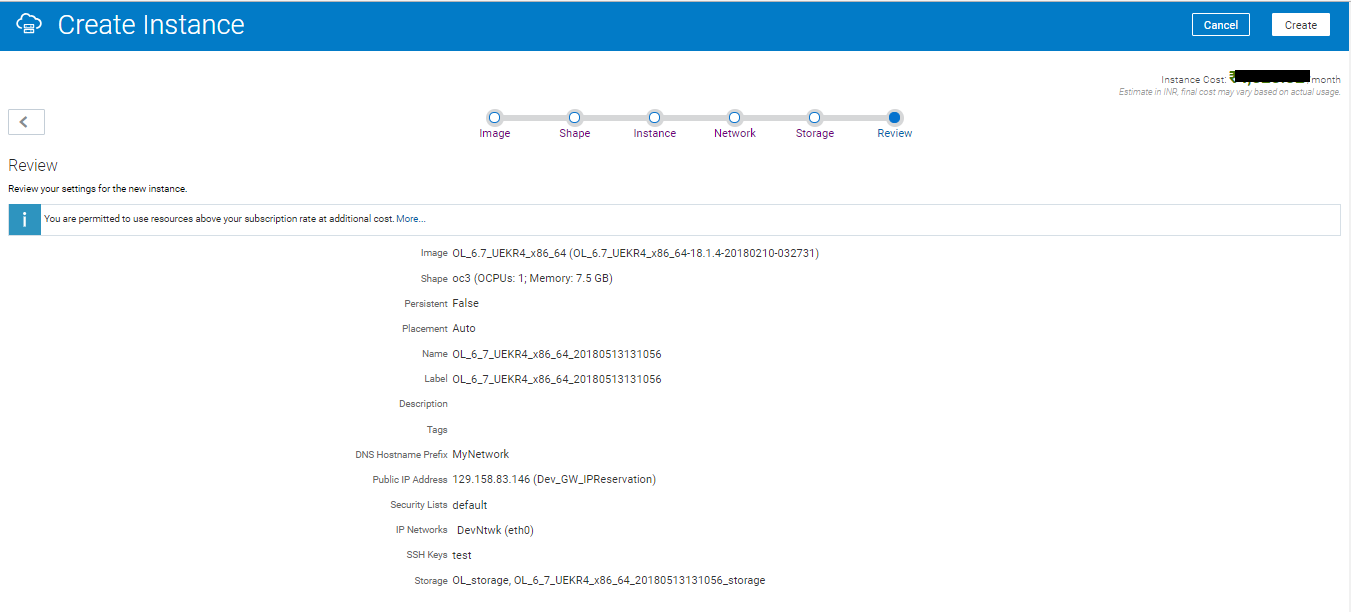
- On the Review page, verify the information that we have entered if satisfied then click Create
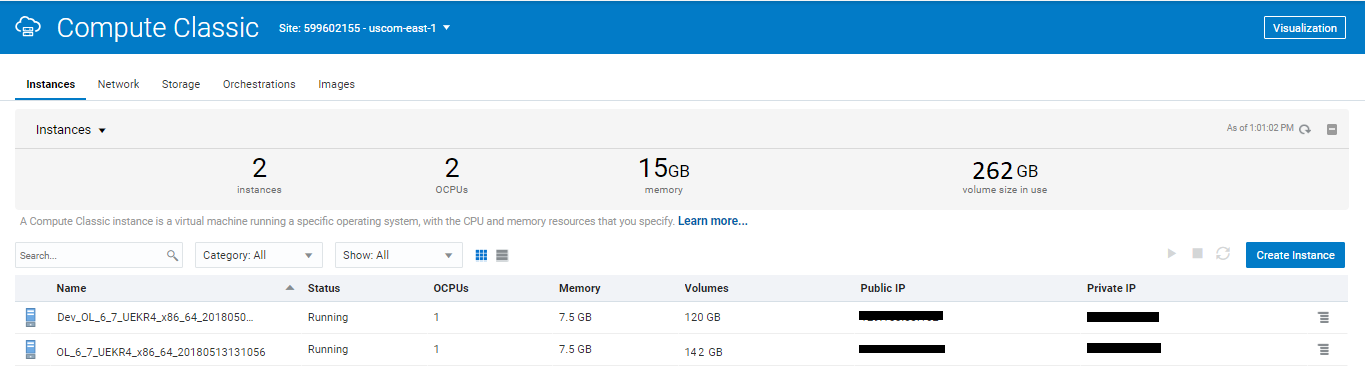
Compute Classic instances are provisioned and managed using orchestrations. Provisioning an instance will take approximately 30 minutes.
Once created successfully, VM would be visible on the Compute Classic page
PLSQL code profiler is an Android App, Useful Code Review solution for Oracle consultants. please it checkout in google play store :
https://play.google.com/store/apps/details?id=appinventor.ai_pshreedhar.PLSQL_Review1
and also check out the solution demo in Youtube
https://youtu.be/Wckm1_s9Y0M?list=PLqfoPI5nmJaNJNleopCOYh3rqX-8zraqU
Thanks for the explanation. It’s really helpful. Please keep sharing
Oracle Course in Delhi