How to call OIC REST API in VBCS (VBCS -> OIC)
In this article, I’m going to show a beautiful use case which I encounter in my project. In this article, I’ll show how to call OIC REST service from VBCS.
Some useful links
Basics of Oracle Visual Builder Cloud Services
Create a simple web application: Visual Builder Cloud Service(VBCS)
In this article, we will execute the below use case:
- Create an OIC REST service which accepts the file, JSON payload(First Name, Last Name) as input parameters and returns the JSON response(Greeting)
- Create Service connection in VBCS application which is used to call REST API
- Create a webpage in VBCS which will have text box (First Name, Last Name), file picker and Submit button
- Call the OIC REST API on button click and pass the input parameter in the REST service which is entered from VBCS page
Let us move forward and see how to achieve this
OIC REST service in Oracle Integration
Considering we already have an OIC REST service as below:
Request
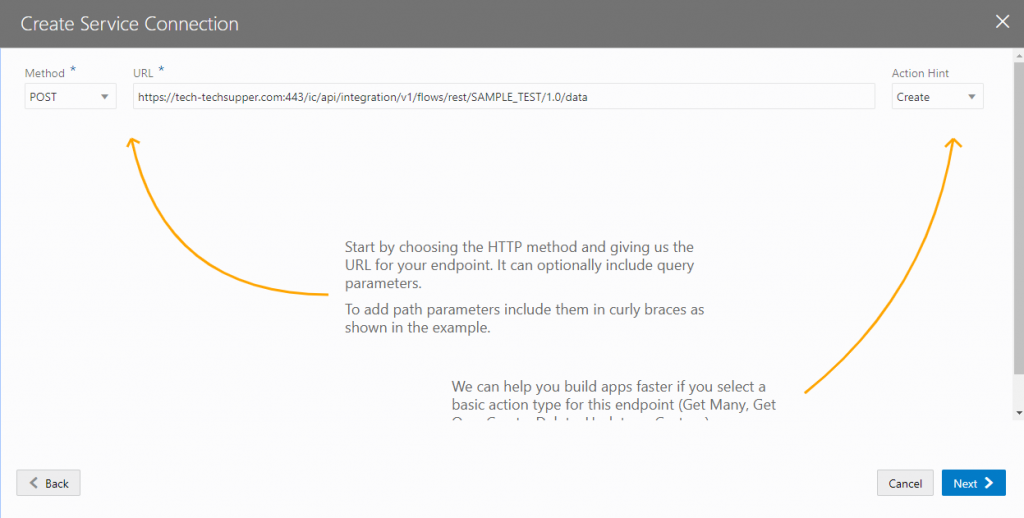
URL: https://test-techsupper.com:443/ic/api/integration/v1/flows/rest/SAMPLE_TEST/1.0/data
Method POST
Request
Request Media Type: multipart/mixed
Request sample
{ “FirstName”:””, “LastName”:”” }
Response
Response Media Type: application/json
Response sample
{ “Greeting”:”” }
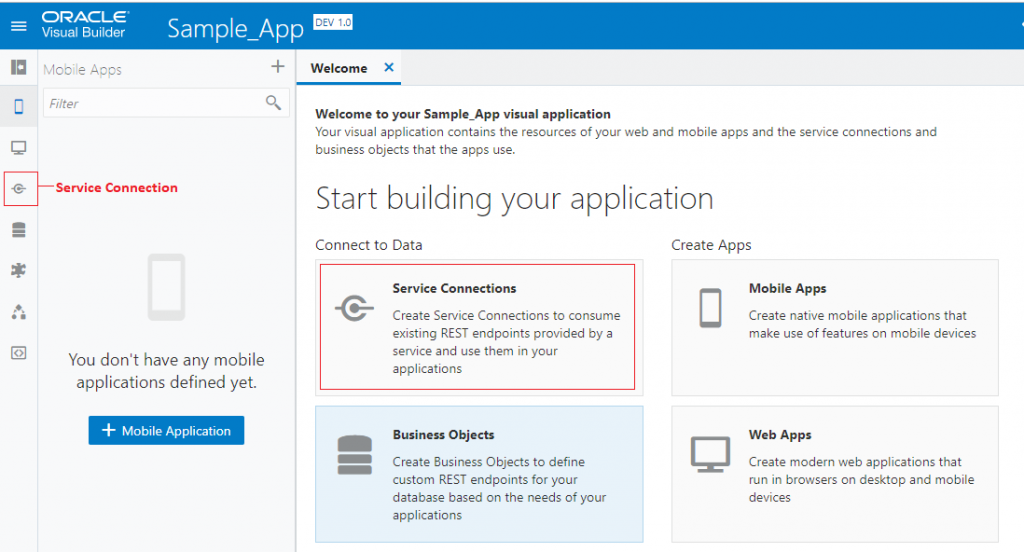
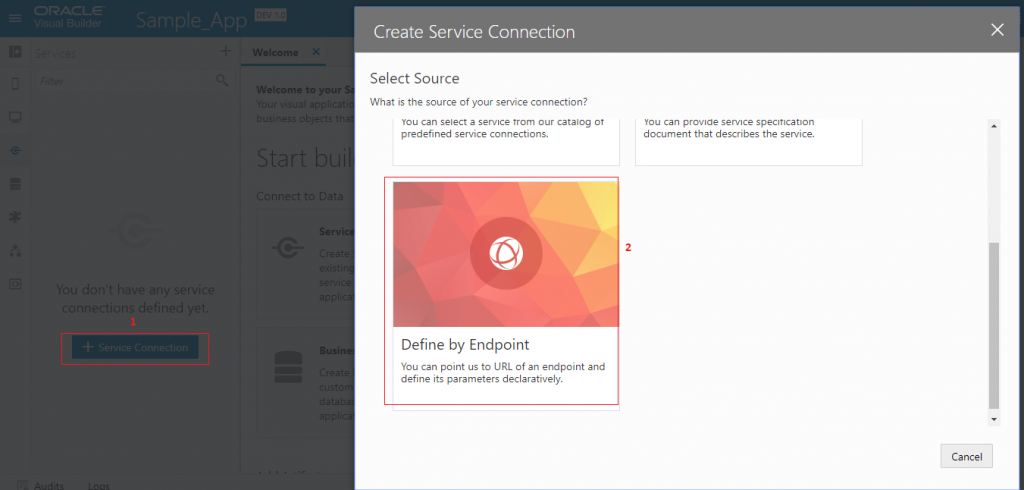
Create Service Connection in VBCS
Click on the Service Connections either from the left panel or center menu
Click on the + Service Connection and then Select Define by Endpoint
Select Method as POST, Enter REST Endpoint URL, select Create from Action Hint drop-down and select Next button
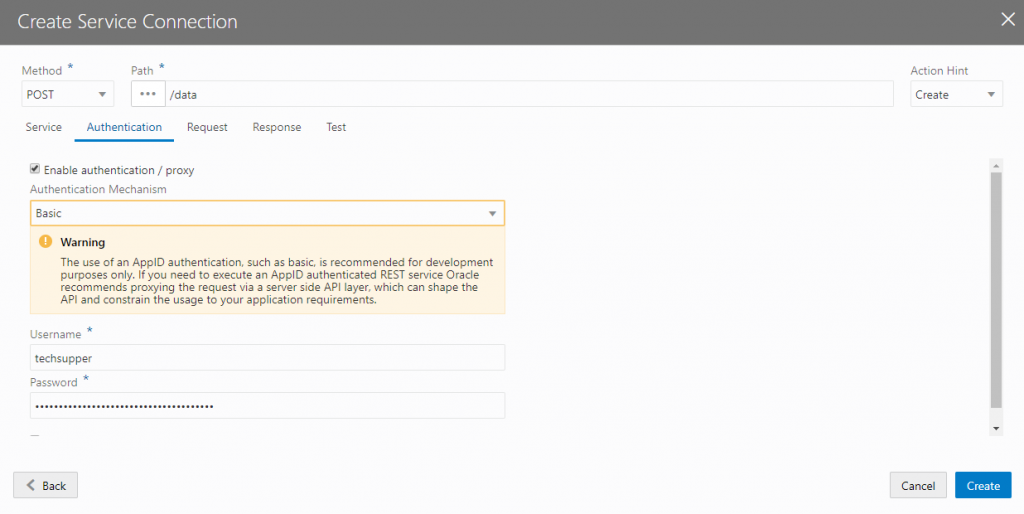
In the next screen, you can change the Service Name if required else skip and switch to the Authentication tab. Check Enable authentication/proxy checkbox, Select Basic from Authentication Mechanism dropdown and enter user name and password
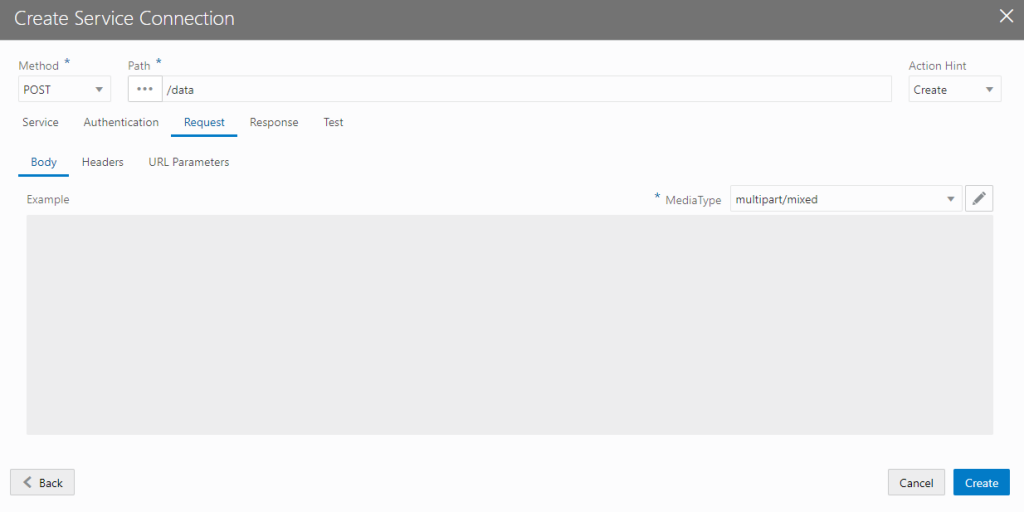
Select the Request tab and edit Media Type as multipart/mixed
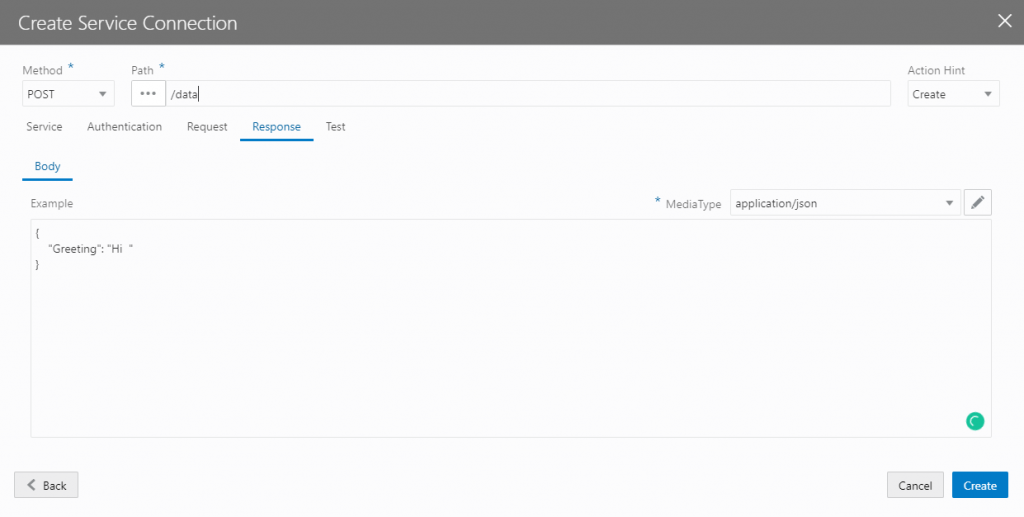
Select the Response tab, and enter OIC service response in the Body text area. Click on the Create button
Create WebPage in VBCS
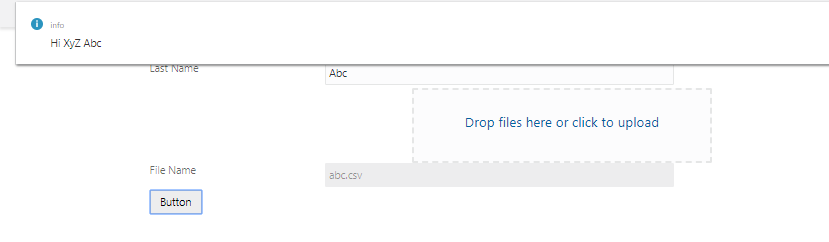
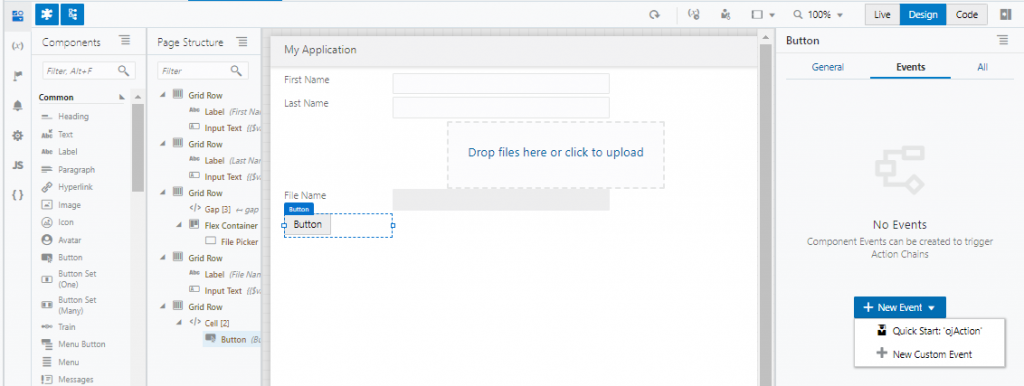
Open the main-start page and drop below component on the page
| Component Name | Label | Is Disabled |
| Input Text | First Name | No |
| Input Text | Last Name | No |
| Input Text | File Name | Yes |
| Button | Button | No |
Since File picker component doesn’t exist in VBCS version 19.1.3 hence we have to add this manually. To do so, open the web page HTML code and add below code after the Last Name
<div class="oj-flex">
    <div class="oj-flex-item oj-sm-12 oj-md-3"></div>
    <div class="oj-flex oj-flex-item oj-sm-12 oj-md-4">
        <oj-file-picker id="oj-file-picker-1084591017-1" class="oj-flex-item"></oj-file-picker>
    </div>
</div>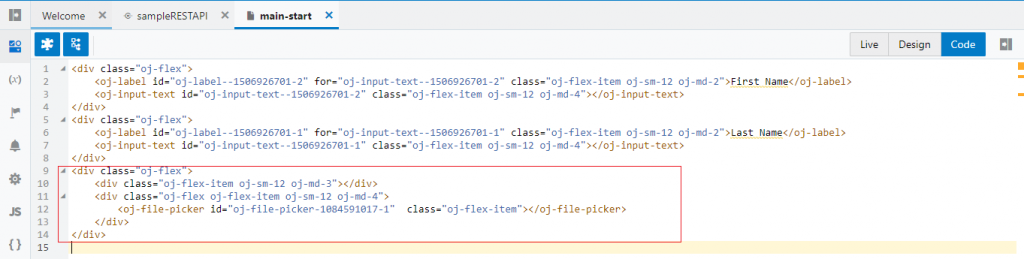
Open the Metadata, and add below code
,"oj-file-picker": {
         "path": "ojs/ojfilepicker"
       }
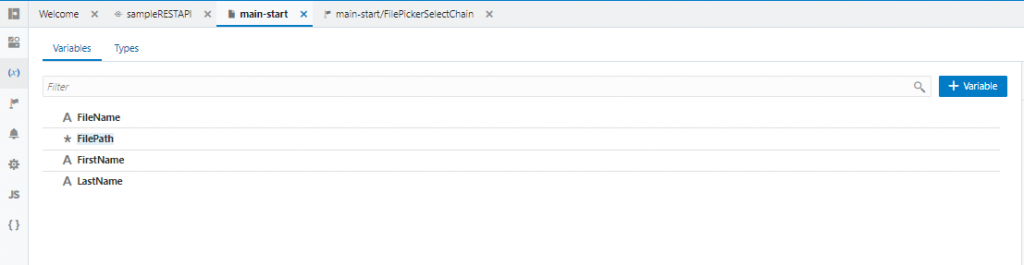
Open the Variables tab and create below variables
- FileName -> String type
- FirstName -> String type
- LastName -> String type
- FilePath -> Any type
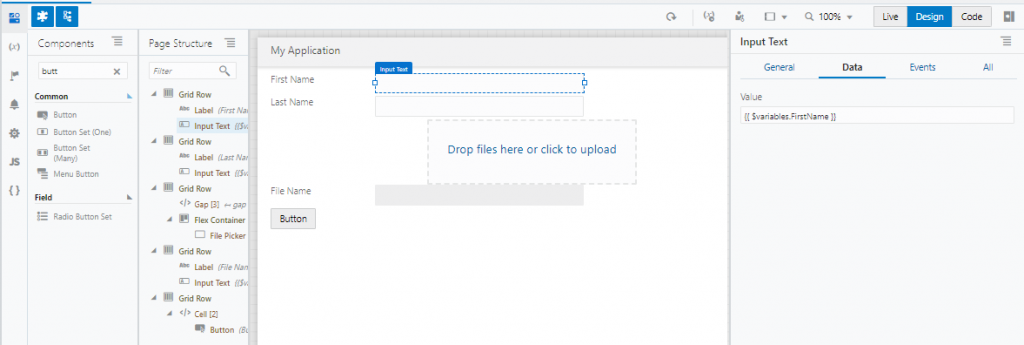
Open the Designer tab and select First Name input element, see the Data tab and bind value as {{ $variables.FirstName }}
Repeat the same step for Last Name and File Name components and bind values as {{ $variables.LastName }} and {{ $variables.FileName }} respectively
Select the file picker element, go to the Events tab, select + New Event, and select + New Custom Event
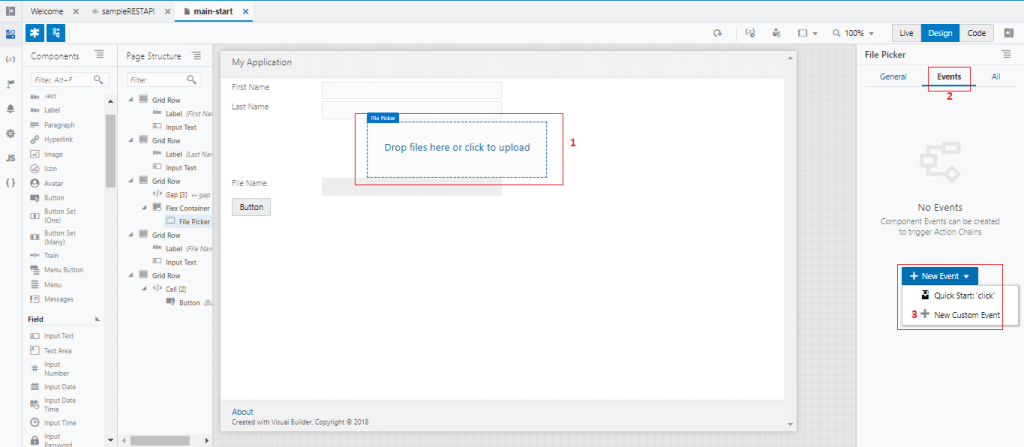
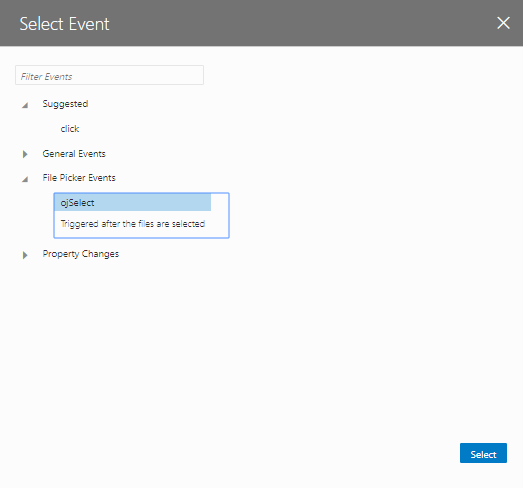
Expand File Picker Events, select ojSelect and Click Select button
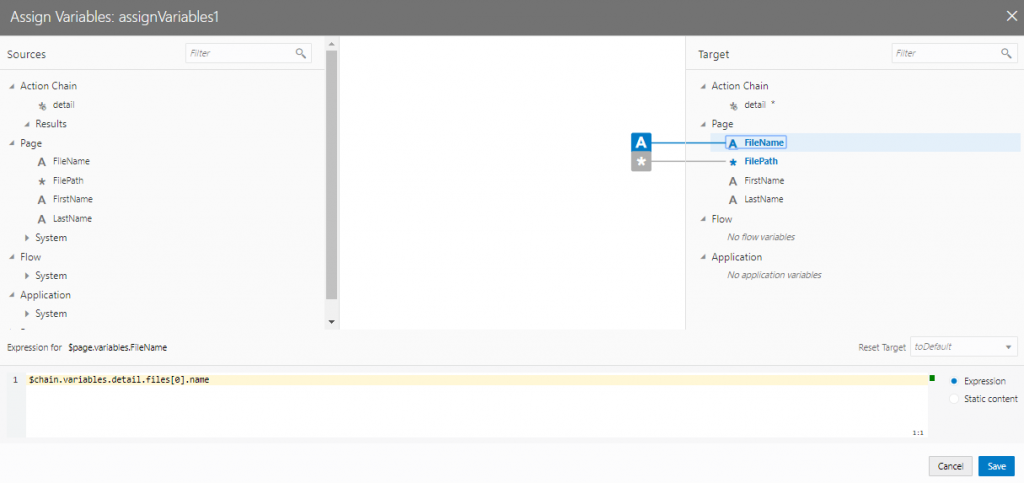
In the Next popup, Select New Action Chain button which will open the file with name something main-start/FilePickerSelectAction. Drop Assign Variables activity and click on the Assign from the right panel.
Select FileName in the Target section and enter expression as $chain.variables.detail.files[0].name Make sure the Expression radio button is selected. The expression will get the file name during runtime and assign to the FileName variable.
Samways, select FilePath in the Target section and enter expression as $chain.variables.detail.files Make sure the Expression radio button is selected.
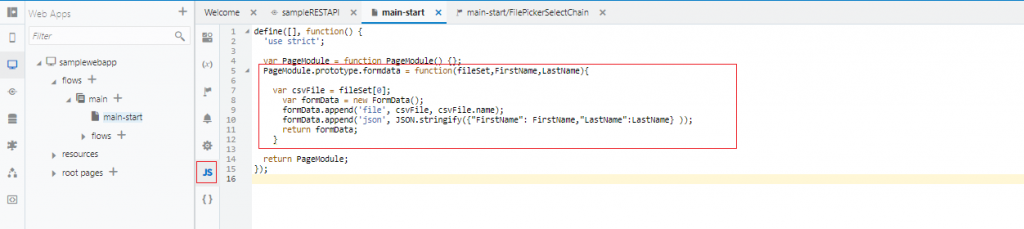
Go to the main-start page, select Functions tab and enter below code just below the line var “PageModule = function PageModule() {};“. This will create a function with the name formData. In this function, we are building the REST API request.
  PageModule.prototype.formdata = function(fileSet,FirstName,LastName){

    var myfile= fileSet[0];
      var formData = new FormData();
      formData.append('file', myfile, myfile.name);
      formData.append('json', JSON.stringify({"FirstName": FirstName,"LastName":LastName} ));
      return formData;
    }
Go back to the Designer tab and select Button. From the Events tab, select +New Event and select Quick Start: ‘ojAction’
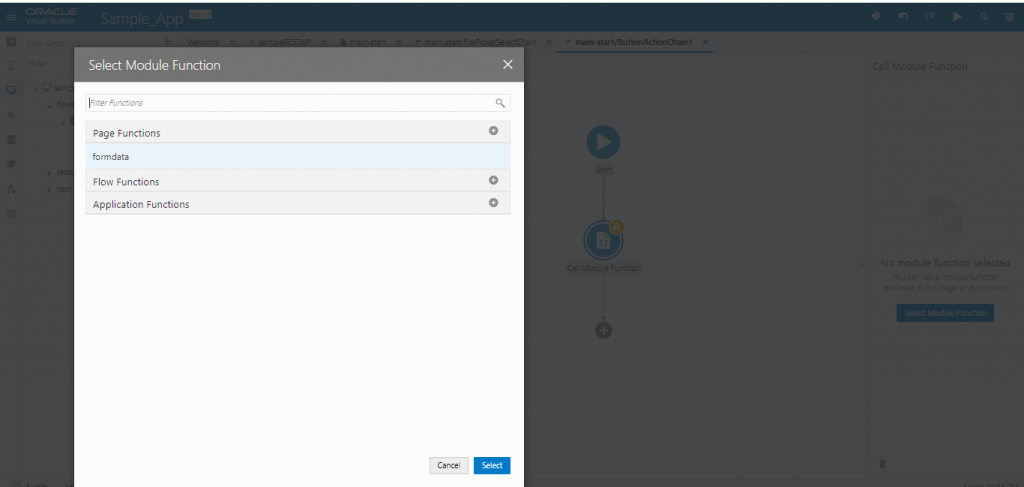
Drop Call Module Function activity on the event Action Chain. Click Select corresponding to the Function Name from right panel. From the opened popup expand Page Functions and select formData function which we created in the previous step
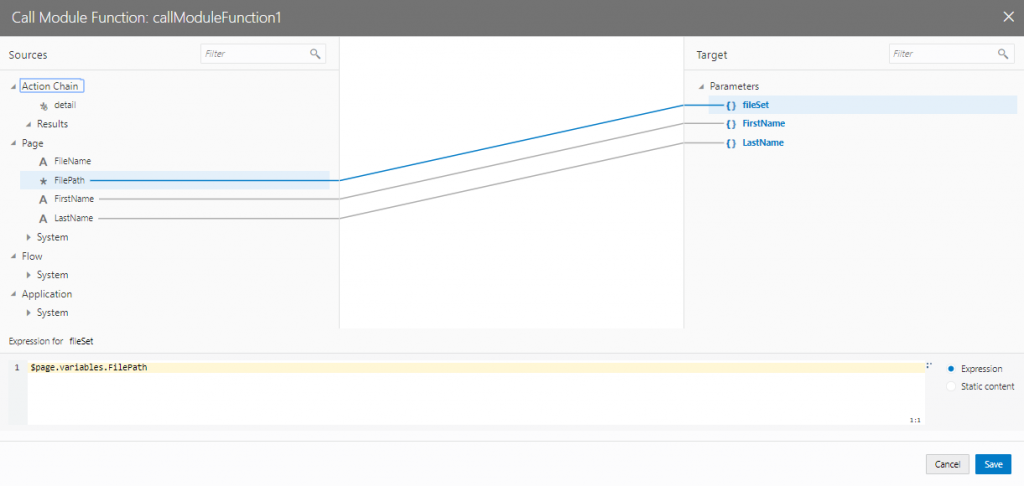
Select Call Module Function activity, click on Assign from the right panel and do the mapping as below
- FilePath -> fileSet
- FirstName -> FirstName
- LastName -> LastName
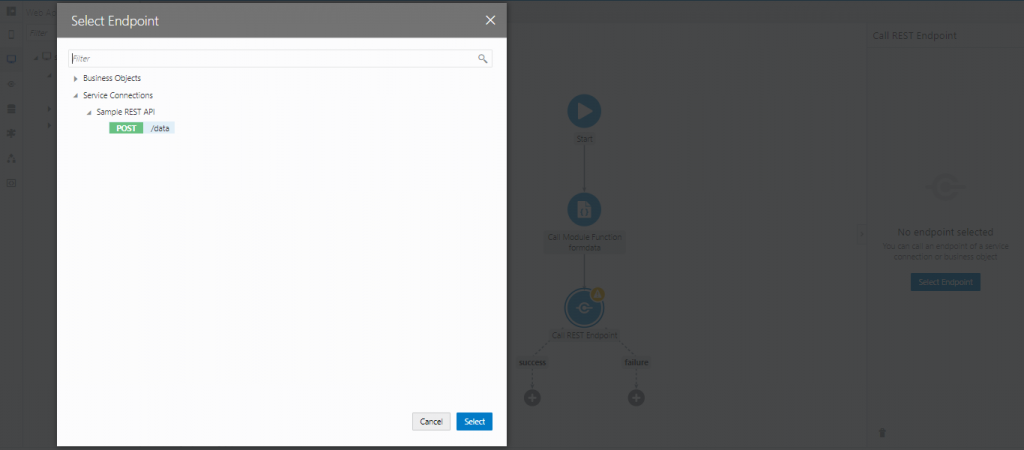
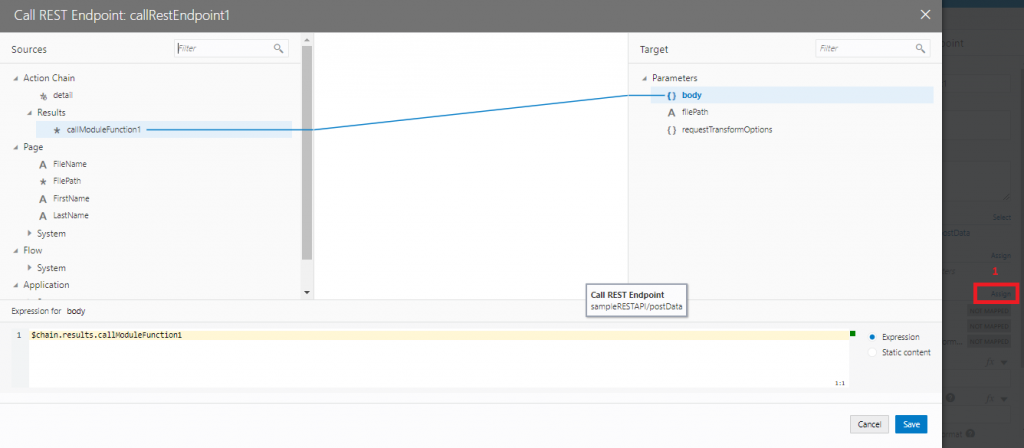
Drop Call Rest EndPoint activity just below the Call Module Function activity. Click on the Select from the right panel and select /data Endpoint
Click Assign from the right panel and map callModuleFunction1 to body
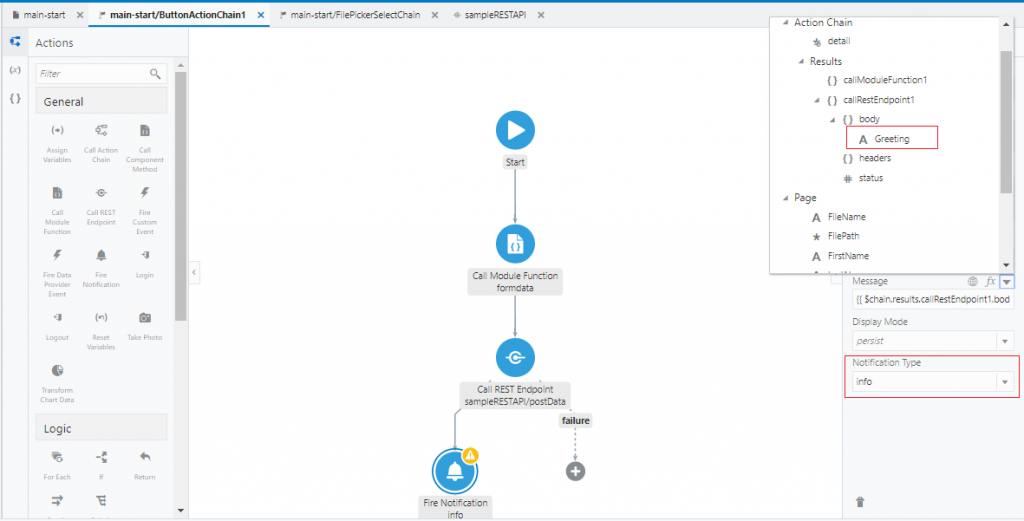
Drop Fire Notification activity under success path and assing “{{ $chain.results.callRestEndpoint1.body.Greeting }}” in the Message from the right panel and Notification Type to info
The Configuration is completed. It’s time to test the VBCS application. Click the Run button. Enter information on the page, select File using File picker and notice the File name will be populated in File Name input text. Click on the button and see the notification popup message which is the response of REST API