Navigation between pages in Oracle VB CS application
While developing a web site it is common to have multiple pages and navigate between from one page to another on some event. This is called navigation between pages. In VBCS application each pages are part of at-least one flow. A flow named main and a page named main-start is created by default when we create an application. The main flow and its nested flows can each contain multiple pages.
Let’s move ahead and see how to create navigation between pages.
Create VBCS web application
Create a VBCS application with name NavigationApp and Web application under this with name navwebapp. As I mentioned earlier, each VBCS web application comes with default flow(main) and page(main-start).
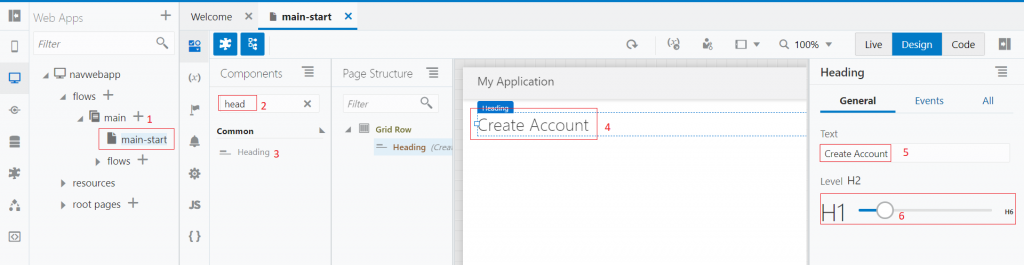
Open the main-start page and drop the Heading activity from the component pallet on page. Change the text as “Create Account” and change level to h2 using slider bar.
Drop Form Layout on page and drop component as below:
| Component Name | Label |
| Input Text | First Name |
| Input Text | Last Name |
| Input Text | |
| Input Password | Password |
| Button | Create Account |
Select First Name input text, click Data tab from right side, click expression from value text box, click on Create variable align to flow and name the variable as FirstName
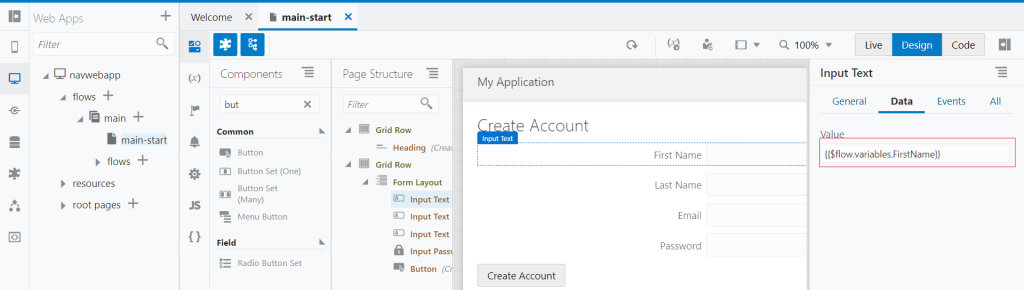
Notice the Value text box expression “{{$flow.variables.FirstName}}“. This will bind the First Name input text with variable FirstName and will be accessible in all the pages under main flow.
Repeat the steps for Last Name, Email and Password and create different variables.
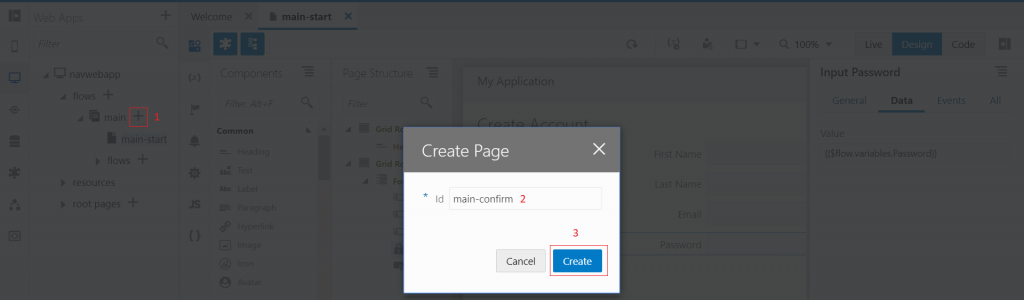
Create another page under same flow(main). To do so, click on the + button corresponding to the main flow. From the Create Page popup, enter the page name as “main-confirm” and click on the Create button
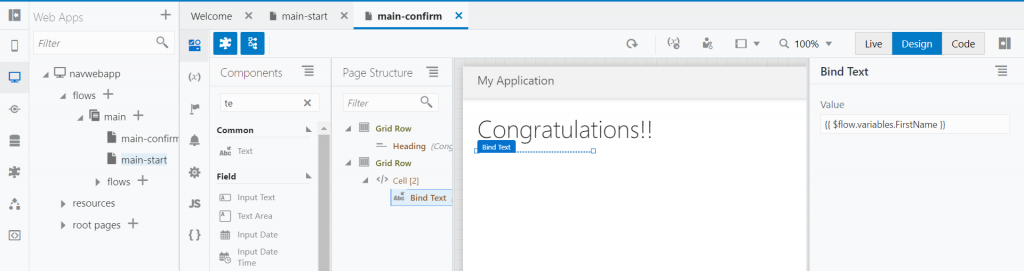
A new page will be created with name “main-confirm“. Drop the Heading activity from the component pallet on page. Change the text as “Congratulations!!” and change level to h2 using slider bar. Drop Text component, and bind it as “{{ $flow.variables.FirstName }}” from the Value
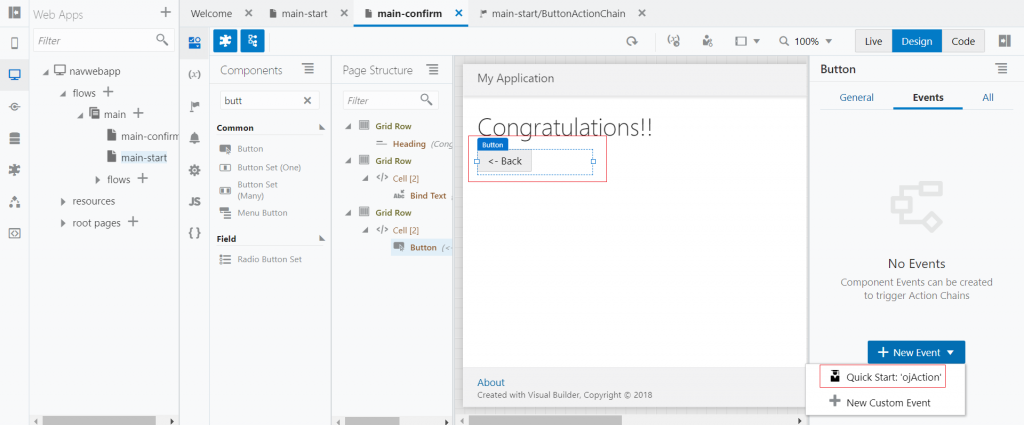
Drop a Button component after the Text element and change text as “<- Back“. Select Button, navigate to Events tab, select + New Event and select Quick Start: ‘ojAction’
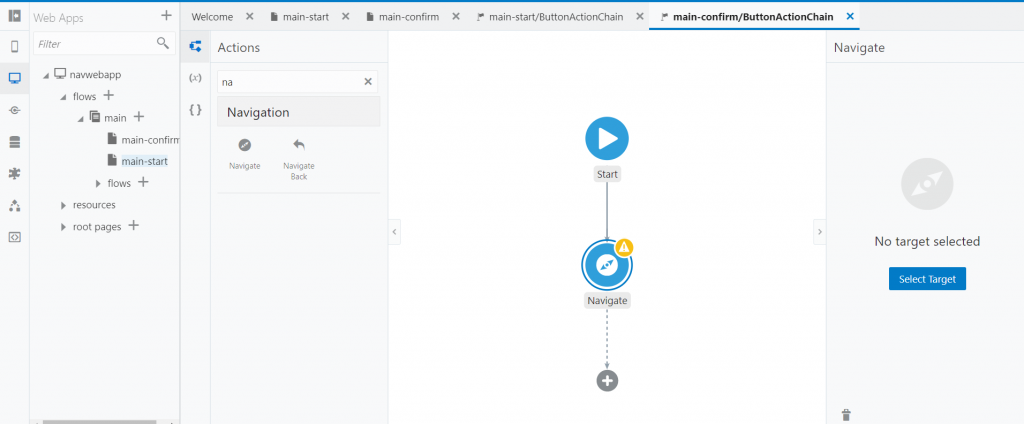
Drop the Navigate activity on the main-start/ButtonActionChain and select Select Target button
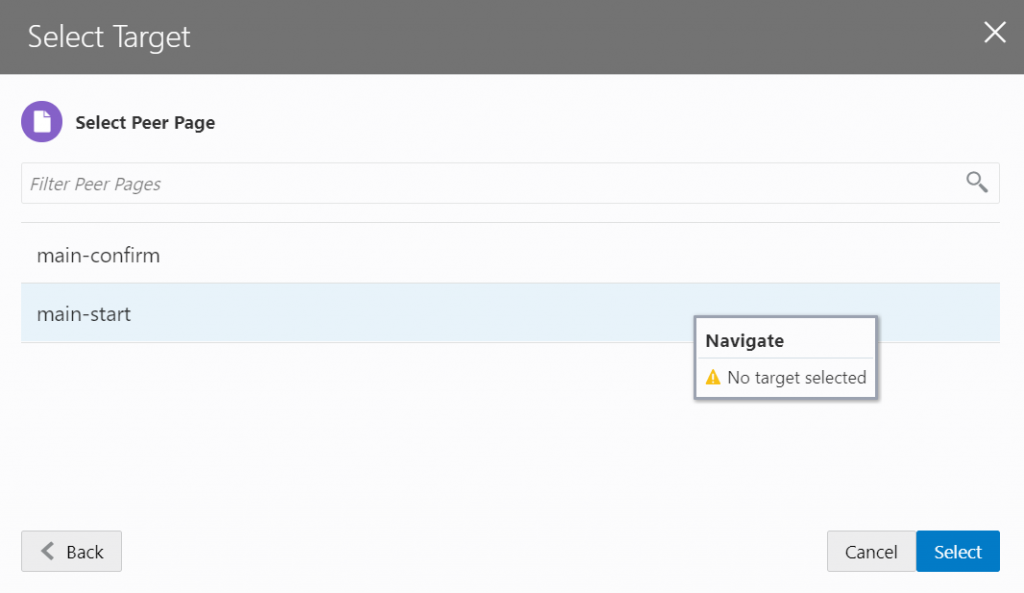
From Select Target popup select Peer Page and select main-start from next screen and click on Select button
Go back to the main-start page, select Create Account button, navigate to Events tab, select + New Event and select Quick Start: ‘ojAction’.
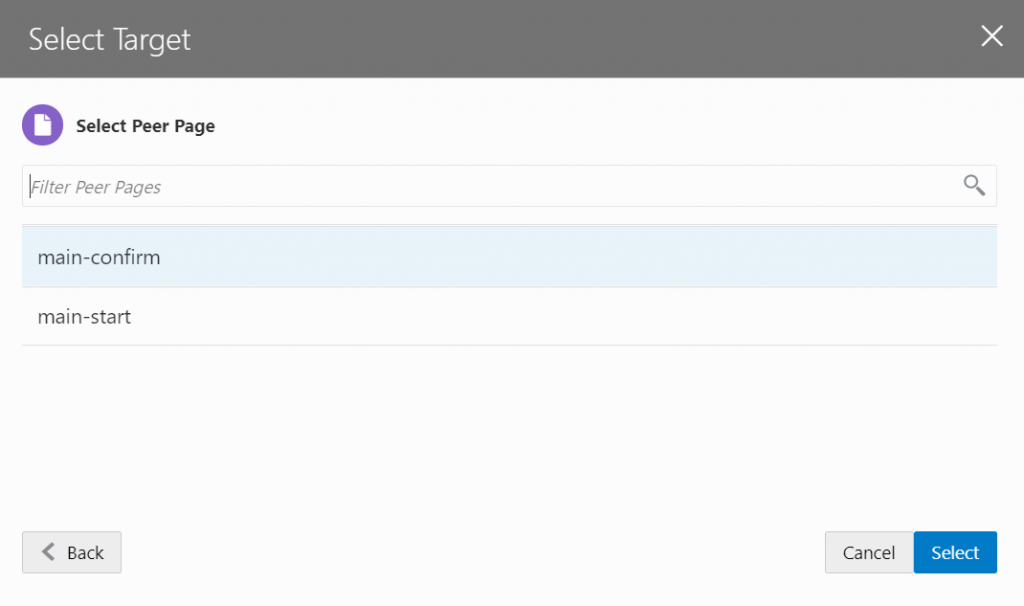
Drop Navigate activity on main-start/ButtonActionChain and select Select Target button. Select Peer Page from Select Target popup, select main-confirm from next screen and click Select button
Test Application
Application configuration is completed now. Let’s play with application. Run application, enter details and Click on the Create Account buton

Clicking on the Create Account will take us to next page(main-confirm). Notice the First Name on the page we entered in previous page
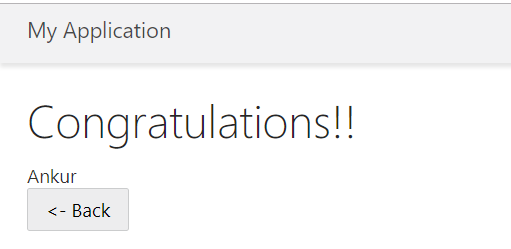
Clicking on the Back button will take to the previous page.

