Migrate Oracle Integrations with Security artifacts
Till now, In our blogs, we have covered how to migrate integrations using .iar files and packages, But in these two methods, the security artifacts will not be migrated.
If you have missed those blogs, click here and check them out.
But if your requirement is to migrate all integrations along with the security credentials then this blog will help you to achieve it.
Pre-requisites:
- OCI Object Storage Bucket
- OIC Instance with Admin access
Please check this detailed video on creating an OCI object storage bucket
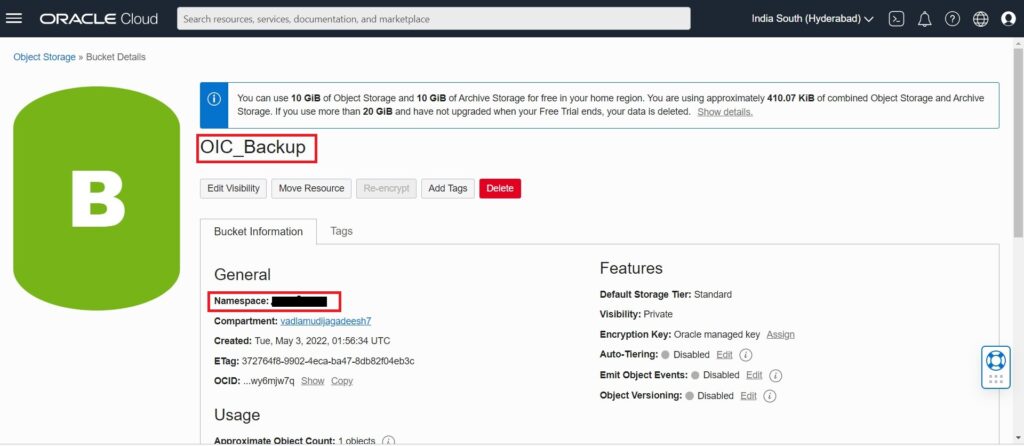
Note down the Bucket Name and Namespace from the Bucket details page as shown in the following screenshot that will be used later part in this article:
Next, we need to create a security token that is required by OCI when you access your storage bucket via an API. Oracle Integration is going to use the OCI Storage Service APIs to read and write files to your bucket, so we need to have this Auth Token ready to go.
To create an Auth Token, click on your Avatar from the top right of the OCI console and select My Profile, This will redirect you to your profile page. Select the Auth tokens tab and click on the Generate Token button.
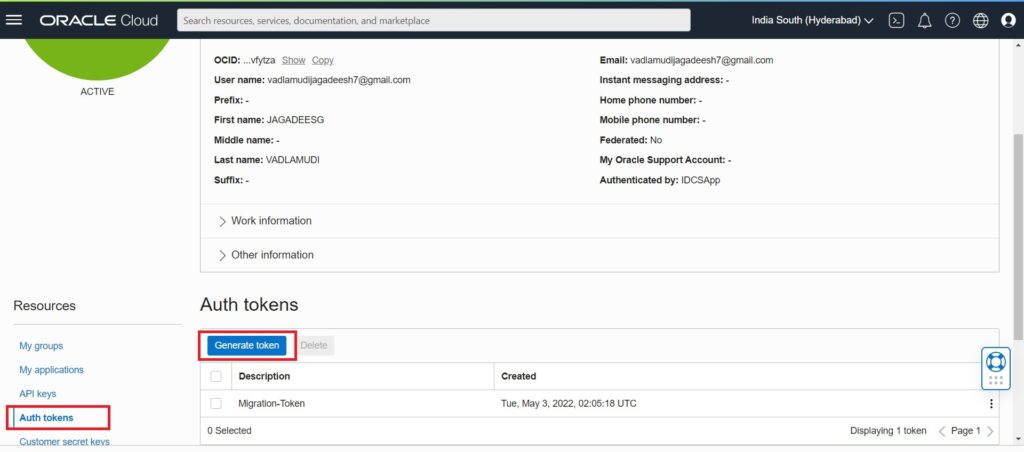
Note: After generating the Authentication Token please copy it in the notepad for further use, You will not be able to see this token or retrieve it ever again.
Configuring Storage Bucket in OIC
Now we are ready with our storage bucket, but before exporting our integrations we need to configure Object Storage on the OIC settings page.
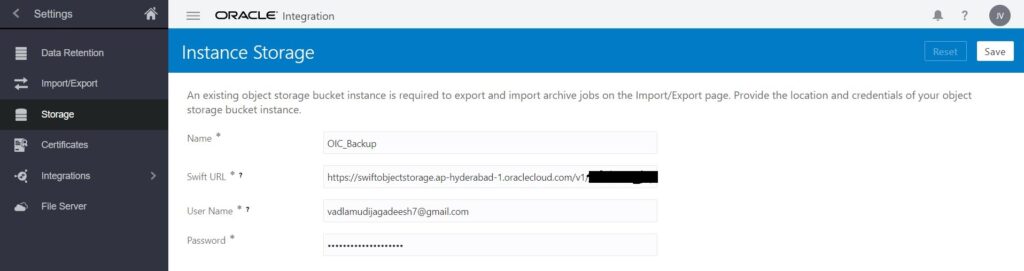
Navigate to the Settings page and select Storage to configure the bucket.
- To configure the Storage bucket we need the following details:
- Name
- Swift URL
- User Name
- Password
- Name: Mention any name as storage, need not be an OCI Bucket name.
- Swift URL: The syntax for Swift URL is mentioned below. Replace region,object-storage-namespace & bucket_name with your OCI details.
https://swiftobjectstorage.{region}.oraclecloud.com/v1/{object-storage-namespace}/{bucket_name}- My complete URL is
https://swiftobjectstorage.ap-hyderabad-1.oraclecloud.com/v1/<my-namespace>/OIC_Backup- Username: This is your OCI username.
- Password: Pay attention here. This is NOT your OCI password as it might seem. This is where you need to provide the Auth Token that you created in the previous step. Hopefully, you saved your token as suggested and have it in a text document. If so, use that as your password. If not, go back to OCI and regenerate a new token.
Creating Export Job in OIC
Once we are done with the above steps, we can start exporting our Integrations to object storage by creating an export Job.
Navigate to the settings page and select the Import/Export tab and click on the Export button:
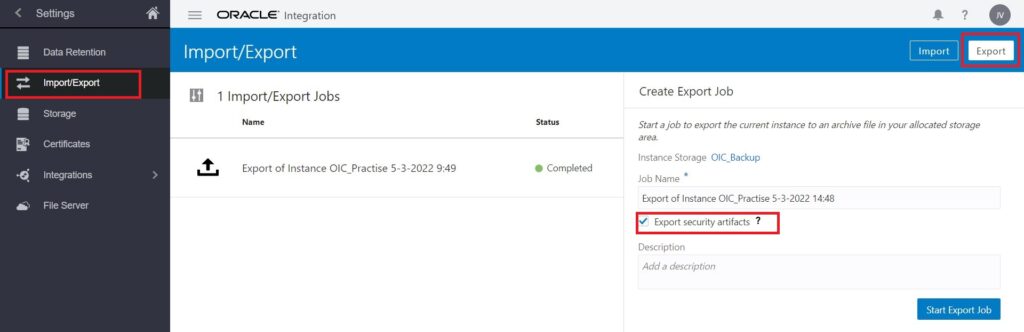
Note: Make sure to check the Export security artifacts checkbox.
The security artifacts that will be exported with your meta-data are as follows:
- Security policies
- Security credentials (for connections)
- Customer certificates
- Application role memberships (for Processes)
Finally, click on Start Export Job to start the export job, This will take approximately 5-10 minutes to complete.
Creating Import Job in OIC
- Sign in to the instance in which to import the exported archive of design-time metadata.
- Configure the Storage bucket in the Storage tab in a similar way to how we configured it in the first instance.
- On the Home page, select Settings > Import/Export.
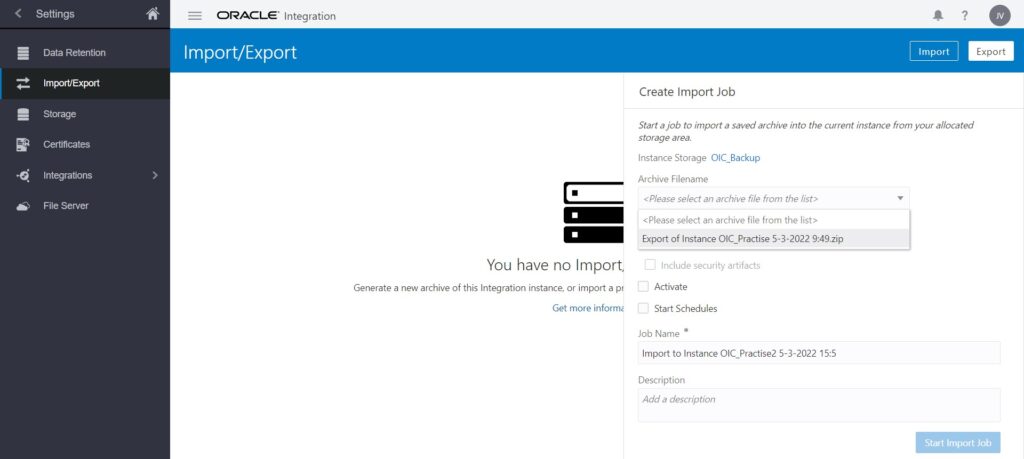
- Click Import to create a job to import the exported archive job from the object storage bucket instance into the new instance. Check out this document to know all the possible options to Import the Integrations.
Finally, Click on Start Import Job.
On Successful completion of the Import Job, We can find all the integrations in our second instance.
Look at the below video on a similar requirement to know the configuration step by step:
You can look at our YouTube channel for Oracle Integration-related videos. Also, don’t forget to subscribe to our channel.
Further Readings
How to create a BIP report in Oracle SaaS
How to create and test custom ESS job in Oracle SaaS
Merging two CSV files into a single file in Oracle Integration
ERP Integration using File Based Data Import: Oracle Integration