
Filter data using q parameter in Oracle Visual Builder
This article demonstrates how to filter table data using the q parameters in Oracle Visual Builder.
In visual builder, there are different data providers such as Service Data Provider (SDP), and Array Data Provider (ADP). Using a Service Data Provider (SDP) we add data to the table component and demonstrate the search operation.
Following are the steps :
- Create a VB application and a web application under the VB application using the Web application navigator.
- Create an Employees Business Objects with the following three fields:
- First Name
- Last Name
- Department Id
- Go to the Data tab and click on +Row to add some rows to Business Object.
For more detail on the creation of Business objects please refer to our antecedent blog which includes the steps to create Business objects
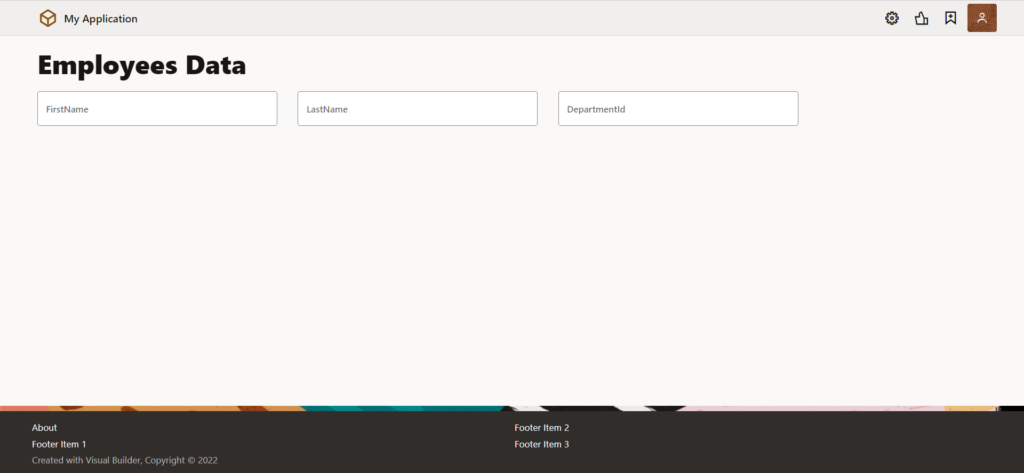
- To add Search Parameters we need to create input fields with respective variables to hold the values. So go to the component pallet, drag and drop three input fields and add label hints as FirstName, LastName, and DepartmentId as shown in the below screenshot:
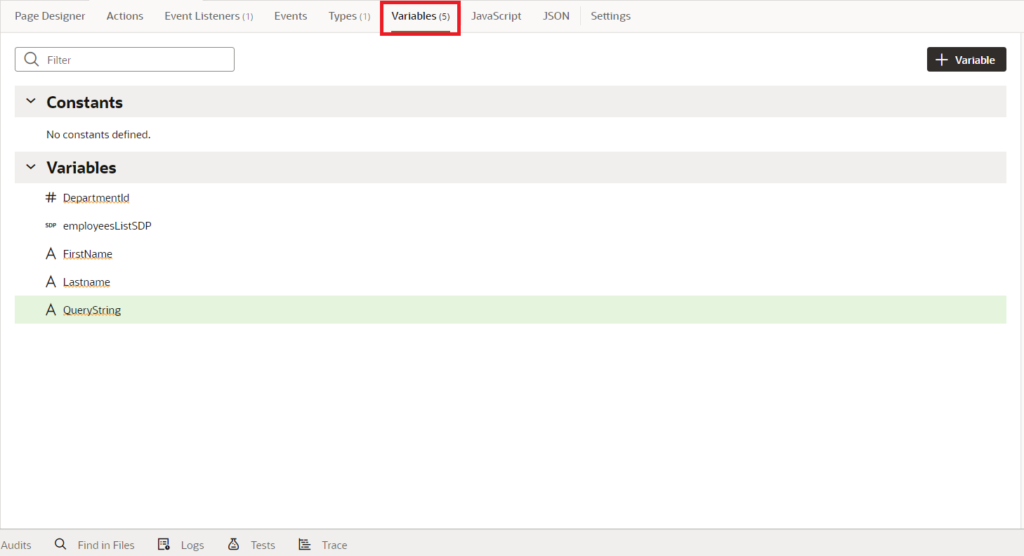
- Go to the Variables tab of the page and create three variables for the input fields(FirstName, LastName of String type, and Department with Number type). Along with this, we need to create another variable(QueryString of String type) to hold the prepared query string.
- Assign the variable to the Input fields by clicking on the Data tab on the properties panel of the input fields.
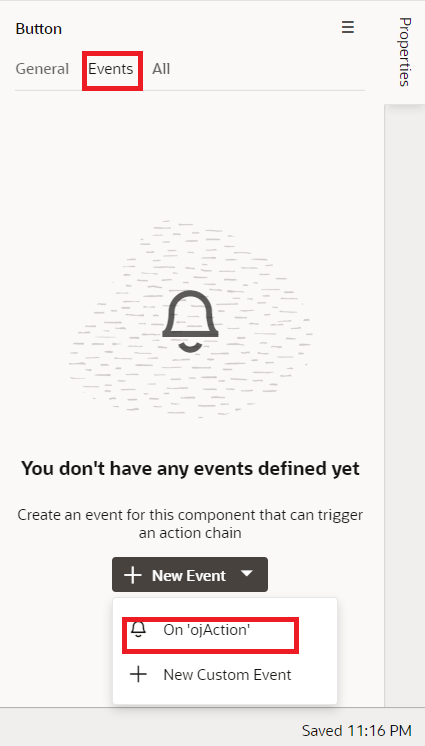
- Add a button with the label Search to trigger the action chain in which we are creating the queryString.
- Go to the Event tab in the properties panel and click on +New Event to add on ojAction for the button as shown in the below screenshot.
- To create the QueryString, the following JavaScript function is written on the page:
QueryStringGenerator(firstName, lastName, departmentId) {
let queryString = "";
if (typeof firstName !== 'undefined' && firstName !== '' && firstName !== null) {
if (queryString == "") {
queryString = queryString + "firstName like (\'%" + firstName + "%\')";
}
else {
queryString = queryString + " AND " + "firstName like (\'%" + firstName + "%\')";
}
}
if (typeof lastName !== 'undefined' && lastName !== '' && lastName !== null) {
if (queryString == "") {
queryString = queryString + "lastName like (\'%" + lastName + "%\')";
}
else {
queryString = queryString + " AND " + "lastName like (\'%" + lastName + "%\')";
}
}
if (typeof departmentId !== 'undefined' && departmentId !== '' && departmentId !== null) {
if (queryString == "") {
queryString = queryString + "departmentId like (\'%" + departmentId + "%\')";
}
else {
queryString = queryString + " AND " + "departmentId like (\'%" + departmentId + "%\')";
}
}
return "(" + queryString + ")";
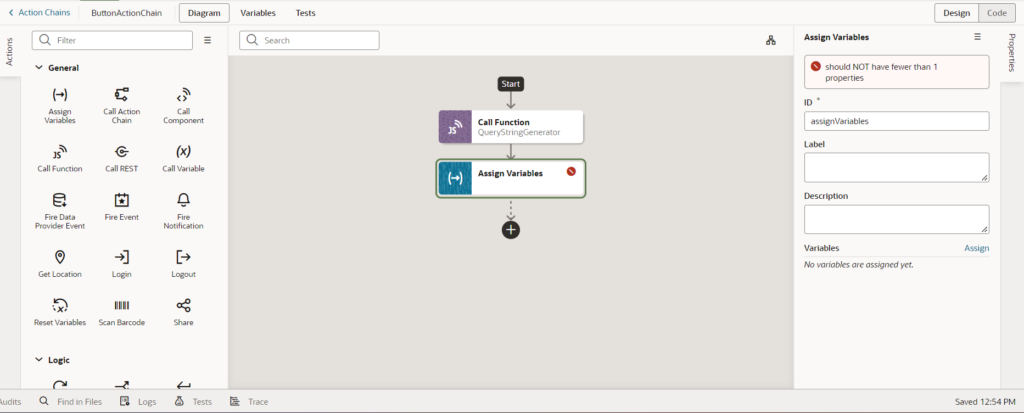
}In the action chain, drag and drop the Call Function action, and call the QueryStringGenerator function.
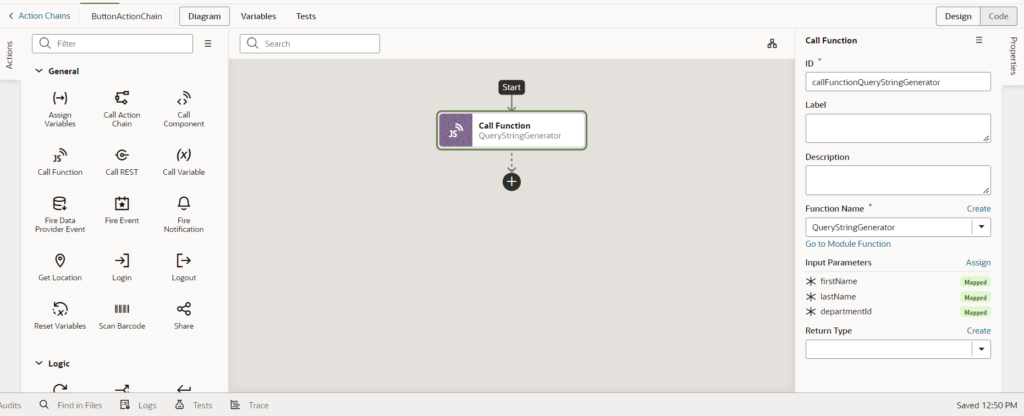
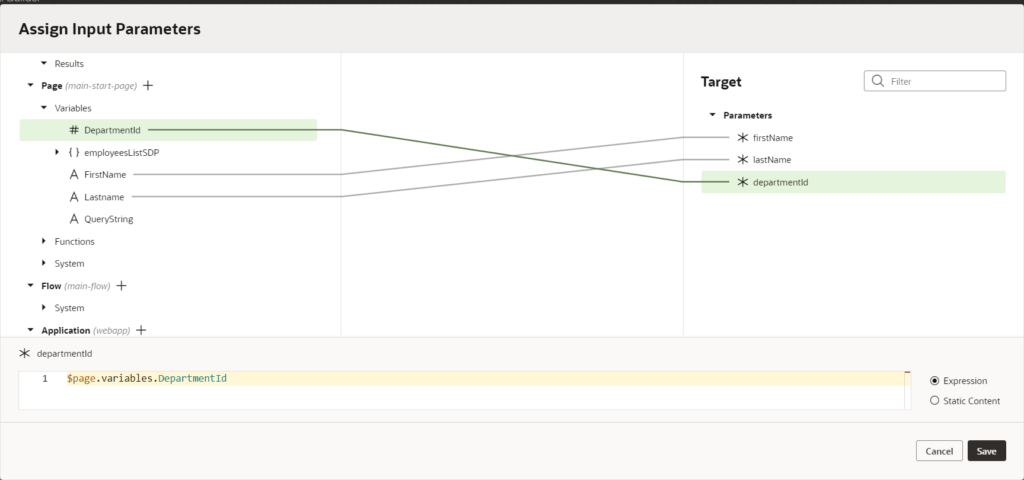
Map the DepartmentId, FirstName, and LastName to the js input parameters as shown in the following screenshot:
- Drag and drop the Assign Variables action after the call Function Action.
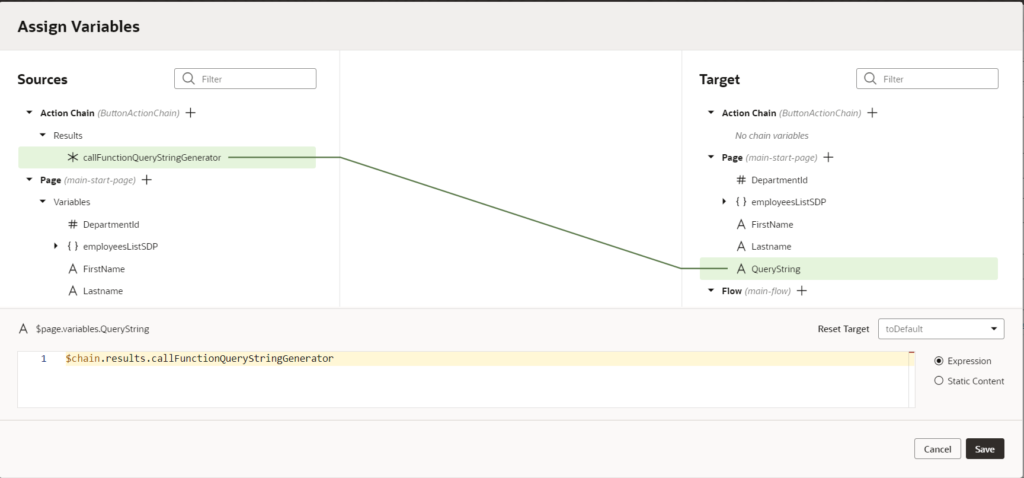
Map the response from the Js function to the QueryString variable as shown in the following screenshot:
Note: If we want to see all the records when we don’t enter any value in the input fields then assign “null” as a default value to the QueryString variable so that all the records will be shown in the table if the query string is empty.
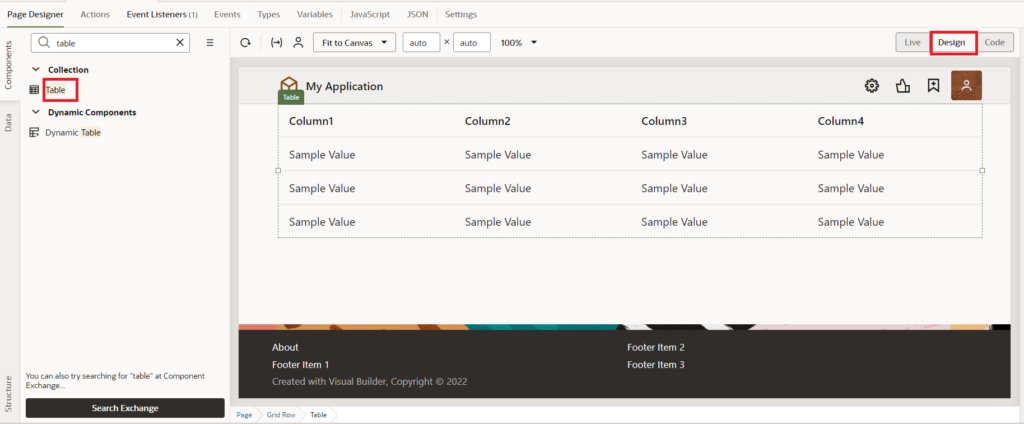
- Go to the Page Designer tab on the main-start page, drag and drop a Table from the components pallet into the design area.
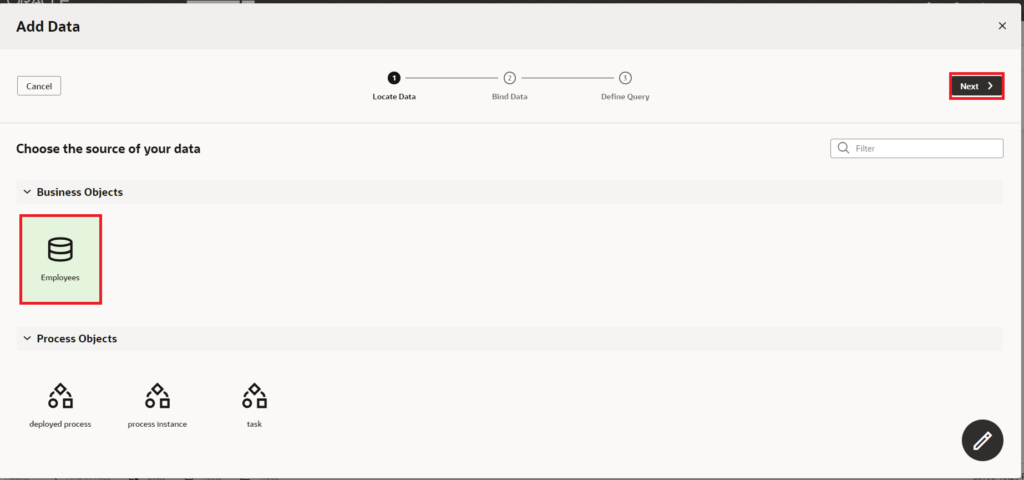
Now we need to add data to the table. For that, we should navigate to the properties pane of Table, go to the Quick Start tab and then select Add Data. With this, a popup will open showing all the business objects and service connections available. Of there we need to select the data source which has to be added to the table.
Here we are working on Employees Business objects and so I am selecting the Employees BO and clicking on Next. Then we need to select the fields which are to be displayed on the table and then click on the Next button followed by the Finish button.
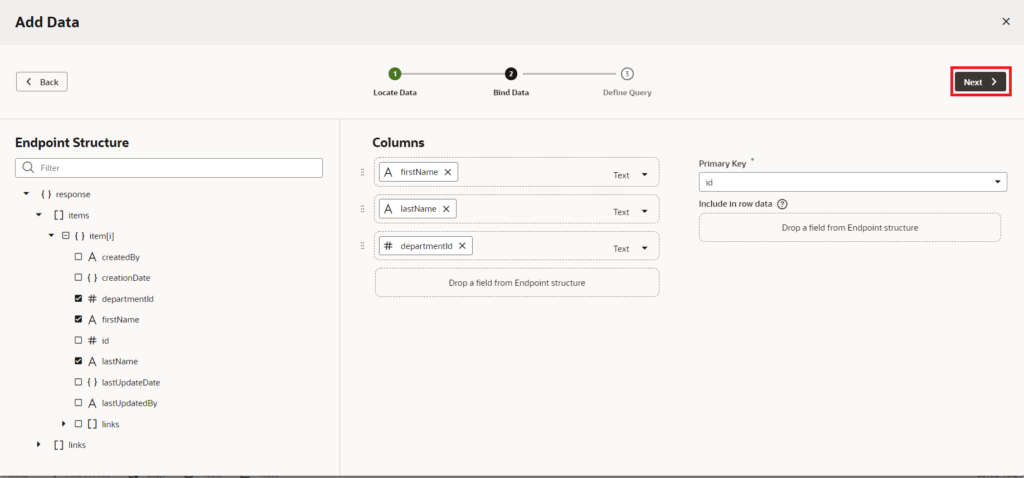
With this, we are done with adding the data to the table as shown in the following table:
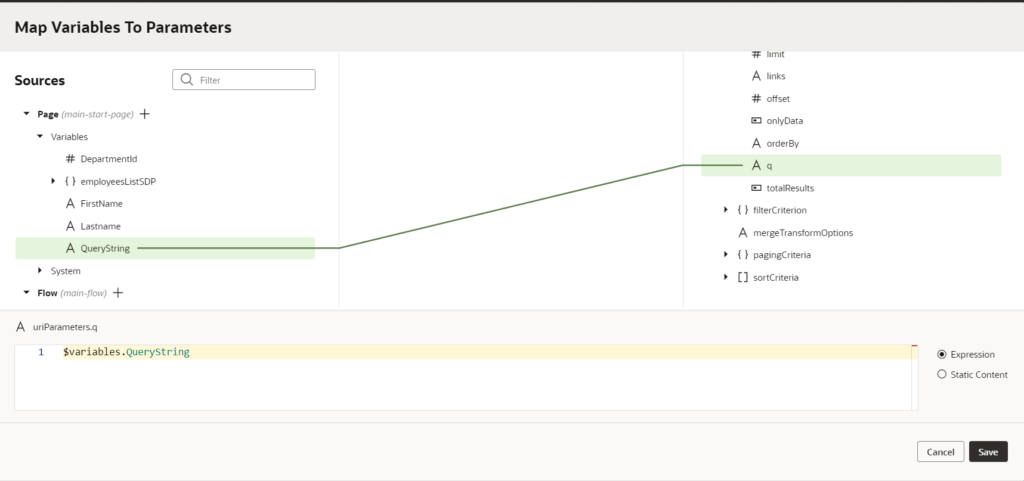
- Go to the Variables tab, click on the employeesListSDP and map the QueryString variable to the q parameter as shown in the below screenshot, and click on Save.
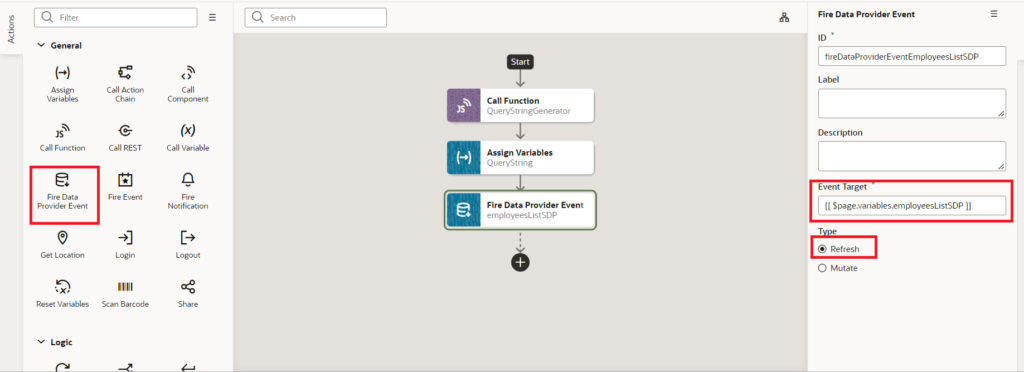
- Go to the search button action, drag and drop the Fire Data Provider Event action after Assign Variable action, enter the employeesListSDP in the Event Target, and select the Refresh option.
With this, we are done with the adding of the functionality to filter table data using the q parameter.
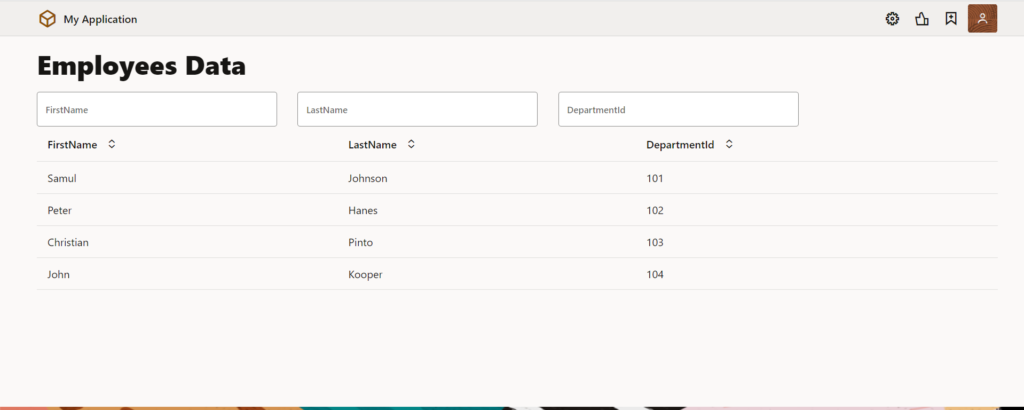
We can now go to the UI and enter First name, Last Name, and DepartmentId and click on the Search button to get the filtered data.
If you liked the article, please like, comment, and share.
Please look at my YouTube channel for Oracle Integration-related videos and don’t forget to subscribe to our channel to get regular updates.
Further Readings
Scheduled parameters to maintain Last Run Date Time in Oracle Integration
How to Customize the Lock Screen in Oracle Visual Builder
Merging two CSV files into a single file in Oracle Integration
ERP Integration using File Based Data Import: Oracle Integration


