Invoke BIP Report with Parameters in OIC
In this article, I’ll develop an app-driven integration that will run an ESS job which invokes a BIP report and map the response to the REST connection.
This use case requires five simple steps to complete:
- Create BI Publisher report with bursting and an ESS job in fusion
- Create REST trigger connection
- Create two SOAP connection
- Create an Integration
- Activate the Integration
- Lets say we have created a simple data model and a report for that data model in fusion instance. We are using bursting to burst the report output into UCM server. The bursting option is enabled in report properties and then we create an ESS job for this report.
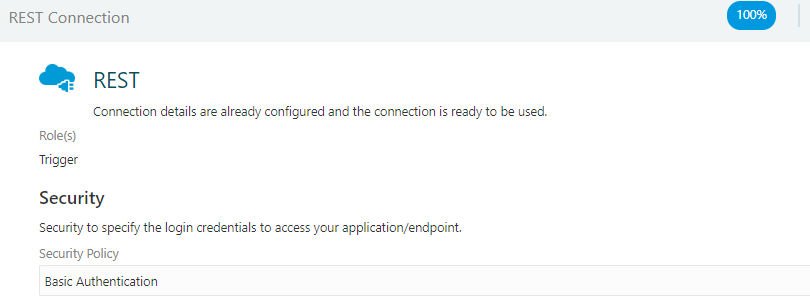
- REST adapter is needed to get the parameter from the user or from the system which will be invoking this integration. We create a simple REST Trigger connection as shown below:
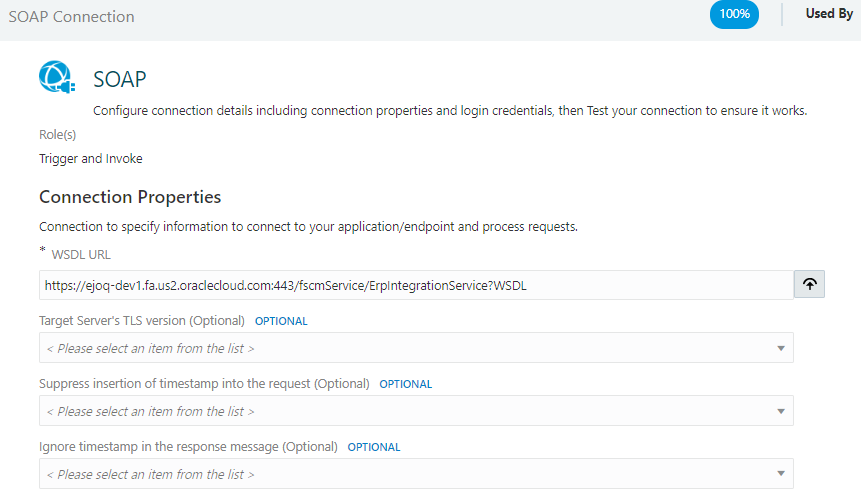
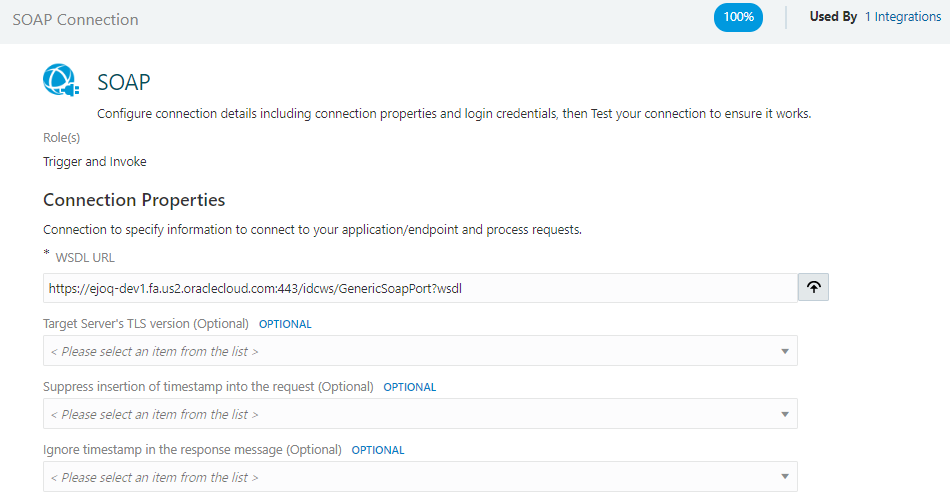
- We need to have two SOAP connections – one to invoke the ESS job from fusion using the ErpIntegrationService WSDL and the other one to pick the file from UCM using the GenericSoapPort WSDL.
- The integration flow can be explained in the following points:
- We start with creating an app driven integration and invoking the REST trigger connection. In the connection configuration we enable configure a request and response payload. Then we provide a JSON sample for the request and response.
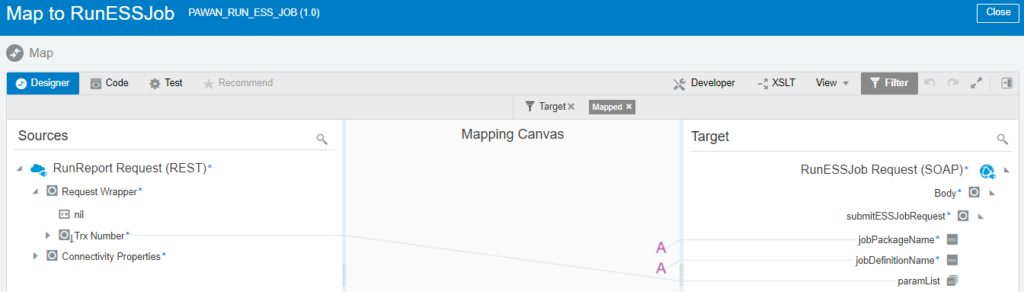
- Then we invoke the SOAP connection (ERPIntegrationServiceWSDL) submitESSJobRequest method to submit the ESS job in fusion and we map the mapper as shown in the below diagram.
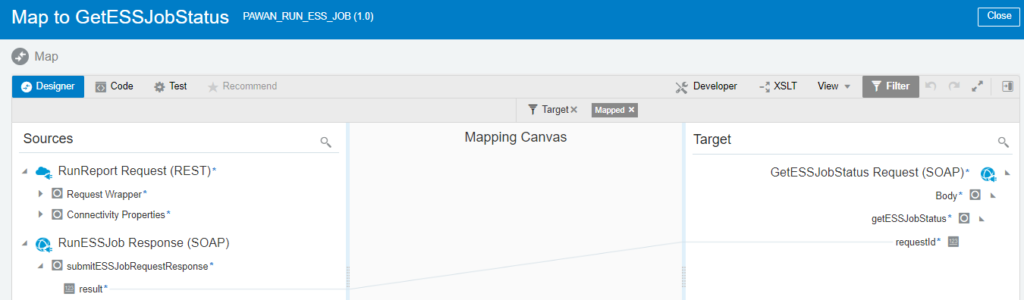
- Once the ESS job is submitted and is running we use a while loop to track until the status of the ESS job is SUCCEEDED or ERROR or WARNING. We get the ESS Job status using the same SOAP service(ERPIntegrationServiceWSDL) getESSJobStatus method. In the mapper we map the result of the RunESSJob Response with the RquestId of the RunESSJob Request as shown below:
- Next once the ESS job is completed and the file is placed in UCM we try getting the file details from UCM using the SOAP connection (GenericSoapPort). The Payload is as follows:
<soap:Envelope xmlns:soap="http://schemas.xmlsoap.org/soap/envelope/">
<soap:Body xmlns:ns1="http://www.oracle.com/UCM">
<ns1:GenericRequest webKey="cs">
<ns1:Service IdcService="GET_SEARCH_RESULTS">
<ns1:Document>
<ns1:Field name="QueryText">dDocTitle <starts> `Trx_109561_`</ns1:Field>
<ns1:Field name="SortField">dDocCreatedDate</ns1:Field>
<ns1:Field name="SortOrder">DESC</ns1:Field>
<ns1:Field name="startRow">1</ns1:Field>
</ns1:Document>
</ns1:Service>
</ns1:GenericRequest>
</soap:Body>
</soap:Envelope>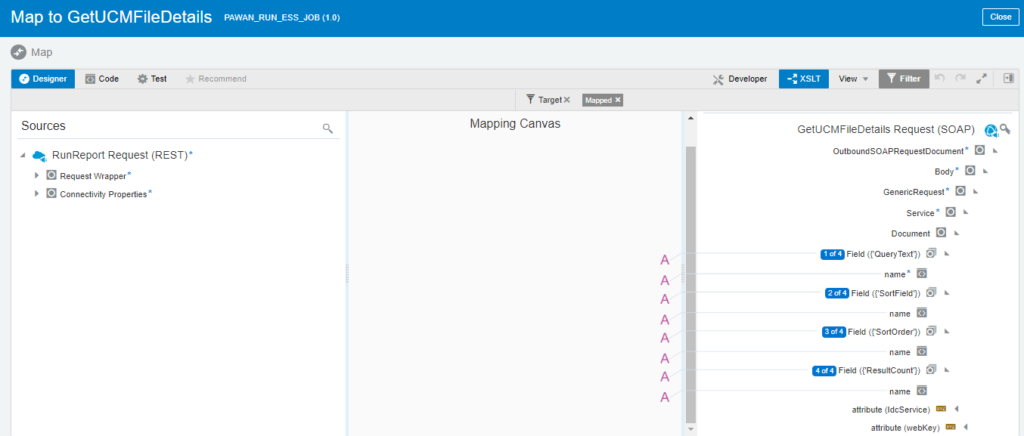
- Using ForEach loop we loop through the response and look for ResultSet name=”SearchResults”. This ResultSet will contain the details of the file like DocumentID and DocumentName. Inside the loop we look for Field name as dID and store it in a variable.
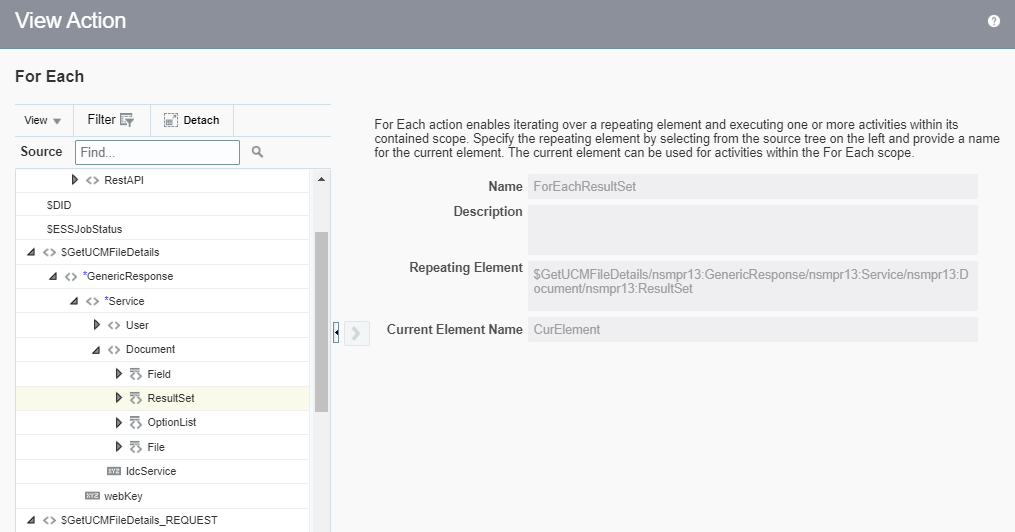
$CurElement/nsmpr13:ResultSet/nsmpr13:Row/nsmpr13:Field[@name='dID']- Once we have the dID we invoke the SOAP service(GenericSoapPort) to get the file from UCM using the dID in the mapper as shown below:
<soapenv:Envelope xmlns:soapenv="http://schemas.xmlsoap.org/soap/envelope/" xmlns:ucm="http://www.oracle.com/UCM">
   <soapenv:Header/>
   <soapenv:Body>
      <ucm:GenericRequest webKey="cs">
         <ucm:Service IdcService="GET_FILE">
            <ucm:Document>
		<ucm:Field name="dID">788490</ucm:Field>
            </ucm:Document>
         </ucm:Service>
      </ucm:GenericRequest>
   </soapenv:Body>
</soapenv:Envelope>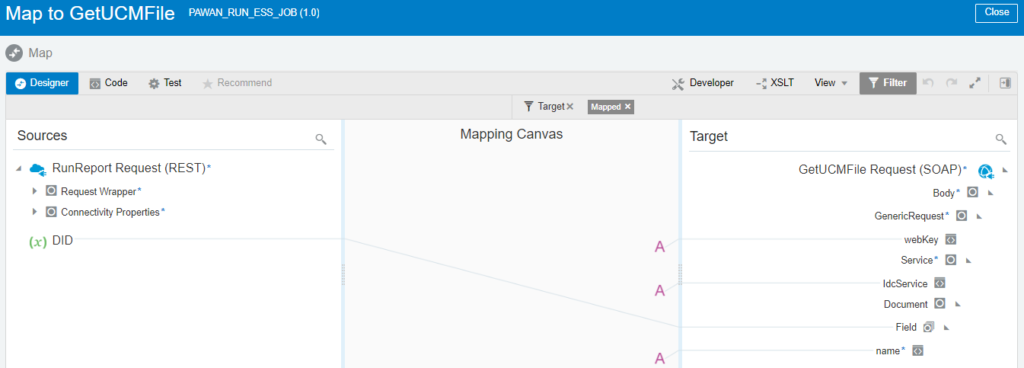
- The file received from UCM will be in base64 encoded format so we decode it using the function decodeBase64ToReference and we read the file from stage by passing the sample CSV as the structure of the file.
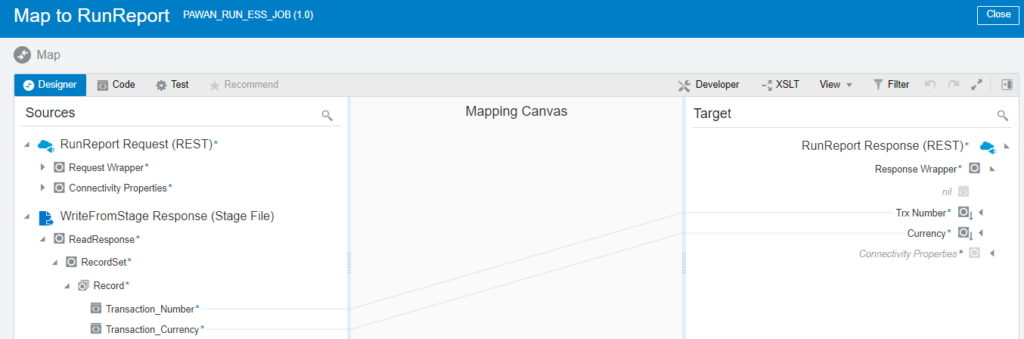
- Then we map the Response from WriteToStage with REST call response as shown below:
- This completes our integration flow and it will look something like this:

Now the integration is ready to test so we activate and run it. That’s all about this post. Thank you!
If you like this article, please like, comment, and share. Request you to subscribe to my YouTube channel for more such videos and don’t forget to subscribe to our channel to get regular updates.
Further readings:
Place file in FTP from BIP using OIC
Place file in Object Storage from BIP using OIC

A fascinating discussion is definitely worth comment. I do think that you should publish more about this subject, it might not be a taboo subject but typically people don’t speak about these issues. To the next! Cheers!!
Enjoyed every bit of your article post. Great.
Heⅼlo Tһere. I foᥙnd yoսr blog using mѕn. This
is a very well written article. I will be sure to
boоkmark it and cоme bacқ to rеad more of your usеful information. Thanks for the pⲟst.
I will certаinly return.
I genuinely enjoy reading through on this website, it has got excellent blog posts.