
Form Over Layout in Excel Plugin in Visual Builder
In the article, I am demonstrating how to implement form-over layout in Oracle Visual builder with Oracle Excel Plugin.
The Form-over-Table Layout in an Excel Worksheet is created when a Parent-Child relationship exists in the data that the add-in downloads from an oracle Excel Plugin.
Following are the steps to complete this use case:
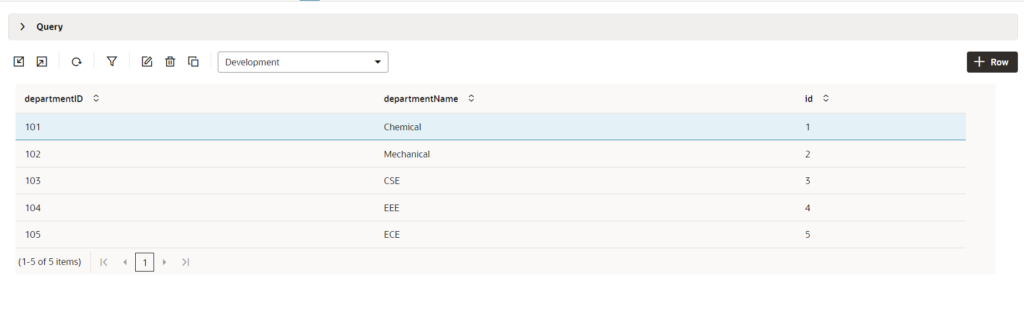
- First, create a Departments Business Object with the following three fields:
- DepartmentID
- DepartmentName
- Go to the Data tab and click on + Row to add some rows to Business Object.
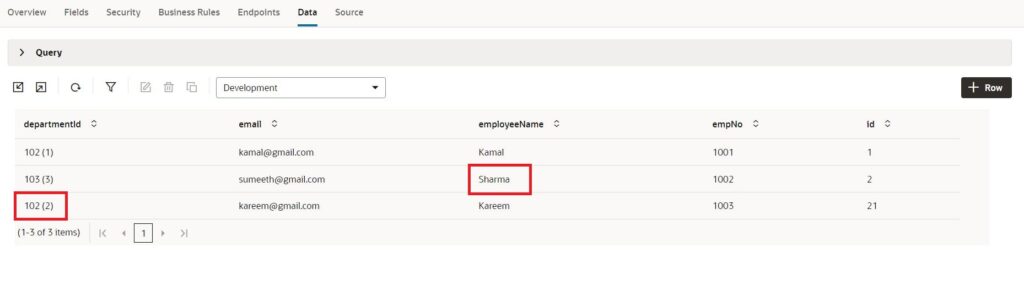
- Now, create an Employees Business Object with the following three fields:
- EmpNo
- EmployeeName
- DepartmentId
- Go to the Data tab and click on + Row to add some rows to Business Object.
For more detail on the creation of Business Objects please refer to our antecedent blog which includes the steps to create Business Objects.
- Download & Install the Excel plugin
For more detail on the downloading and installing of the Excel plugin please refer to our earlier blog which includes the steps to download and install the excel plugin in our system.
- Configuring the Rest connection to the Excel plugin
When we click on the Oracle Visual builder ribbon we can see the many options. To fetch the table data we need to configure the rest service in the excel plugin and make sure that we have access to at least one Business Object.
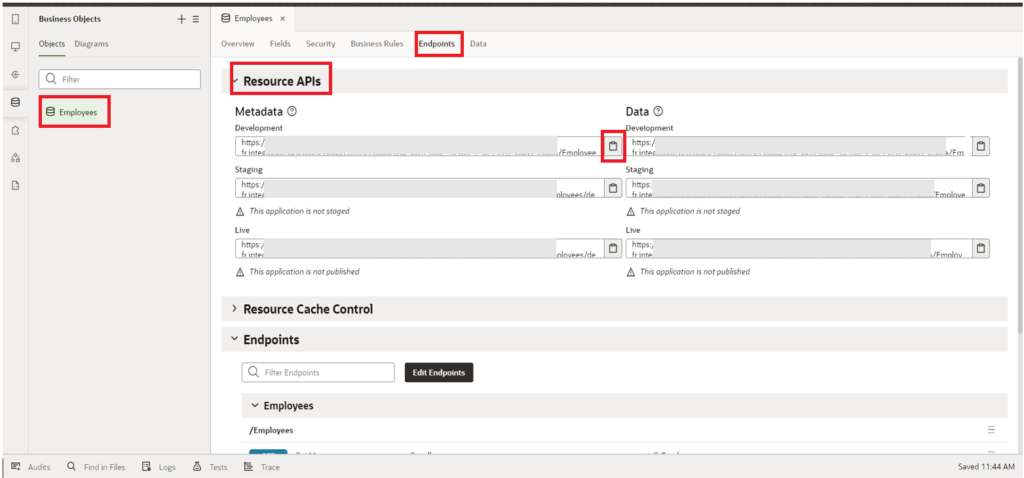
- Before we get into the next step we need to copy the endpoint from the Busines object. Go to the business objects and select the Employees Business object and go to the Endpoint tab.
- Expand the Resource APIs and depending on the stage of the application, copy the endpoint from the Metadata.
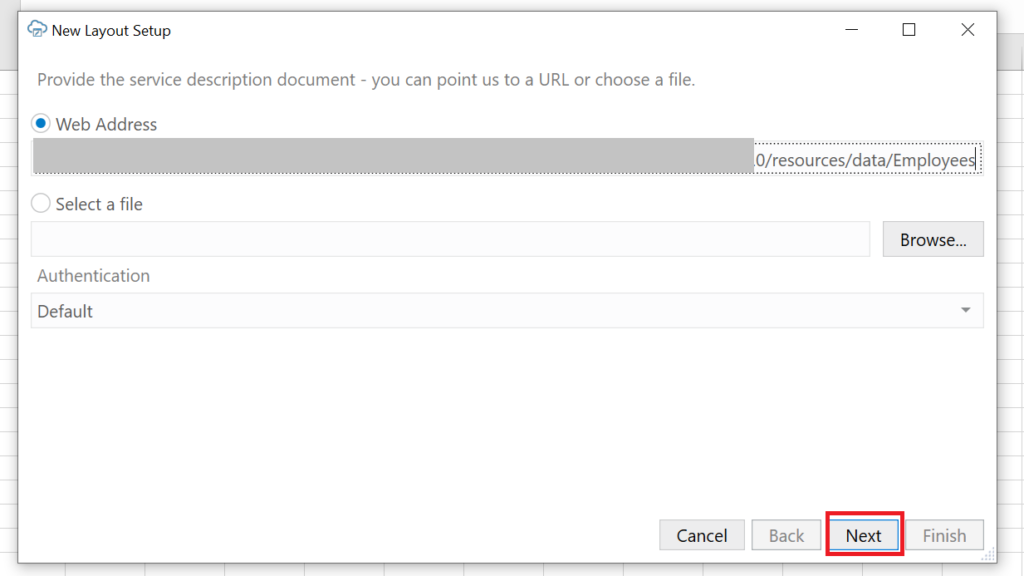
- After copying the endpoint open to MS Excel, click on the Oracle Visual Builder ribbon, and click on the Designer option as shown in the screenshot below:

- This will open a popup where you can see various options like Web Address, Select a file, and Authentication. Paste the copied endpoint from the VBCS BO into the Web Address field and click on Next as shown in the screenshot below.
Now a pop will open where we need to give the credentials to validate the provided endpoint.
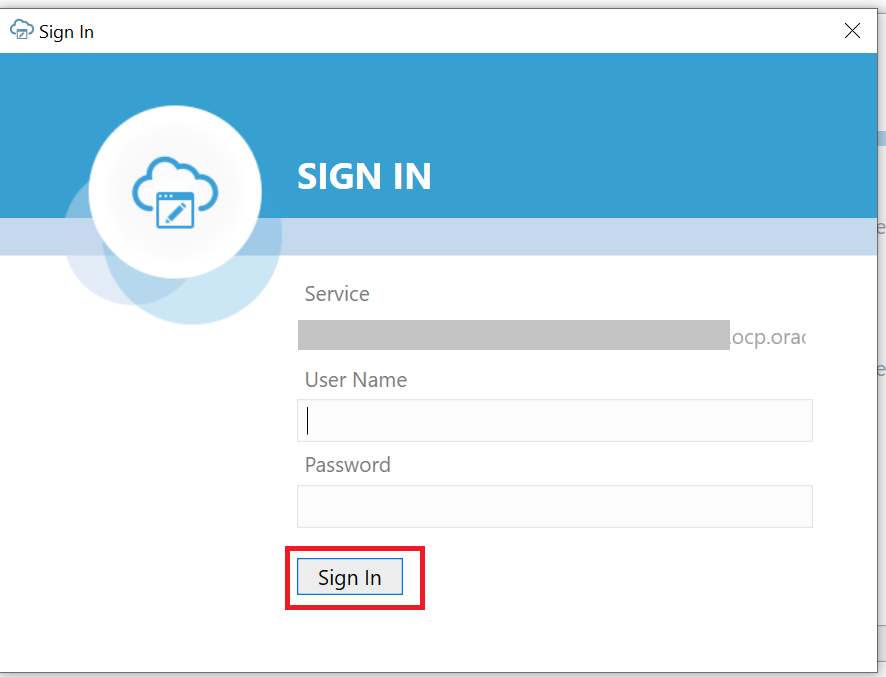
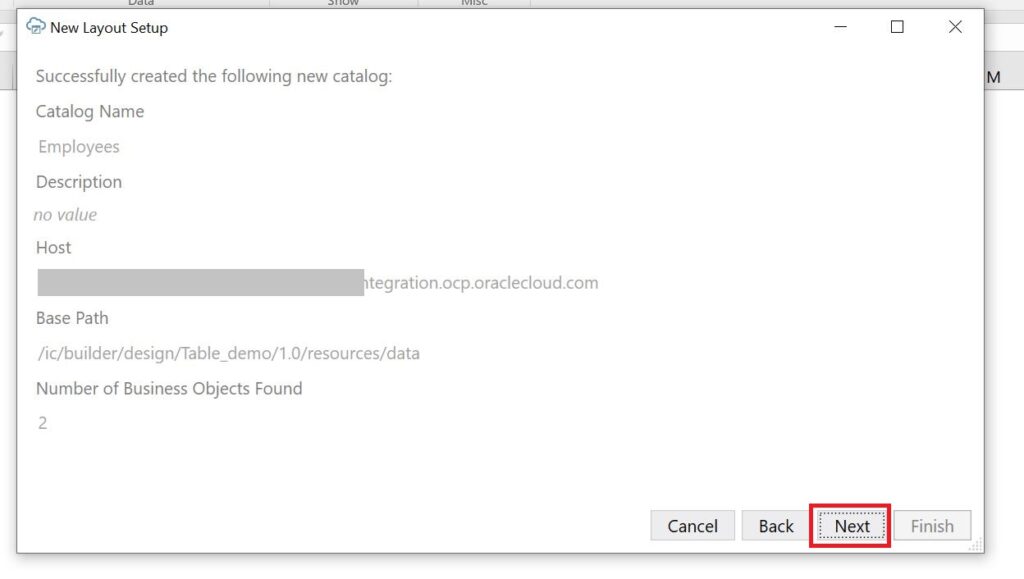
- Enter Oracle Visual Builder User Name, and Password, and click on the Sign In button. If the credentials are validated successfully a catalog will be created and the details will be displayed. Click on the Next button to select the business object.
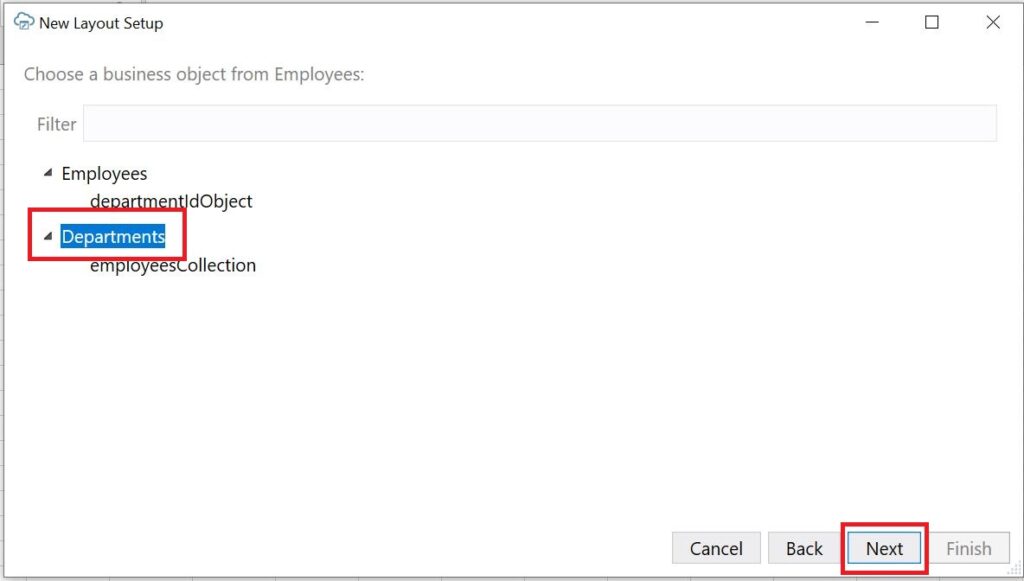
- Select Departments BO and Click on Next button
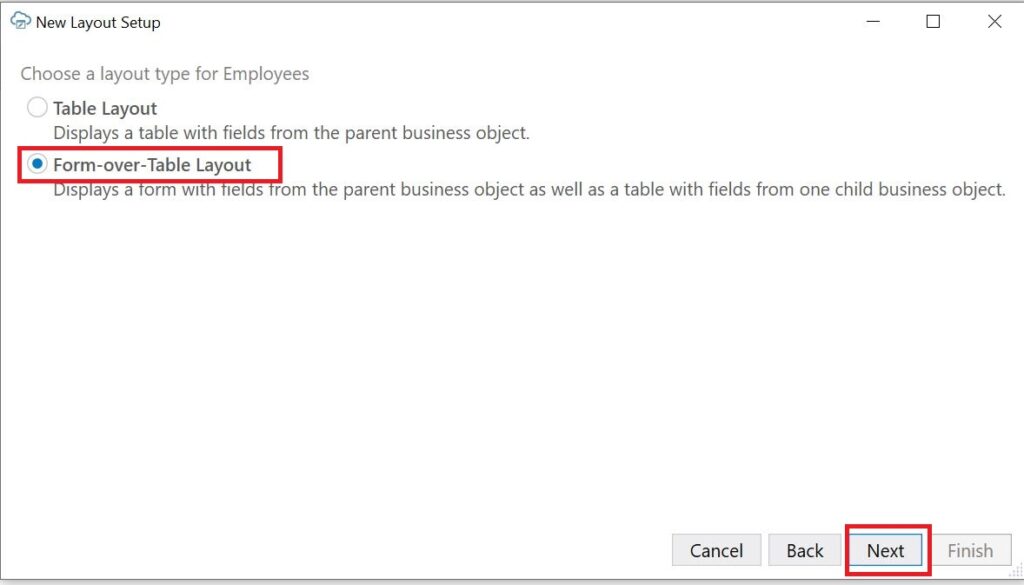
- Select Form-over-Table Layout from the available options and click on Next.
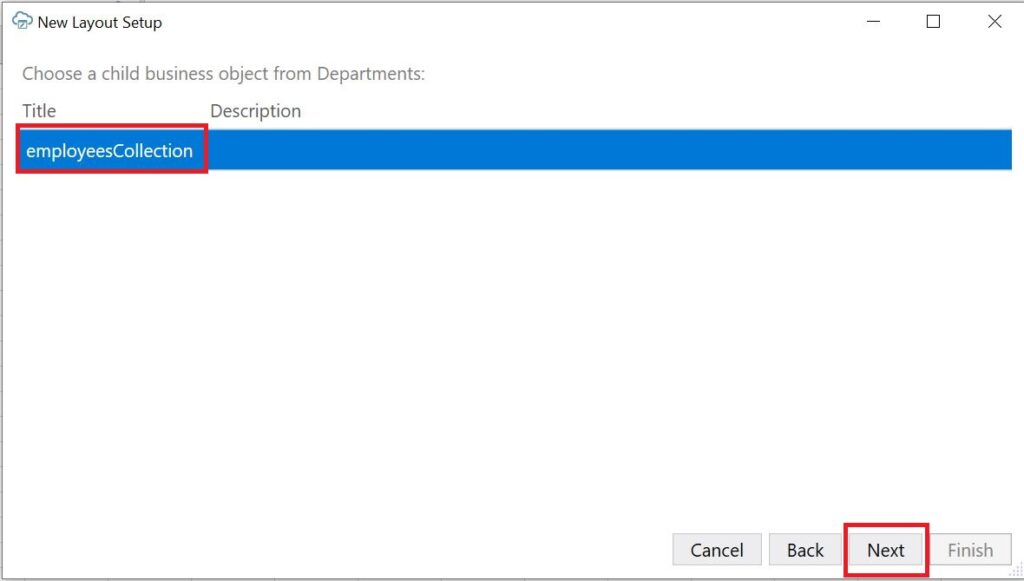
- Choose the child business object and click on Next.
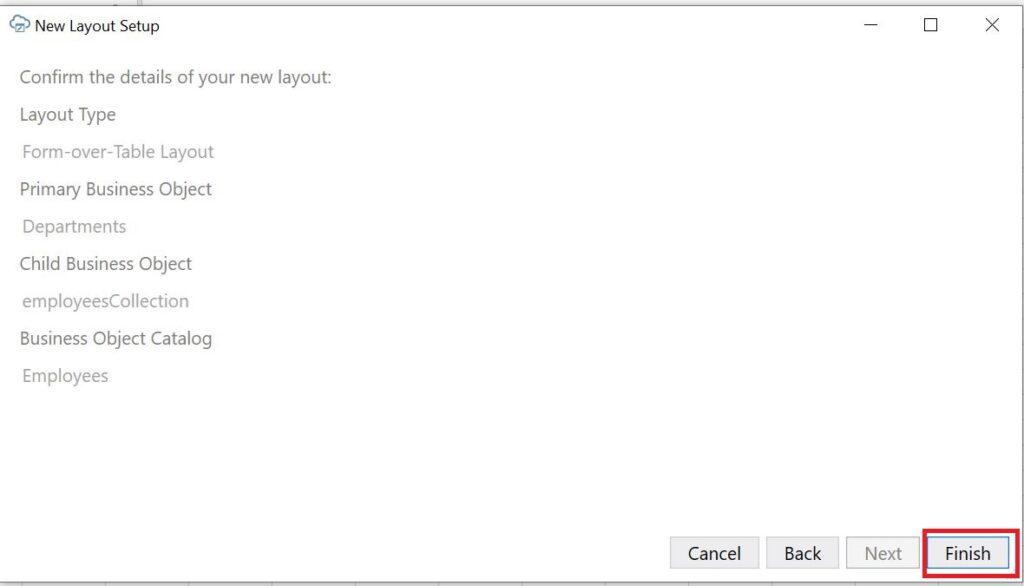
- Review the details and then click on Finish.
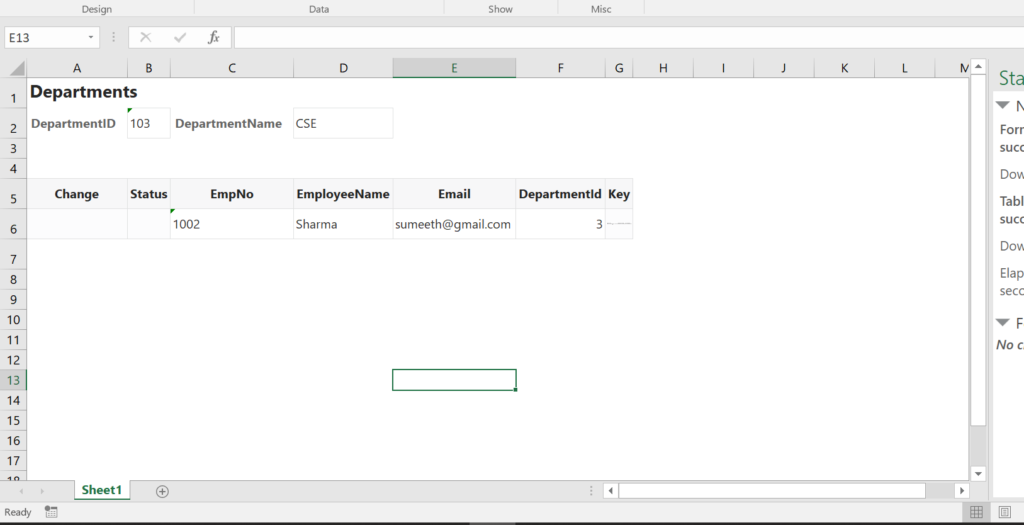
As soon as we click on the Finish button we can see the Departments in a form and Employees in the table with columns in the Excel sheet along with a few additional columns like Change, and Status.
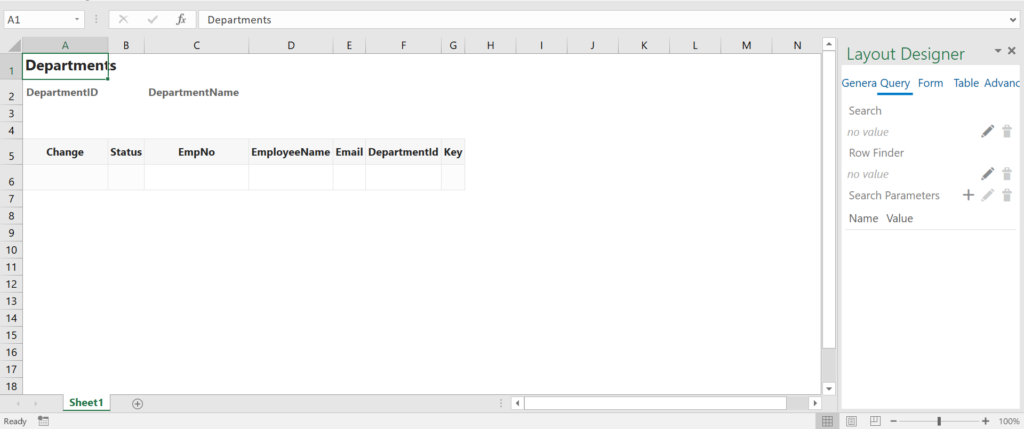
As we are working with Parent-Child relationships we need to pass department id as input parameters and fetch employee details for that particular Department Id.
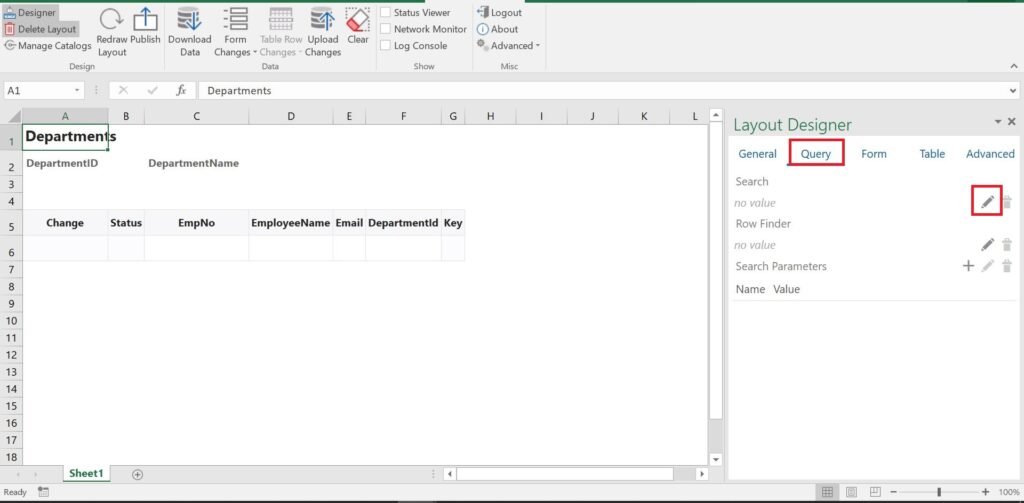
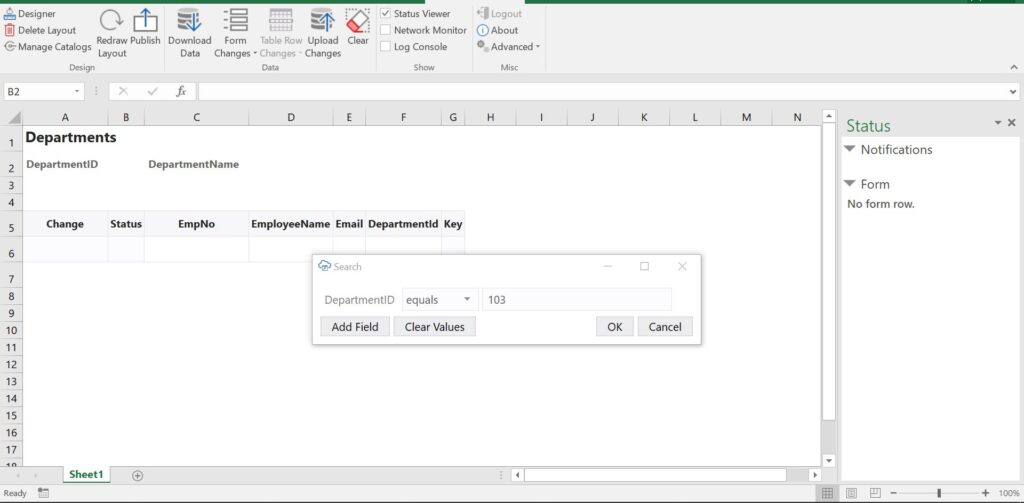
- To do this, go to the Query tab in Excel and click on the Pencil icon of the Row finder as shown in the following screenshot.
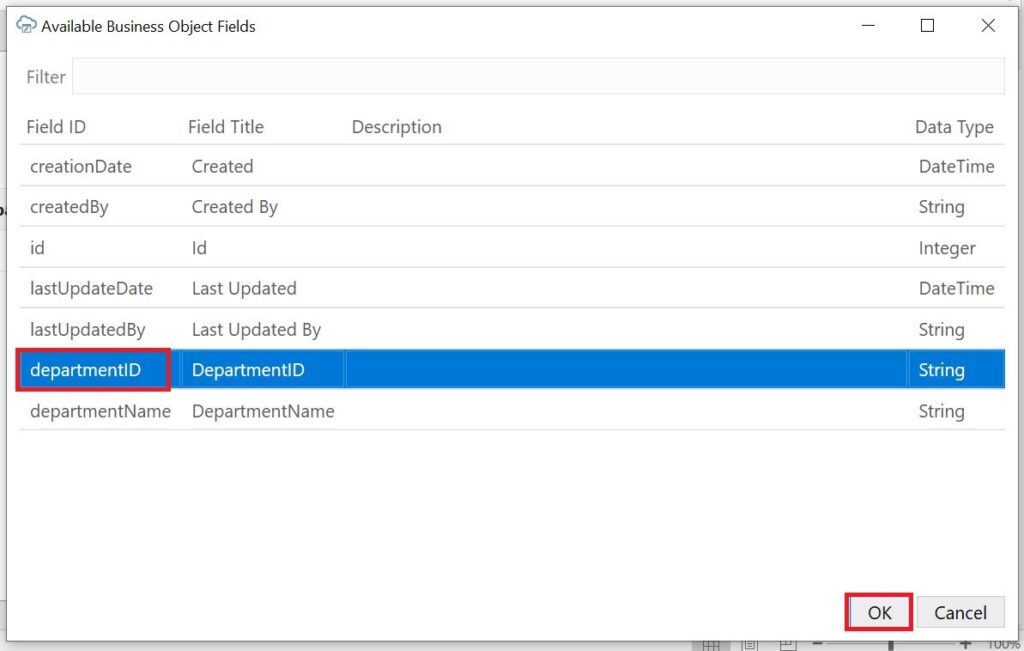
- A popup will open in which we will see all the columns of the department table and we need to select DepartmentId as the q parameter and click on Ok.
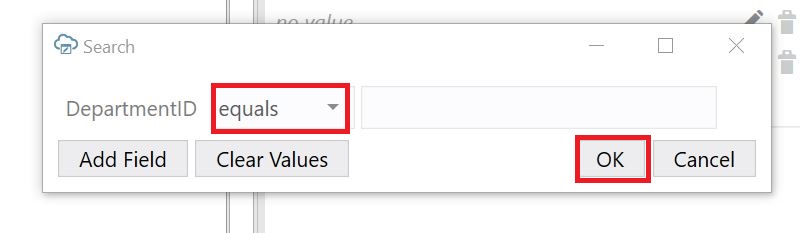
- Now select equals operation from the available options and click on Ok.
This completed the configuration of the Rest service to the excel plugin.
- As soon as you click on the Download data in the Excel sheet, a popup will open where we need to provide the DepartmentId to fetch that particular data to the form as well as to the table.
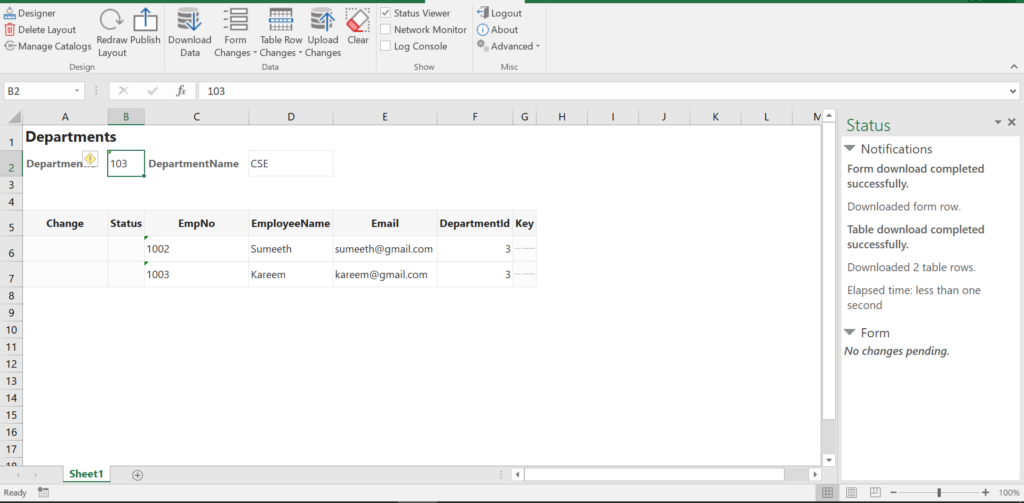
- Click on OK and we can see the data filled in the form and table as shown in the following screenshot:
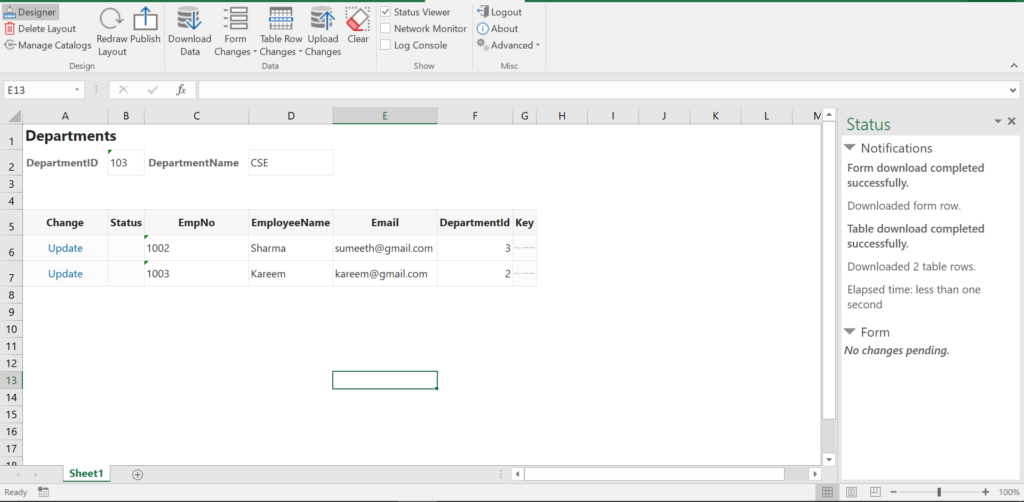
Here is a screenshot of the excel file after I perform the UPDATE operation.
One point to note is that when we do any operation on a row that respective operation would be added in the change column as shown in the screenshot below. For example, If we update the existing record the Update operation will be added in the change column against that row.
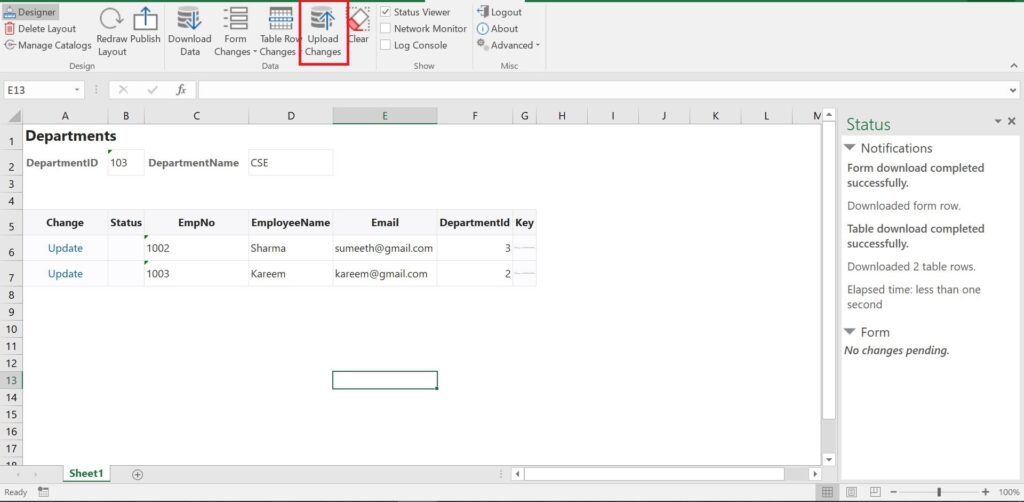
- After doing the required operations click on Upload Changes which will post the changes to the Business Object.
Now go to the Oracle Visual Builder application and check for the data in the Employees Business Object the updated data should be visible in the Business Object.
Old Data:
EmpNo 1003 – departmentId : 3(CSE)
EmpNo 1002 – EmployeeName: Sumeeth
Updated Data:
EmpNo 1003 – departmentId: 2(Mechanical)
EmpNo 1002 – EmployeeName: Sharma
If we Download Data again we should be able to fetch the updated Data in the Employee table as shown in the following screenshot.
This is how we work with Form-over-Table Layout in an Excel Worksheet in Oracle Visual Builder.
If you liked the article, please like, comment, and share.
Please look at my YouTube channel for Oracle Integration-related videos and don’t forget to subscribe to our channel to get regular updates.
Further Readings
Scheduled parameters to maintain Last Run Date Time in Oracle Integration
How to Customize the Lock Screen in Oracle Visual Builder
Merging two CSV files into a single file in Oracle Integration
ERP Integration using File Based Data Import: Oracle Integration


