
Styling Table rows conditionally in Oracle Visual Builder
In this article, we demonstrate styling table rows conditionally using a row template in Oracle Visual Builder
Consider, for example, the case where there are 100s of records and we need to find the records that match a particular value without any search criteria. In that case, coloring the records based on the value and providing a legend will the colors and the representations will help the user quickly find the records that match.
For this reason, we are helping users with a solution that will highlight the records with different colors based on the matching value.
As an example, we are using the details of a student to explain the above scenario.
Following are the steps to complete this use case:
First, create a Students Business Object with the following three fields:
- Name
- Class
- Grade
- Go to the Data tab and click on + Row to add some rows to the Business Object.
For more detail on the creation of Business Objects please refer to our antecedent blog which includes the steps to create Business Objects.
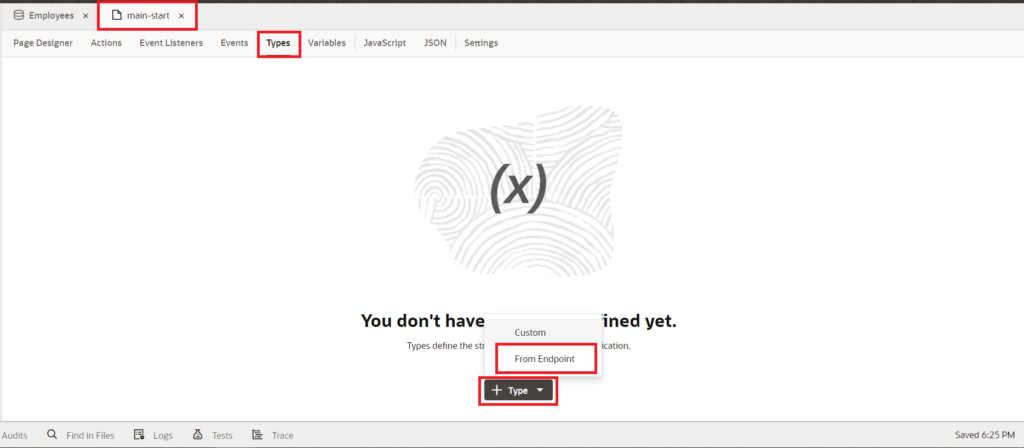
3. Before we create a table, navigate to Types in the navigation tab of the main-start page, click on +Types, and select From Endpoint.
This will open a popup with all the available BOs, service connections, and Process Objects. As we are using BO, expand Business Objects, click on Students BO select GET Students/Students_Id endpoint, and click on the Next button as shown in the following screenshot: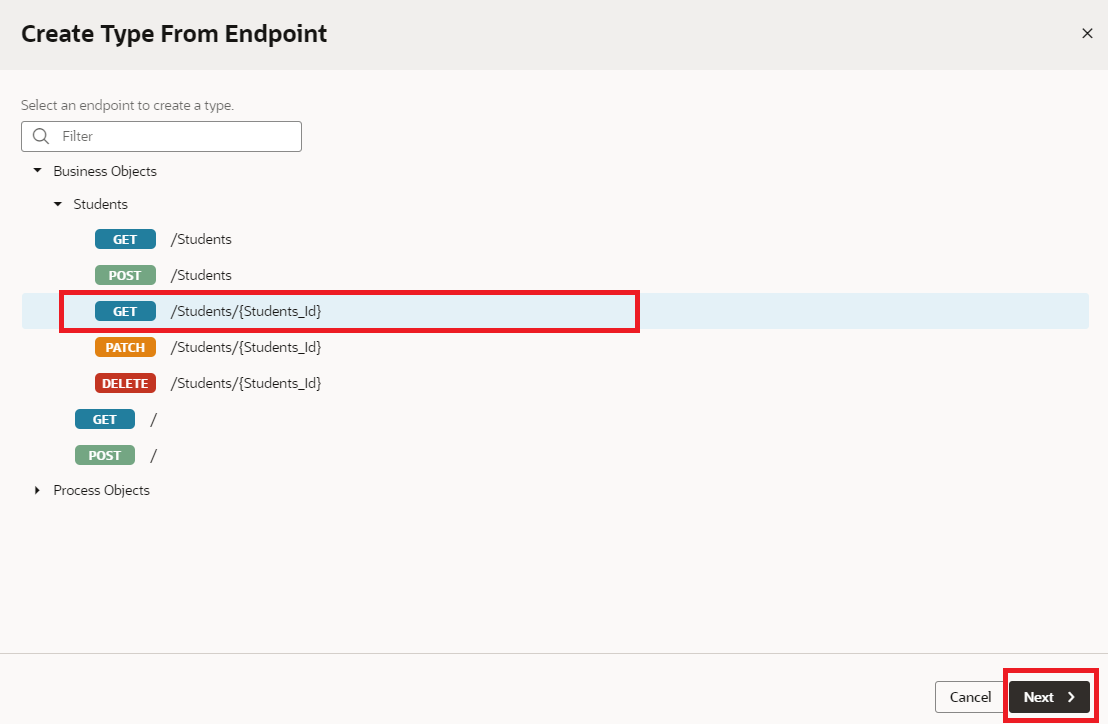 4. Select the fields from the response that we wish to show in the table and click on the Finish button.
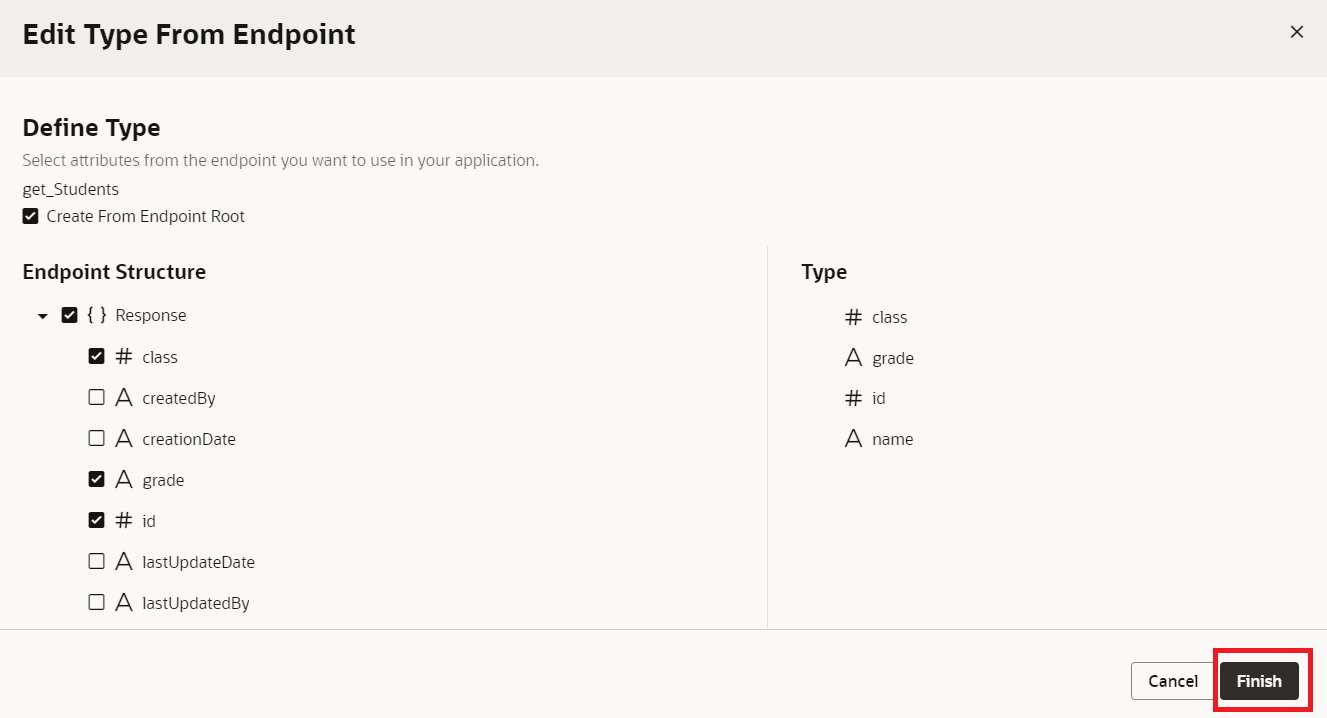
5. Go to the Variables Tab in the navigation tab, click on the + Variable button, Enter the ID select the Type as Array Data Provider, and click on the Create button.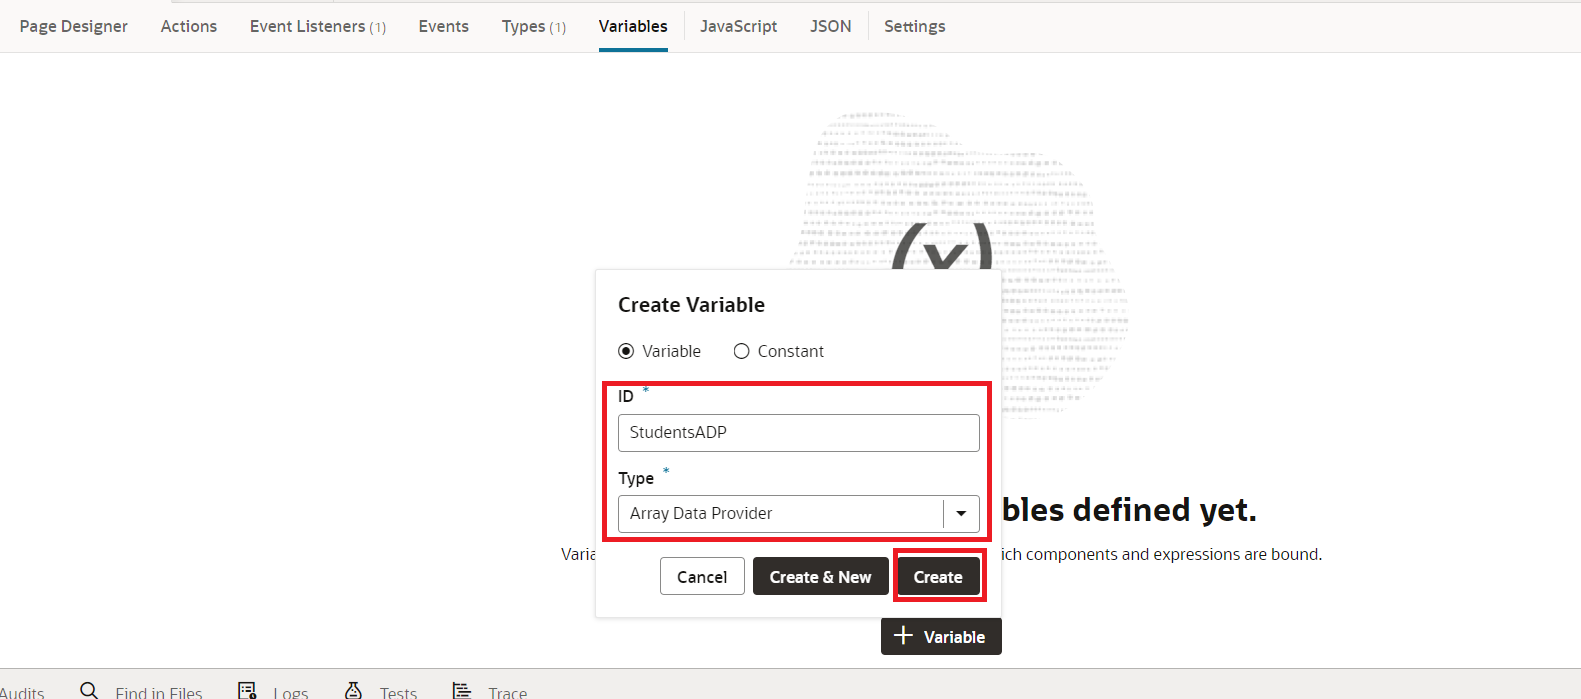
After creating ADP select get_students in Item Type and make Id as key attribute.
6. Likewise create another variable (columns) of Array type as shown in the following screenshot: 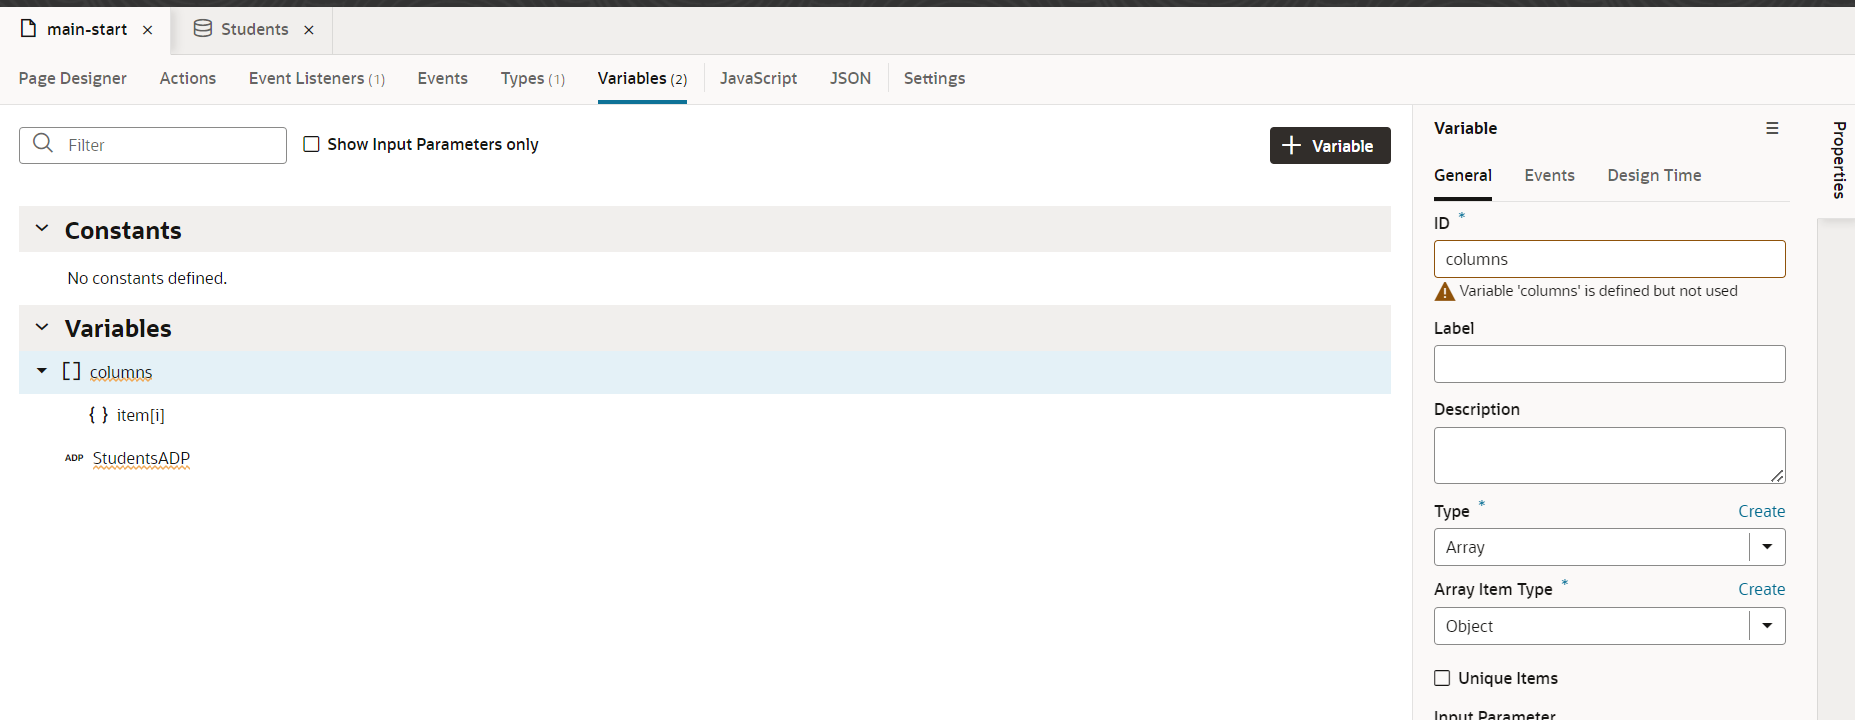
7. For the columns provide a default value field with this array:
[
{
“headerText”: “Name”,
“field”: “name”
},
{
“headerText”: “Class”,
“field”: “class”
},
{
“headerText”: “Grade”,
“field”: “grade”
}
]
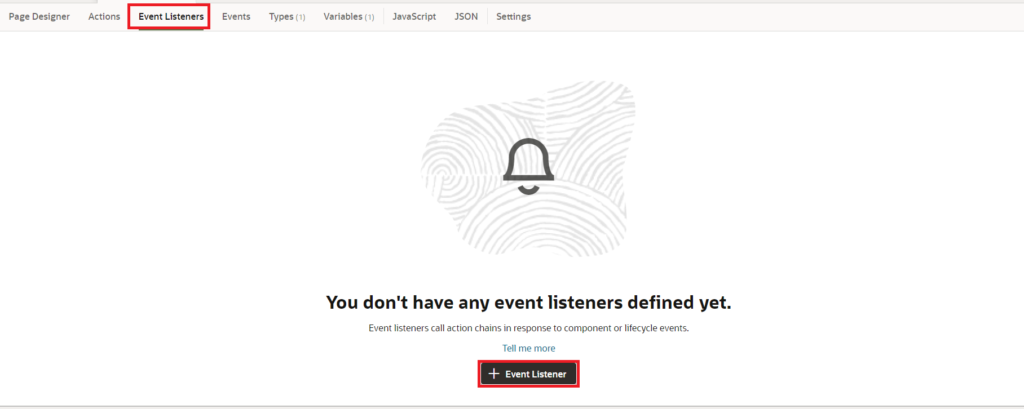
8. We need to create an action to fetch the data from the rest service. Hence, go to the Event Listeners tab, and click on the + Event Listener button as shown in the following screenshot:
9. select the vbEnter event and click on the Next button:

10. Click on Page Action Chains + enter the ID for the Action chain and click on the Finish button.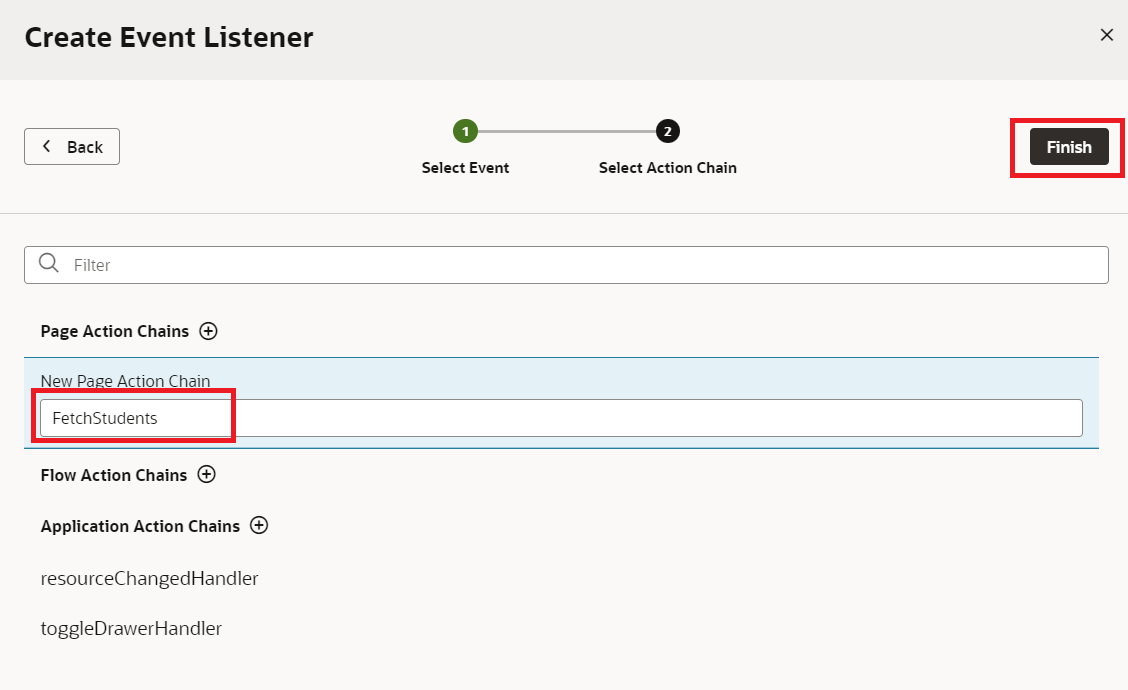
11. Go to the FetchStudents action chain, and add call Rest action to the start node.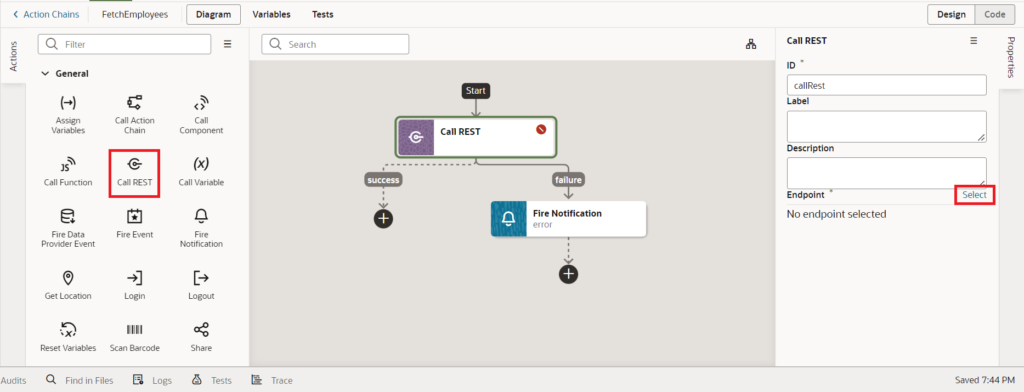
Select the GET /Students BO endpoint from the Students BO and click on the Select button.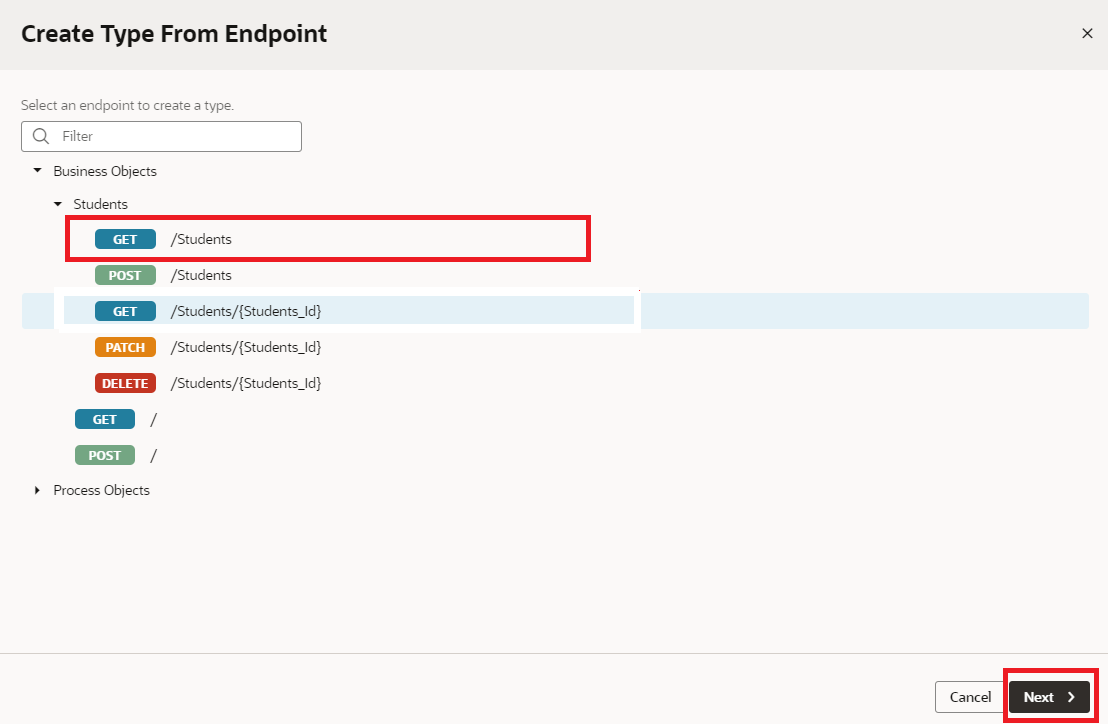 12. Drag and drop the Assign Variable action to the Action chain.
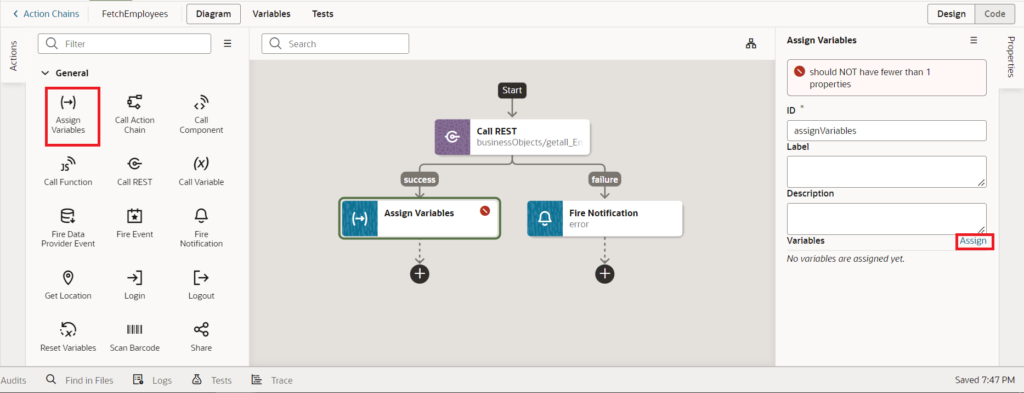
Map the [] items from the response of callrestGetallStudents action to the [] data of the StudentsADP and click on Save as shown in the following screenshot: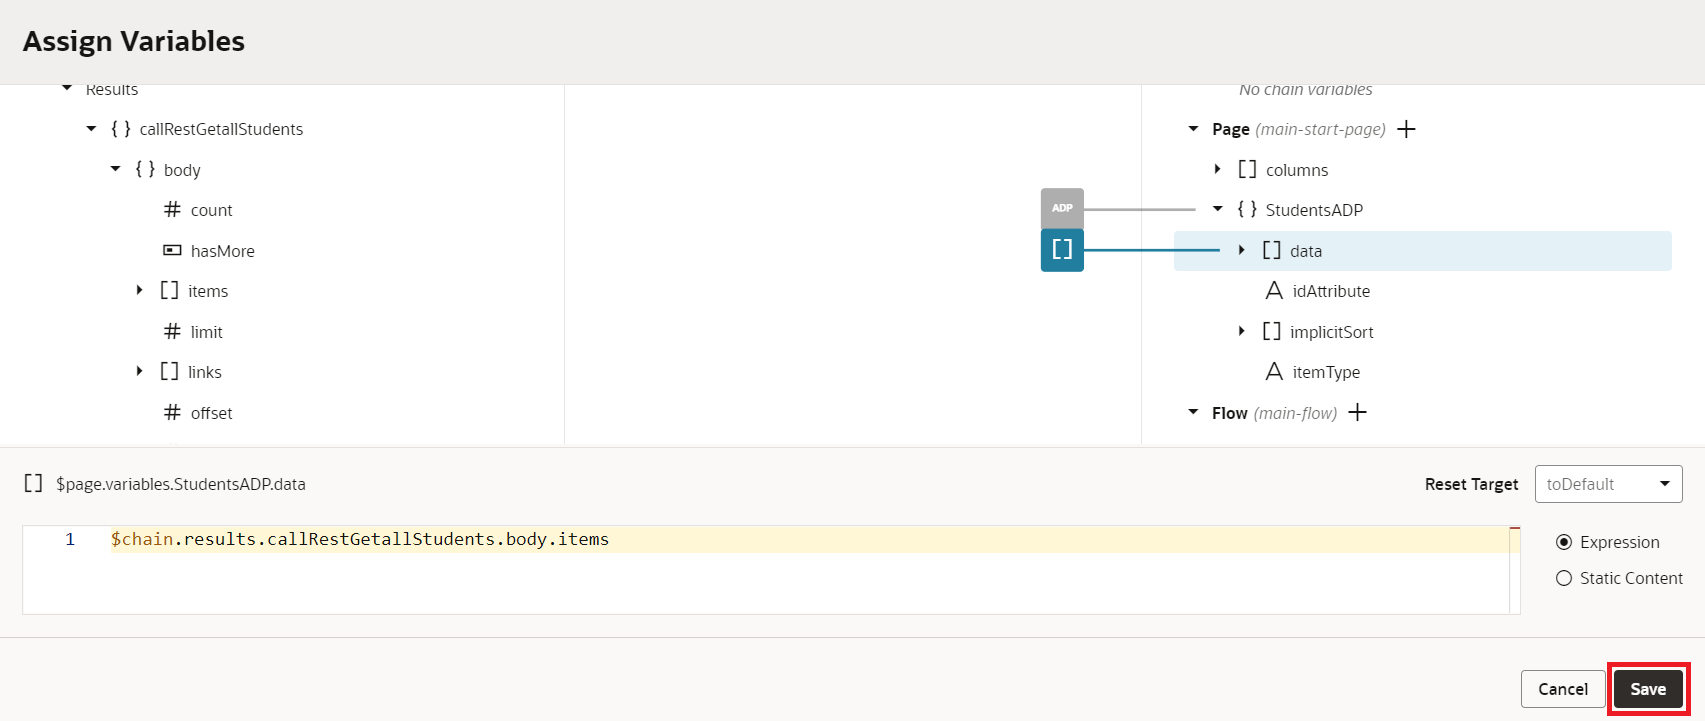 13. Before we start working on the table open app.css and add the piece of code to provide classes to add colors to the records:
.Agrade{

  background-color: green;

}
.Fgrade{

  background-color: red;

}
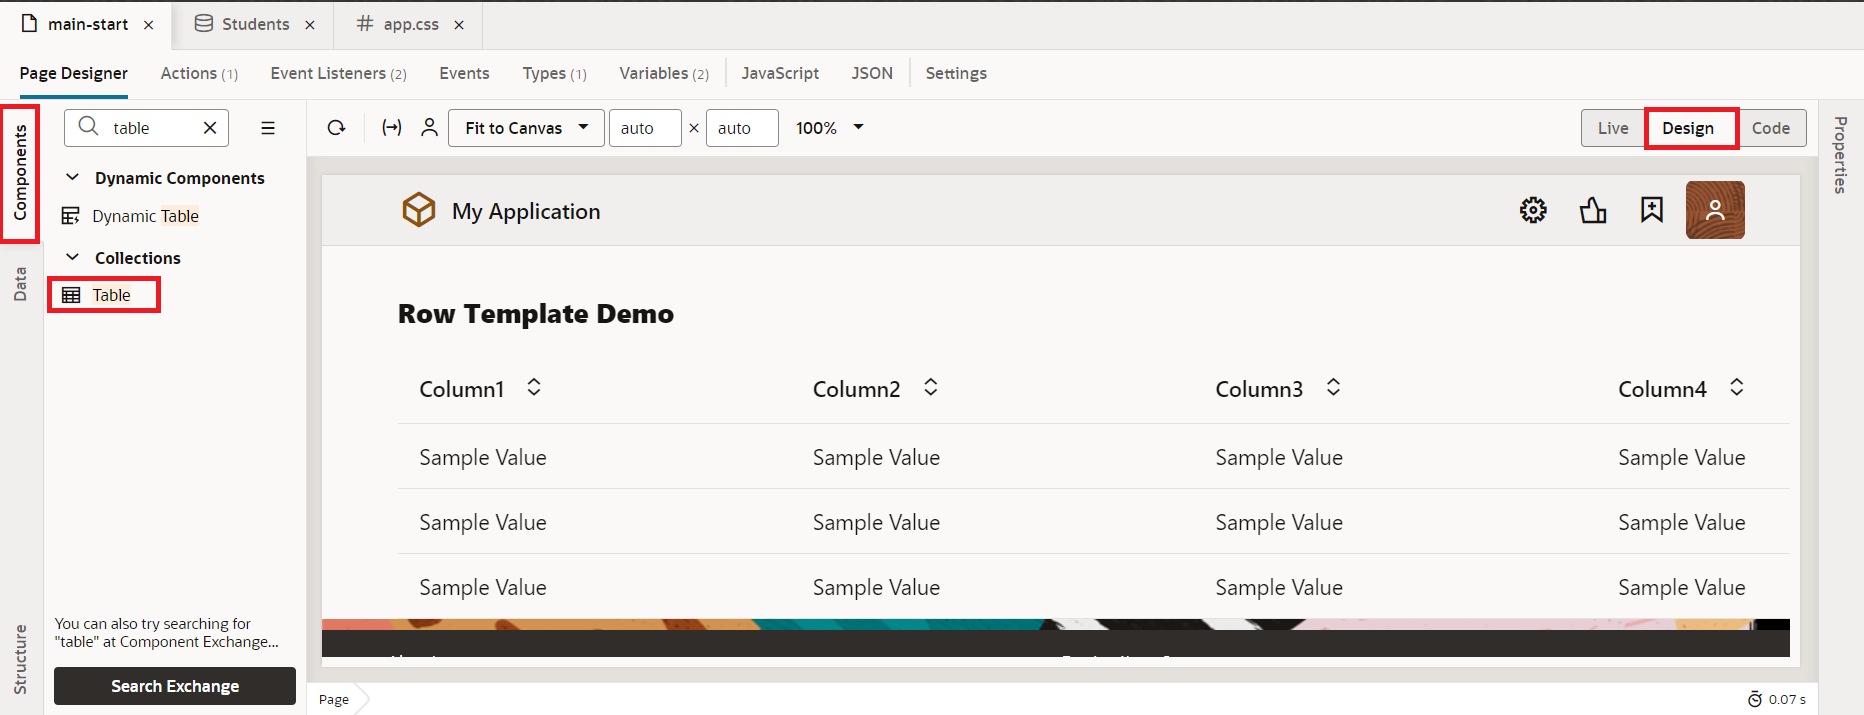
15. To add data to the table, click on the Data tab in the properties pane, select StudentsADP, and choose the columns variable in the Table Columns Section as shown in the following screenshot:
16. Now step into the code for the table and add a template with slot=”rowTemplate”. Add the <tr> and <td> tags to the table with values. The code after these add-ons would be as follows:
<oj-table scroll-policy="loadMoreOnScroll" class="oj-flex-item oj-sm-12 oj-md-12" data="[[ $variables.StudentsADP ]]" columns="[[$variables.columns]]">
<template slot="rowTemplate" data-oj-as="row">
<tr>

          <td>

            <oj-bind-text value="[[row.data.name]]"></oj-bind-text>

          </td>

          <td>
            <oj-bind-text value="[[row.data.class]]"></oj-bind-text>

          </td>
          <td>
            <oj-bind-text value="[[row.data.grade]]"></oj-bind-text>

          </td>

        </tr>

      </template>

    </oj-table>
  <oj-table scroll-policy="loadMoreOnScroll" class="oj-flex-item oj-sm-12 oj-md-12"

      data="[[ $variables.StudentsADP ]]" columns="[[$variables.columns]]">

      <template slot="rowTemplate" data-oj-as="row">

        <tr

          :class='[[ row.data.grade ==="A" ? "Agrade" : row.data.grade ==="F" ? "Fgrade" : "" ]]'>

          <td>

            <oj-bind-text value="[[row.data.name]]"></oj-bind-text>

          </td>

          <td>

            <oj-bind-text value="[[row.data.class]]"></oj-bind-text>

          </td>

          <td>

            <oj-bind-text value="[[row.data.grade]]"></oj-bind-text>

          </td>

        </tr>

      </template>

    </oj-table>
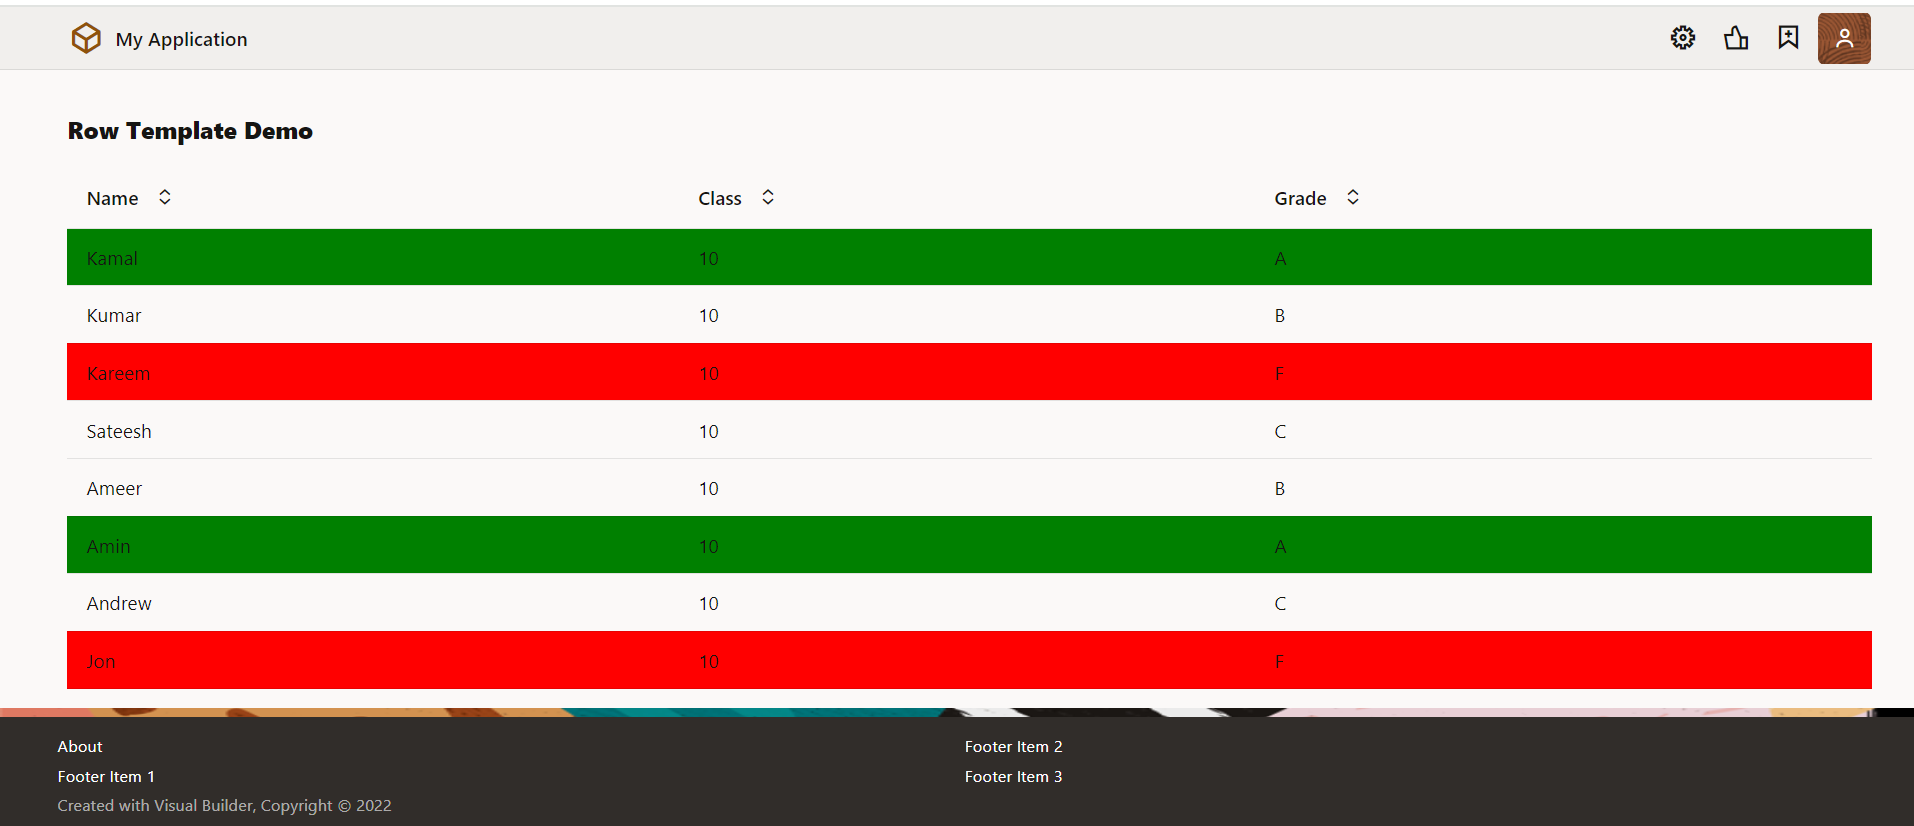
This is how we can style the records using the row template in Oracle Visual Builder.
If you liked the article, please like, comment, and share.
Please look at my YouTube channel for Oracle Integration-related videos and don’t forget to subscribe to our channel to get regular updates.
Further Readings
Scheduled parameters to maintain Last Run Date Time in Oracle Integration
How to Customize the Lock Screen in Oracle Visual Builder
Merging two CSV files into a single file in Oracle Integration
ERP Integration using File Based Data Import: Oracle Integration
Import Suppliers using FBDI in Oracle Integration
How to call Oracle SaaS ESS job using Oracle Integration


