
Enabling Column Personalization in Dynamic Tables in Oracle Visual builder
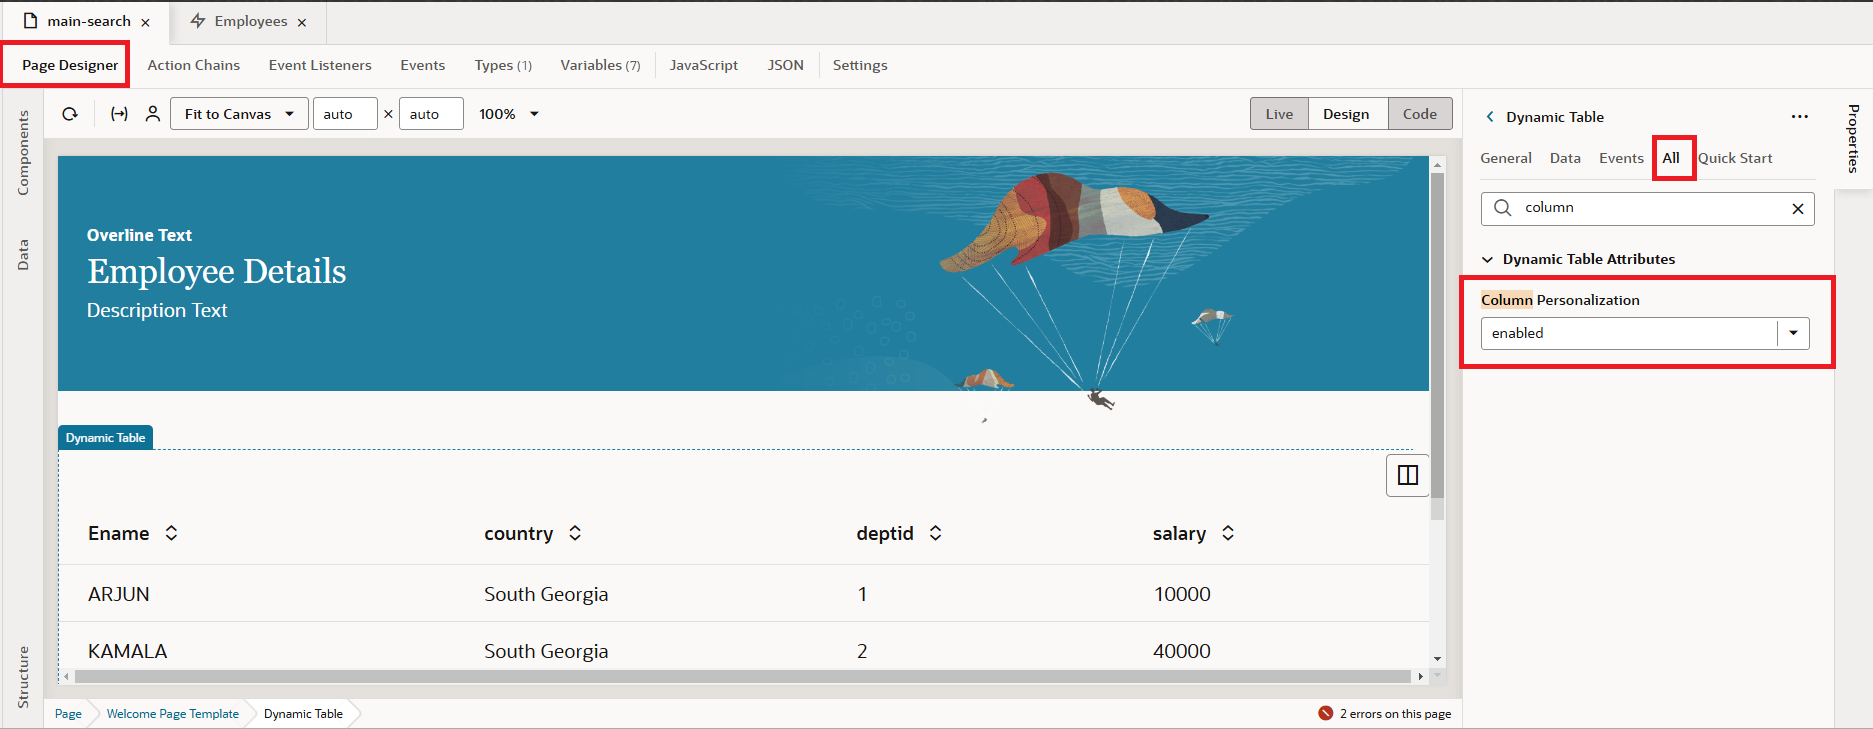
This article illustrates enabling column personalization in Dynamic Tables in Oracle Visual Builder.
With this feature, users can reorder columns by dragging and dropping them, and choose which columns to show or hide. To manage columns, users can click the button in the top right of the table to open the column management dialog.
- Develop a VB Application by entering the application name and choosing the Redwood Starter Template from the available options as shown in the following screenshot:
 2. When crafting a VB application utilizing the Redwood Starter Application template, it generates a ‘vbredwoodapp’ with the default flow set to ‘main’.
3. Click on +icon beside the main and select Create Page as shown in the following screenshot: 4. A dialog box will prompt us to input the page ID. Upon scrolling to the bottom, we’ll encounter the Welcome Page template. Select it and click on the Create button as shown in the following screenshot:
 5. Now click on main flow, switch to the settings tab, and change the default page from main-start to main-search as shown in the following screenshot:
 6. Before we start with the UI let’s create an Employee business object, create the required fields, and add data to it.
7. Navigate to the Variables tab, click on + Variable, enter the personalization of Object type, and click on the Create button as shown in the following screenshot:
In the Properties pane of the new personalization variable, change the Persisted property to Device.

8. Now navigate to the main-search Page Designer tab, switch to Properties of the page, and add the Page Title as Employee Details as shown in the following screenshot:
9. Click on the Data tab below the components, select Employees BO, drag and drop to the default slot, and select Dynamic Table under rendering options as shown in the following screenshot:

10. In the Select Rule Set page of the Configure Layout dialog, click “New Rule Set” to create custom display logic, and then enter a label and ID for the rule set as shown in the following screenshot:

11. Select all the fields which are to be shown in the screen and click on Next button followed by Finish button as shown in the following screenshot:
 12. In the Code view of the Page Designer, set the Dynamic Table’s private-state to personalization and enable column management and add

13. Now when we preview the application, we should see the a Customize Columns icon as shown in the below screenshot:
![]()
14. Clicking on the icon will open a popup that lets the user choose which columns to show or hide in the UI. Additionally, users can rearrange column positions by double-clicking on any column.

This is how we can enable Column Personalization in Dynamic Tables in the Redwood Welcome Template in Oracle Visual Builder. If you liked the article, please like, comment, and share.
Watch the video below to see all the steps presented on the same template:
Please look at my YouTube channel for Oracle Integration-related videos and don’t forget to subscribe to our channel to get regular updates.
Further Readings
Creating a search page using Oracle Visual Builder Redwood
Using Redwood General Overview Page Template in Oracle VBCS
Configuring Simple Create and Edit Page Template | Oracle Redwood
Configure General Drawer Template in Oracle Redwood
How to Customize the Lock Screen in Oracle Visual Builder
Merging two CSV files into a single file in Oracle Integration