Mastering Conditional Mapping in OIC Using XSLT Choose-When-Otherwise
Sometimes a straight source-to-target mapping isn’t enough. In many OIC integrations, a target field’s value needs to depend on the value of another field in the same record. The OIC Mapper doesn’t expose this as a simple drag-and-drop option, but it’s built right into the XSLT view using the choose / when / otherwise constructs. Here’s the full step-by-step process, from opening the mapper to validating the tested output.
The Example Scenario
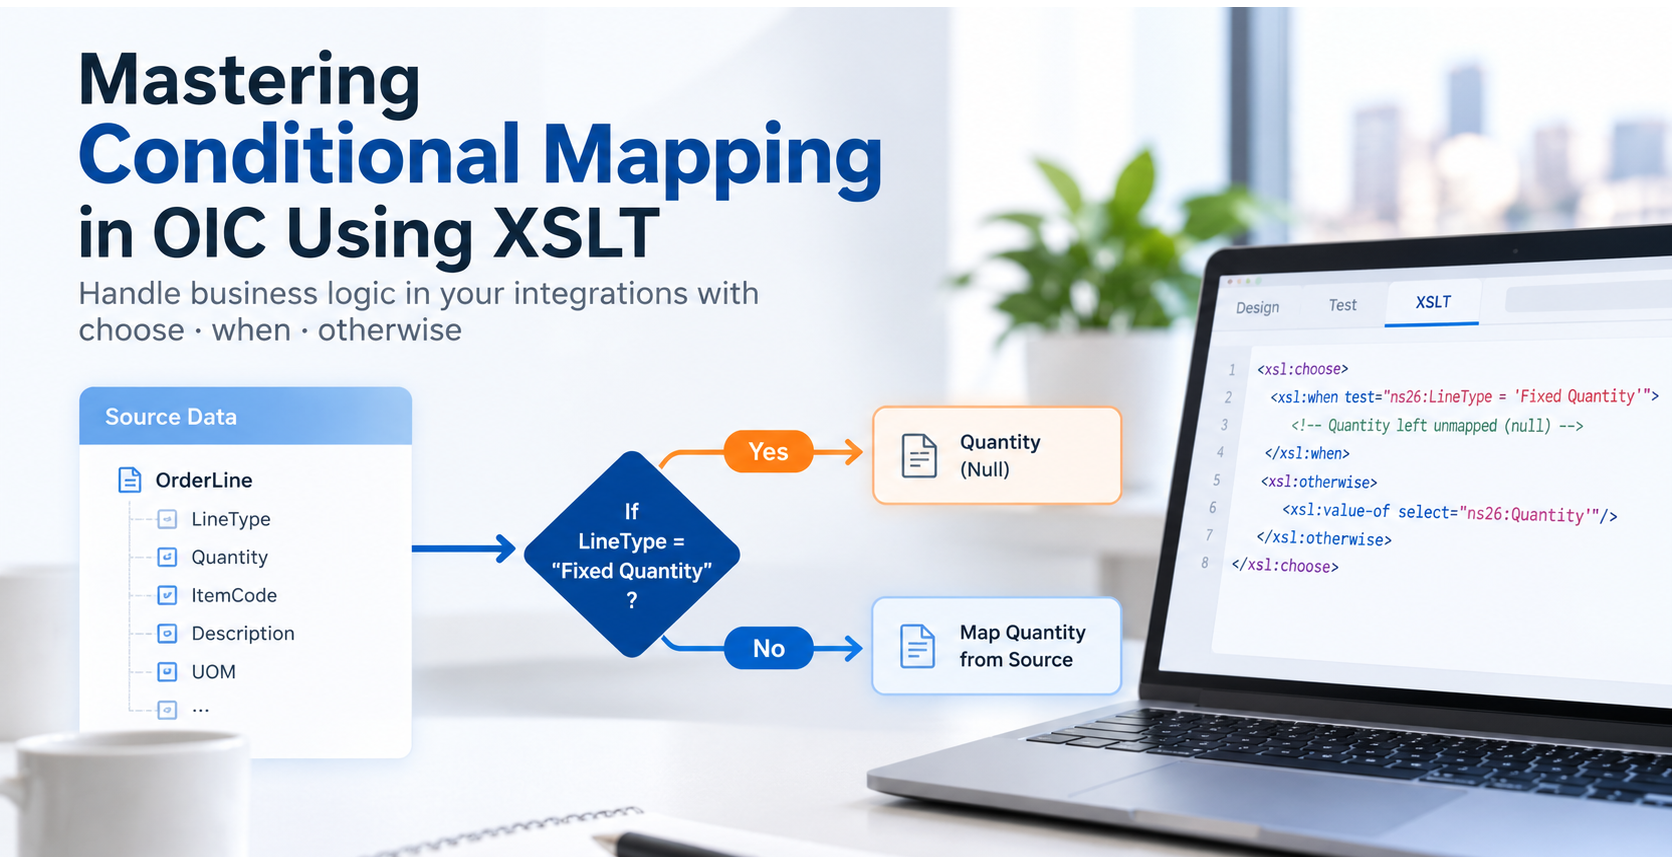
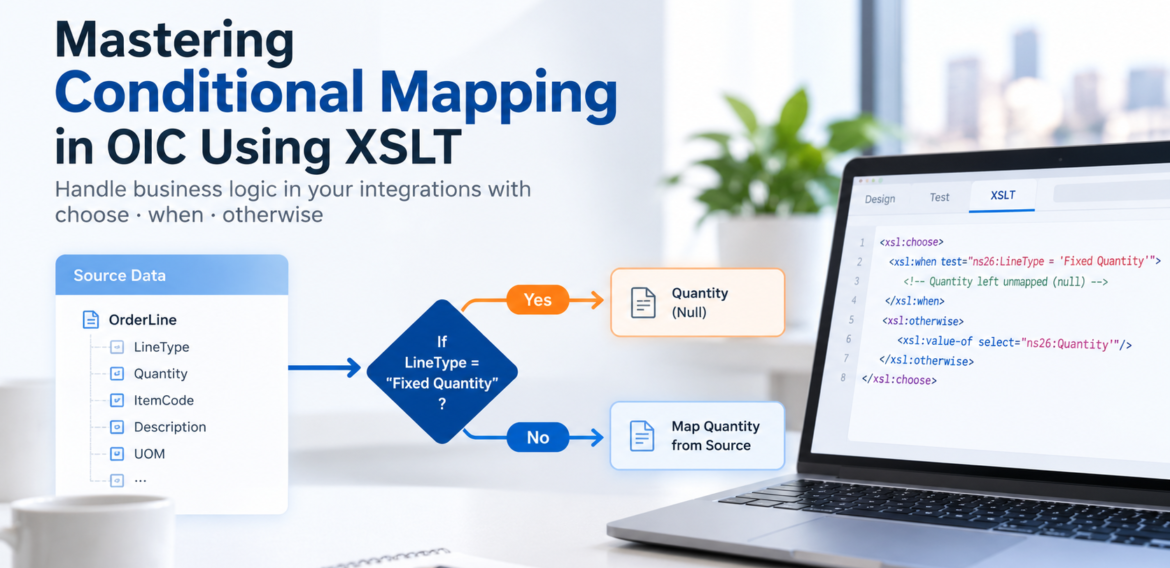
To walk through this, we’ll use a real case: an integration mapping order line items, each with a LineType field and a Quantity field. The requirement is
- If
LineTypeis “Fixed Quantity”, theQuantityfield in the target should be left empty (null), since a fixed quantity line doesn’t carry a variable count. - For every other
LineType,Quantityshould be mapped through normally from source to target, unchanged.
That’s a single condition with two outcomes exactly what choose / when / otherwise is built for. The steps below show how it’s implemented in the mapper.
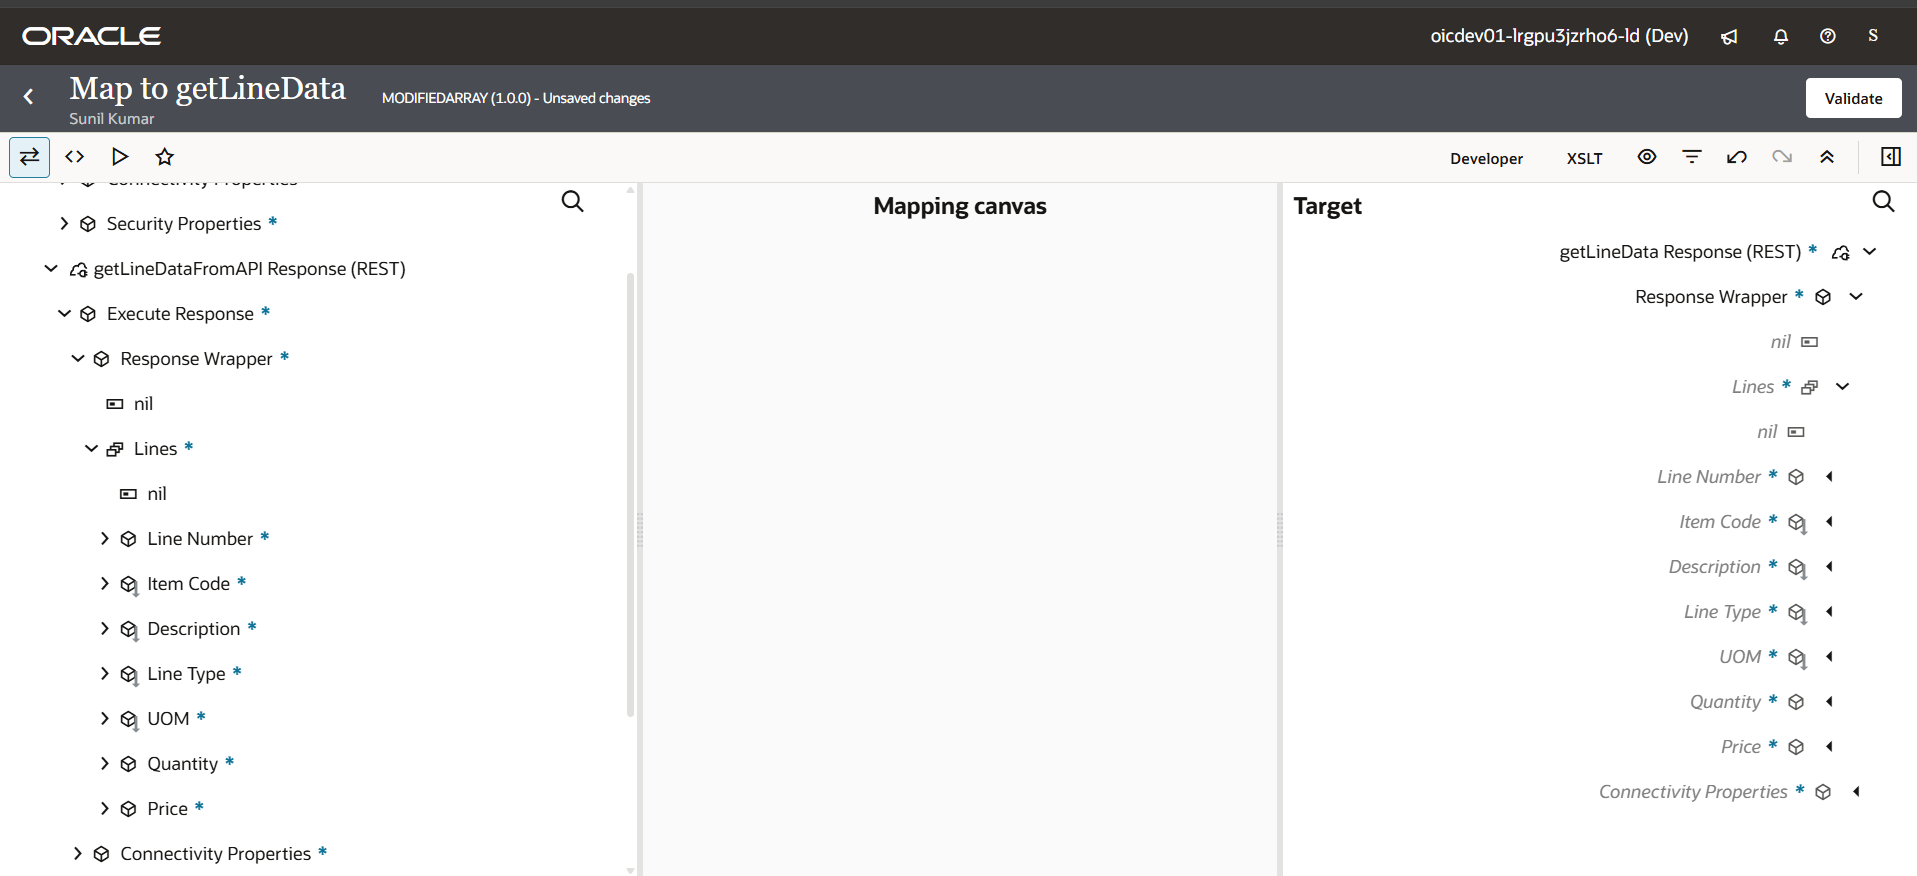
Step 1: Open the Mapper
Open the map you want to edit; in this case, Map to getLineData. On the left, you’ll see your source structure (getLineDataFromAPI Response), and on the right, your target structure (getLineData Response), both broken down field by field (Line Number, Item Code, Description, Line Type, UOM, Quantity, Price).
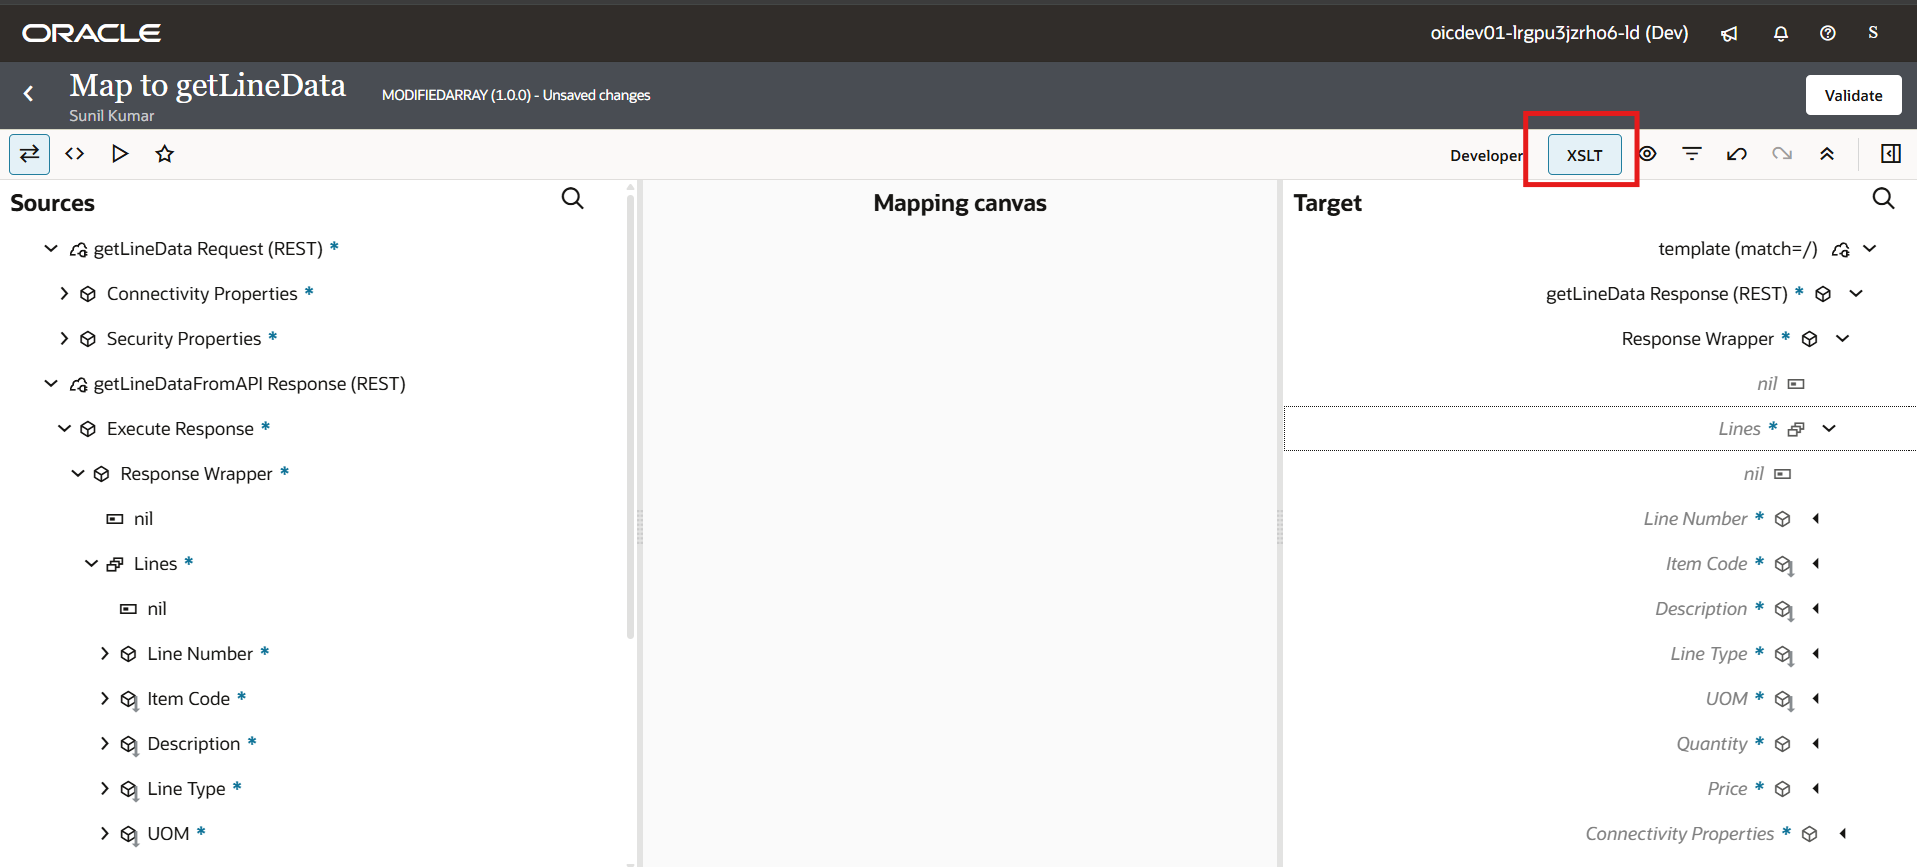
Step 2: Switch to the XSLT View
By default, the mapper opens in the visual drag-and-drop view. Click the XSLT button in the top toolbar to switch to the developer view. This unlocks the full XSLT Constructors panel, which you’ll need for conditional logic.
Step 3: Open the Components Panel and Map Your Array
Expand the Components panel on the right, then open XSL Constructors > Flow Control. Here you’ll find choose, for-each, for-each-group, if, otherwise, and when. Before adding any conditions, map your array and its items normally in this case, the Lines array is mapped through a for-each, with each field (Line Number, Item Code, Description, Line Type, UOM, Quantity, Price) mapped straight across.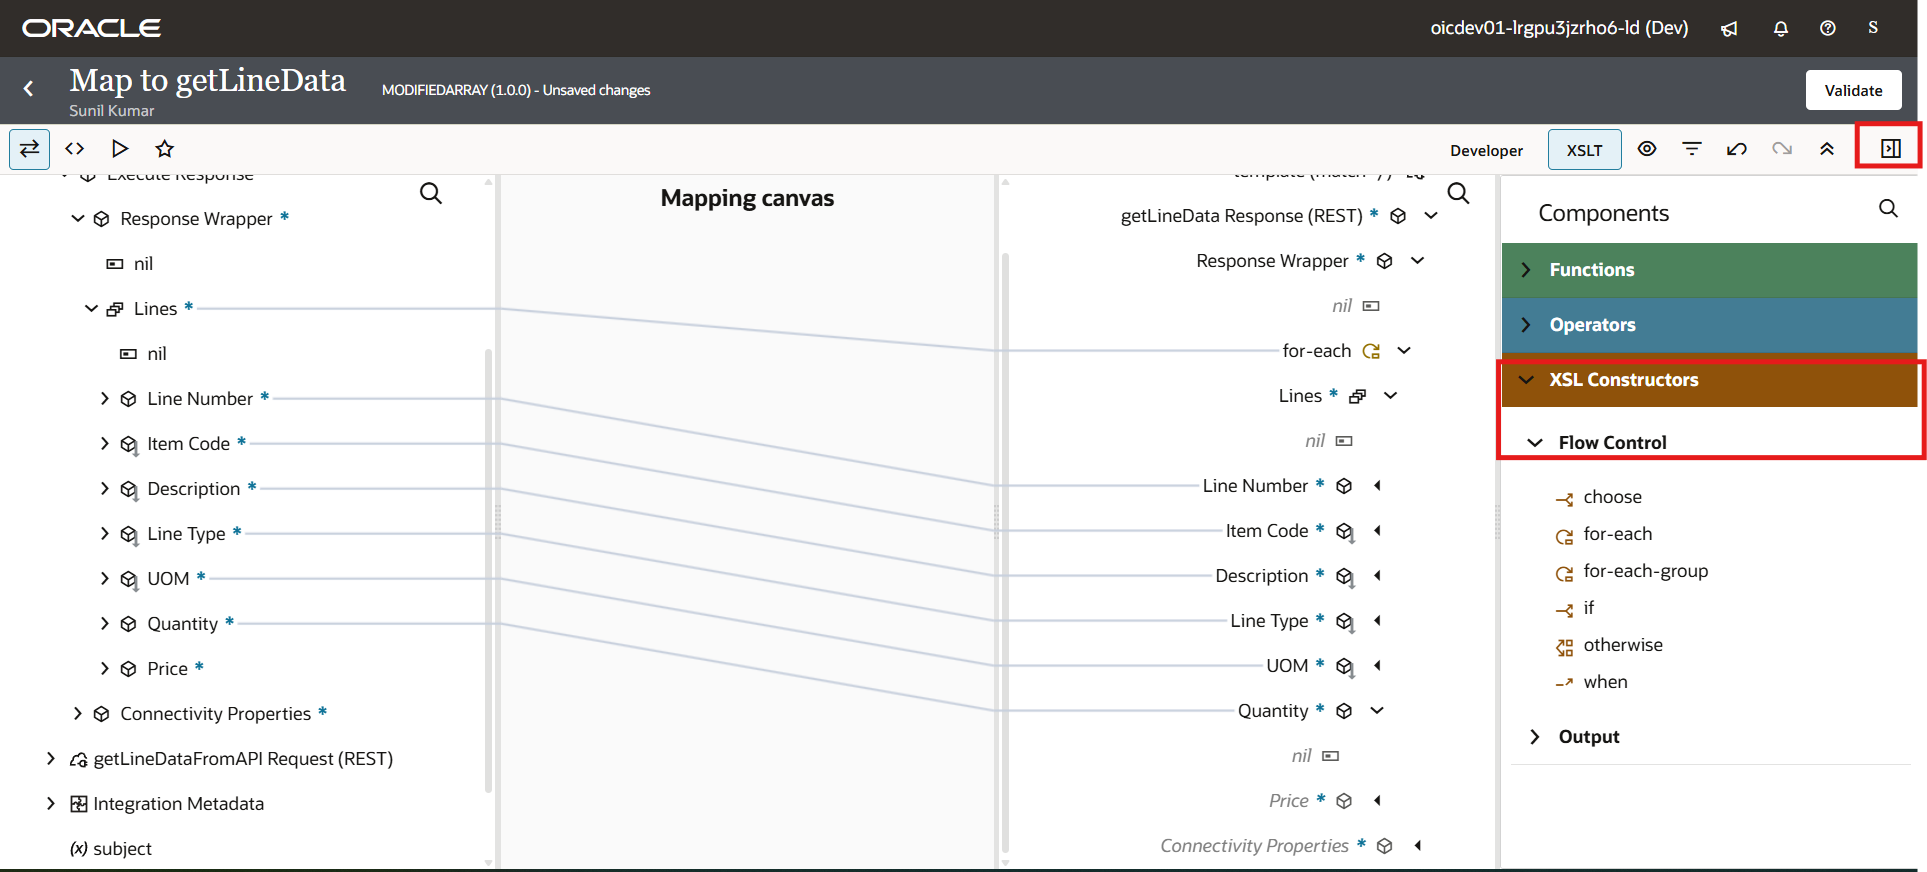
Step 4: Drag “choose” onto the Target Field
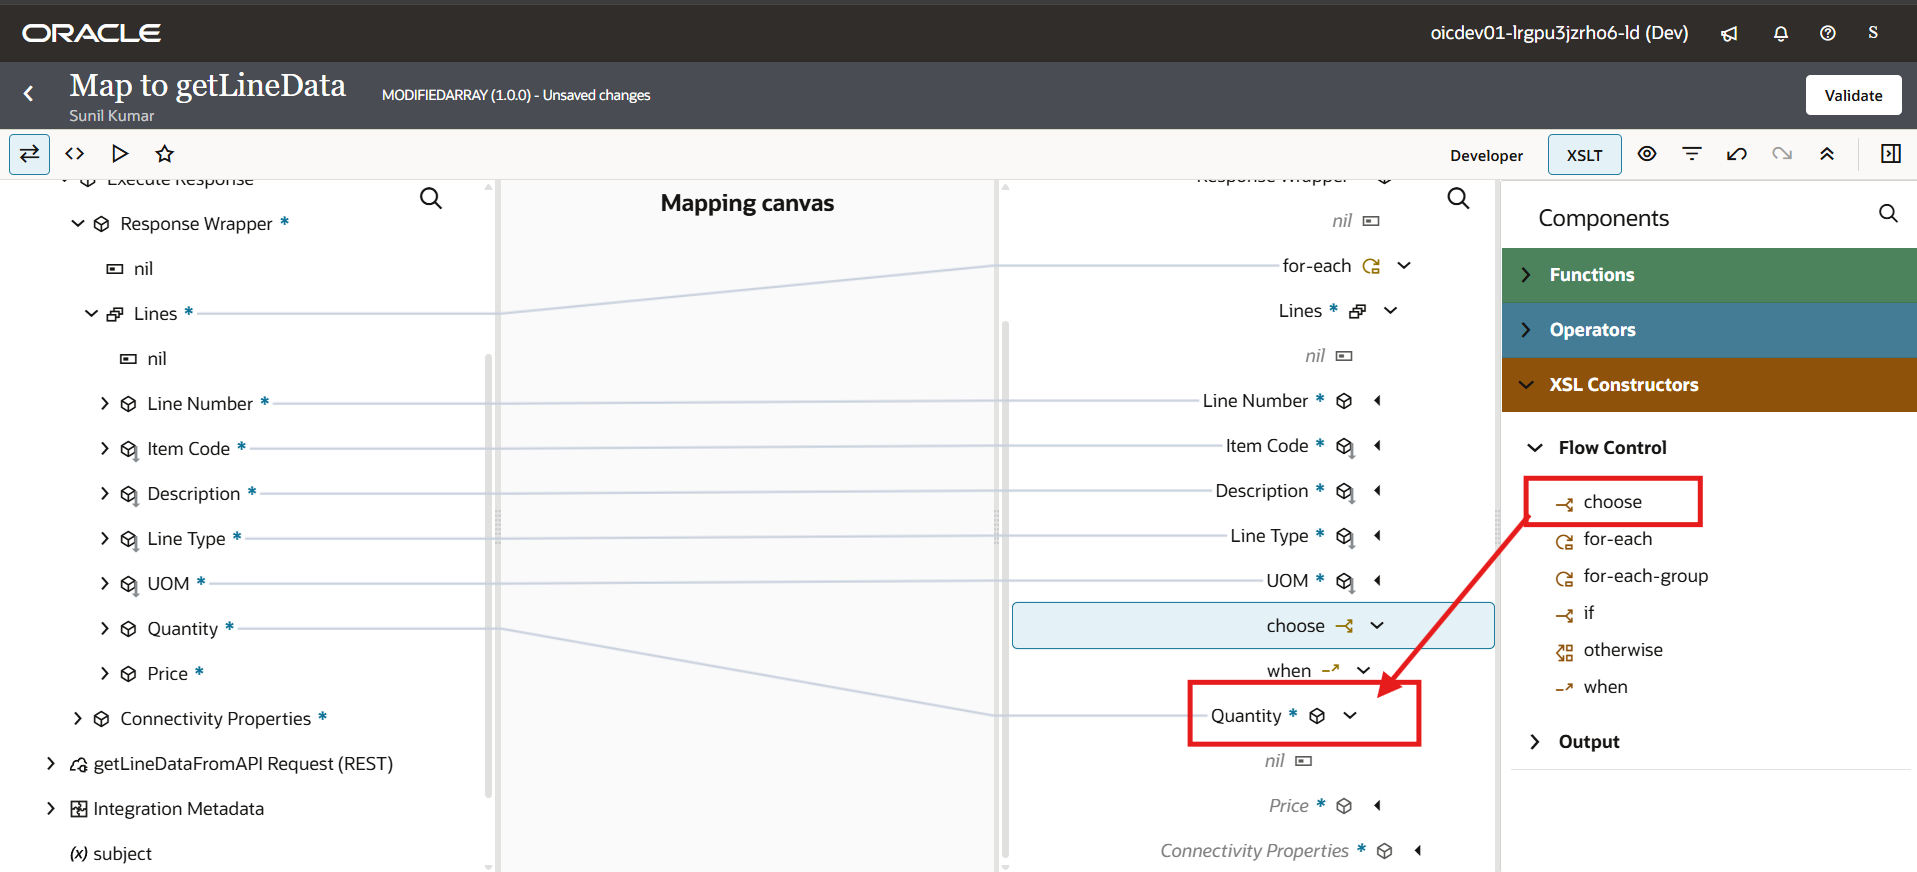
Drag choose from the Flow Control section and drop it directly onto the target field you want to make conditional here, the Quantity field’s mapping icon. This automatically inserts a choose block with a when branch underneath it.
Step 5: Write Your Condition in the “when” Branch
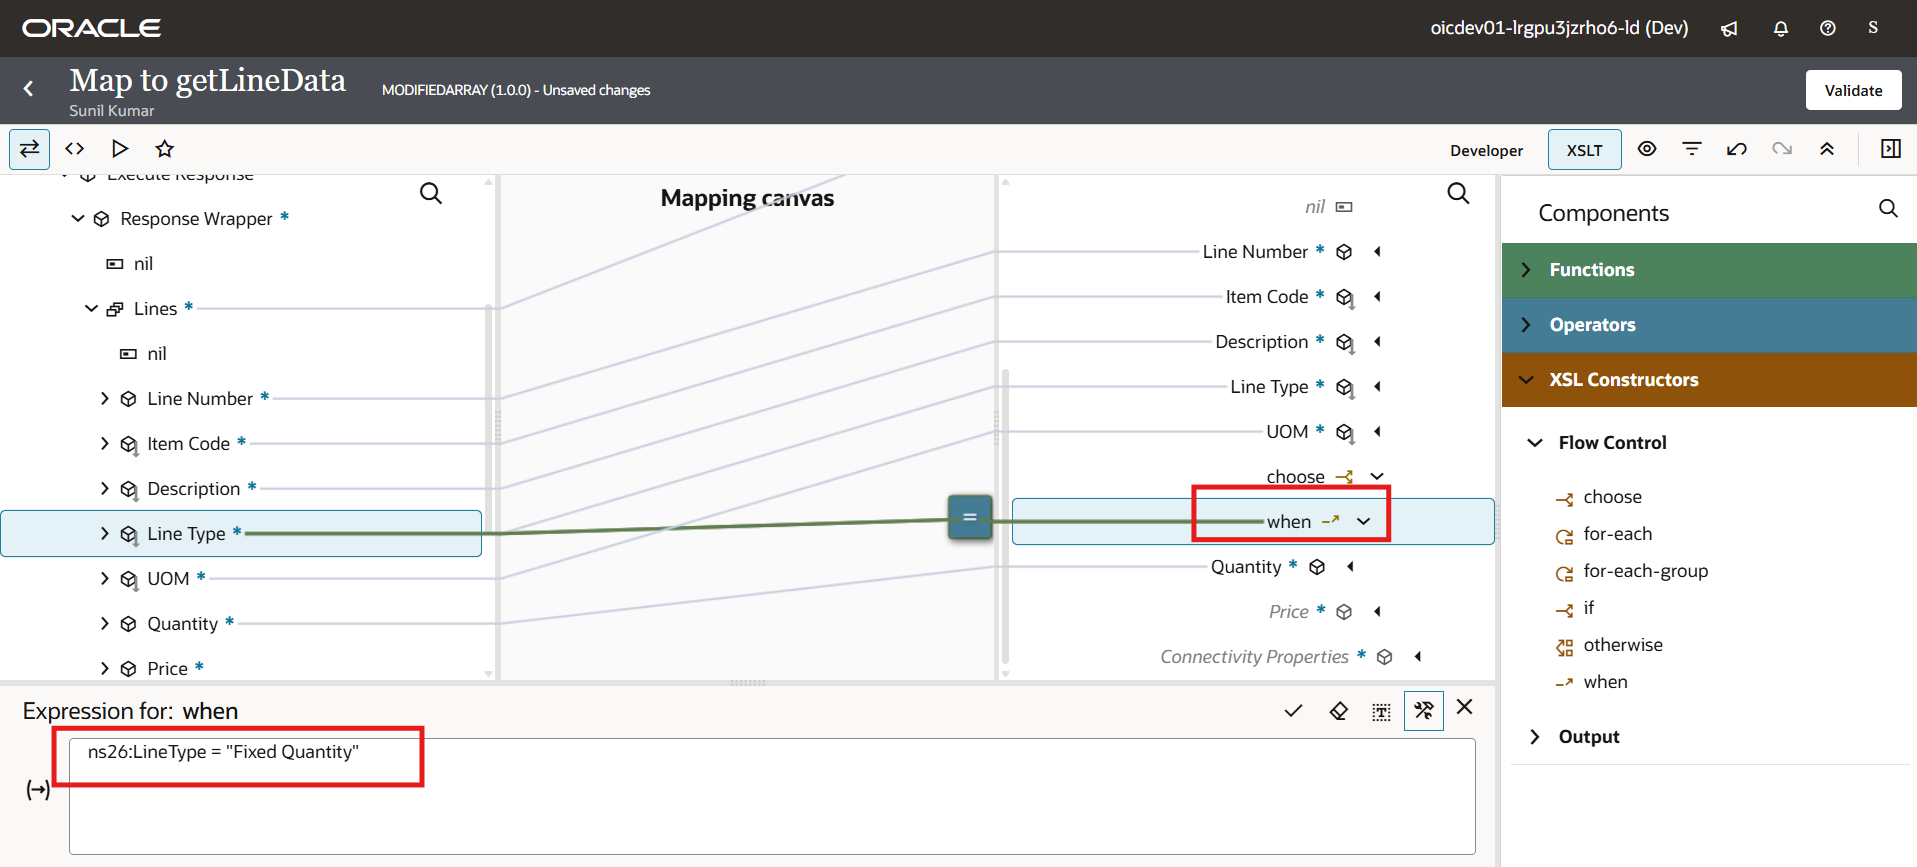
Click the when node to open its expression editor. Write the condition that should trigger this branch. In this case, the rule is: when LineType equals “Fixed Quantity”
ns26:LineType = "Fixed Quantity"
Step 6: Leave Quantity Unmapped for That Condition
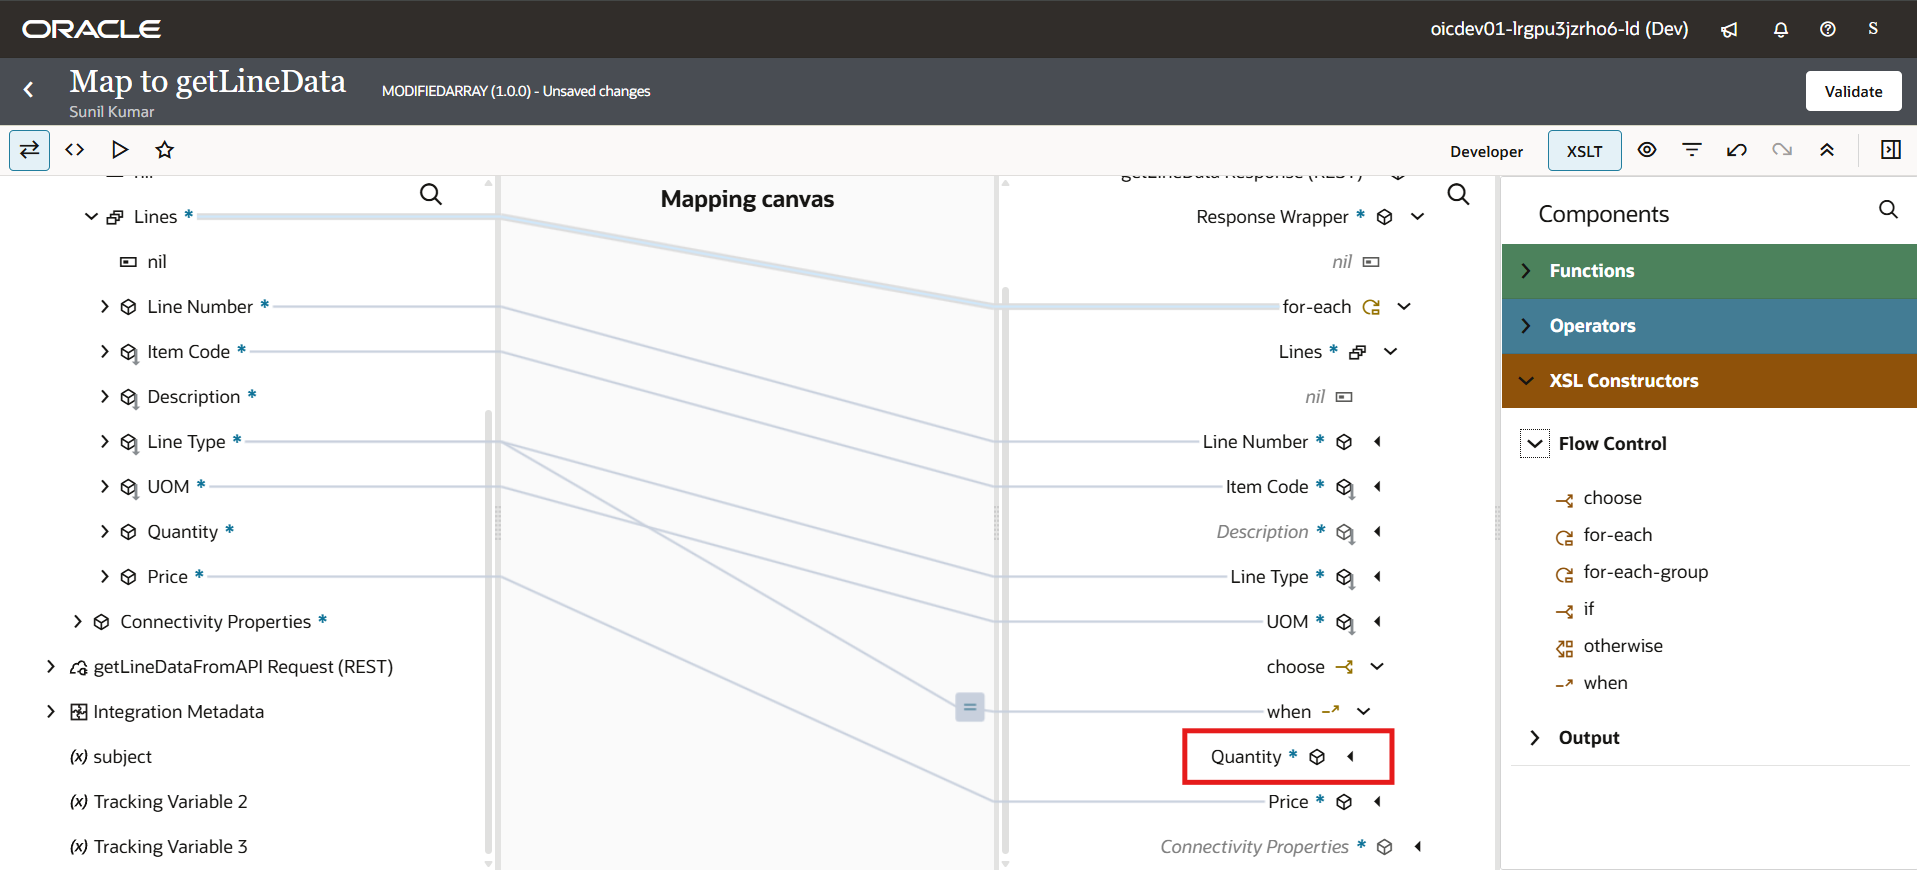
Since the requirement is for Quantity to be null whenever LineType is “Fixed Quantity”, remove the source-to-target link for Quantity inside this when branch. No mapping line means no value gets written the field stays null for that condition.
Step 7: Add “otherwise” for the Default Case
Drag otherwise from the Flow Control section and drop it onto the when node. This adds the fallback branch of the choose block — the logic that runs whenever the condition isn’t met. Insideotherwise, map Quantity from source to target as a normal, direct pass-through, so every line type other than “Fixed Quantity” keeps its actual quantity value.
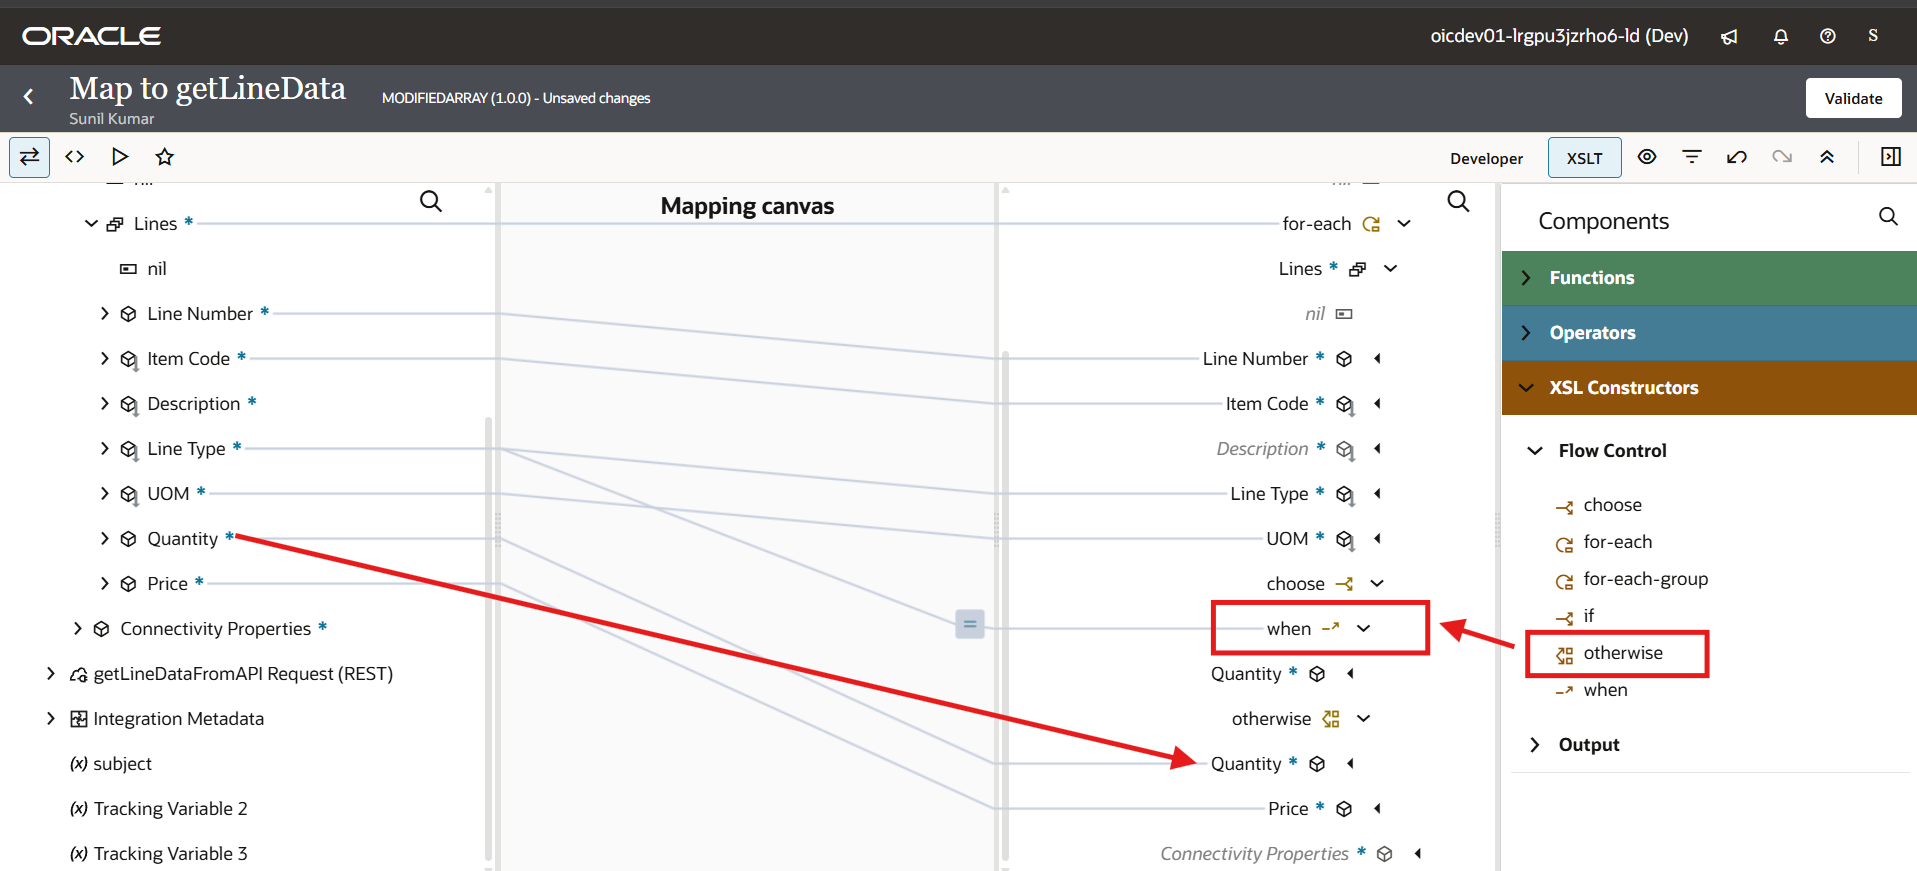
Adding more conditions: If you need additional rules beyond a single when/otherwise pair, drag another when from the Flow Control section and drop it onto the choose block itself (as a sibling before otherwise), then give it its own condition. The choose block evaluates each when in order and falls through to otherwise only if none of them match.
Step 8: Validate, Save, and Test
Click Validate to confirm the XSLT is well-formed, then save the map. Run a test through the integration to confirm the behavior. In the test results below, notice line 1 (LineType: "Fixed Quantity") comes back with "Quantity": null, while line 2 (LineType: "Variable Quantity") keeps its actual quantity of 120 — exactly as intended.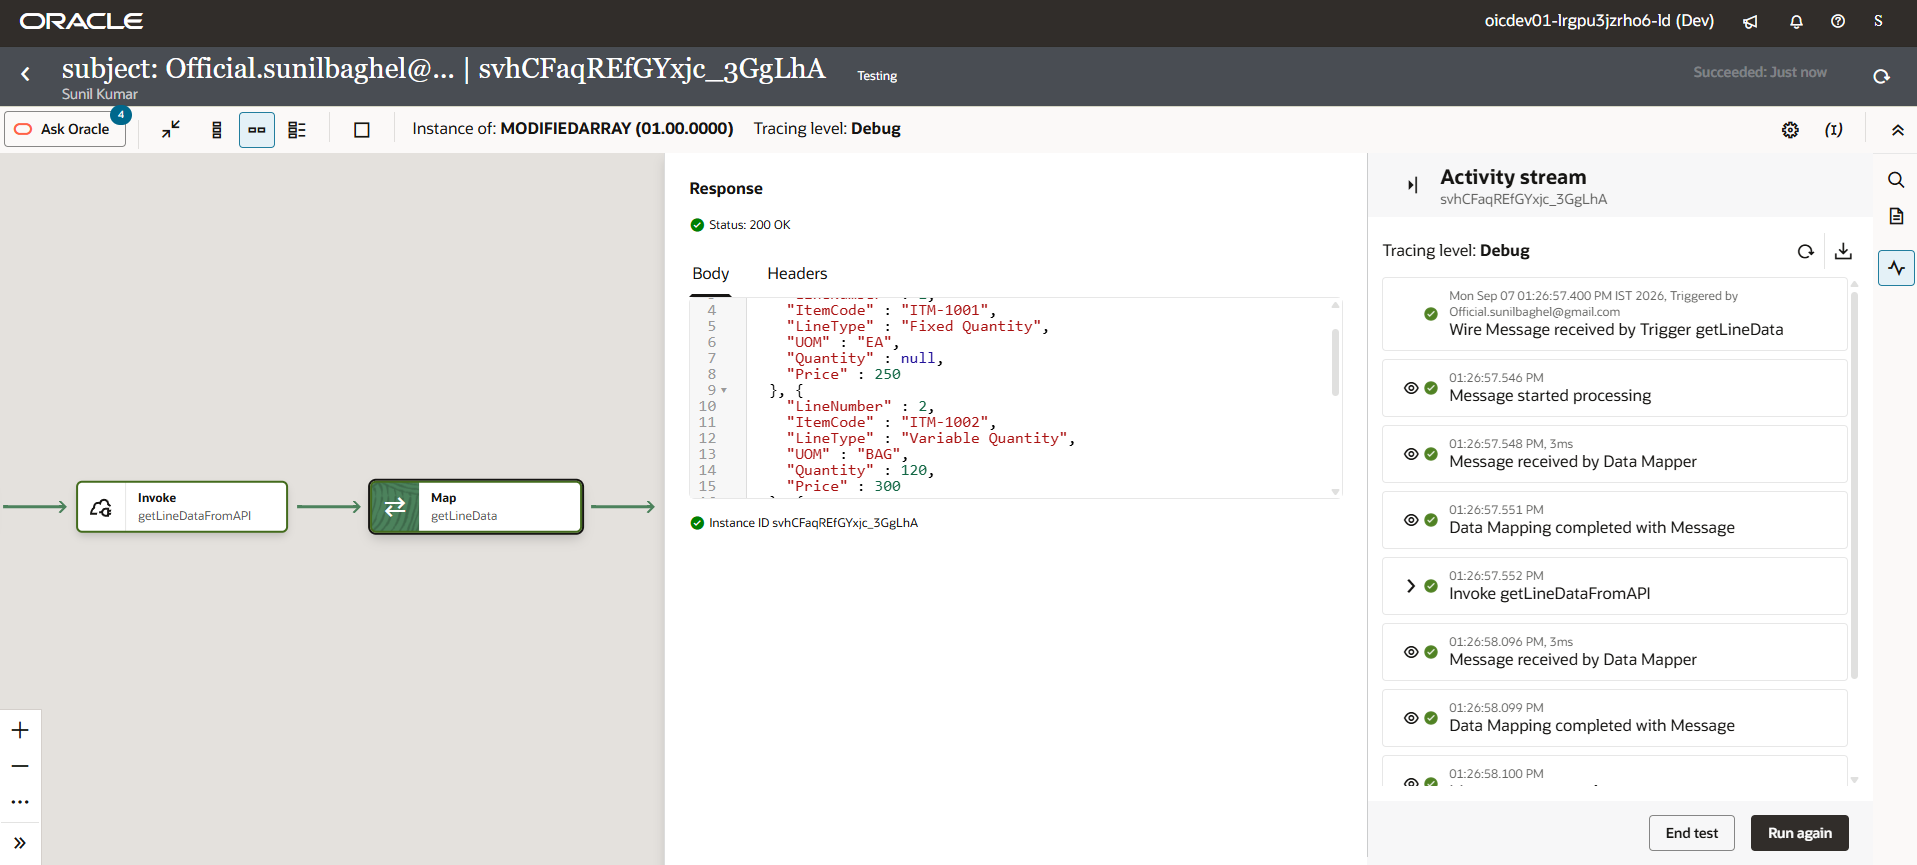
Conclusion
The visual mapper handles most field mappings fine, but as soon as a target value depends on a condition elsewhere in your payload, you need to drop into the XSLT view and use choose / when / otherwise. Once you’ve done it once, the pattern is easy to repeat: drop choose onto the field, define your condition in when, decide what happens in each branch, then handle every other case in otherwise. It’s a small technique, but it turns rigid one-to-one mappings into mapping logic that actually reflects your business rules.