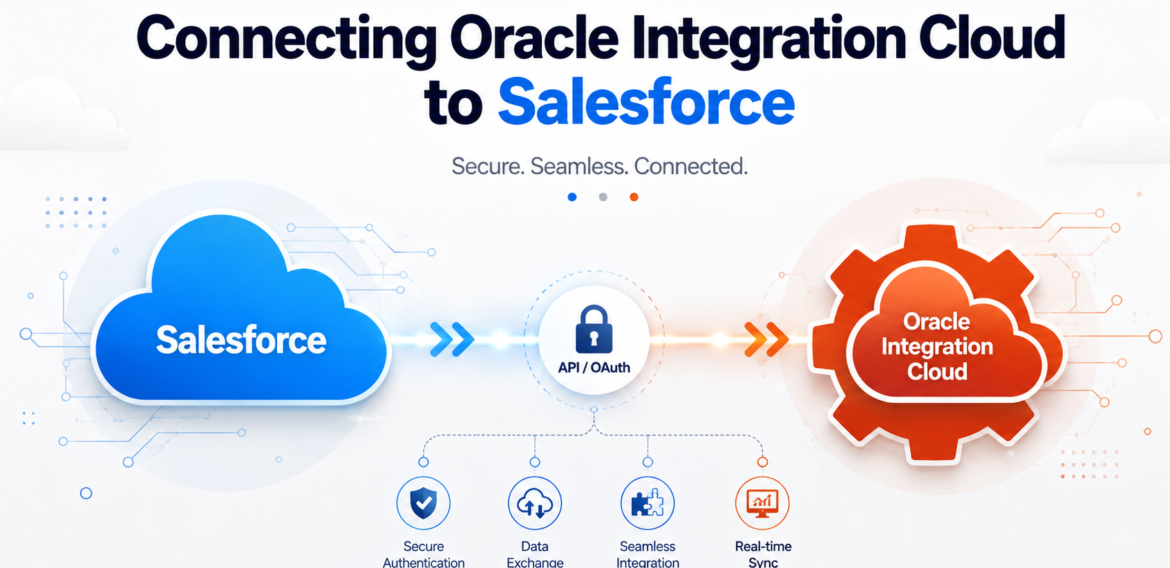
Connecting Oracle Integration to Salesforce using Client Credentials
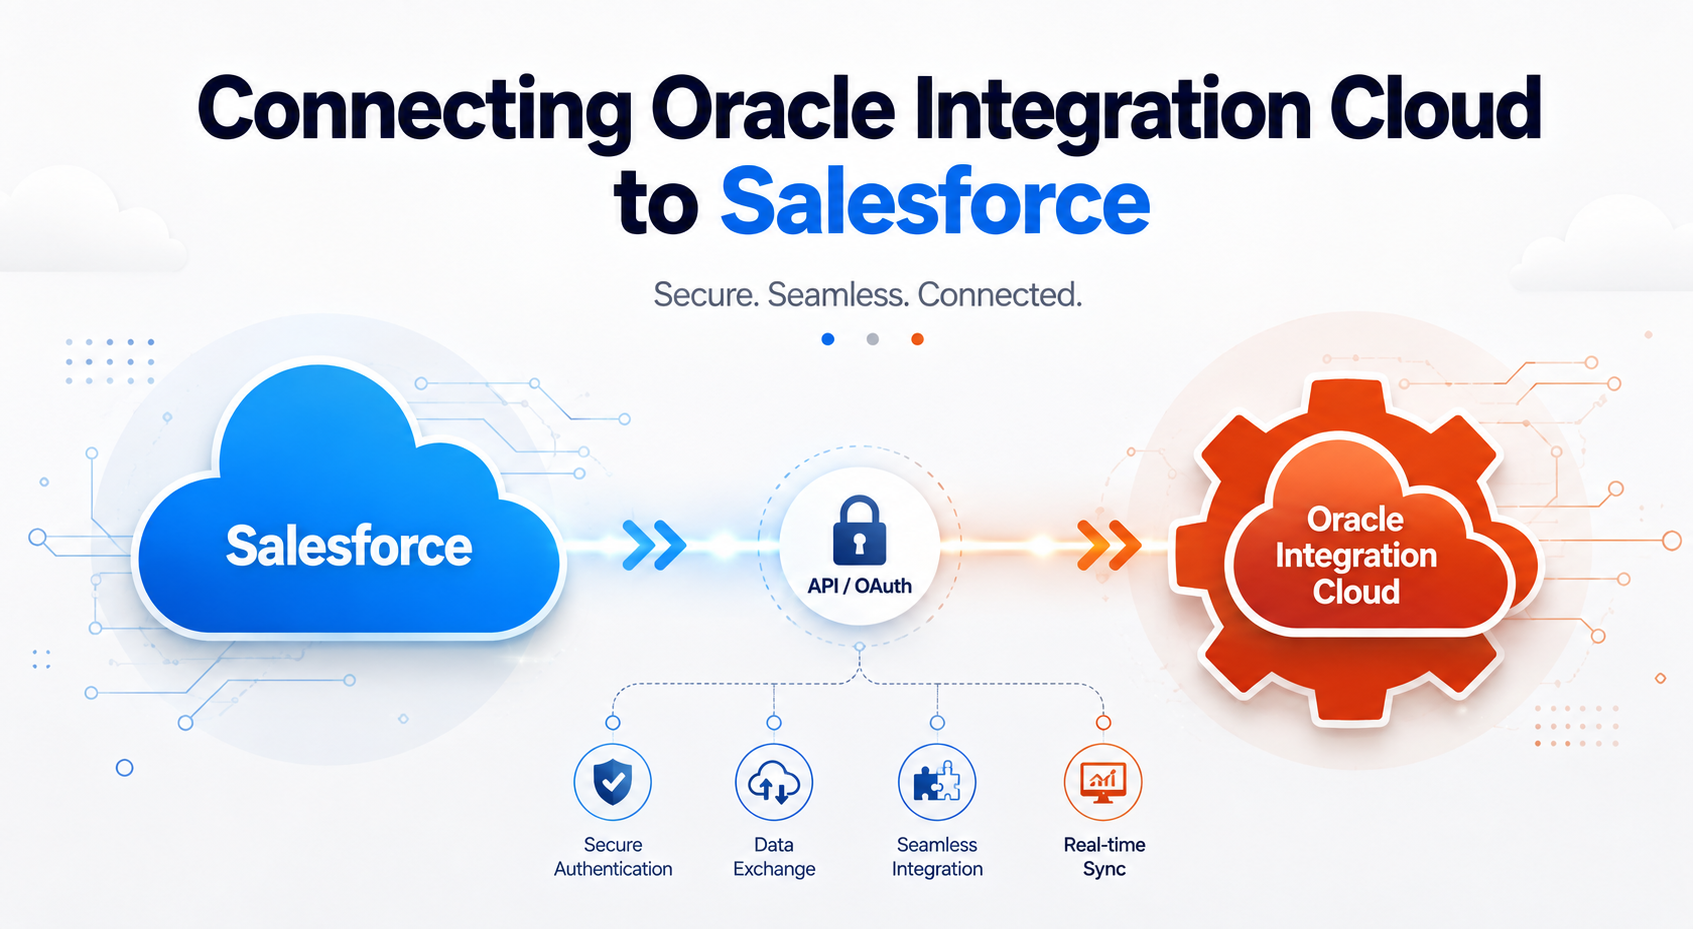
This article walks through the end-to-end setup of a Salesforce connection in Oracle Integration Cloud (OIC) using the OAuth 2.0 Client Credentials security policy, from creating the External Client App in Salesforce to configuring and testing the connection in OIC.
Why Are We Using OAuth 2.0 Client Credentials?
Salesforce is retiring the Username Password Policy for the Salesforce Adapter with the Summer 2027 release. This means password-based authentication should no longer be used for new, long-term integrations. Even the old connection should shift to OAuth 2.0 client credentials.
Check out the Oracle Integration announcement here.
For this setup, we are using the OAuth 2.0 Client Credentials security policy because it provides a suitable authentication model for a server-to-server integration between Oracle Integration Cloud (OIC) and Salesforce.
With Client Credentials :
- OIC authenticates using the Consumer Key (Client ID) and Consumer Secret (Client Secret).
- No Salesforce username and password need to be stored in the OIC connection.
- The integration can obtain an OAuth access token without requiring an interactive user login.
- Salesforce uses the configured Run-As user to determine the permissions under which the integration operates.
- It provides a more suitable approach for an automated integration that runs in the background.
What you will do :
- Confirm your Salesforce org edition supports External Client Apps.
- Create an External Client App in Salesforce and enable OAuth.
- Enable the Client Credentials Flow and assign a Run-As user.
- Retrieve the Consumer Key and Consumer Secret.
- Create and configure the Salesforce connection in OIC.
- Update the Callback URL once the integration is deployed.
▶ WATCH THE FULL SETUP WALKTHROUGH ON YOUTUBE
Step 1: Confirm Your Salesforce Edition
Log in to Salesforce and confirm your org edition. The Client Credentials flow (External Client Apps) is available on Developer Edition and other supported editions, but is not available on the free Starter Edition.
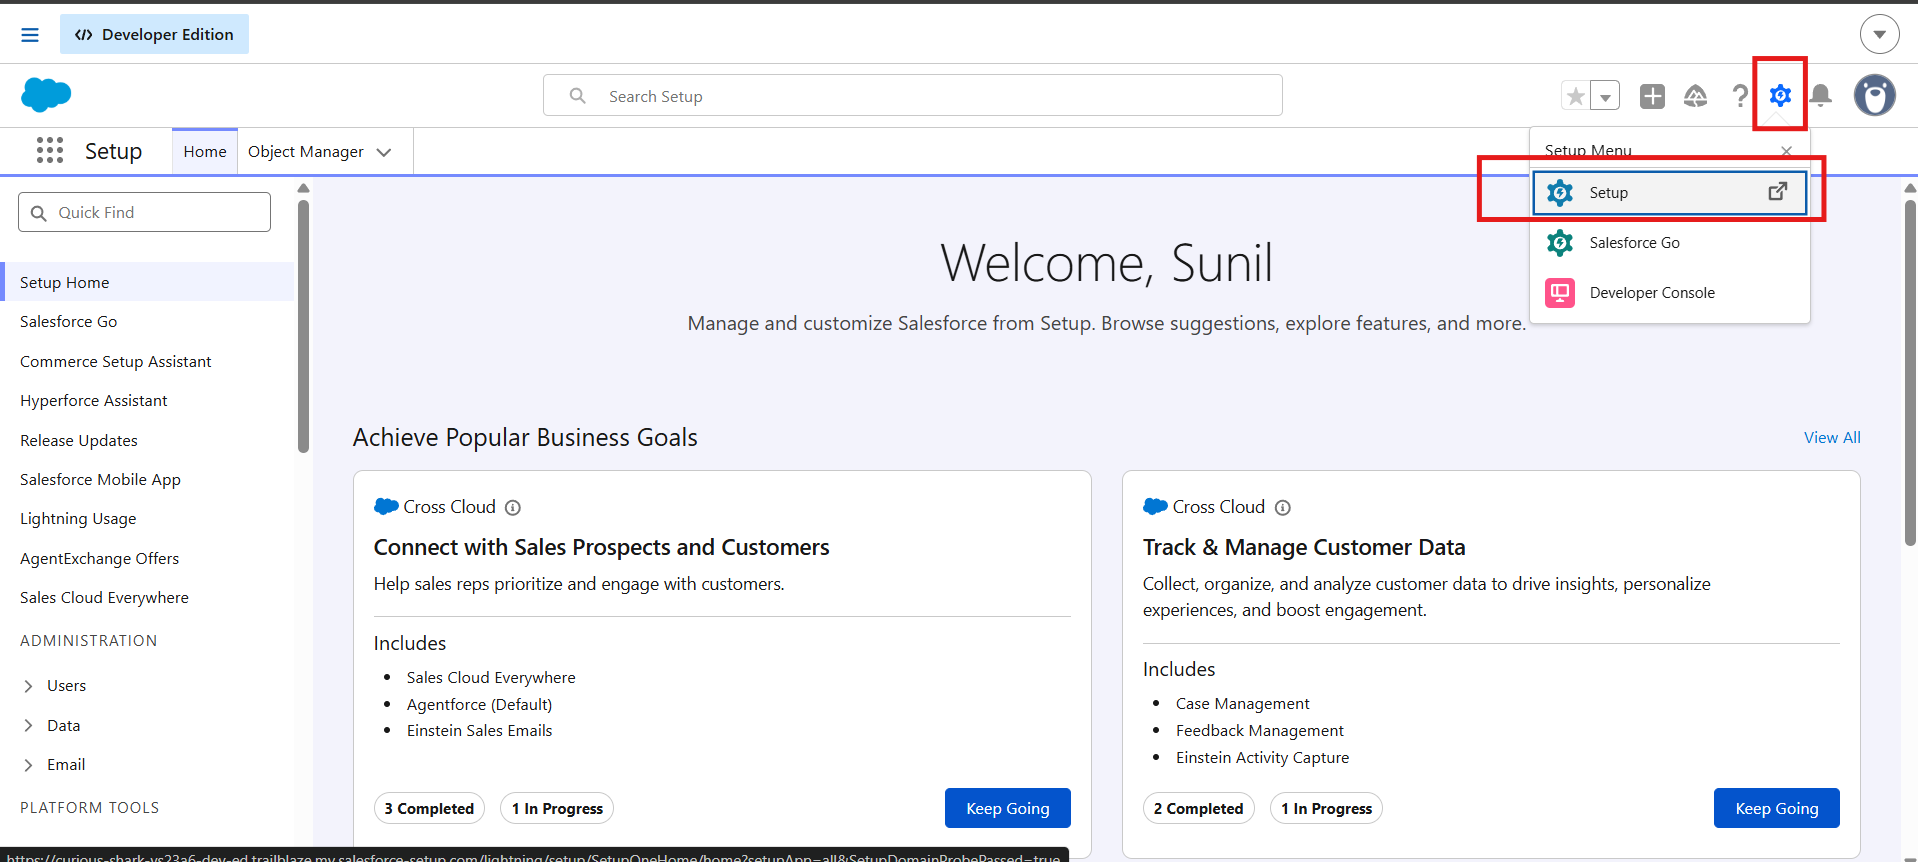
1.1 Open Setup
Click the gear (Setup) icon in the top-right corner, then click Setup. It opens in a new tab.
1.2 Check the Organization Edition
In the Quick Find box on the left, search for and click Company Information. The Organization Edition field shows your current edition.
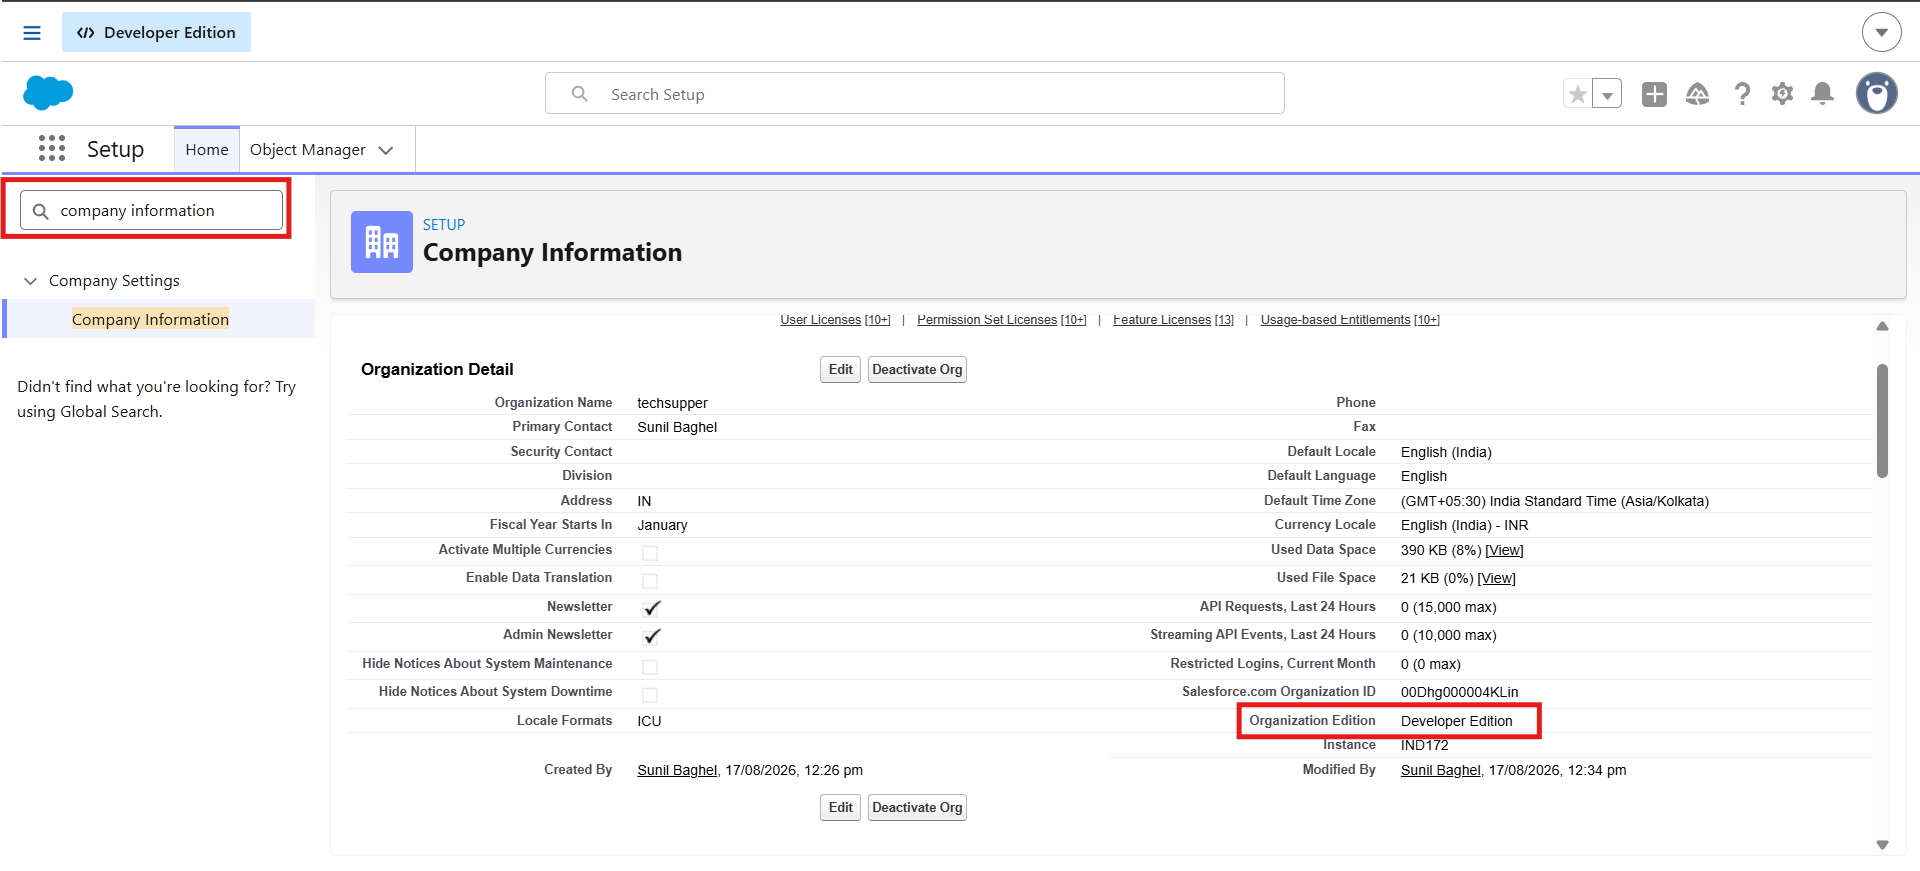
Note: If your org shows Starter/Essentials edition, External Client Apps and the Client Credentials flow will not be available. Use a free Developer Edition org instead (signup.salesforce.com).
Step 2: Create an External Client App
Client credentials (Consumer Key and Consumer Secret) are generated from an External Client App.
In Quick Find, search for External Client App Manager, then click New External Client App.
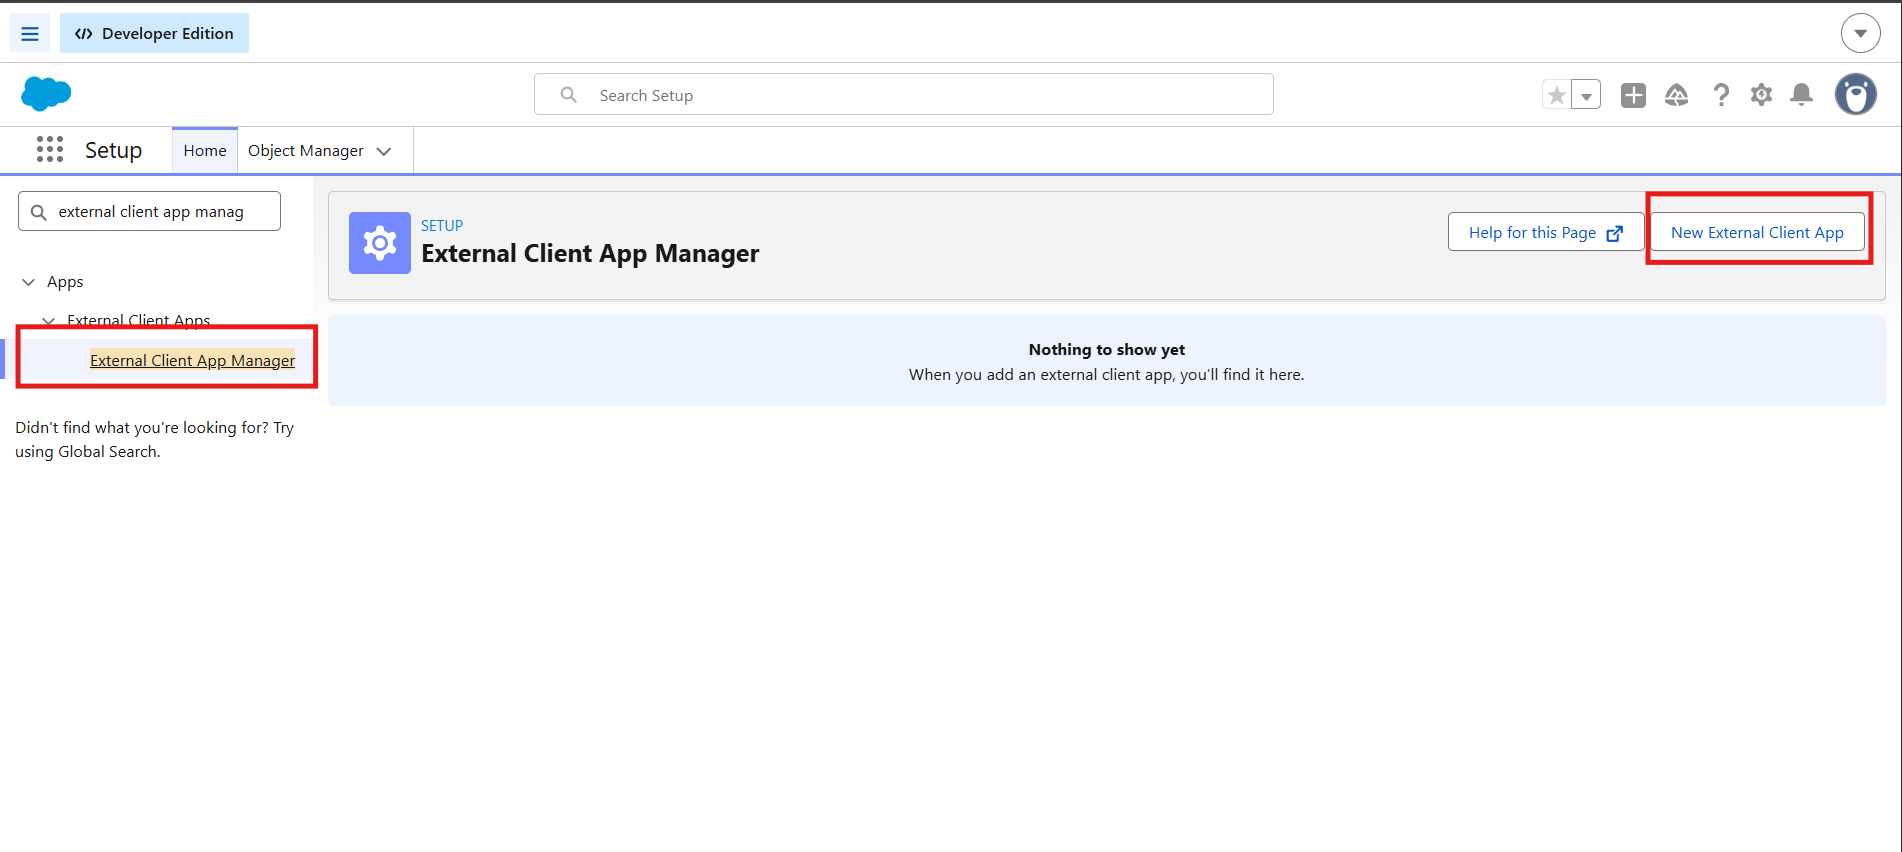
Step 3: Fill in Basic Information
Enter the External Client App Name and API Name (these can match), and the Contact Email ,use the email address the Salesforce org was created with, since Salesforce will send a verification code to it later.
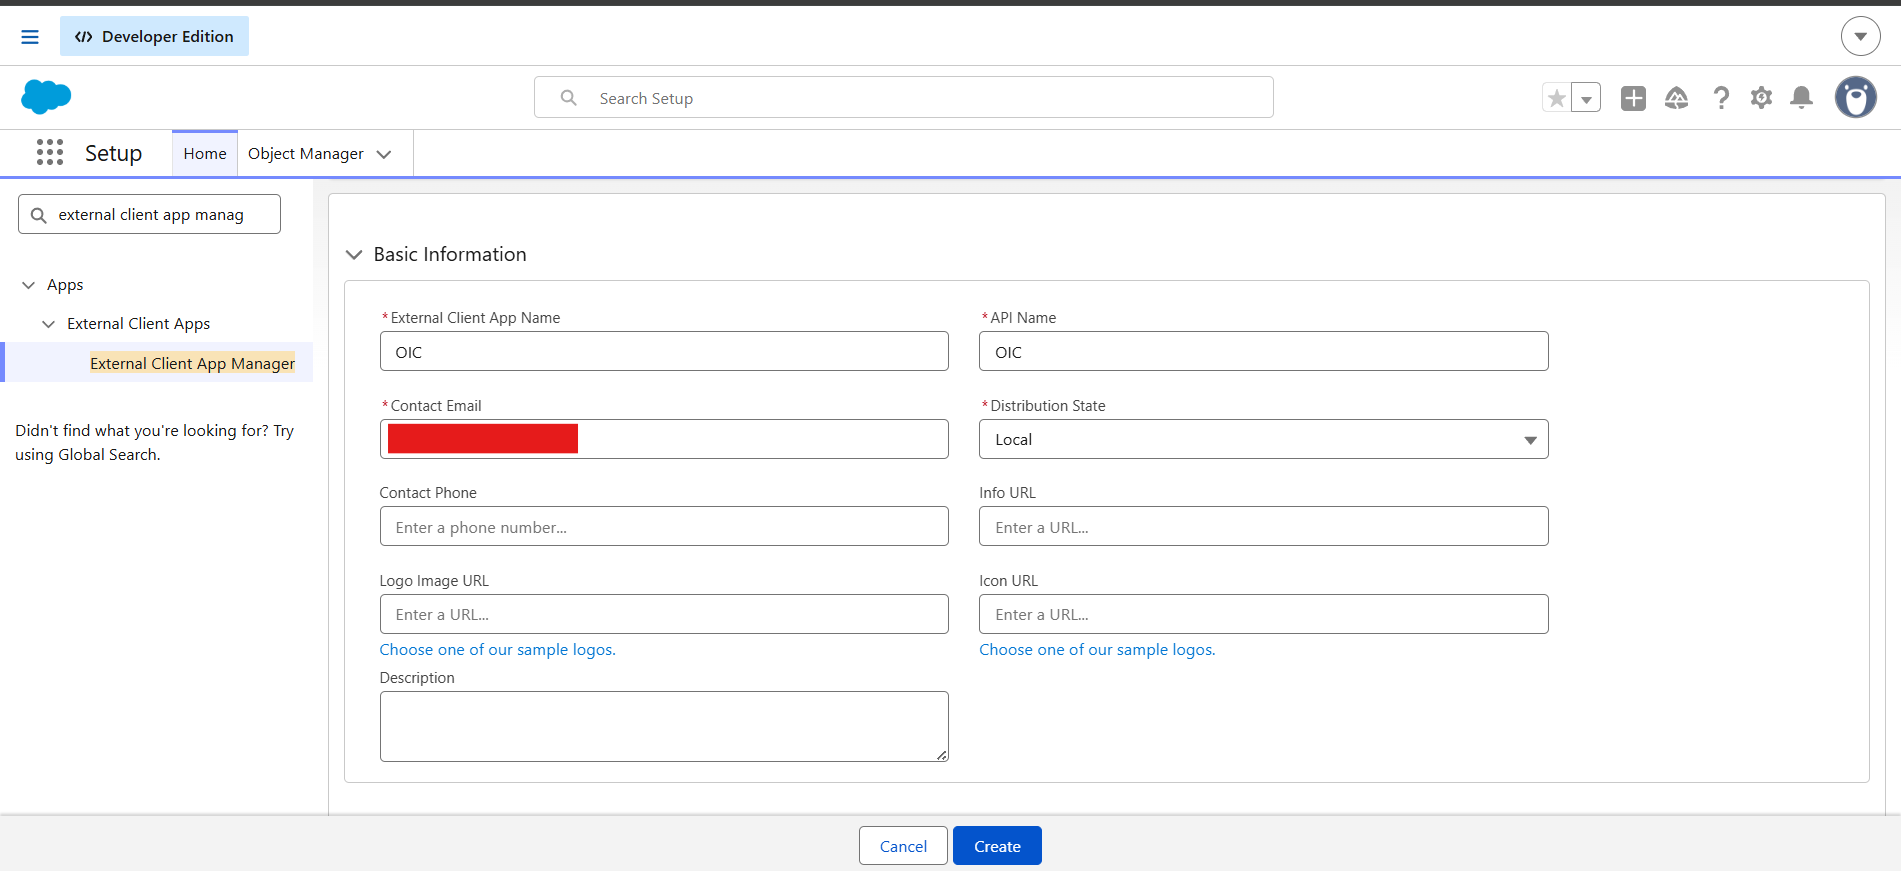
Note: Distribution State can stay as Local since this app is only used internally for the OIC integration.
Step 4: Enable OAuth Settings
Scroll down to API (Enable OAuth Settings) and check Enable OAuth.
4.1 Callback URL
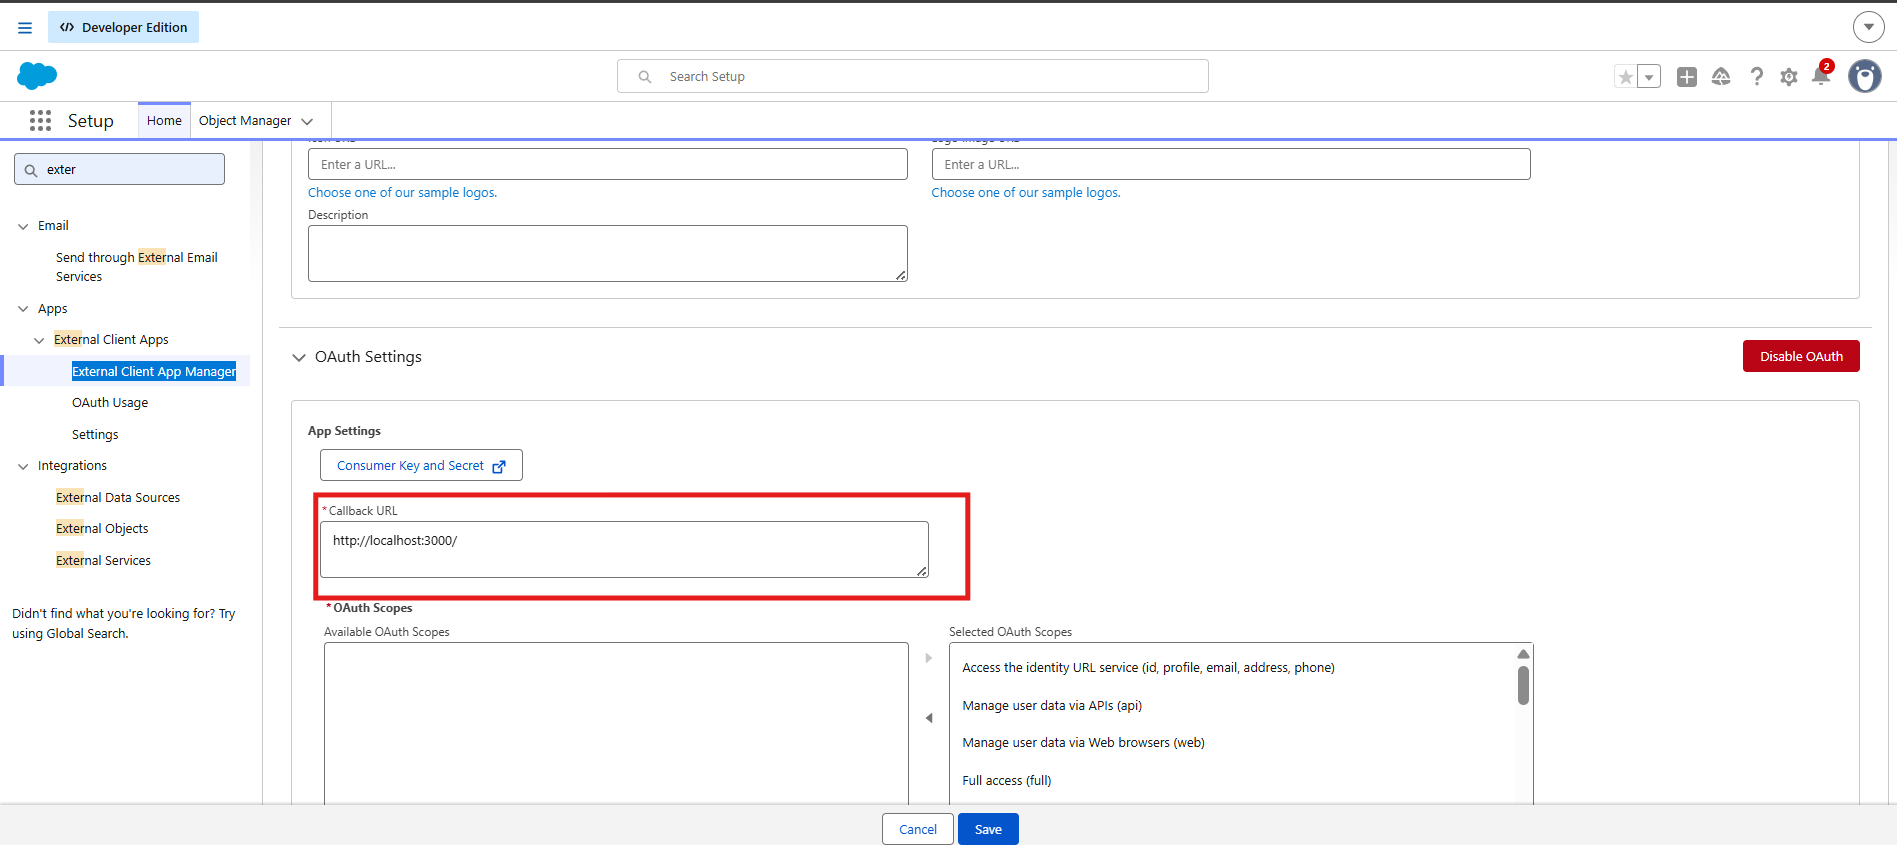
Enter any placeholder URL for now
http://localhost:3000/
This is a required field, but Salesforce does not validate it at creation time. You can update it later with the real callback URL once your OIC integration is created and deployed (see Step 9).
4.2 OAuth Scopes
Move the scopes your integration needs from Available OAuth Scopes to Selected OAuth Scopes. These control what the connected app is allowed to do once it authenticates.
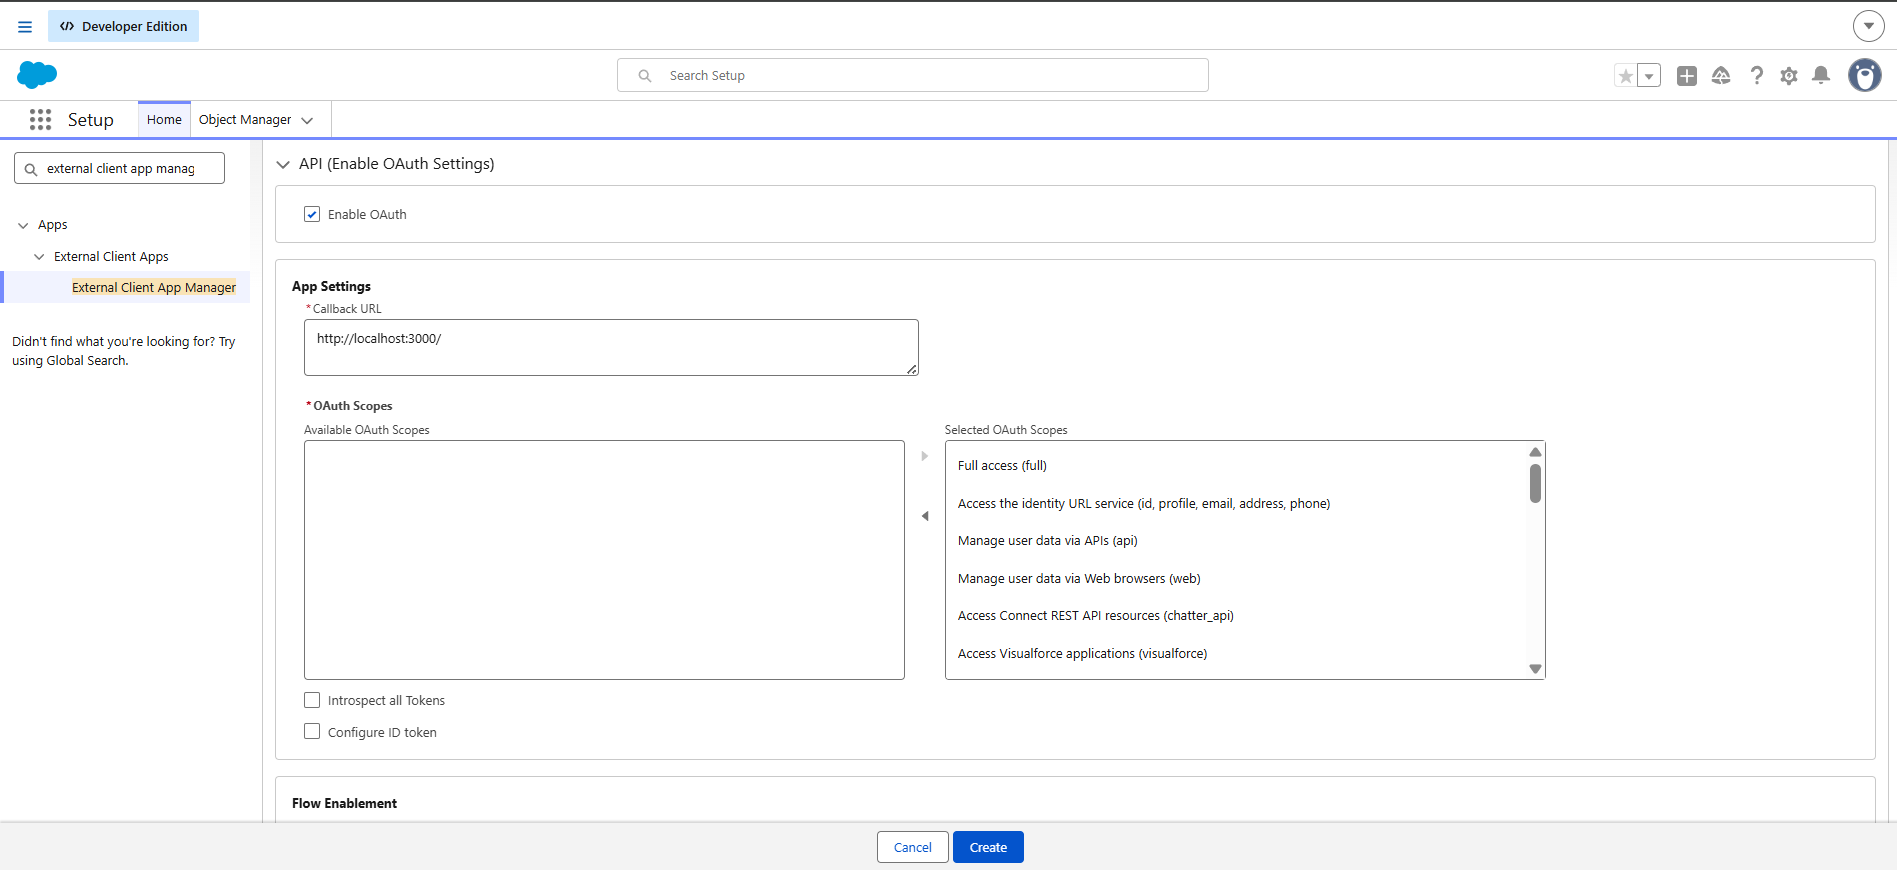
Note: Selecting “Full access (full)” works for testing, but for a production integration it’s better practice to select only the specific scopes the integration actually needs (for example “Manage user data via APIs (api)”) rather than granting full access.
Step 5: Configure Flow Enablement
Scroll down to Flow Enablement and Enable Client Credentials Flow required, since this is the flow OIC will use to authenticate.
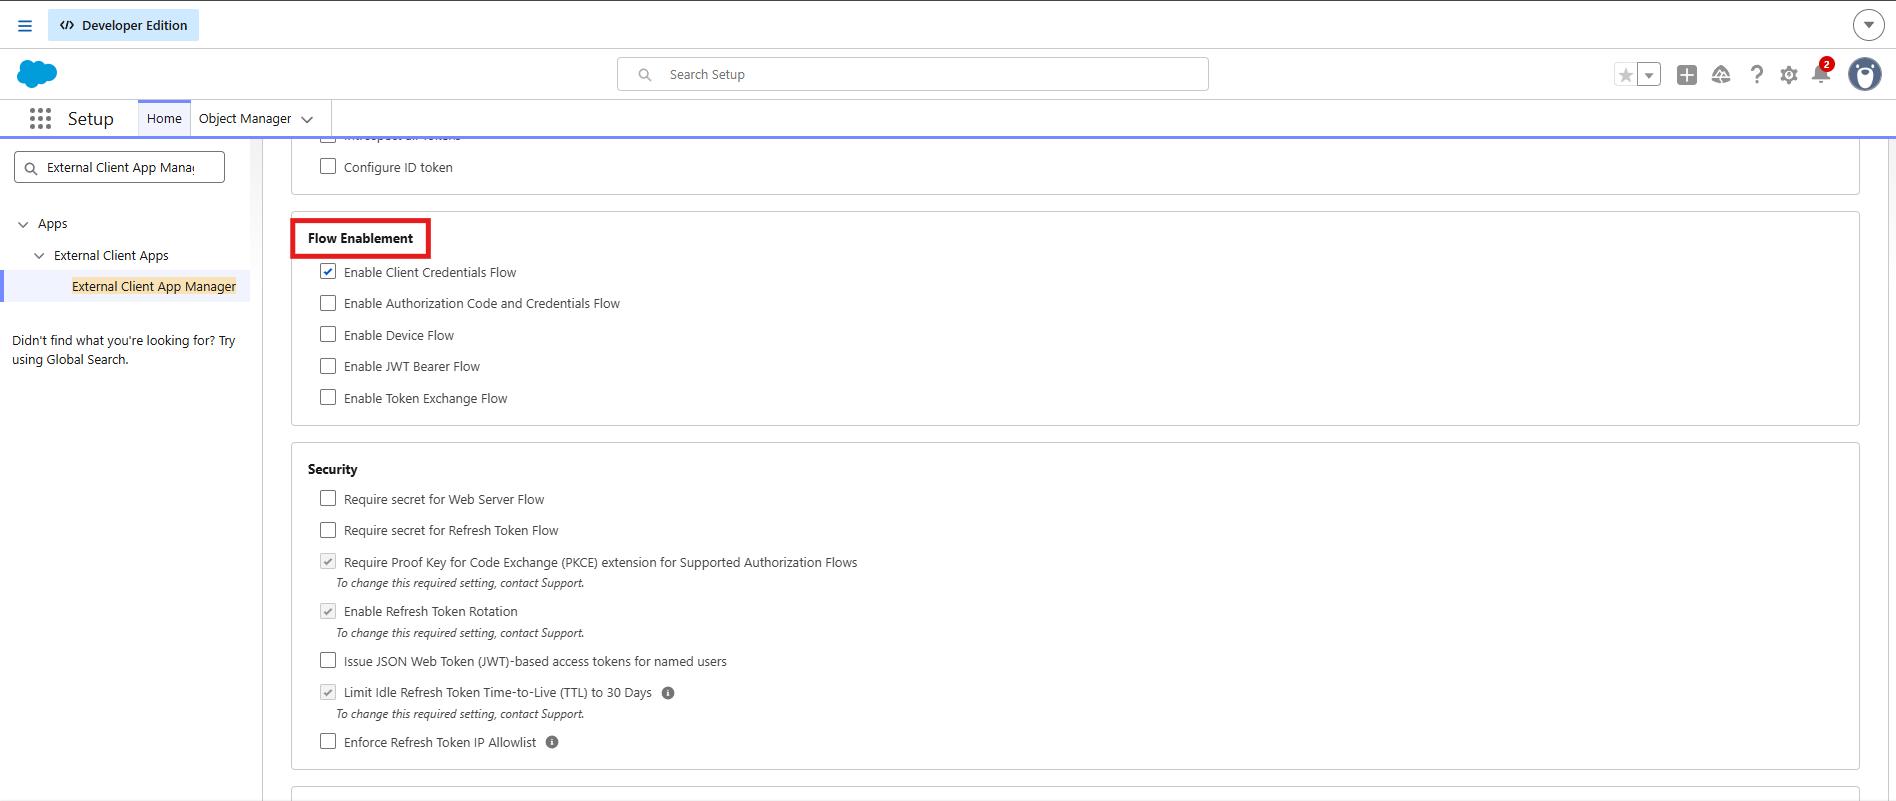
Note: For a pure client-credentials (server-to-server) integration, Enable Client Credentials Flow is the only setting that is strictly required.
Click Create to finish.
Step 6: Enable the Client Credentials Flow with a Run-As User
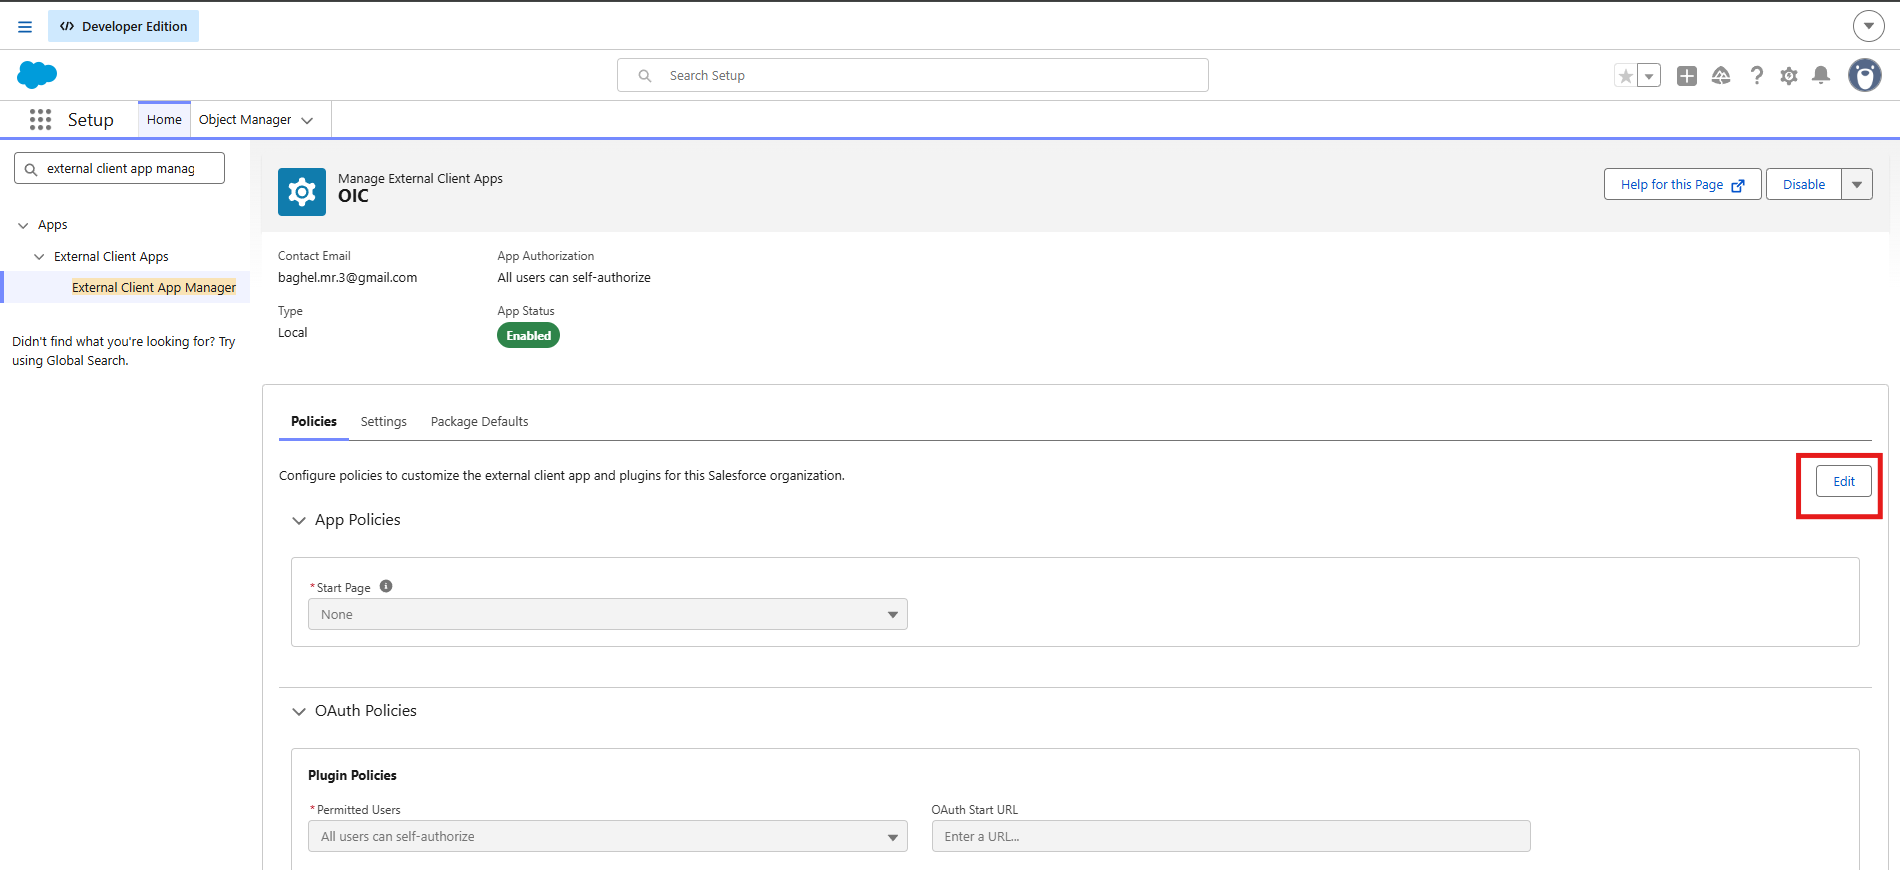
After creation, Salesforce opens the app’s Manage External Client Apps page (status: Enabled). Click Edit.
6.1 Find your username
The Client Credentials Flow needs a “Run As” user , the Salesforce user whose permissions the integration will run under.
To find your username
- Click your profile icon in the top-right
- Right click on Settings and Select Open on new Tab.
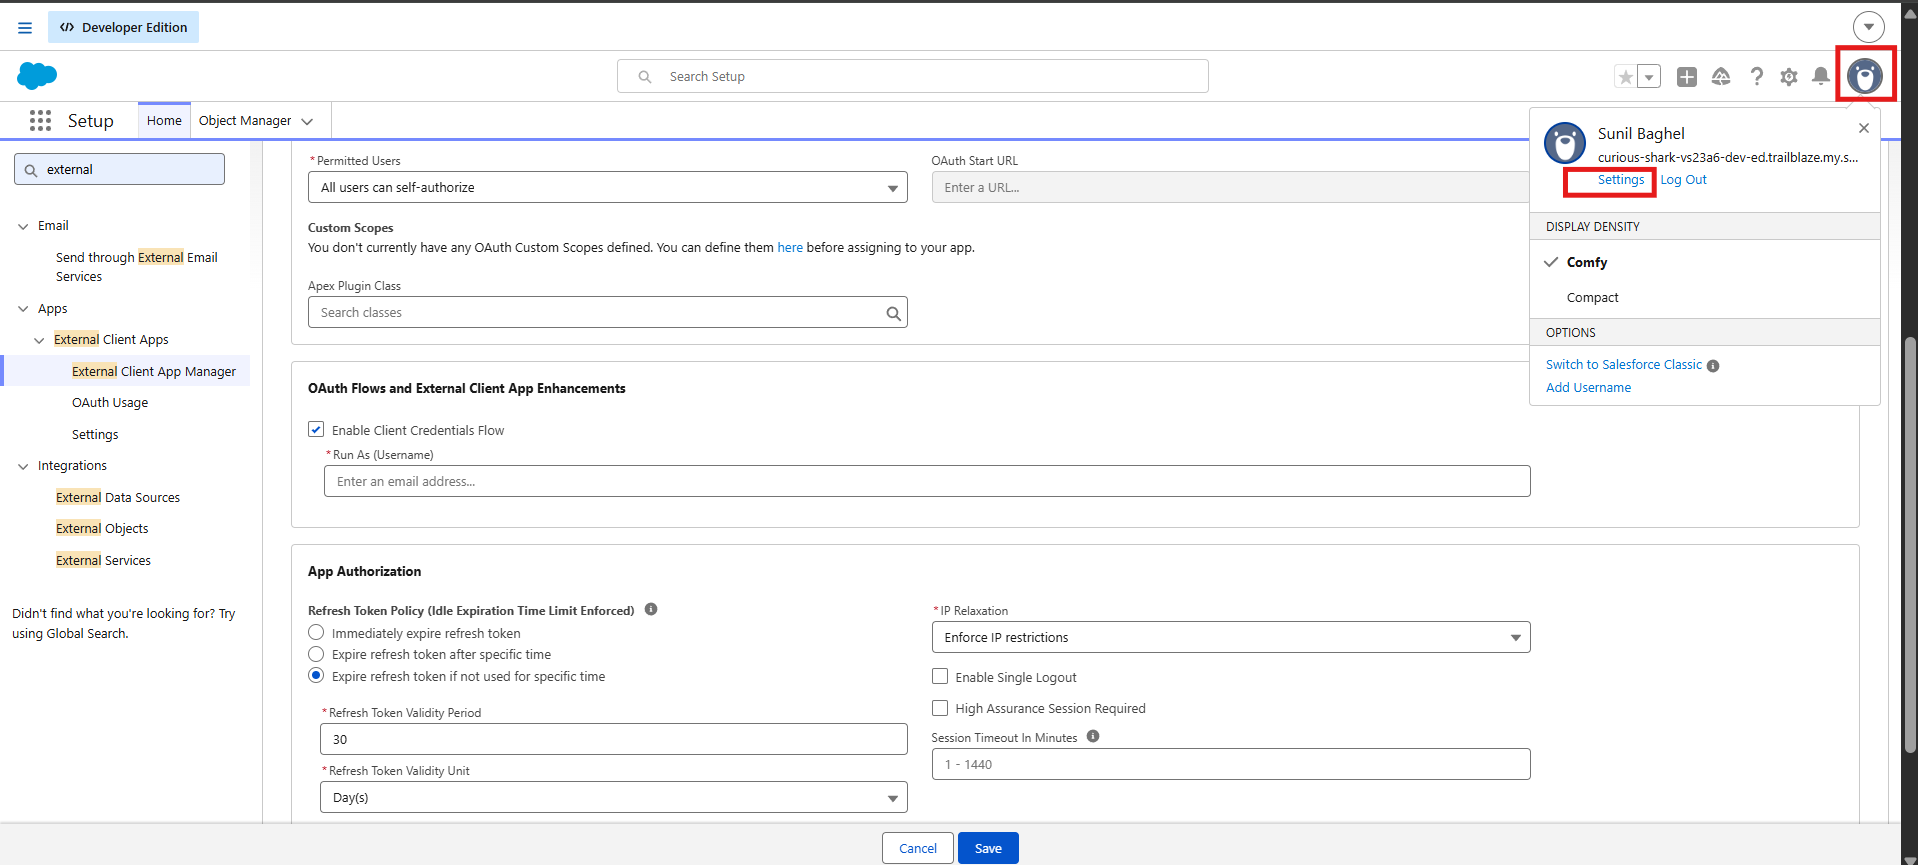
This opens the Personal Information page, which displays your Username.
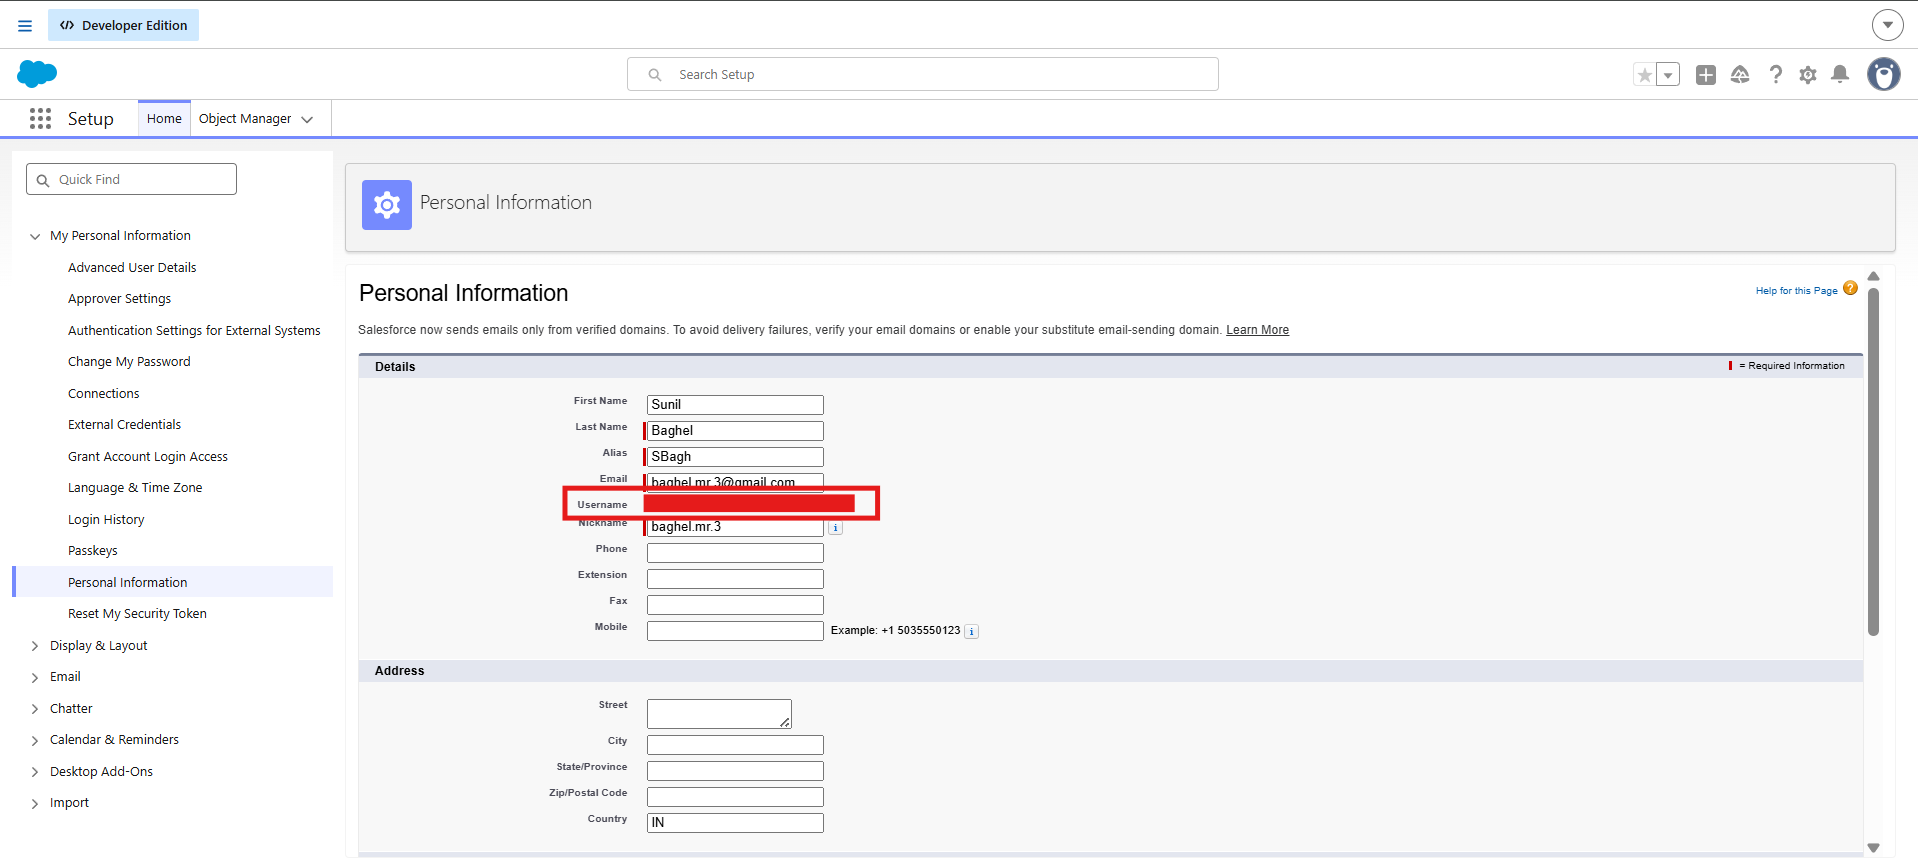
6.2 Set the Run-As user
Go back to the app’s Policies tab (from Step 6),
- Scroll to OAuth Policies
- Expand OAuth Flows and External Client App Enhancements
- check Enable Client Credentials Flow
- paste the username into Run As (Username).
- Click Save.
Step 7: Get the Consumer Key and Consumer Secret
On the app page, open the Settings tab, expand OAuth Settings, and click Consumer Key and Secret under App Settings.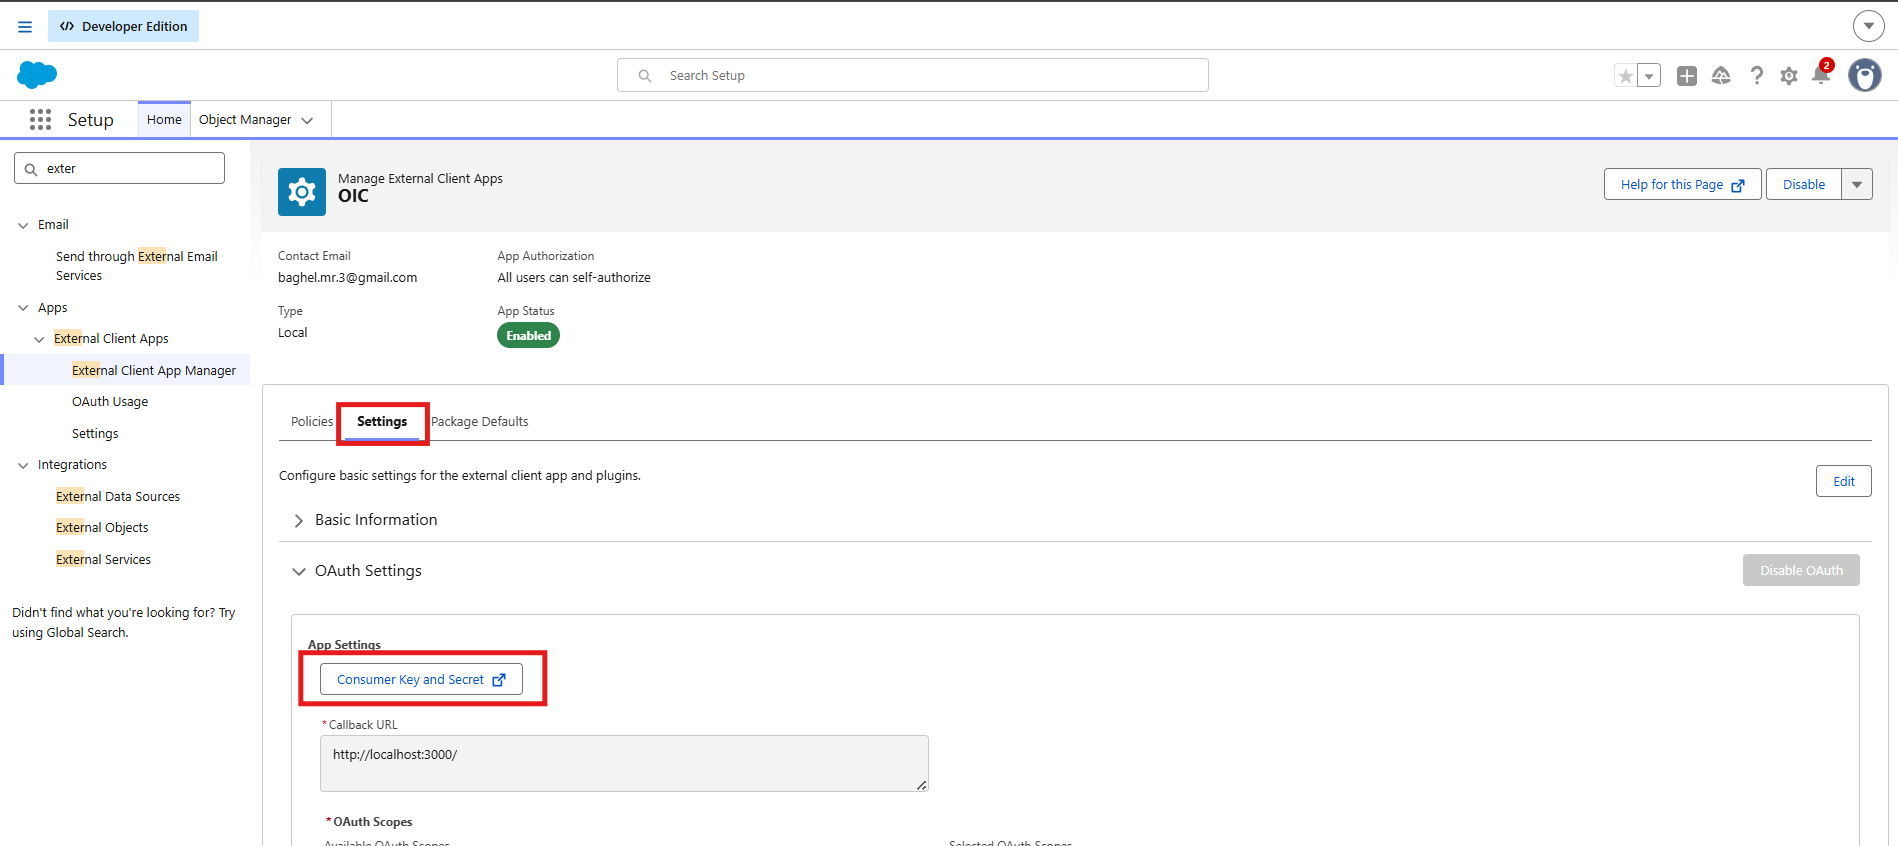
7.1 Verify your identity
Salesforce sends a verification code to the org’s contact email. Enter the code and click Verify.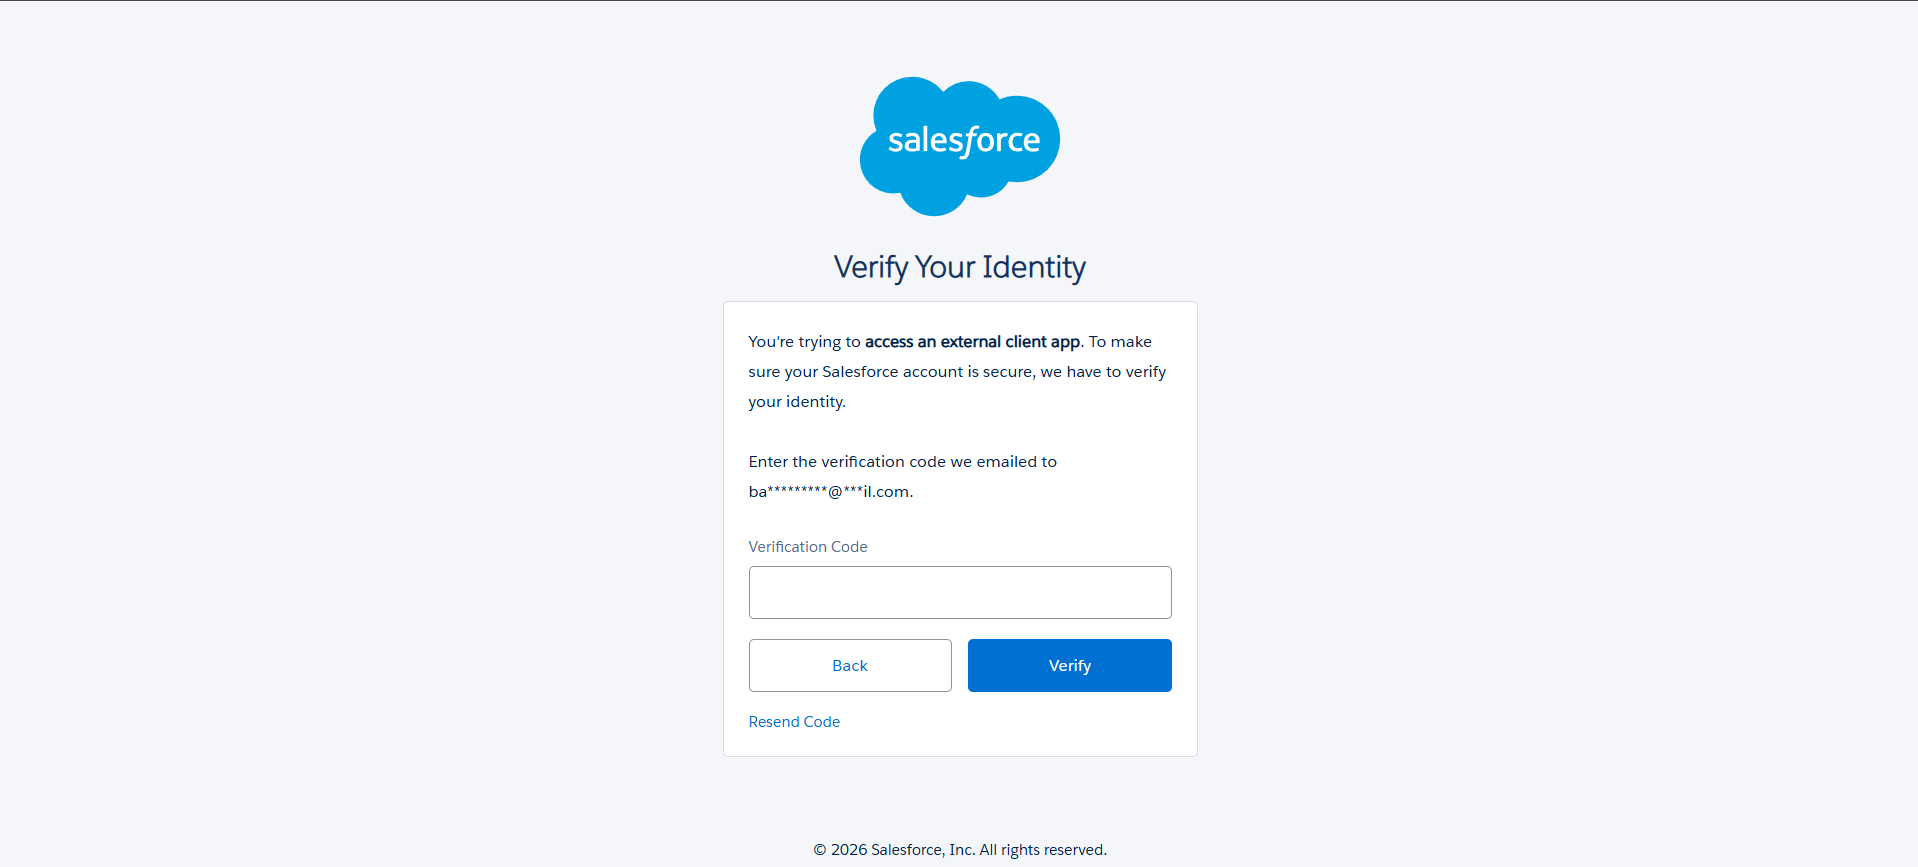
7.2 Copy the credentials
The Consumer Details page displays the Consumer Key and Consumer Secret. Copy both and store them securely , you will paste them into the OIC connection in the next step.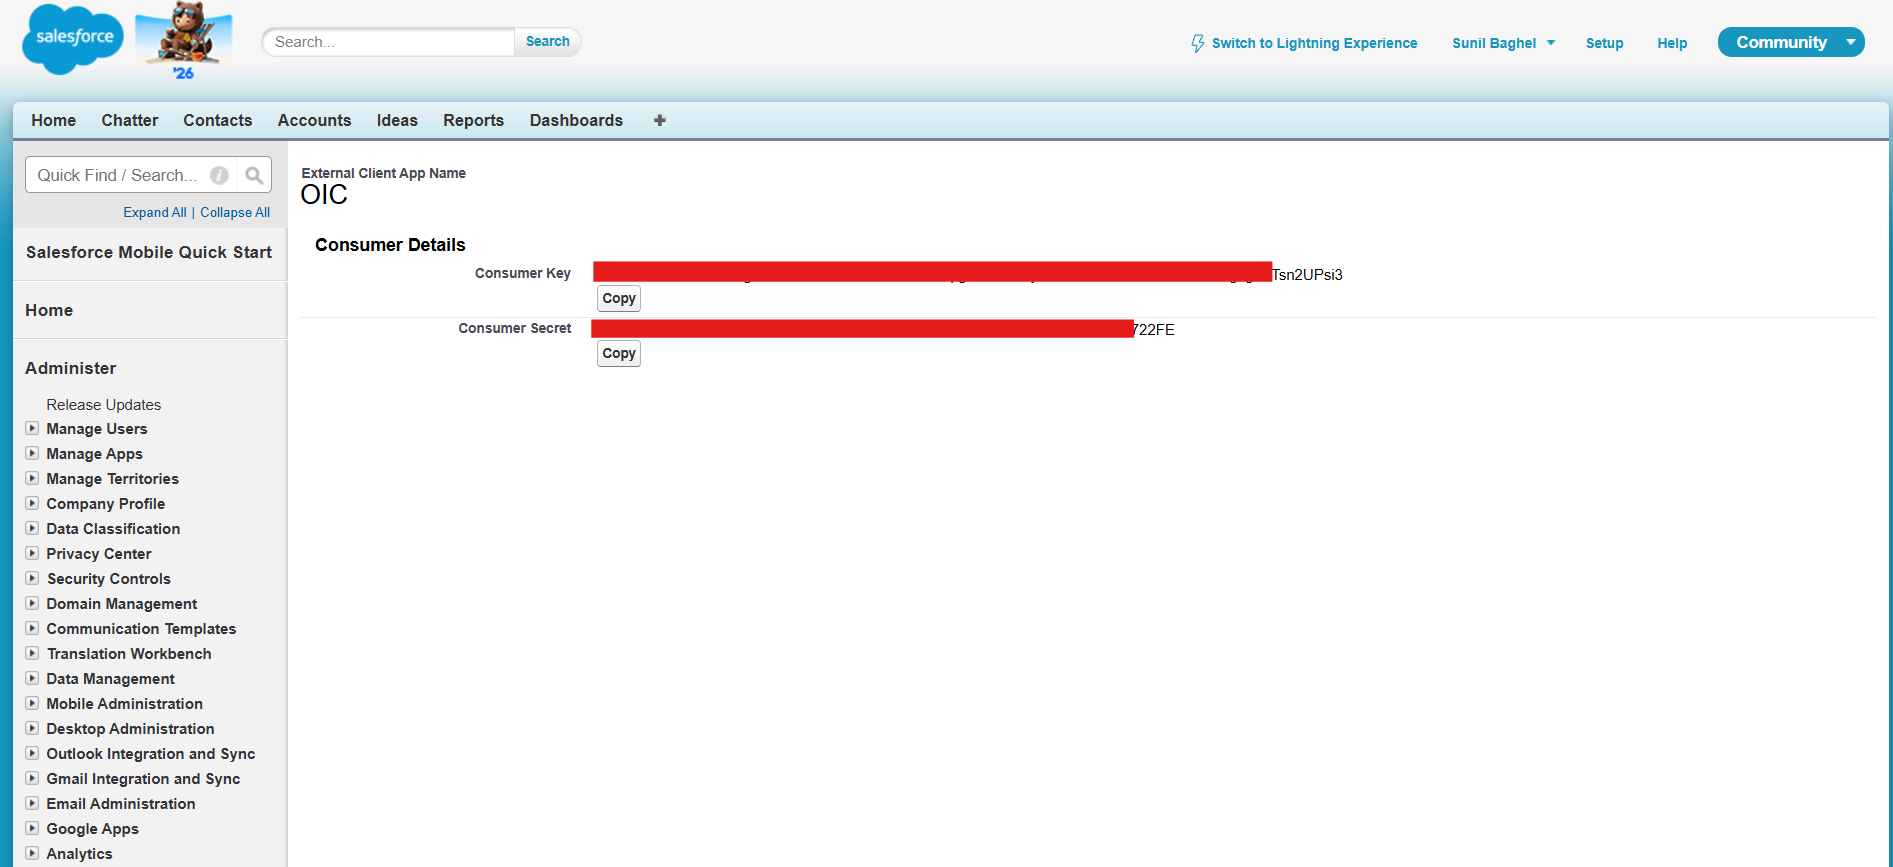
Step 8: Create the Salesforce Connection in OIC
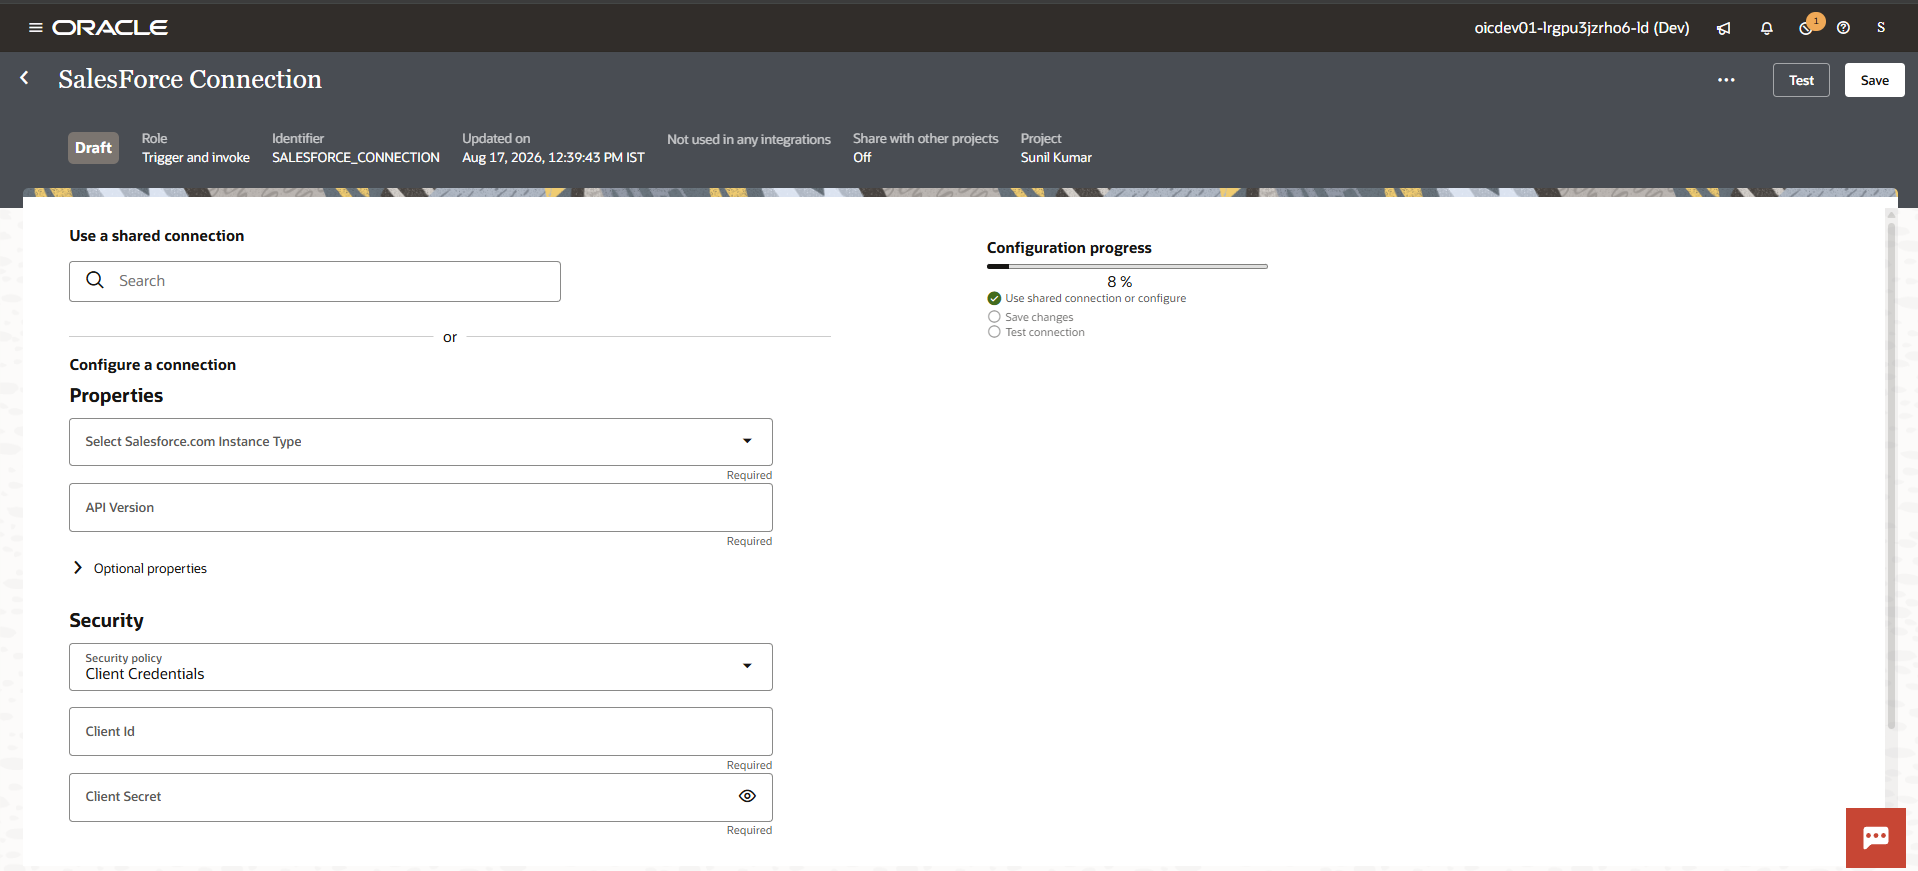
In OIC, create a new Salesforce connection with the Role set to Trigger and invoke.
8.1 Set connection properties
Under Properties:
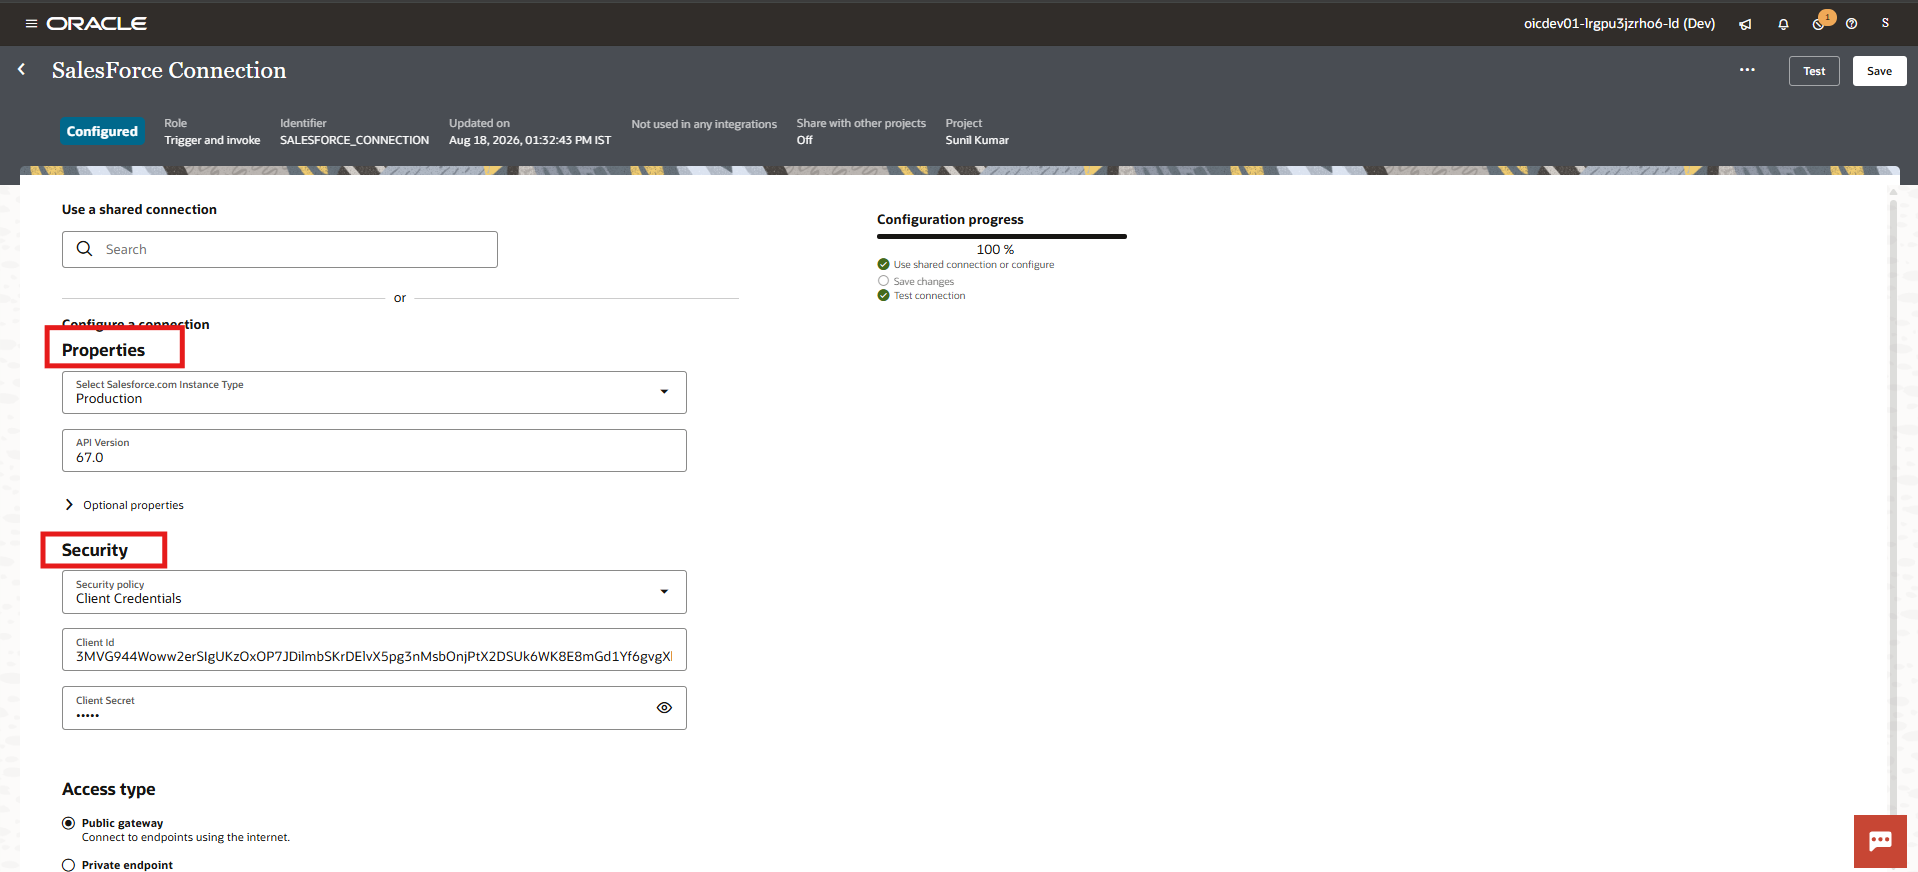
- Select Salesforce.com Instance Type , choose Production (this covers standard Production and Developer Edition orgs, use Test/Sandbox only if you are connecting to an actual Salesforce sandbox).
- API Version , enter the API version matching your org, for example 67.0.
Under Security :
- Set Security Policy to Client Credentials
- Paste the Consumer Key into Client Id and the Consumer Secret into Client Secret.
8.2 Add the custom domain (Optional properties)
To find it in Salesforce
- Search My Domain in Quick Find
- The domain name shown there is what you enter here.
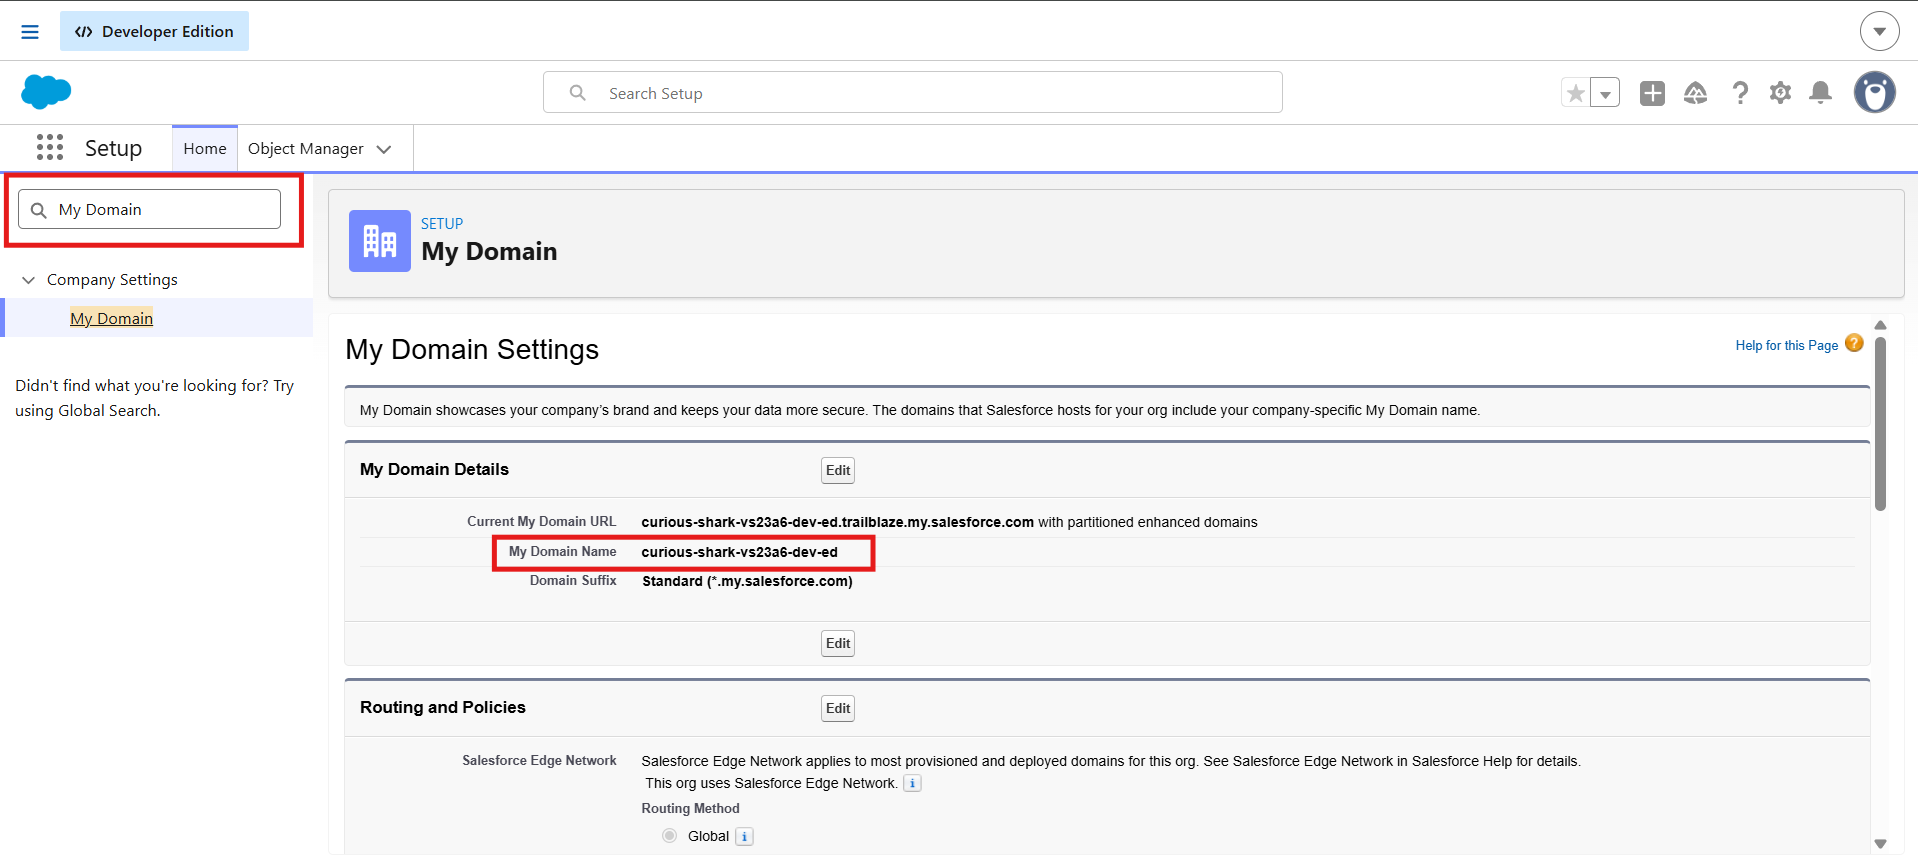
Then go back to SalesForce Connection , Expand Optional Properties.
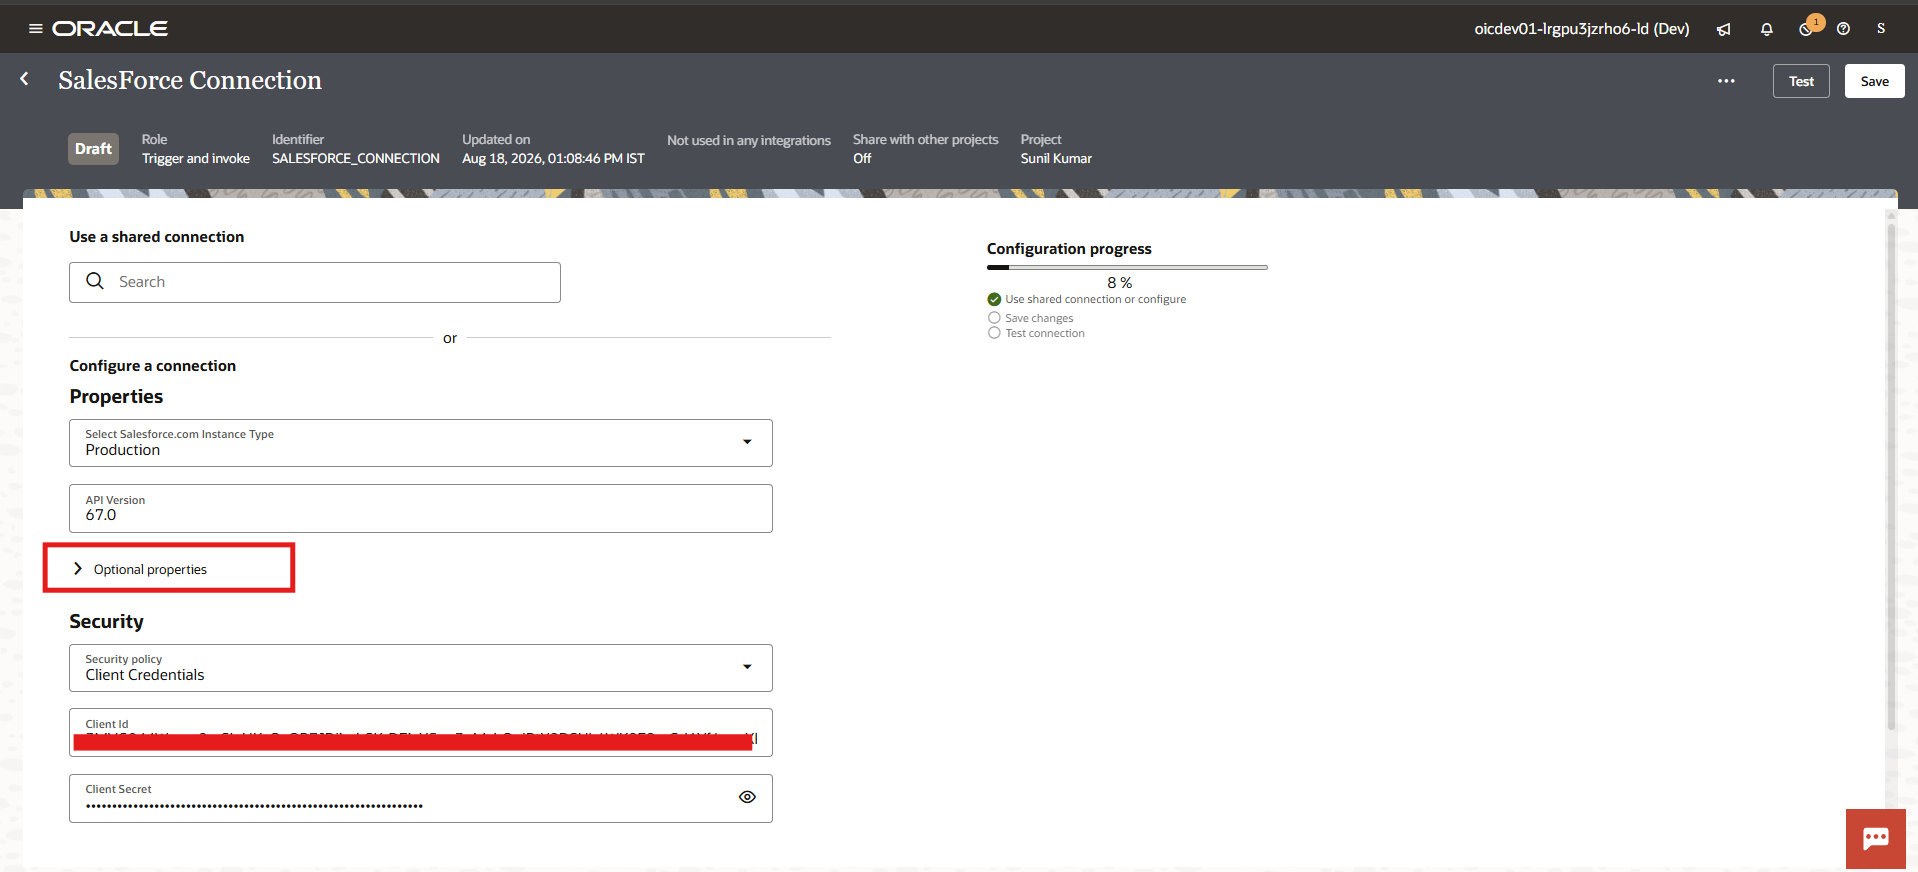
And Paste Domain in Custom Domain
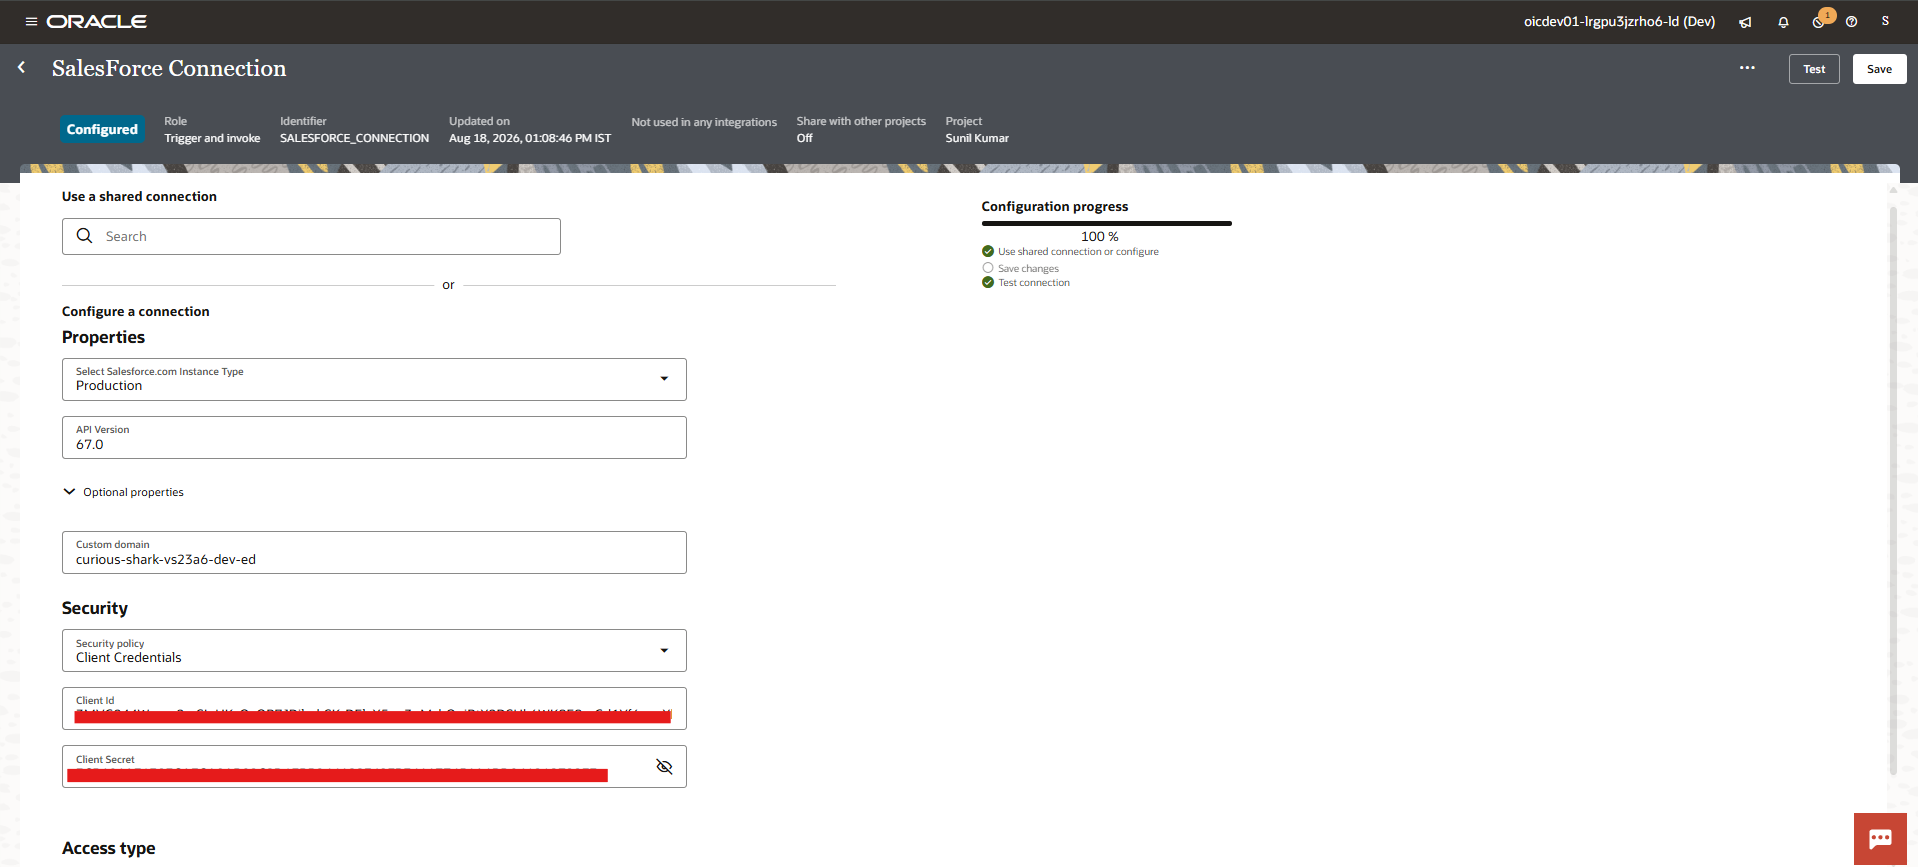
Note: If you are using a Trailblaze (trial) Salesforce org, append .trailblaze to the domain, since the trial hostname suffix is not included in the My Domain value by default.

8.3 Test and save
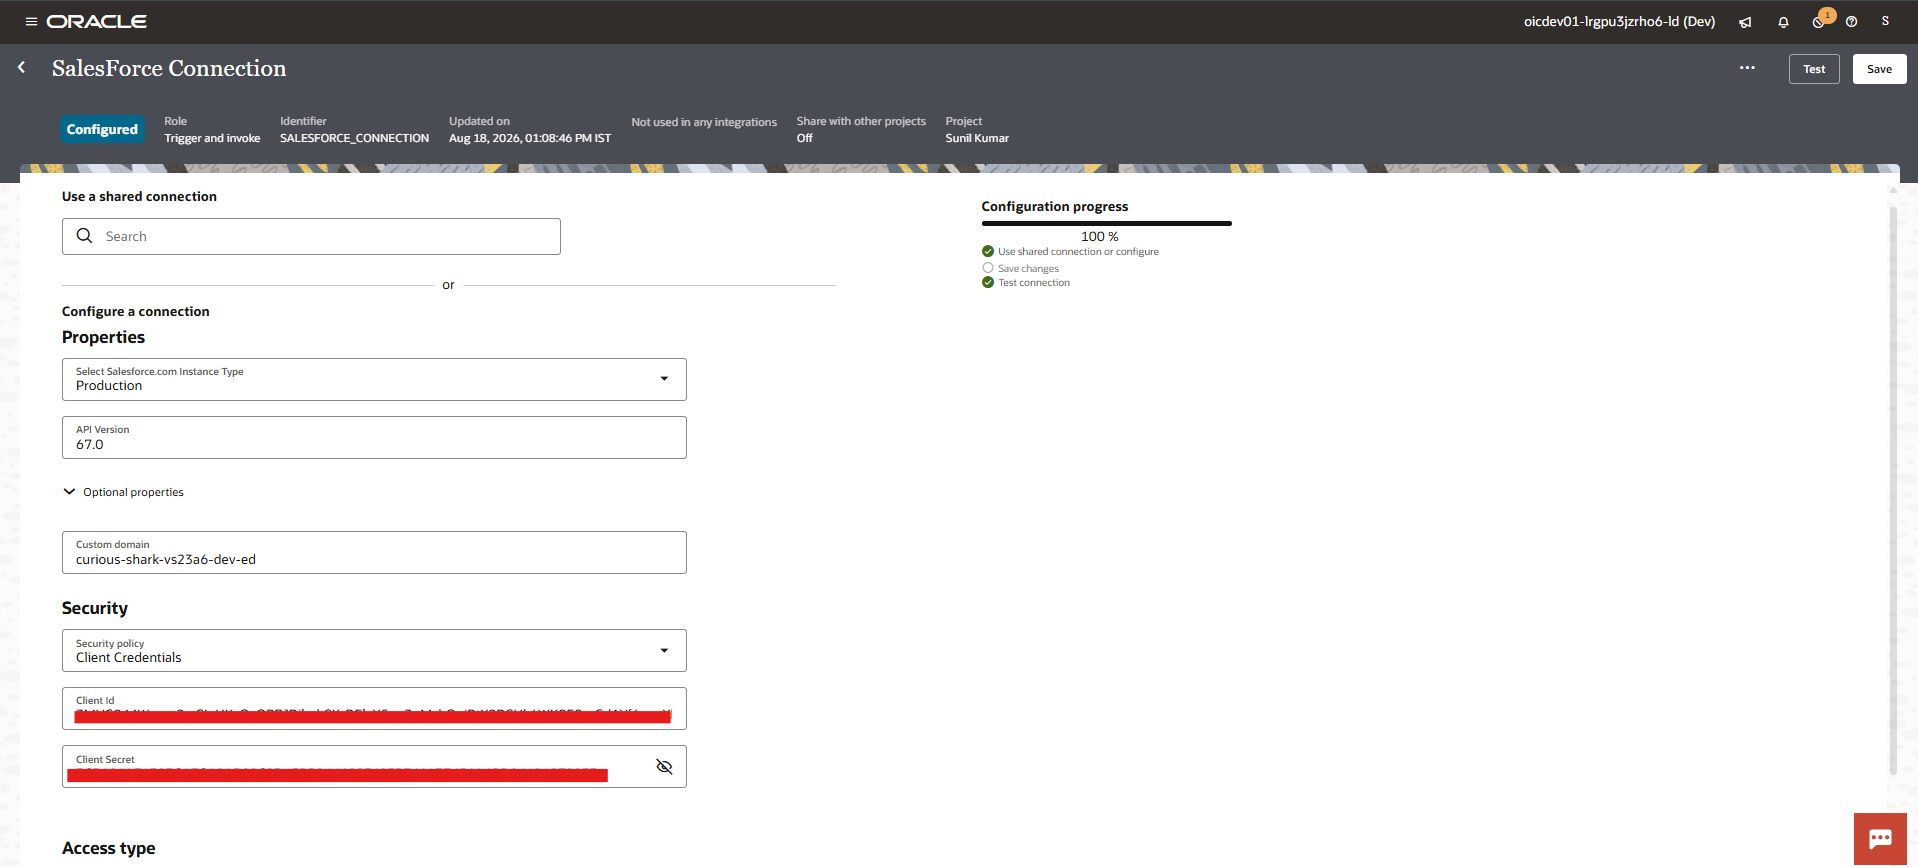
Click Test, then Save. A successful test brings the connection to 100% configuration progress and a Configured status.
Step 9: Update the Callback URL After Deployment
Once your OIC integration using this connection is built and deployed,
- Go back to Salesforce Setup
- Search External Client App Manager in Quick Find.
- Open your app, go to the Settings tab
- Click Edit
- Update the Callback URL under OAuth Settings with your deployed integration’s actual endpoint.
- Click Save.
Summary
With this setup, OIC authenticates to Salesforce using OAuth 2.0 Client Credentials; no interactive login is required at runtime. The External Client App in Salesforce stores the Consumer Key/Secret and the Run-As user identity, while the OIC connection uses those credentials to automatically obtain an access token on each invocation.
▶ WATCH THE FULL SETUP WALKTHROUGH ON YOUTUBE
🚀 Learn It Live with TechSupper
Take the next step with TechSupper’s live, instructor-led classes on Oracle Integration, VBCS, Oracle Fusion AI Agent Studio, AI, Cloud, and much more.
Reach out, and our expert will get back to you personally.
📧 info@techsupper.com |
💬 WhatsApp: +91-99586 39888 |
Our expert typically responds within 24 hours.