How to read a file using ICS FTP adapter
In this blog, we are going to show you, how to use the Oracle Integration cloud service FTP adapter to read a file from the FTP location.In my previous blog, I have explained how to configure FTP adapter in Oracle Integration Cloud Service.


After this blog, we would have learned how to use a file adapter to read CSV files from the FTP location.
Use Case: Develop a scheduled process that will read a CSV file from the FTP location and will insert the CSV data into a database table.
This Use case requires only simple 4 steps to complete:
- Create a FTP connection
- Create an Oracle DB connection
- Create a Scheduled Integration
- Activate & Run the Integration
Let’s go step by step:
- Create FTP connection: FTP connection will work as an Invoke to read data from CSV file. In one of my blog, I have already showcased how to create FTP connection. Please check it out before moving forward.
- Create DB connection: DB connection will work as a Target point. In one of my blog, I have showcased how to create DB connection. Please check it out before moving forward.
- Create a Scheduled Integration
-
Login into ICS console
-
Click on the Integration tile from ICS home page
-
Click on the Create button from the upper right corner
-
Select the Orchestration pattern from the dialog box
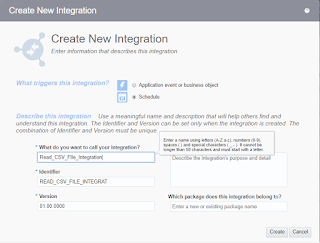
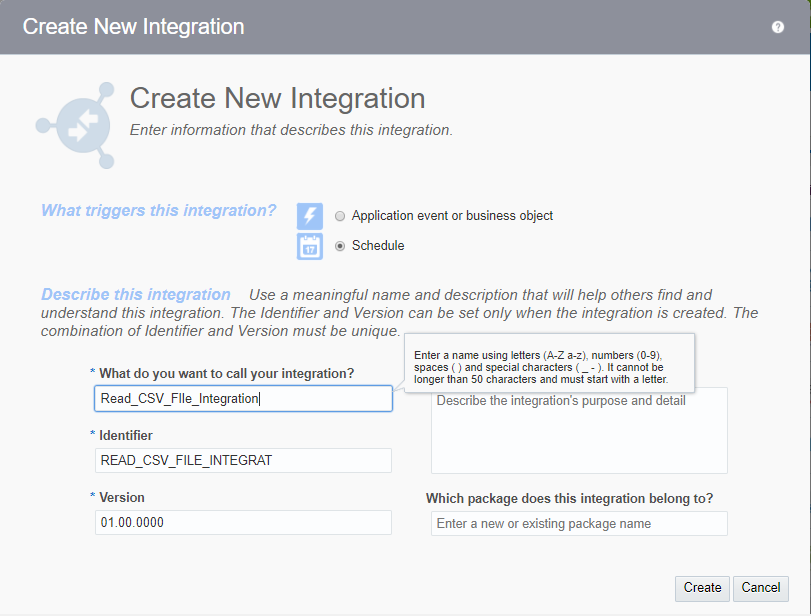
- Enter Below information and click on Create button
- Select the Scheduled radio button
- Enter Integration Name in What do you want to call your integration text box
- An Identifier would be picked up automatically from Integration name however you can edit it
- Let the Version as it is
- Enter the description What does this integration do box
- Leave the package box as it is
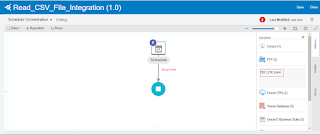
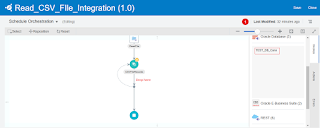
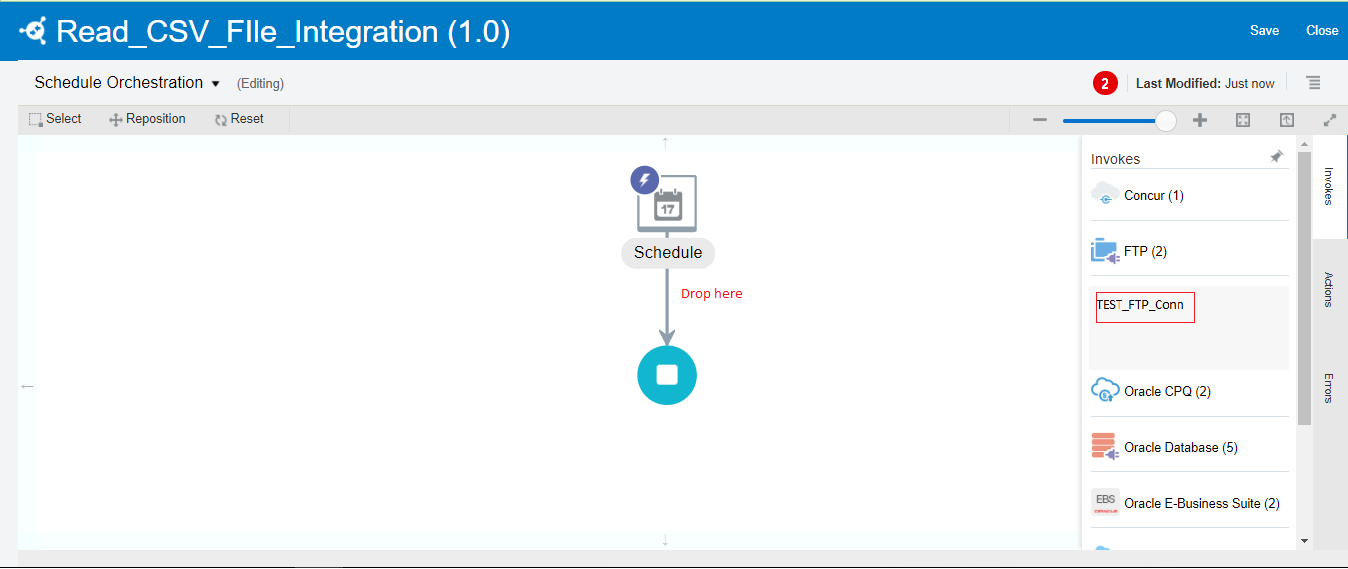
- Click Invokes from right navigation, Select TEST_FTP_Conn, drag and drop the TEST_FTP_Conn just below Scheduled activity
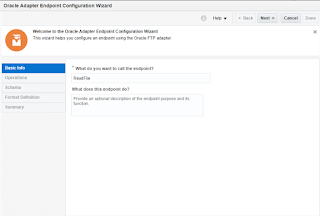
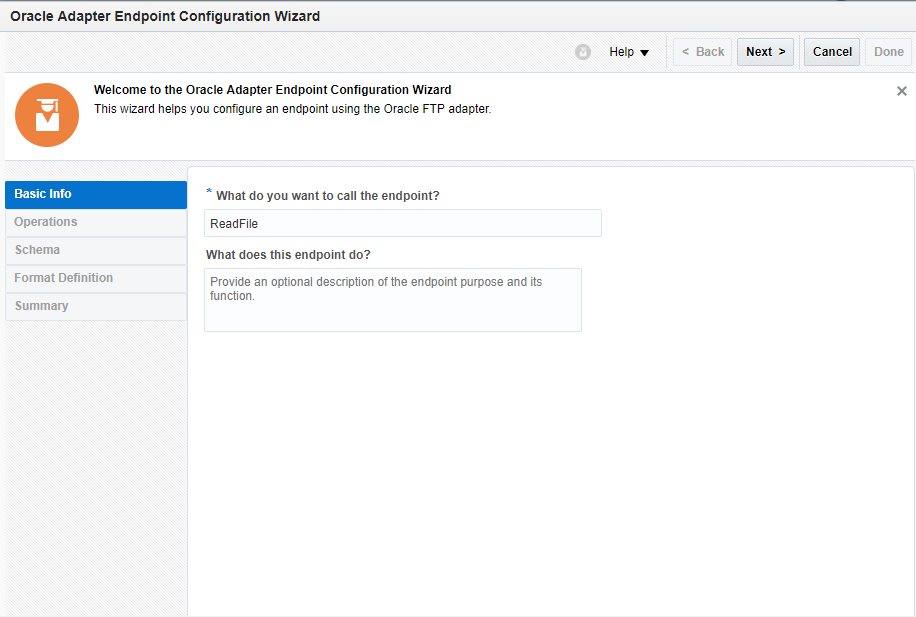
- Enter Name and optionally the description. Click Next button
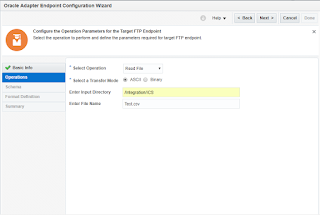
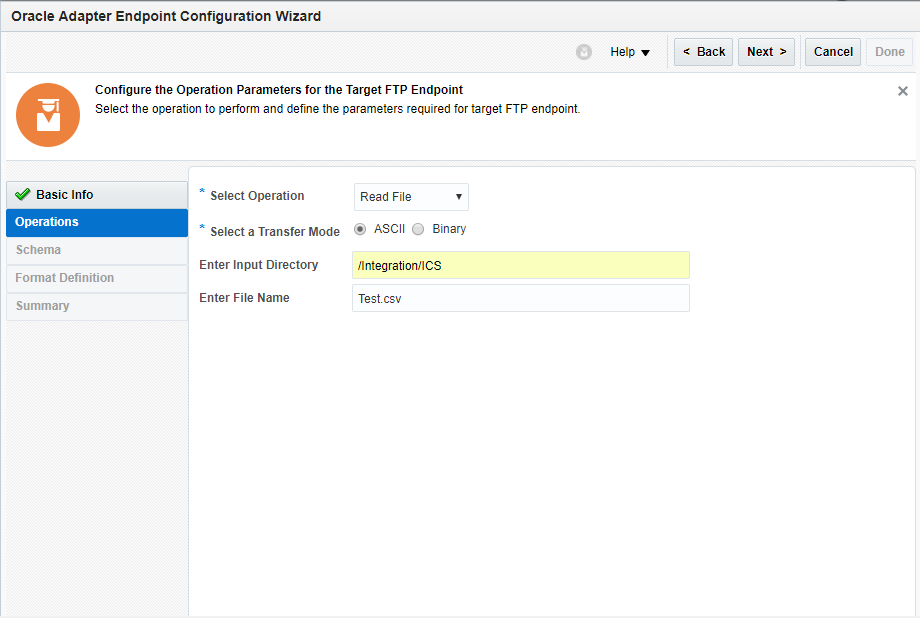
- Enter below information and click the Next button
- Select Operation: In our case select Read File
- Select a Transfer Mode: Select ASCII
- Enter Input Directory: Enter directory location from where the file would be read
- Enter File Name: Enter the file name
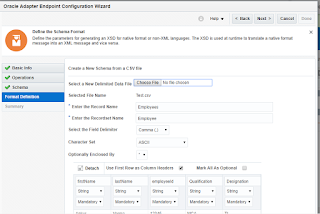
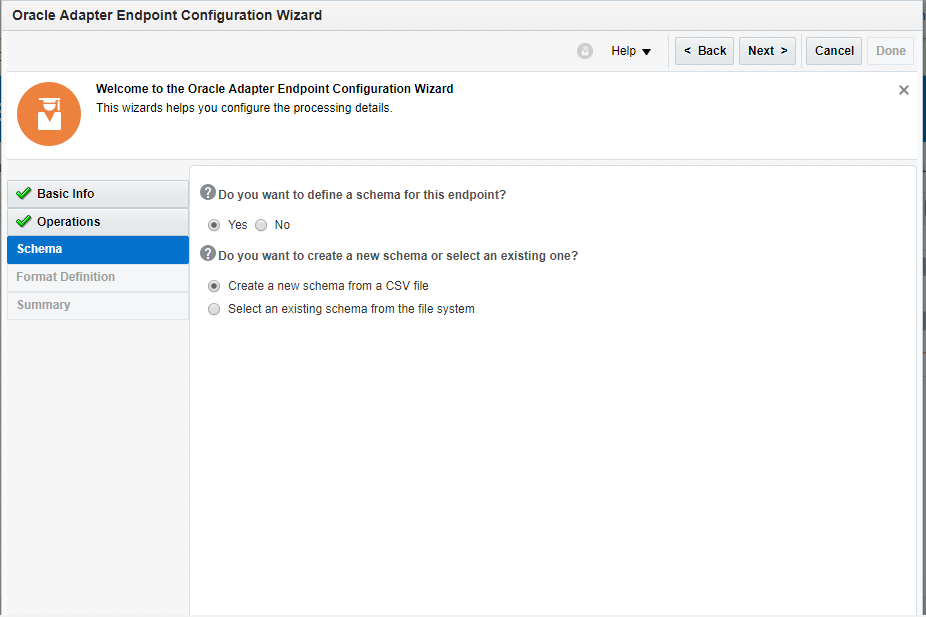
- Select Yes radio button from Do you want to define a schema for this Endpoint and select Create a new schema from a CSV file option as shown in below screenshot and click Next button
- Enter below information and Select Next button
- Select a new Delimited File: Select the sample Test.csv file(download from here)
- Enter the Record Name: Employees
- Enter the Recordset Name: Employee
- Select the Field Delimiter: Select Comma(,) as the CSV file is comma separated
- Character Set: Select ASCII
- Optionally Enclosed By: “
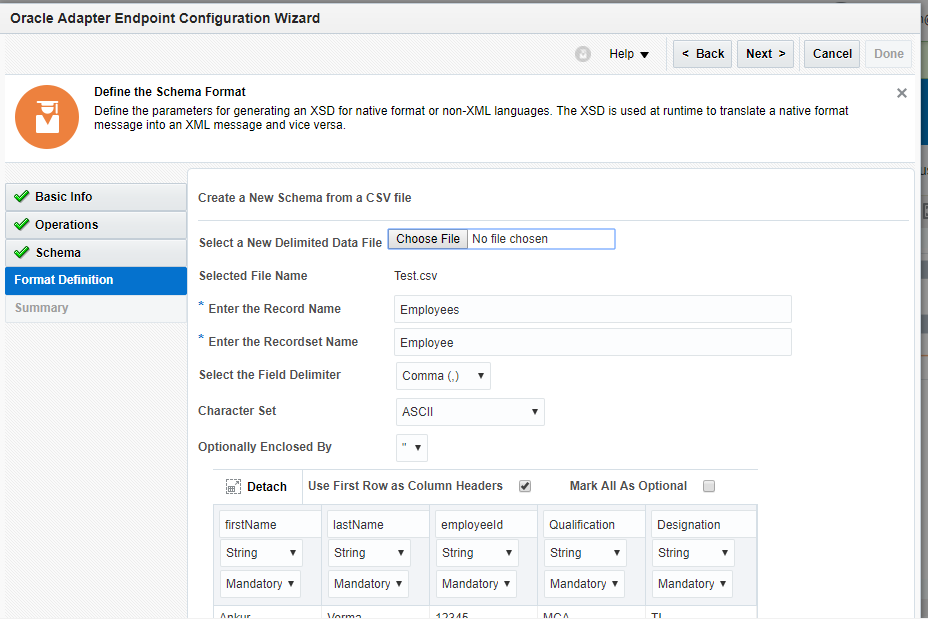
- Select the Done button from the Summary page
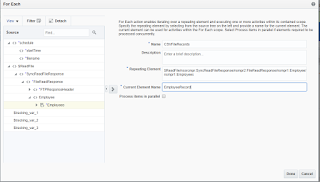
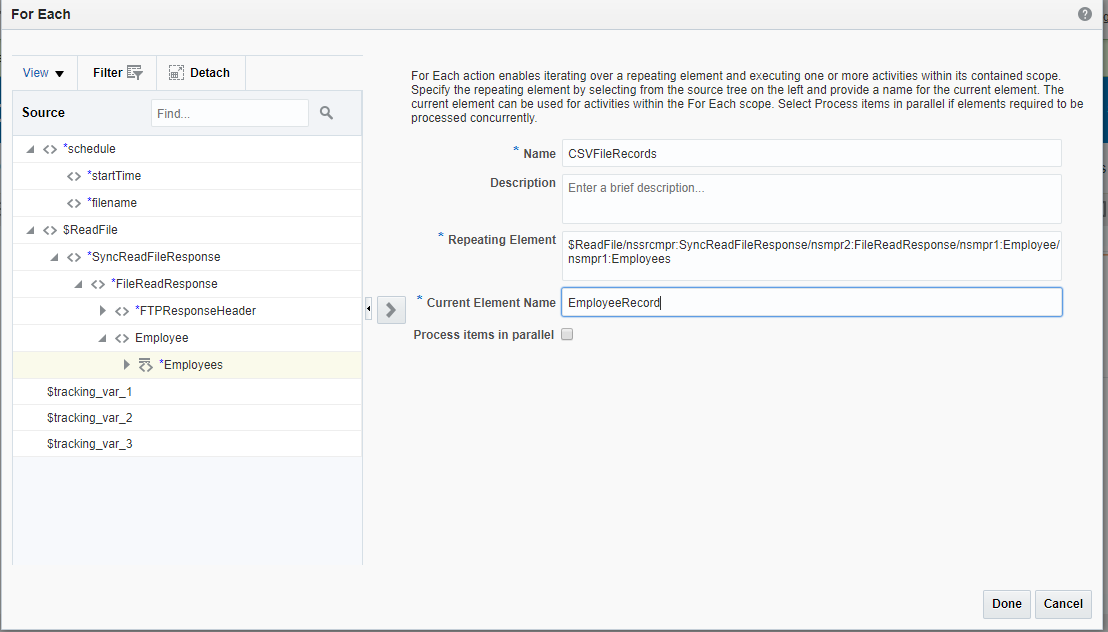
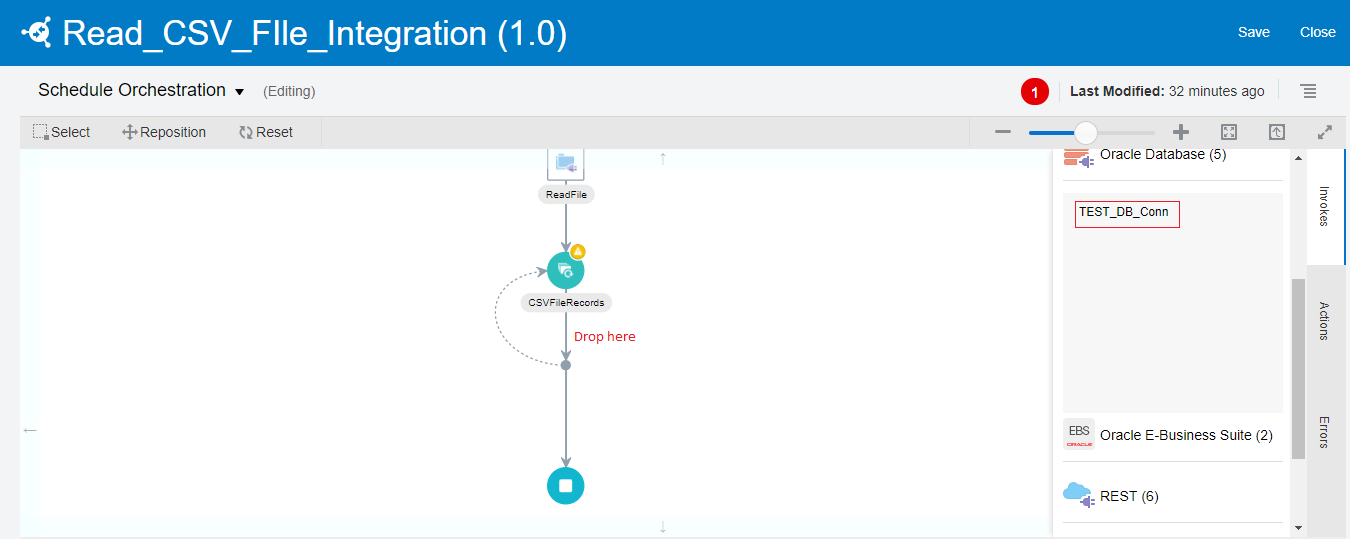
- Drag & Drop For Each activity from the Actions tab just below the ReadFile activity. This For Each will be used to iterate over the CSV file records

- Enter below information from the opened popup of For Each and click Done button
- Name: Enter name of the ForEach
- Repeating Element: Expand $ReadFile -> SyncReadFileResponse -> FileReadResponse -> Employee from left panel and Drop the Employees element in Repeating Element box
- Current Element Name: Enter EmployeeRecord
- Click Invokes from right navigation, Select Oracle Database, drag and drop the TEST_DB_Conn under ForEach
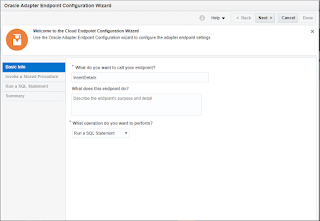
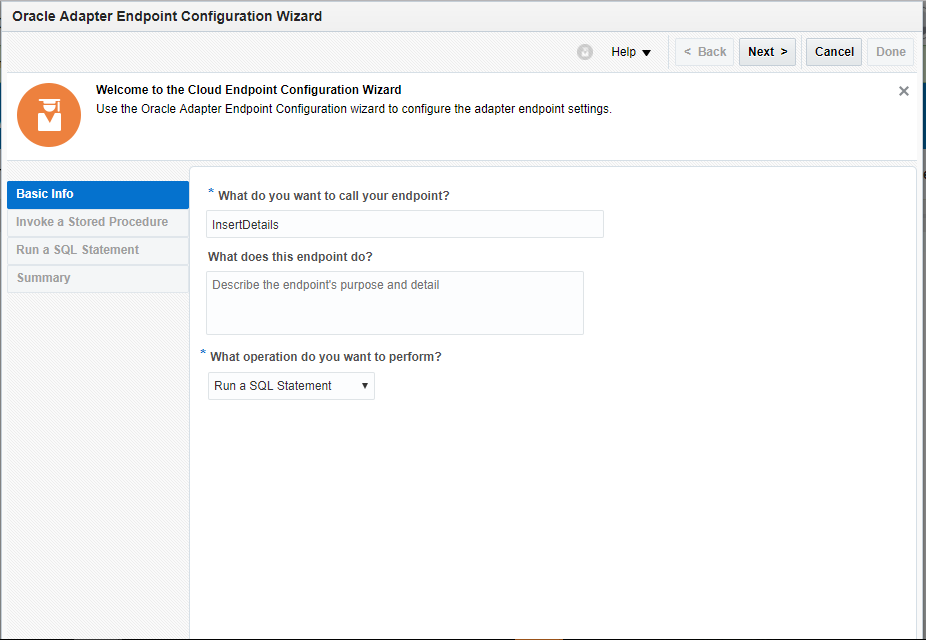
- Enter below information and Click Next
- Enter endpoint name in What do you want to call your endpoint
- Select Run a SQL Statement from What operation do you want to perform drop down
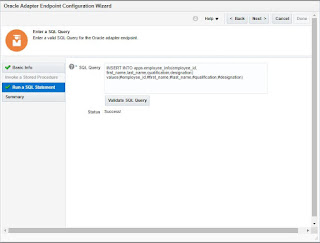
- Enter below insert query in SQL query box and Click Validate SQL query to validate the entered query and Click Next button
INSERT INTO apps.xx_employee_info(employee_id, first_name,last_name,qualification,designation) values(#employee_id,#first_name,#last_name,#qualification,#designation)

- Click Done
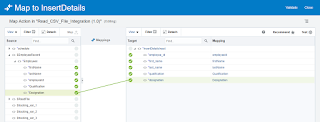
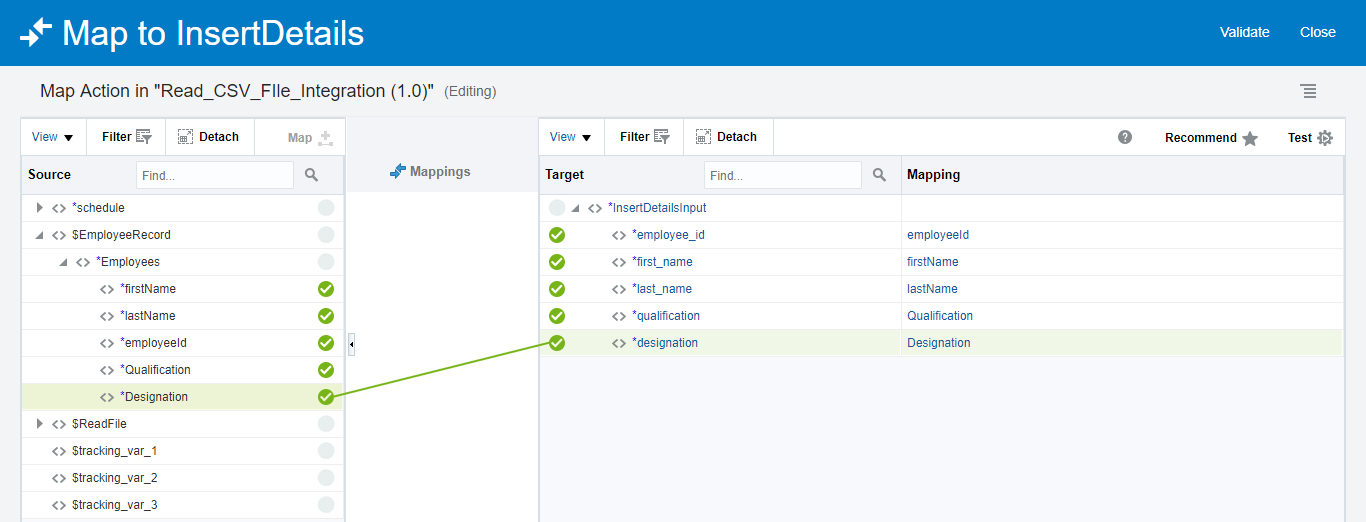
- Open InsertDetails mapper and map the fields from left panel(EmployeeRecord -> Employee) to right panel(InsertDetailsInput). Click Validate and Close button
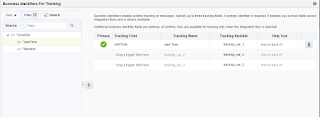
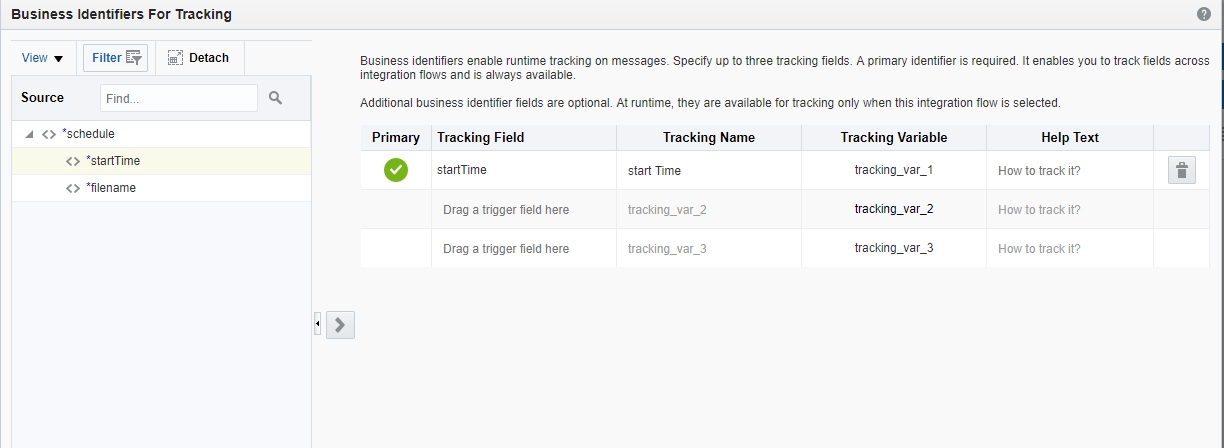
- Click on the Action menu and Tracking button
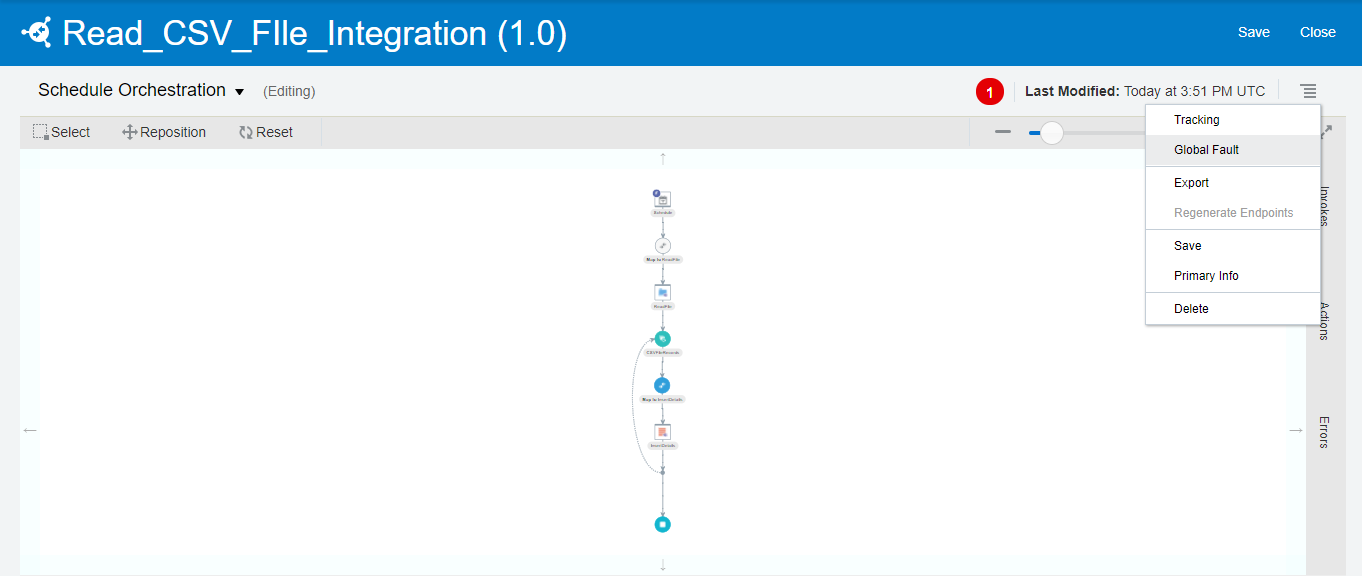
- Drop startTime to the Tracking Field
This completes our integration. Close Save and Close button
4. Activate the Integration
- Click on the Activate button

- Select Enable Tracking and Include Payload checkboxes and click Activate button
- Click on Action Menu and Click on Submit Now button
As soon as we click on the Submit Now button, integration will be submitted. Now see your database tables. Whatever record exist in the CSV file, it must be inserted into the database table.
This is how we can use the File adapter to read the CSV file.

How to drag and drop current element name in for each action. Could you please creat an integration only demonstration of for-each action.
Hi Ankur,
Thanks for this information. Can you please help with a csv file that can have multiple levels like one header and multiple line levels for each header line. In short how can i give the file layout to the ftp adapter??
I am also trying the same, when i provide the structure file content it takes only header columns.
hankyou for sharingerp software